Beyond the Basic Beam: Pergola Designs That Redefine Outdoor Living
I was halfway through my second cup of coffee when it hit me, the reason my backyard never felt like a real room. I’d added the plush seating, the weatherproof rug, even a proper dining set. But something was missing. Then a neighbor stopped by, glanced up at the empty sky above my patio, and said, “You know what this space needs? A ceiling.” And just like that, the puzzle piece clicked into place.

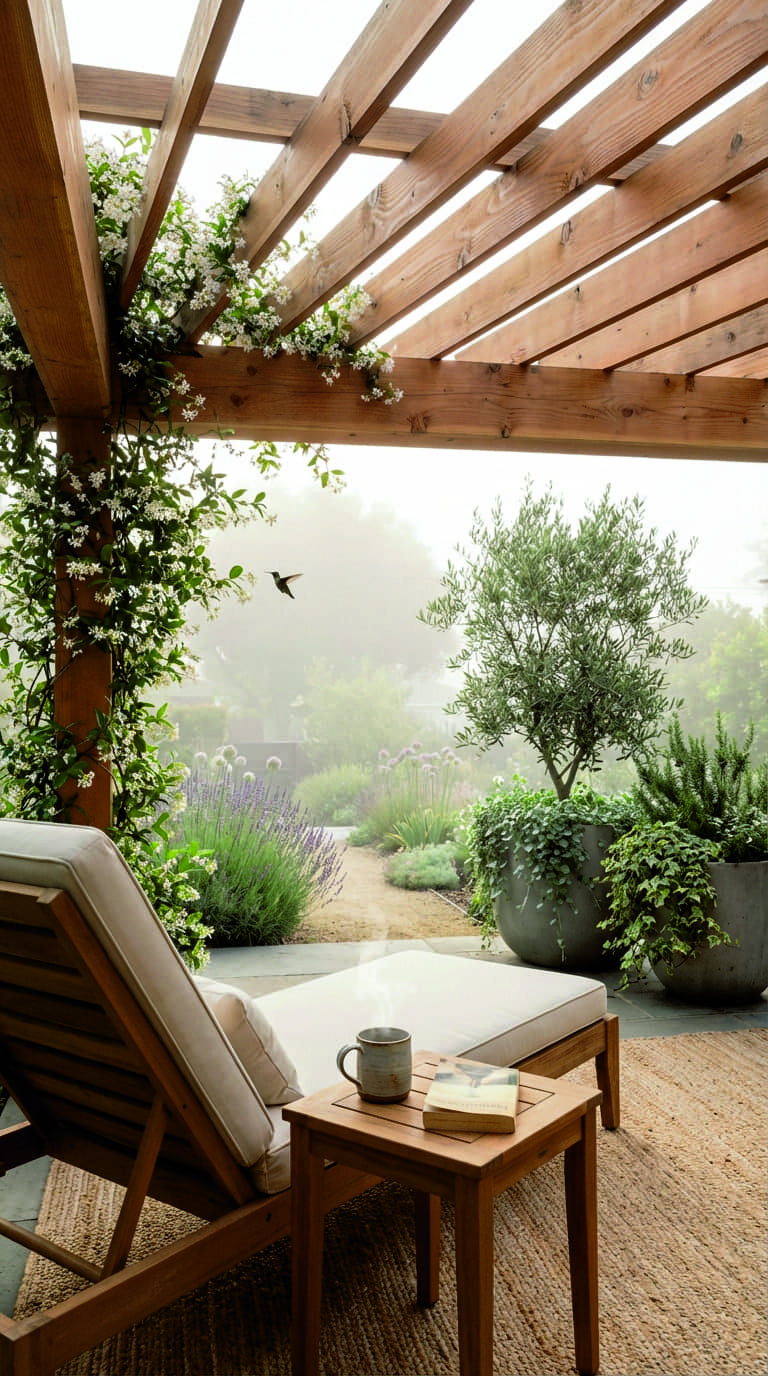
We design every surface of our indoor rooms with intention, the floors we walk on, the walls that hold our art, the ceilings that frame our conversations. Yet outside, we so often leave that overhead plane completely blank. That’s where the modern pergola steps in, not as mere decoration, but as the architectural element that finally makes your outdoor space feel like a true extension of home.
The Pergola’s Quiet Revolution
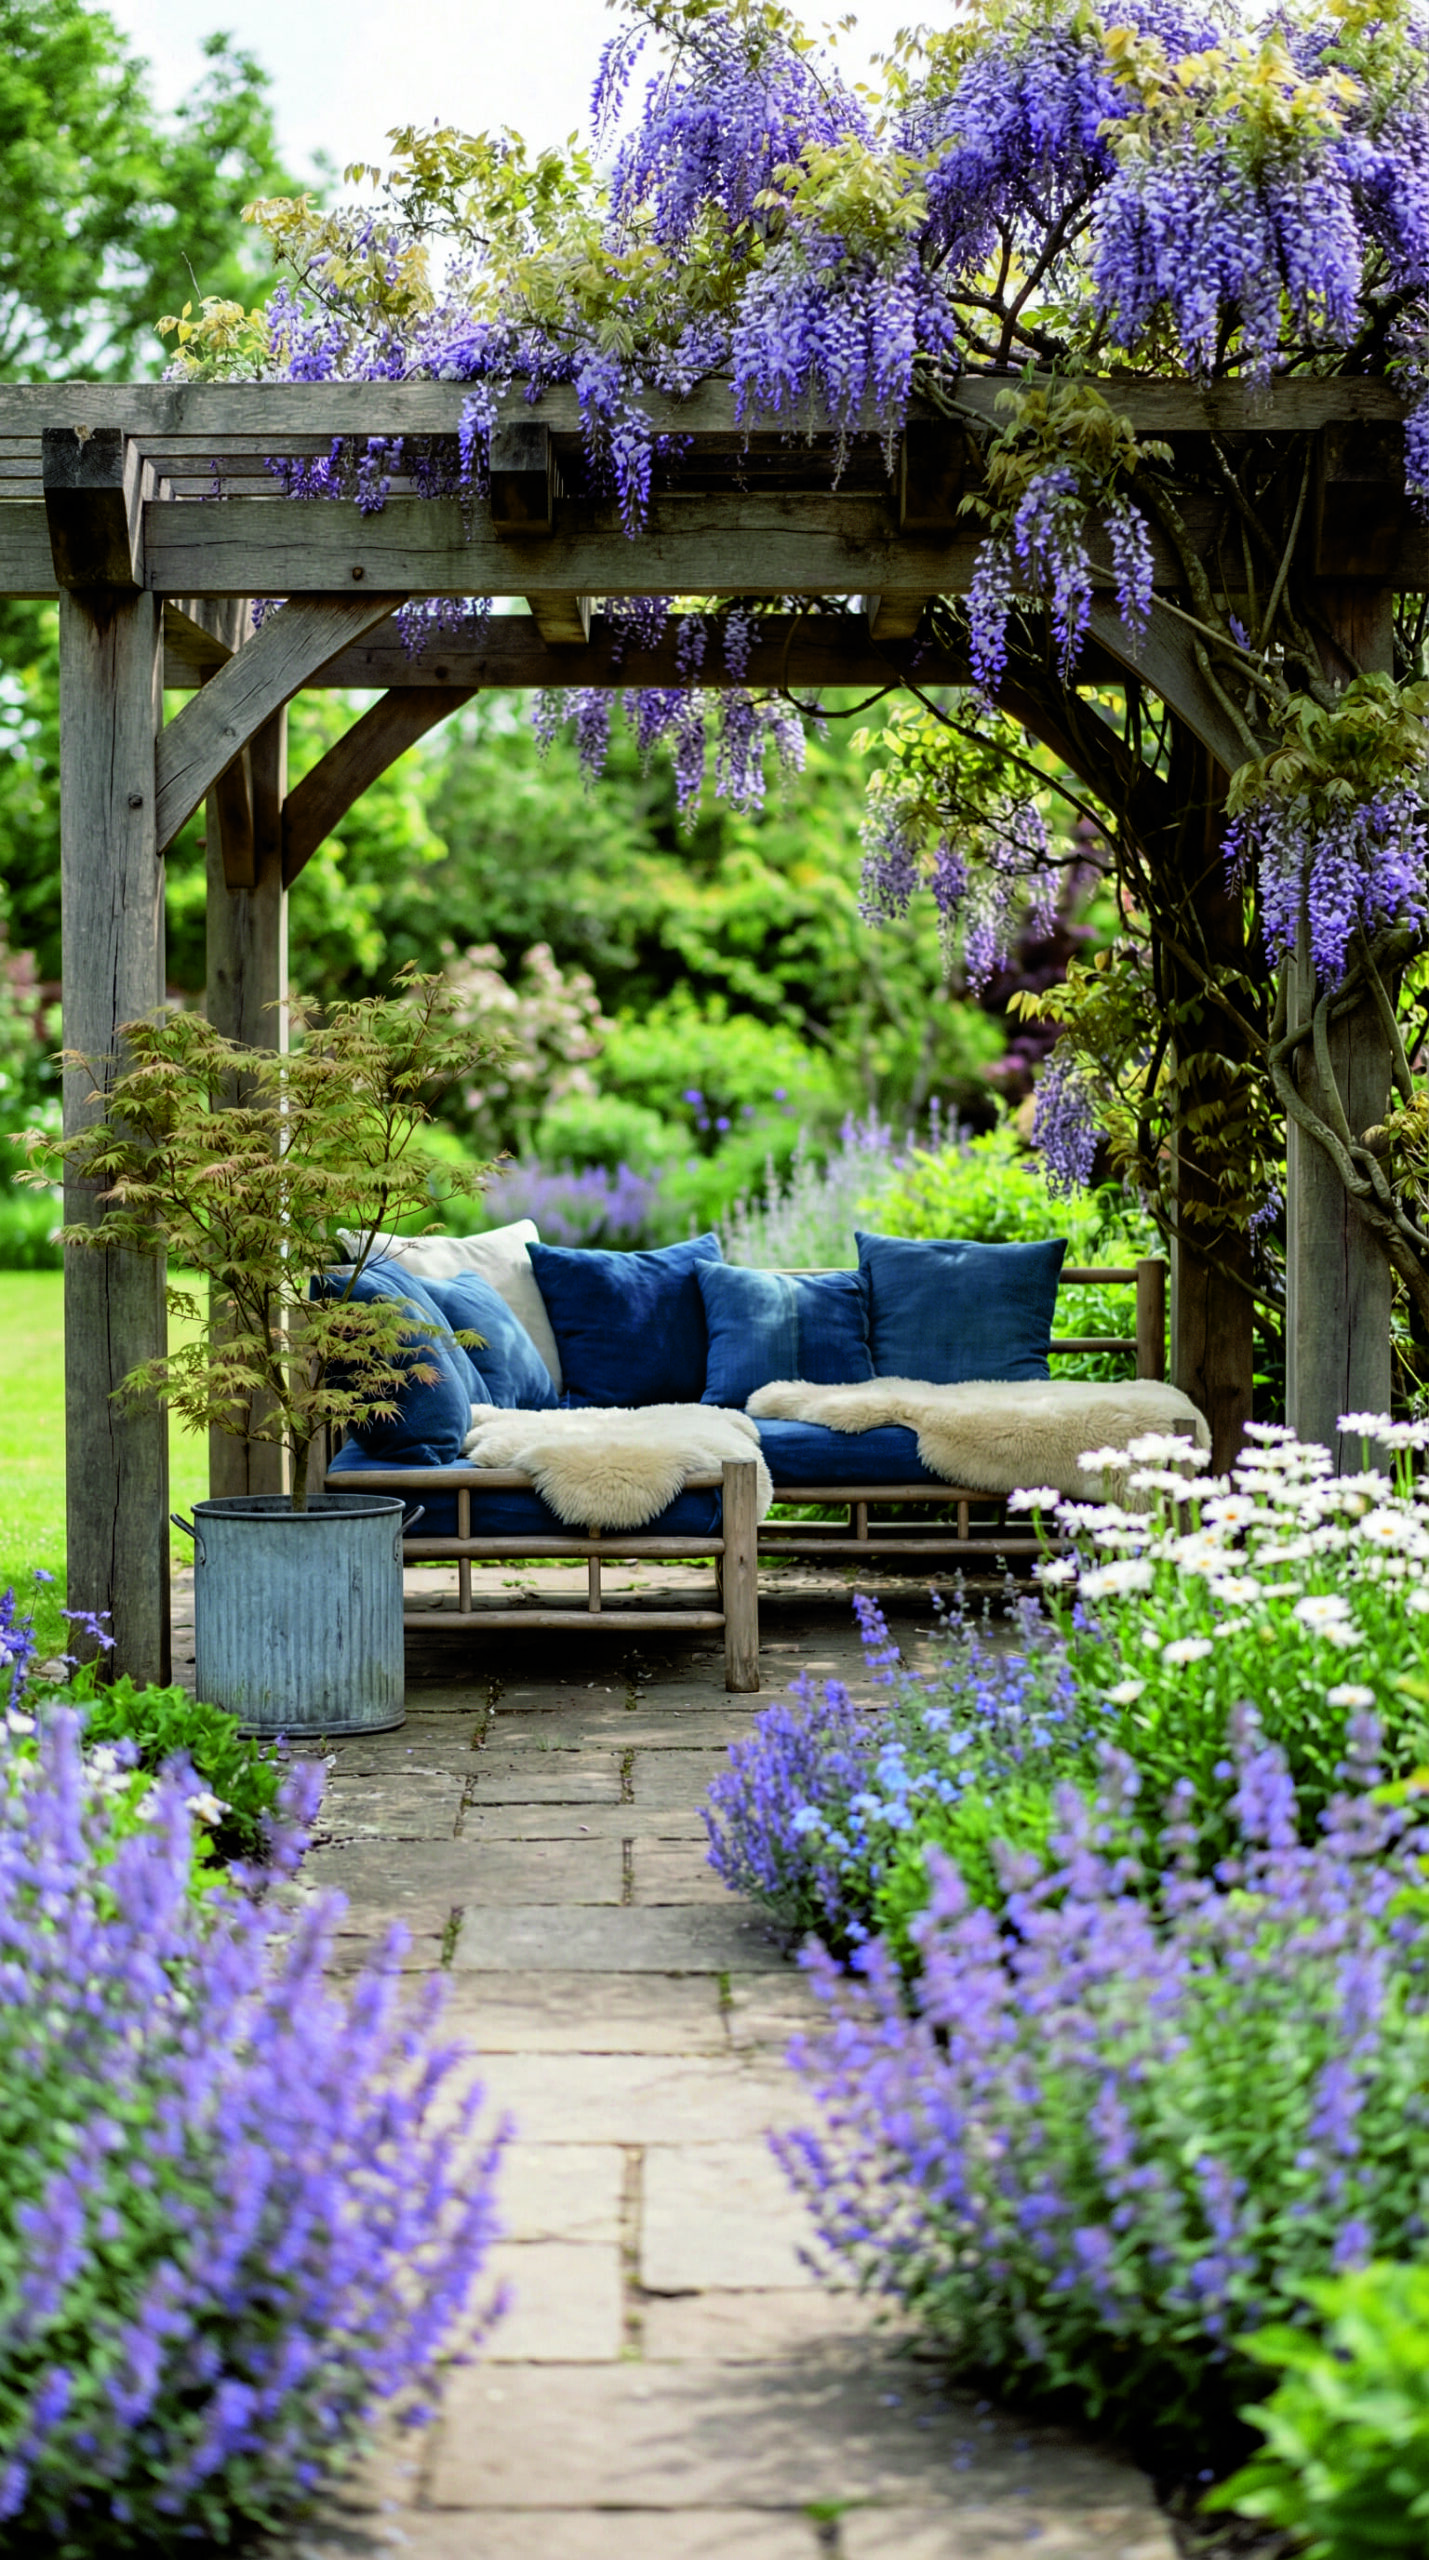
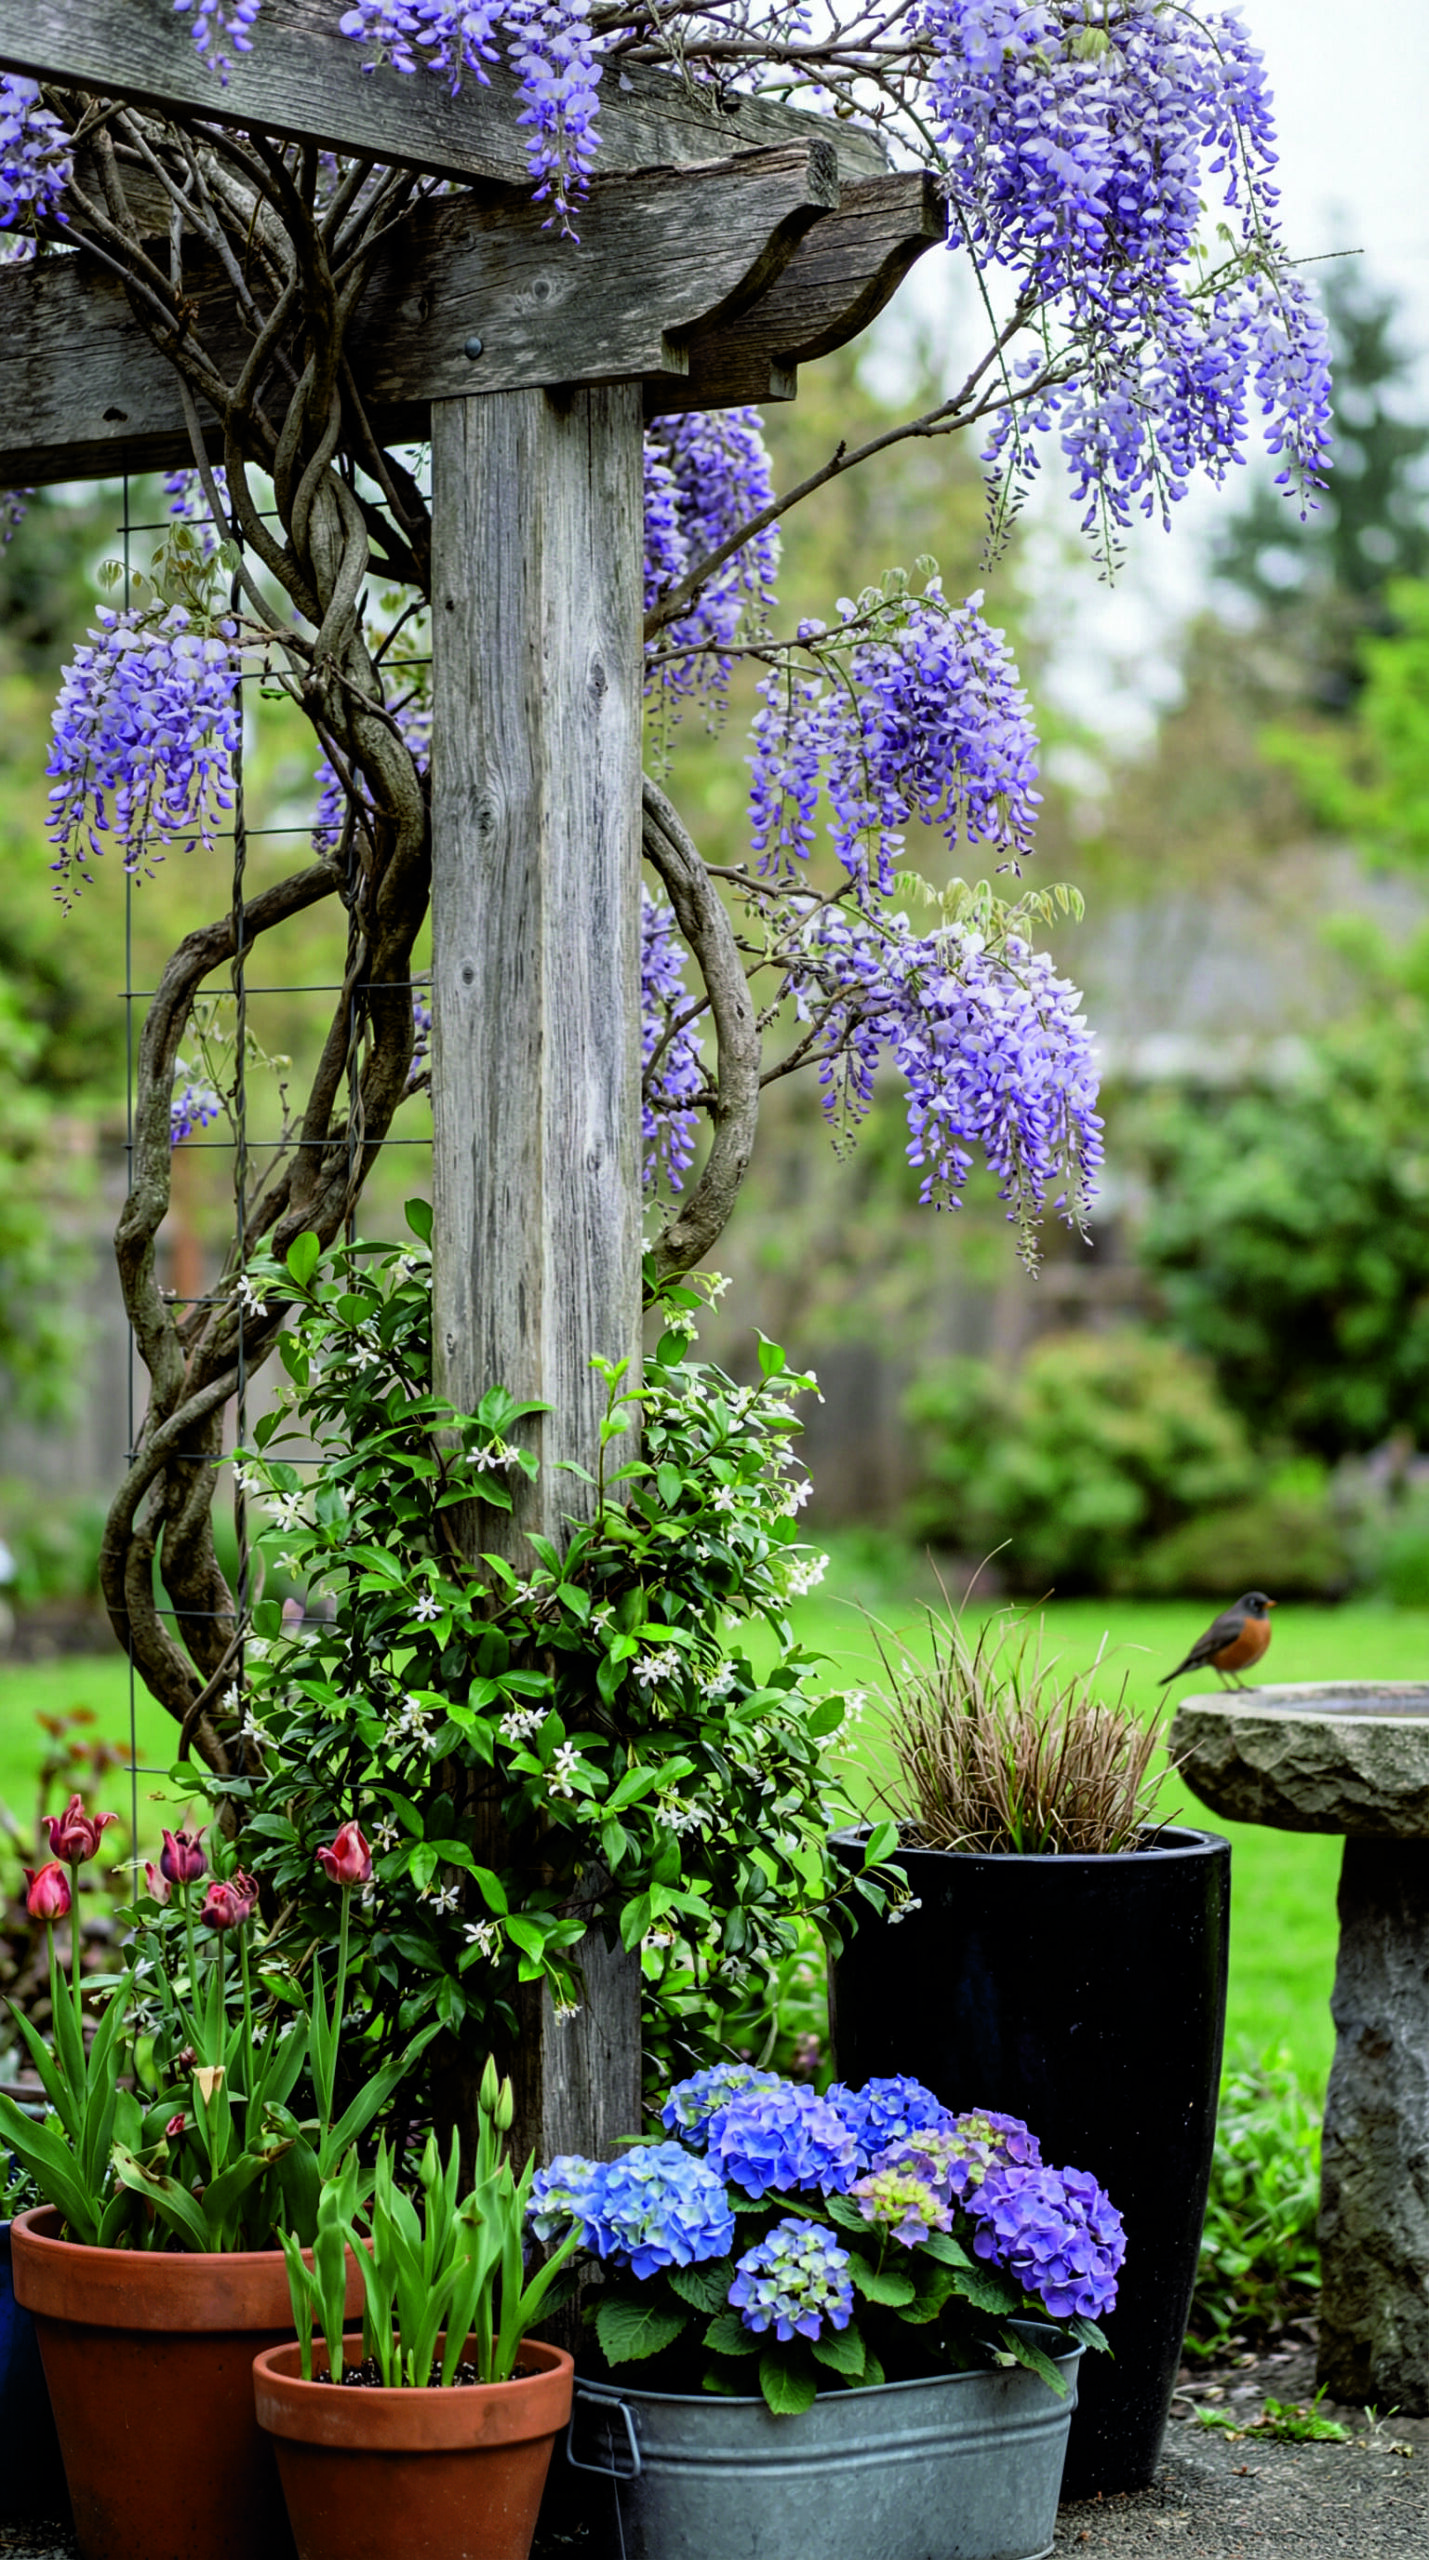
For decades, pergolas lived a quiet life in garden corner, mostly decorative structures draped with wisteria in grand estates or basic wooden frames anchoring suburban patios. They provided a suggestion of shelter, a place for vines to climb, but rarely served as the functional backbone of outdoor living.
Today’s pergola has quietly shed that passive role. Fueled by innovations in materials, smart technology, and our collective desire to blur the lines between indoors and out, the modern pergola has become the defining feature of thoughtfully designed backyards. It’s no longer just about shade, it’s about creating atmosphere, solving weather worries, and crafting spaces where evenings linger longer and mornings feel more intentional. Whether your outdoor area spans acres or fits neatly on a city balcony, there’s a pergola design waiting to transform how you experience it.
The Louvered Pergola: Weather Wisdom Overhead
When Rain Becomes an Invitation, Not an Interruption
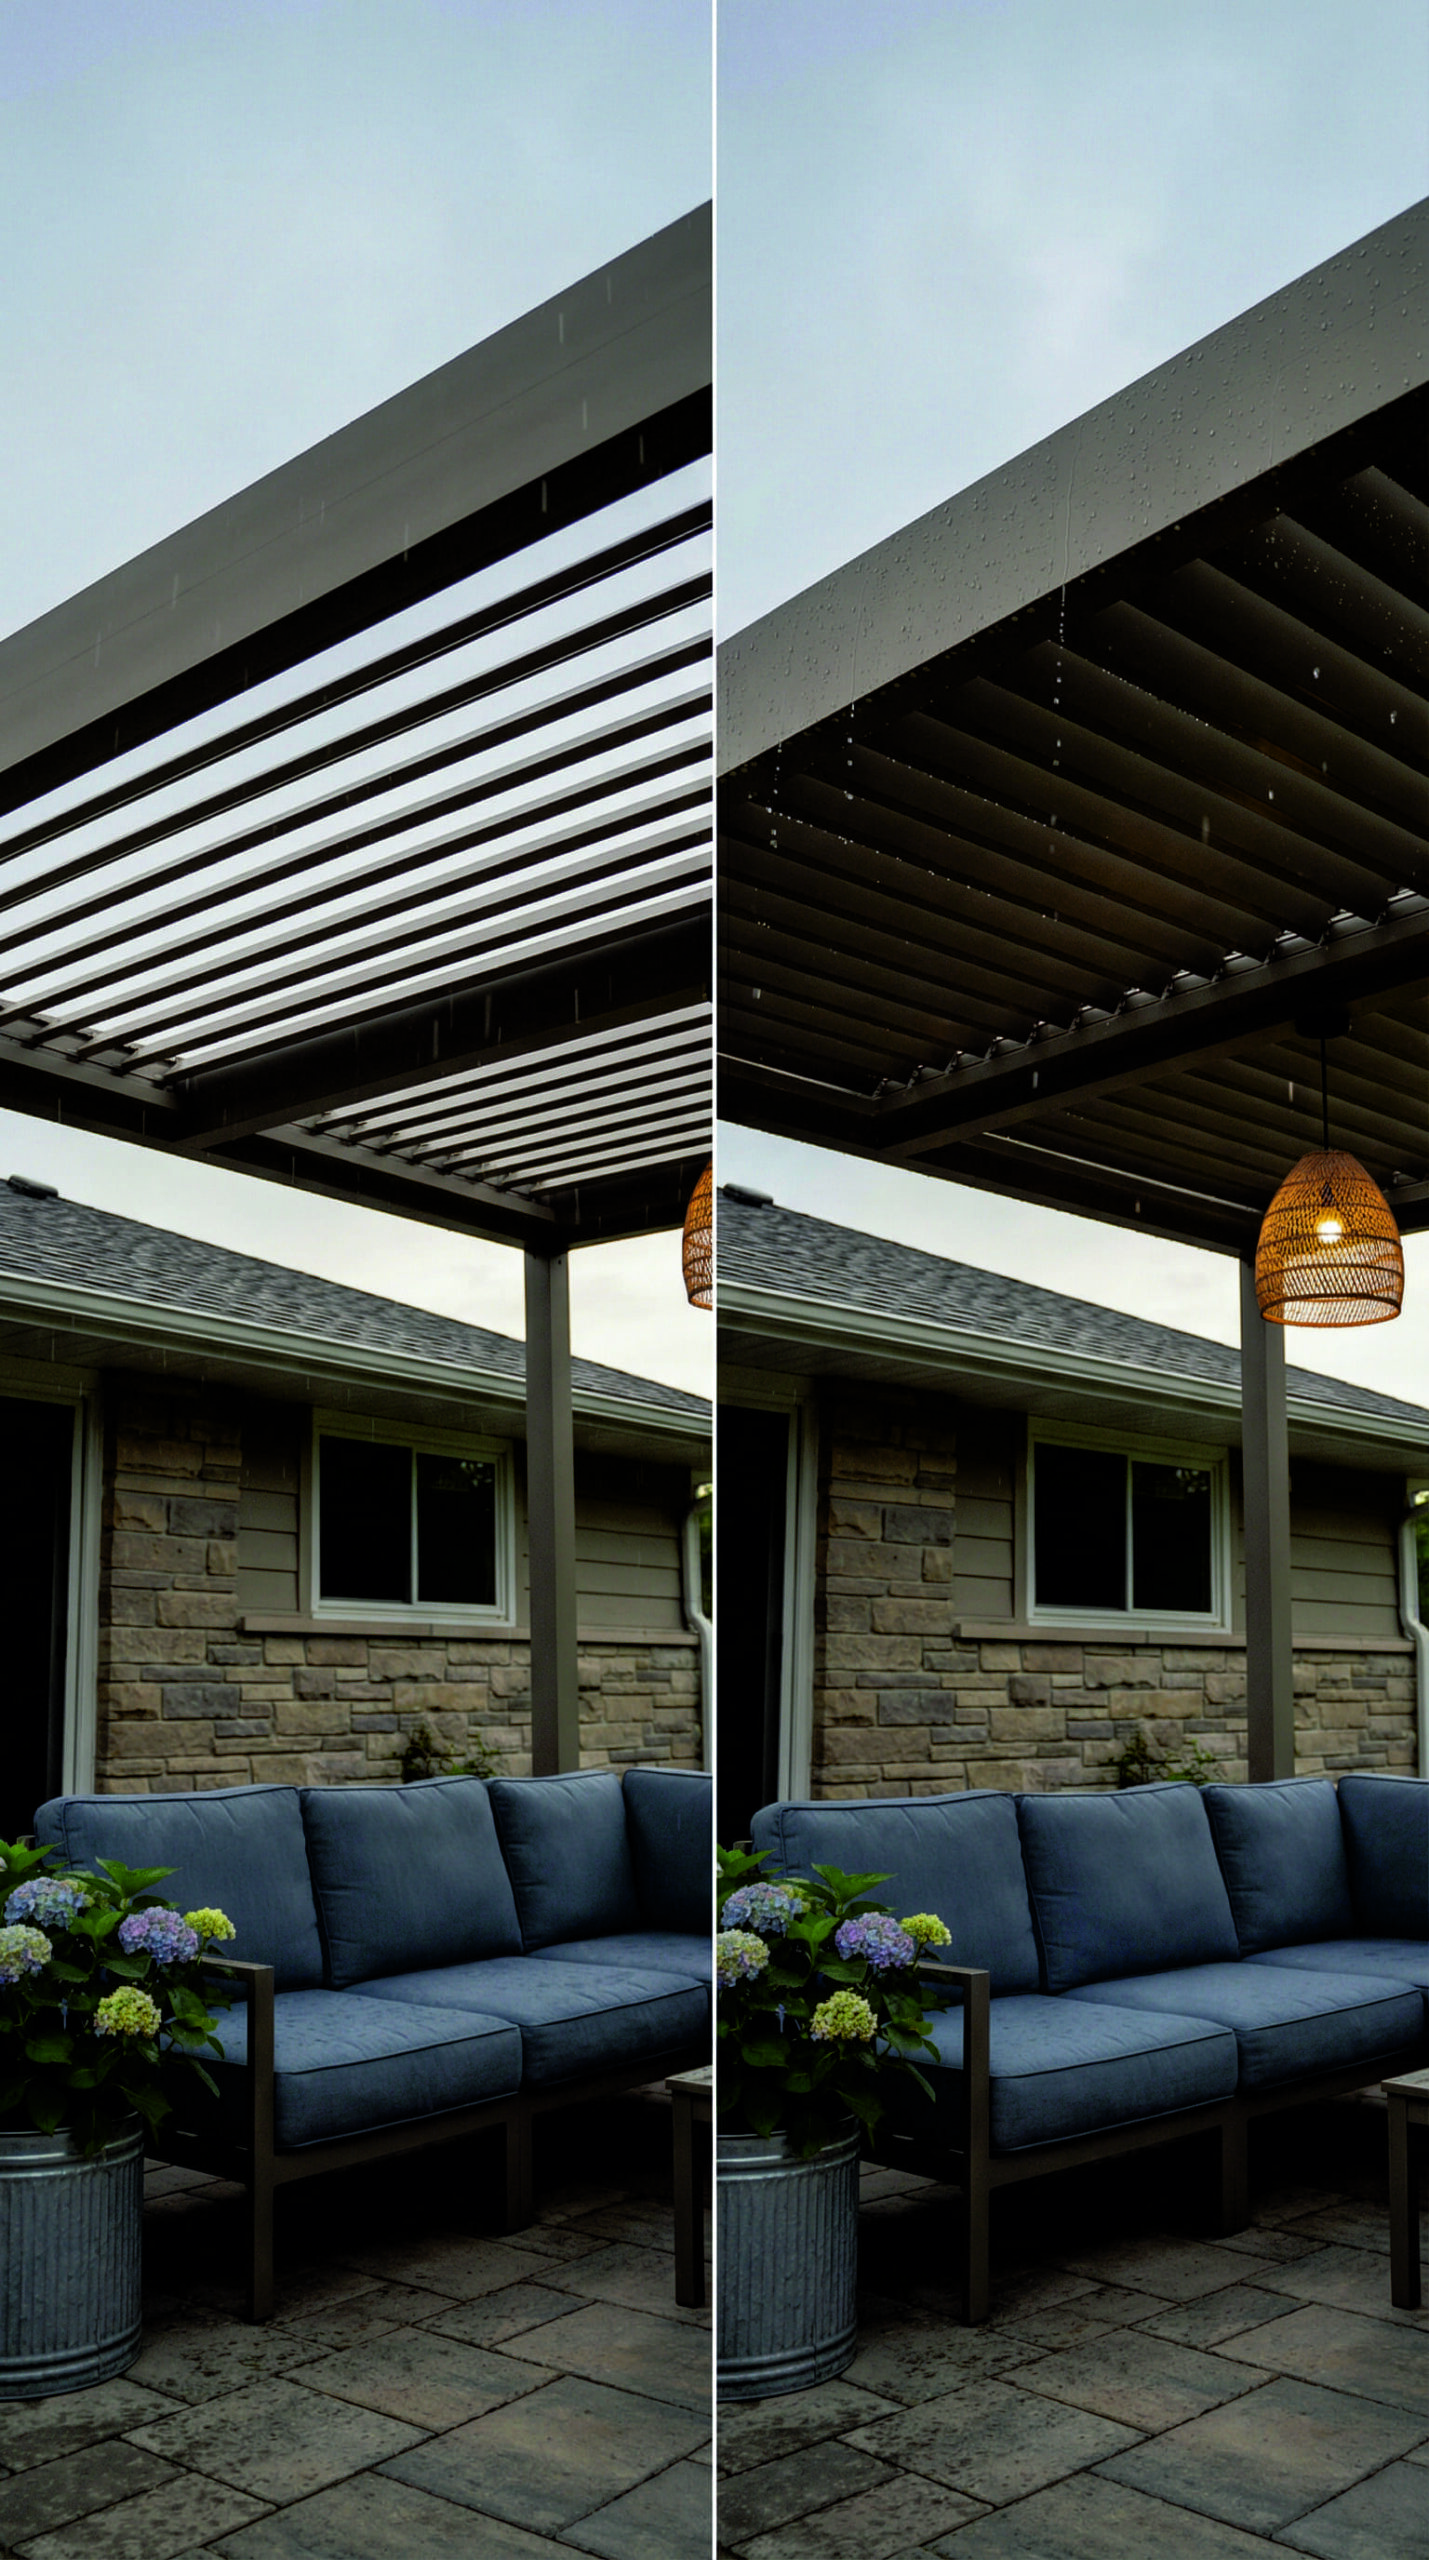
The first time I saw a louvered pergola in action, I watched a family finish their dinner as a summer shower rolled in. Instead of scrambling for cover, the host simply tapped a button on his phone. With a soft mechanical hum, the aluminum slats above rotated closed, forming a seamless roof that shed water completely. Conversation never paused. Plates never moved. The rain became part of the ambiance rather than an evacuation signal.
This is the magic of the louvered design, it transforms your outdoor space from fair-weather-only to genuinely usable. Fixed-roof pergolas force you to choose between sun protection and rain protection. Louvered systems eliminate that compromise entirely. The slats adjust anywhere from fully open (for stargazing or maximum sun) to completely closed (for downpours), with infinite positions in between for perfect dappled light.
Choosing Your Operation Style
You’ll find two main approaches to louver operation. Motorized systems offer effortless control through wall switches, remotes, or smartphone apps, ideal for entertaining when you don’t want to leave the table to adjust shade levels. Manual crank systems provide the same functional range at a lower price point and with fewer mechanical parts to maintain. Neither is inherently better; it comes down to how often you’ll adjust the slats and whether convenience justifies the investment. For most families who use their outdoor space several times weekly, motorization quickly becomes indispensable.
Aluminum’s Surprising Warmth
Letting Go of the Wood-Only Mindset
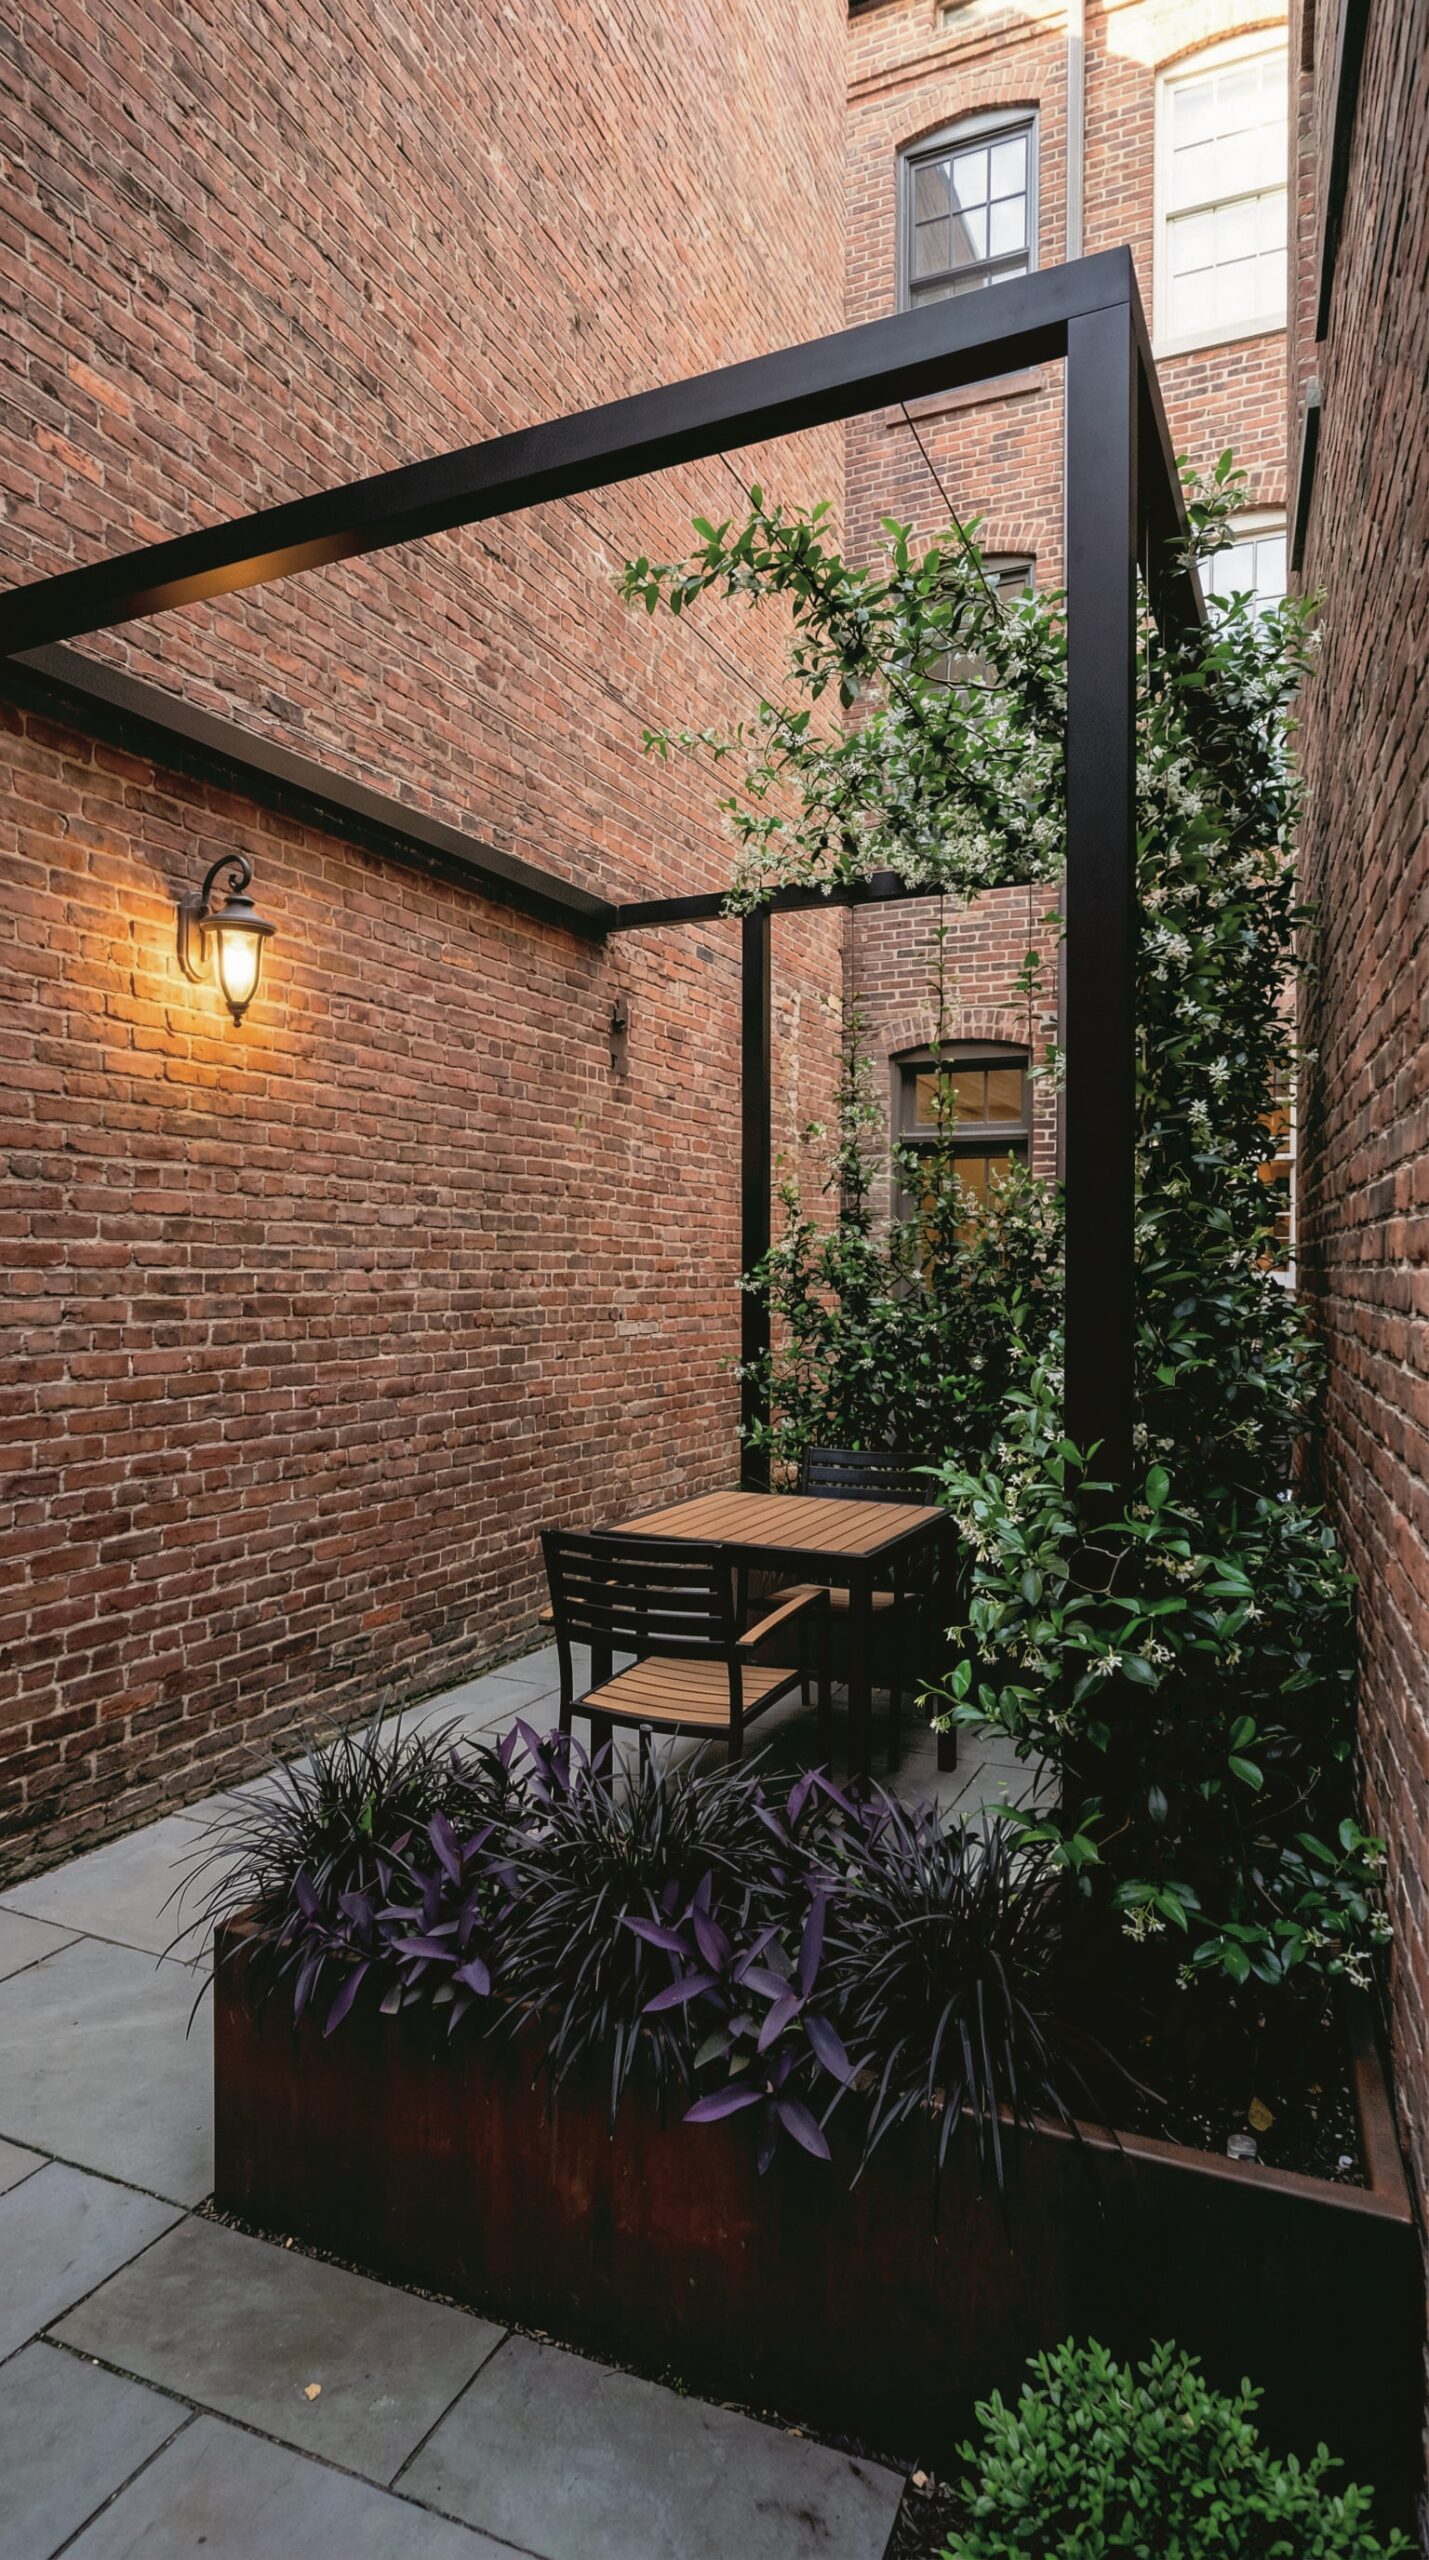
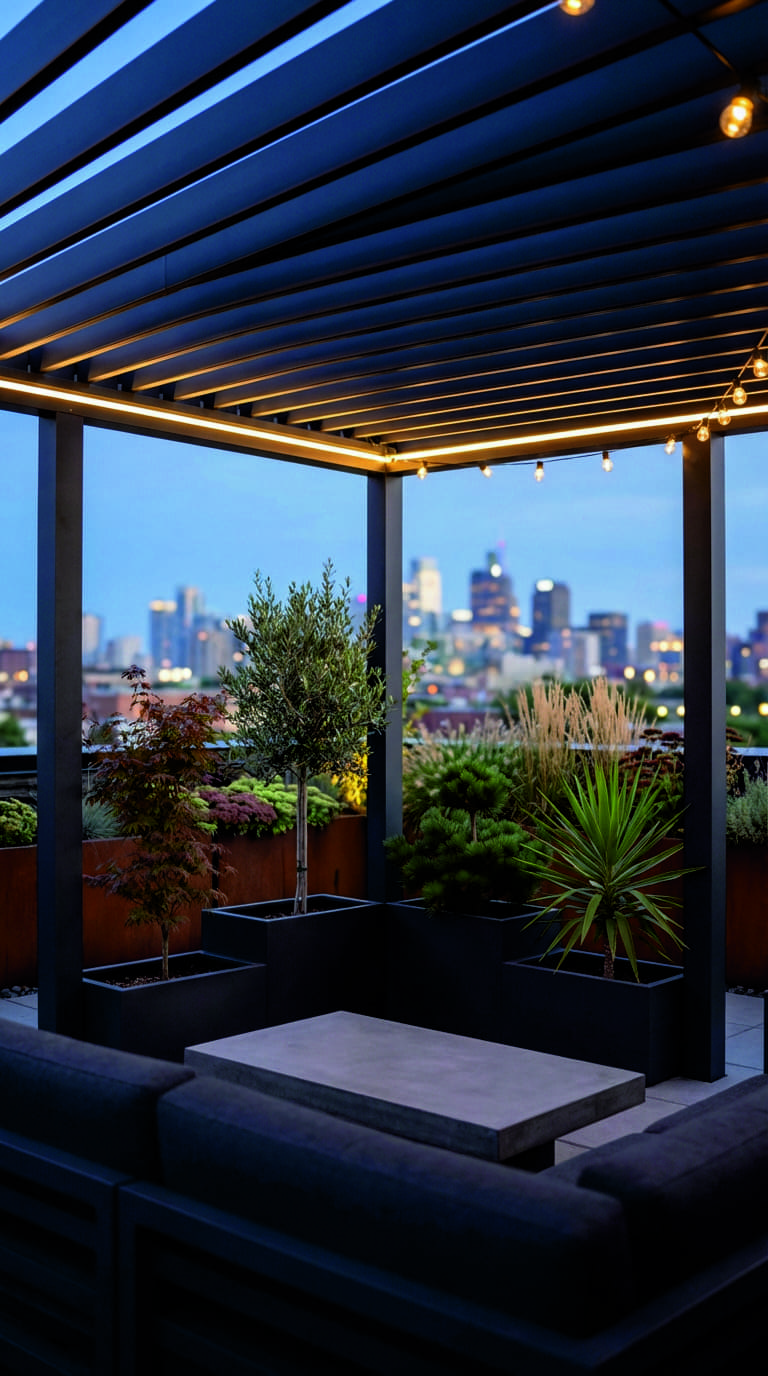
I’ll admit I was skeptical the first time I saw an aluminum pergola. My mental image was of cold, industrial scaffolding, not exactly the cozy backyard vibe I was after. Then I stood beneath one finished in a soft matte bronze, its slender beams nearly disappearing against the twilight sky while warm string lights glowed overhead. The structure felt elegant, almost weightless, and remarkably at home in a garden filled with lush plantings. That experience rewired my assumptions completely.
Modern aluminum pergolas bear little resemblance to the bulky metal structures of decades past. Powder-coated finishes now come in sophisticated earth tones, warm greys, deep charcoals, even soft whites, that complement natural materials rather than competing with them. The profiles have slimmed dramatically too; many systems feature beams just 2 to 3 inches deep, creating a clean, contemporary silhouette that lets your landscaping remain the star.
The Maintenance Math That Adds Up
Here’s the practical reality many homeowners overlook: wood pergolas demand seasonal attention. Every 12 to 18 months, you’ll face sanding, staining, or painting to prevent graying, splintering, or rot, especially on horizontal surfaces exposed to rain and sun. Aluminum asks for almost nothing. A quick rinse with the garden hose a couple times a year keeps it looking fresh. No sanding. No staining. No worrying about termites or moisture damage at connection points. For busy households or vacation properties, this near-zero maintenance isn’t just convenient, it’s liberating. You invest once in installation, then simply enjoy the space for decades without recurring upkeep costs or labor.
Freestanding Versus Attached: Finding Your Foundation
The Freestanding Approach: Creating Destination Zones
A freestanding pergola works like punctuation in your landscape, it creates a deliberate pause, a defined space within the larger yard. Positioned over a dining set in an open lawn, it draws people naturally toward that spot. Placed at the far end of a garden path, it becomes a destination worth walking toward. This independence gives you tremendous flexibility in layout, especially in larger yards where you might want multiple functional zones: a dining area near the house, a lounge space deeper in the garden, perhaps a quiet reading nook tucked beside flower beds.
The key to success with freestanding designs lies in scale and proportion. Your pergola should feel substantial enough to anchor the space without overwhelming it. As a general rule, the structure should cover approximately 70 to 80 percent of your seating area, enough to provide meaningful shade while maintaining an open, airy feel. Leave breathing room around the edges so the space doesn’t feel cave-like, and position it to capture desirable views while providing shelter from prevailing sun angles during your peak usage hours.
The Attached Advantage: Seamless Indoor-Outdoor Flow
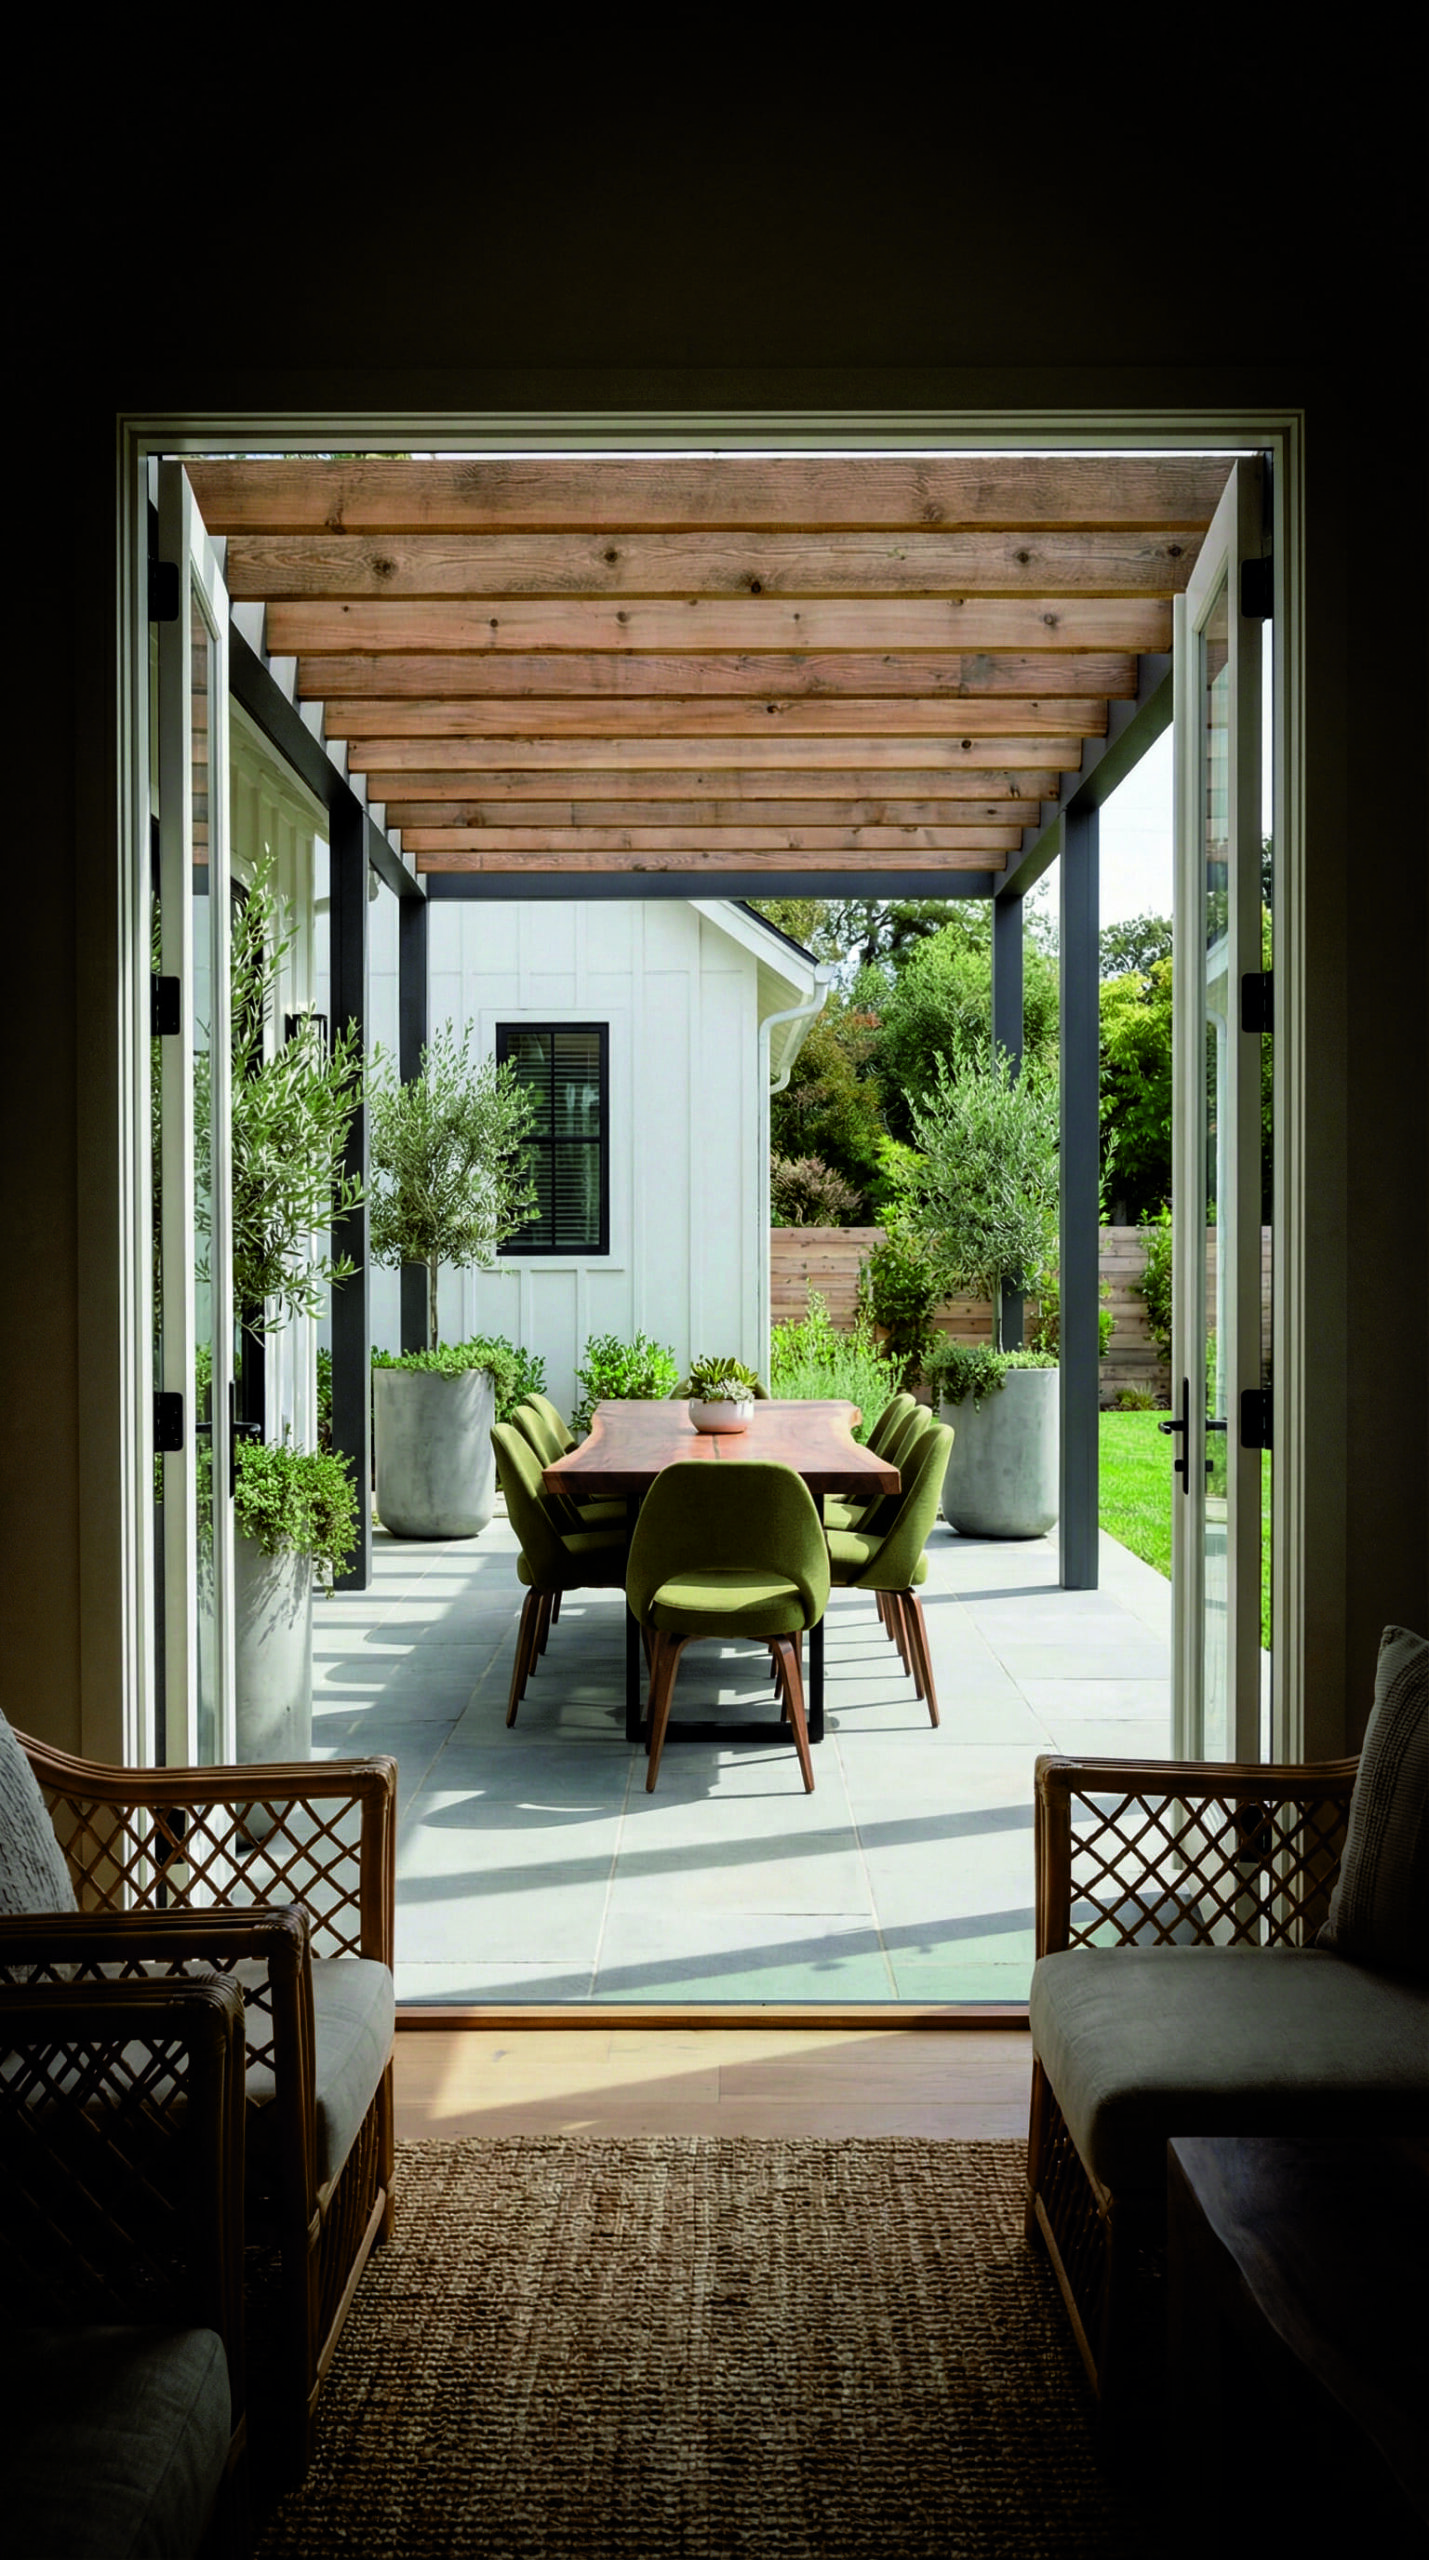
When space is limited or you want to maximize the connection between interior and exterior living areas, attaching your pergola directly to your home’s structure makes brilliant sense. This approach creates an effortless transition, stepping from your kitchen or living room directly beneath a defined overhead plane that visually extends your home’s architecture outward.
Structural attachment requires careful planning. Your pergola’s beam depth should harmonize with your home’s existing eaves for visual continuity. Leave a small gap, typically 3 to 4 inches, between the pergola’s back edge and your home’s exterior wall to allow for airflow and prevent moisture buildup. This narrow space also becomes an ideal channel for running electrical wiring to overhead lighting or ceiling fans, keeping cords hidden and installations clean. Most importantly, check local building codes early; attached structures often require permits where freestanding ones under 200 square feet may not.
Small-Space Superpowers
The Compact Canvas
You don’t need a sprawling estate to benefit from a pergola’s magic. In fact, some of the most inspiring designs I’ve encountered live in modest urban yards where every square foot counts. The secret lies in thoughtful scaling and vertical strategy.
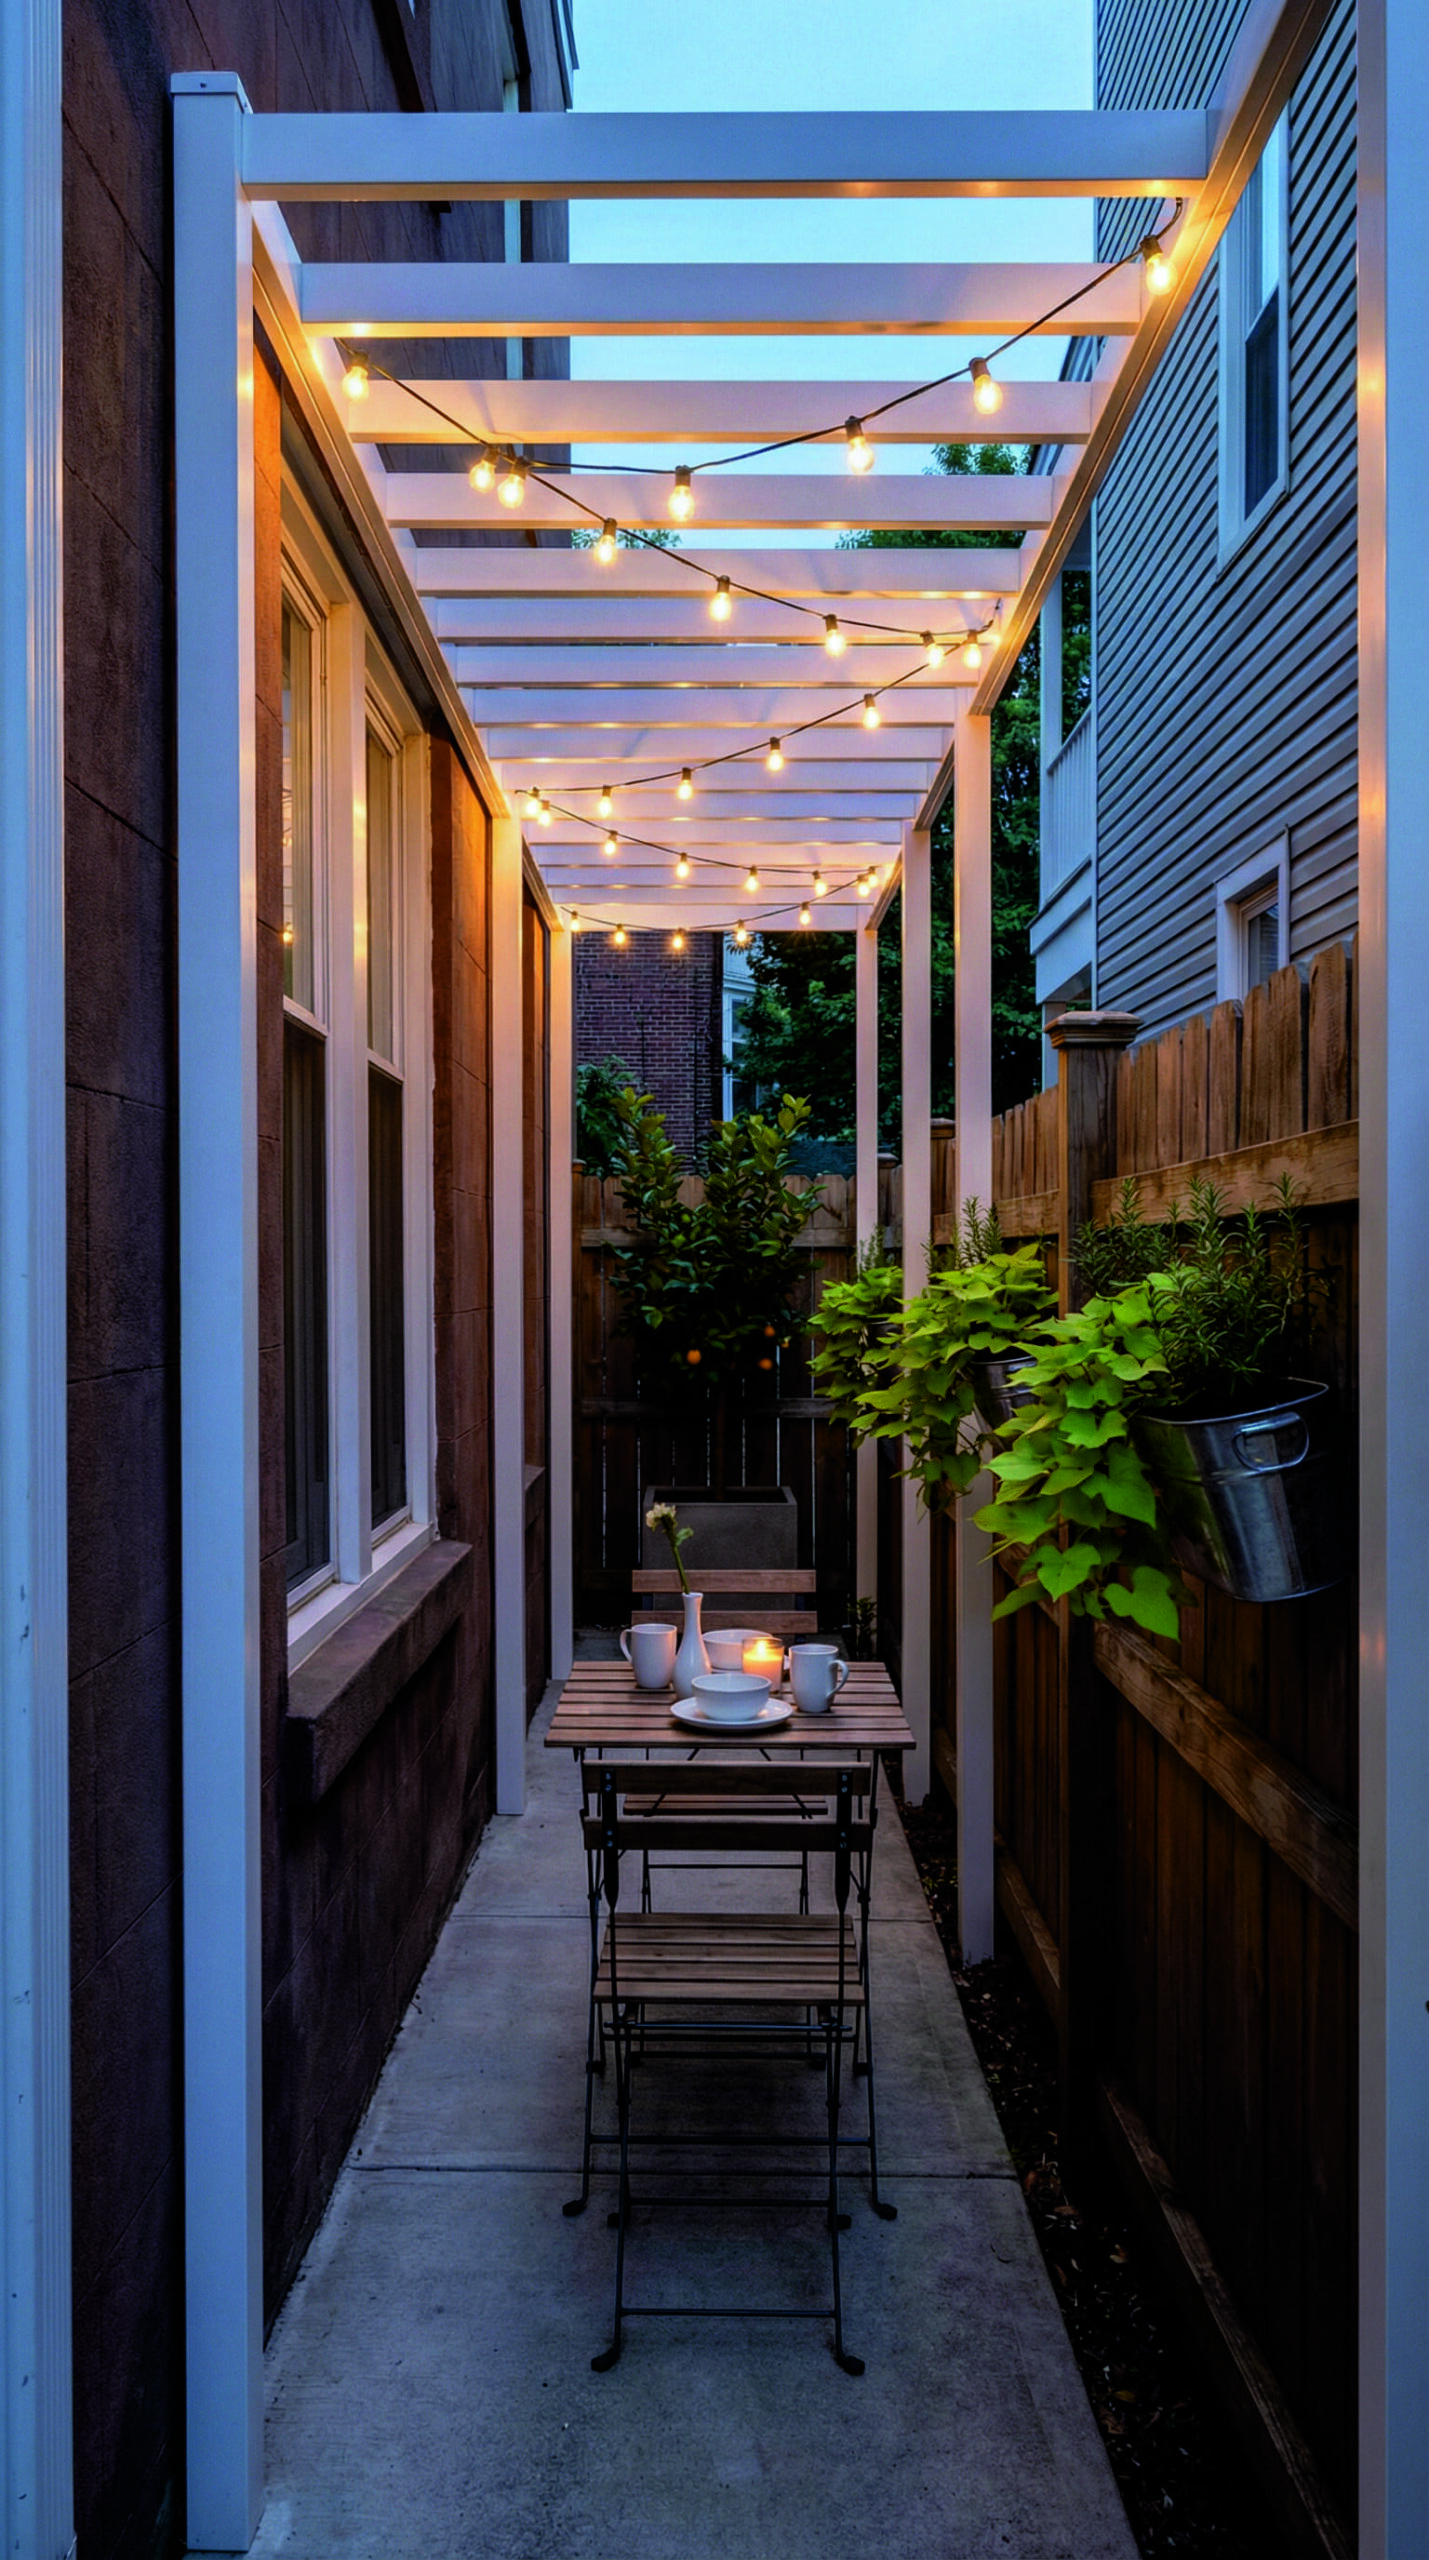
An 8-foot by 10-foot pergola provides ample coverage for a cozy bistro set with two chairs and still leaves room for potted plants beneath the beams. Narrow configurations work beautifully too, a 4-foot by 12-foot structure stretched along a side yard can transform an awkward passageway into a fragrant herb garden tunnel or a serene morning coffee spot. When space feels tight, paint your pergola beams the same color as your fence or adjacent wall. This simple trick helps the structure visually recede, making the space feel larger and more integrated.
Climbing Up, Not Out
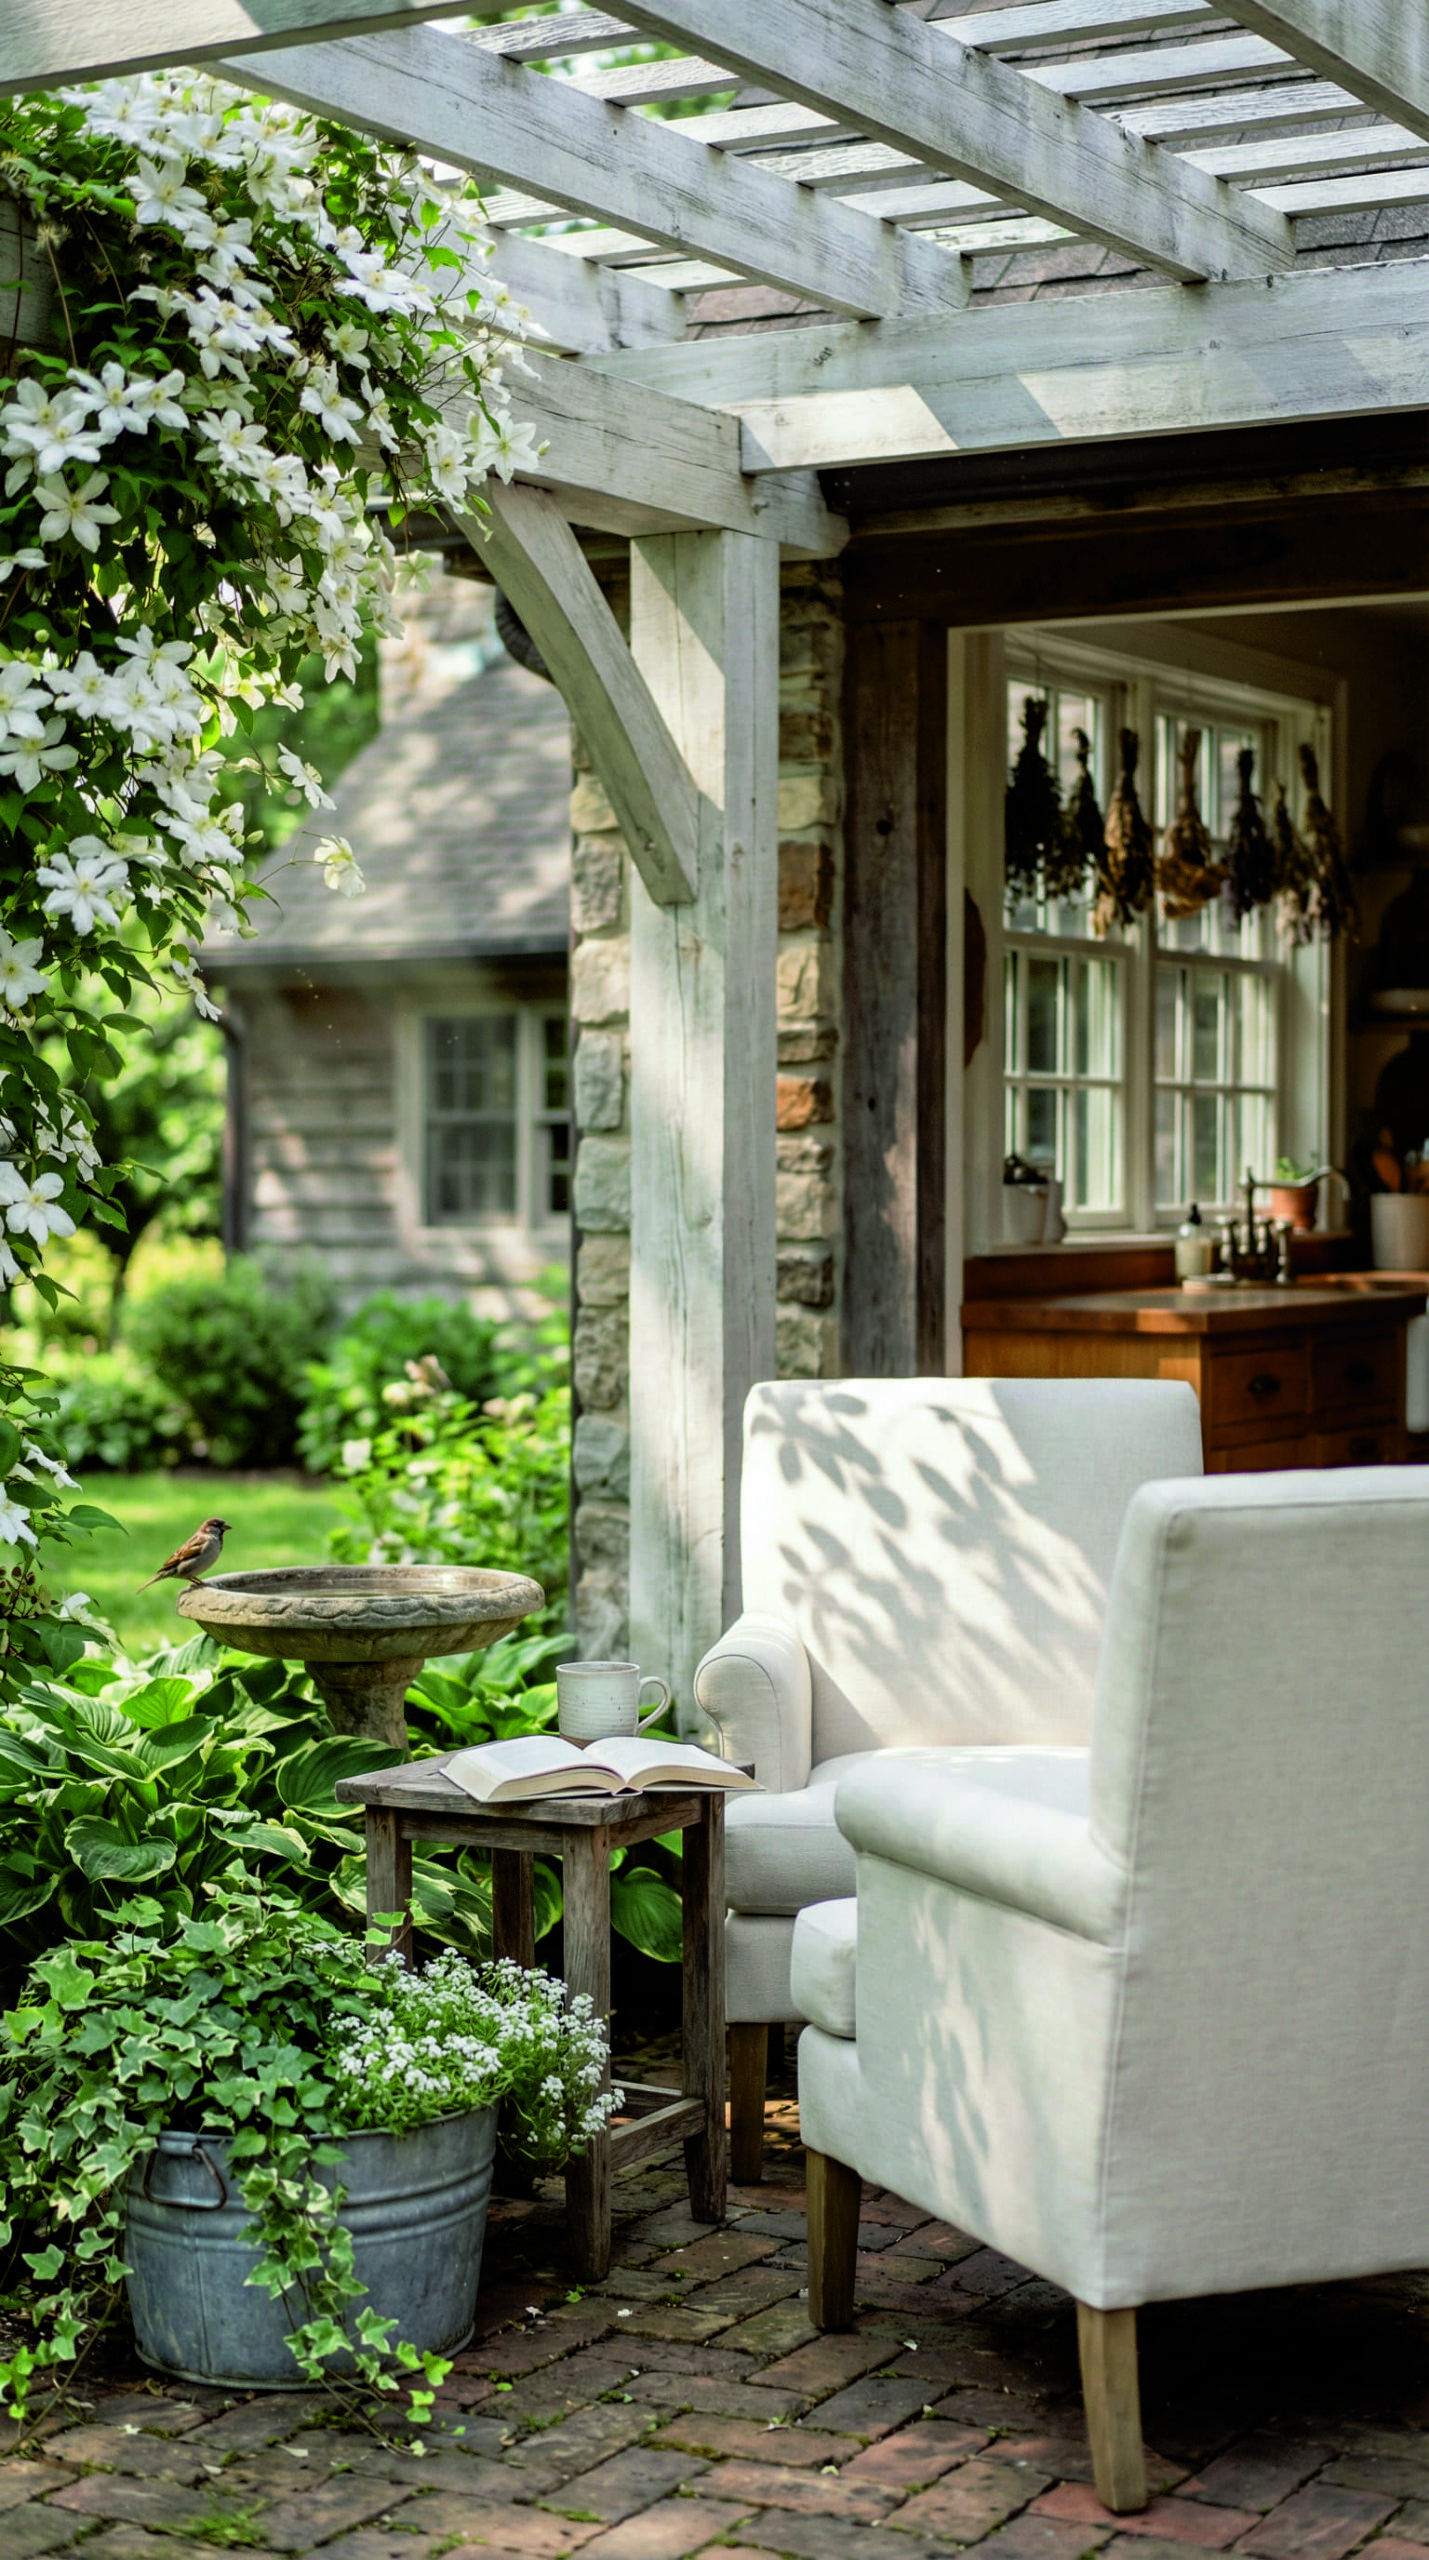
In compact gardens, vertical growth becomes your greatest asset. Train climbing plants upward along pergola posts rather than letting them sprawl outward across precious floor space. Clematis offers quick coverage with seasonal blooms in soft purples and pinks. Jasmine provides evergreen structure plus intoxicating evening fragrance. For edible interest, try training pole beans or sugar snap peas along slender wires attached to posts, they’ll climb vigorously through summer, providing shade and harvest simultaneously. Just remember to install removable wire trellises rather than letting vines attach directly to beams; this protects your pergola’s finish and makes seasonal pruning far simpler.
Light It Like a Pro

The Three-Layer Lighting Formula
Darkness doesn’t have to signal the end of your outdoor evening. With intentional lighting, your pergola-covered space can transition gracefully from sun-drenched afternoon to intimate twilight gathering. The secret lies in layering three types of light:
Ambient lighting sets the overall mood. Paper lanterns dangling at varying heights create a festive, relaxed atmosphere. Woven rattan pendants clustered asymmetrically overhead bring warmth and texture. For a cleaner modern look, recessed LED discs installed directly into beam undersides provide soft, diffused glow without visible fixtures.
Task lighting ensures functionality where needed most. Slim LED strips mounted along beam undersides illuminate dining surfaces perfectly, choose 2700K to 3000K color temperature for that flattering, warm-white glow that makes food look appetizing and faces look rested. Position these strips to graze downward rather than shine directly into seated eyes.
Accent lighting adds drama and dimension after sunset. Small uplights nestled at the base of pergola posts graze upward along vertical beams, emphasizing height and structure. When vines climb your pergola, these same uplights will cast enchanting shadow patterns across nearby walls or fences as evening deepens.
Wiring Preplanning
If you’re installing a new pergola, run electrical conduit through beam channels during construction, even if you don’t plan to add lighting immediately. Retrofitting wiring later means visible cords snaking along beams or complicated fishing jobs through finished structures. A little foresight during installation pays dividends in clean aesthetics and flexible future upgrades.
The Outdoor Kitchen Pergola
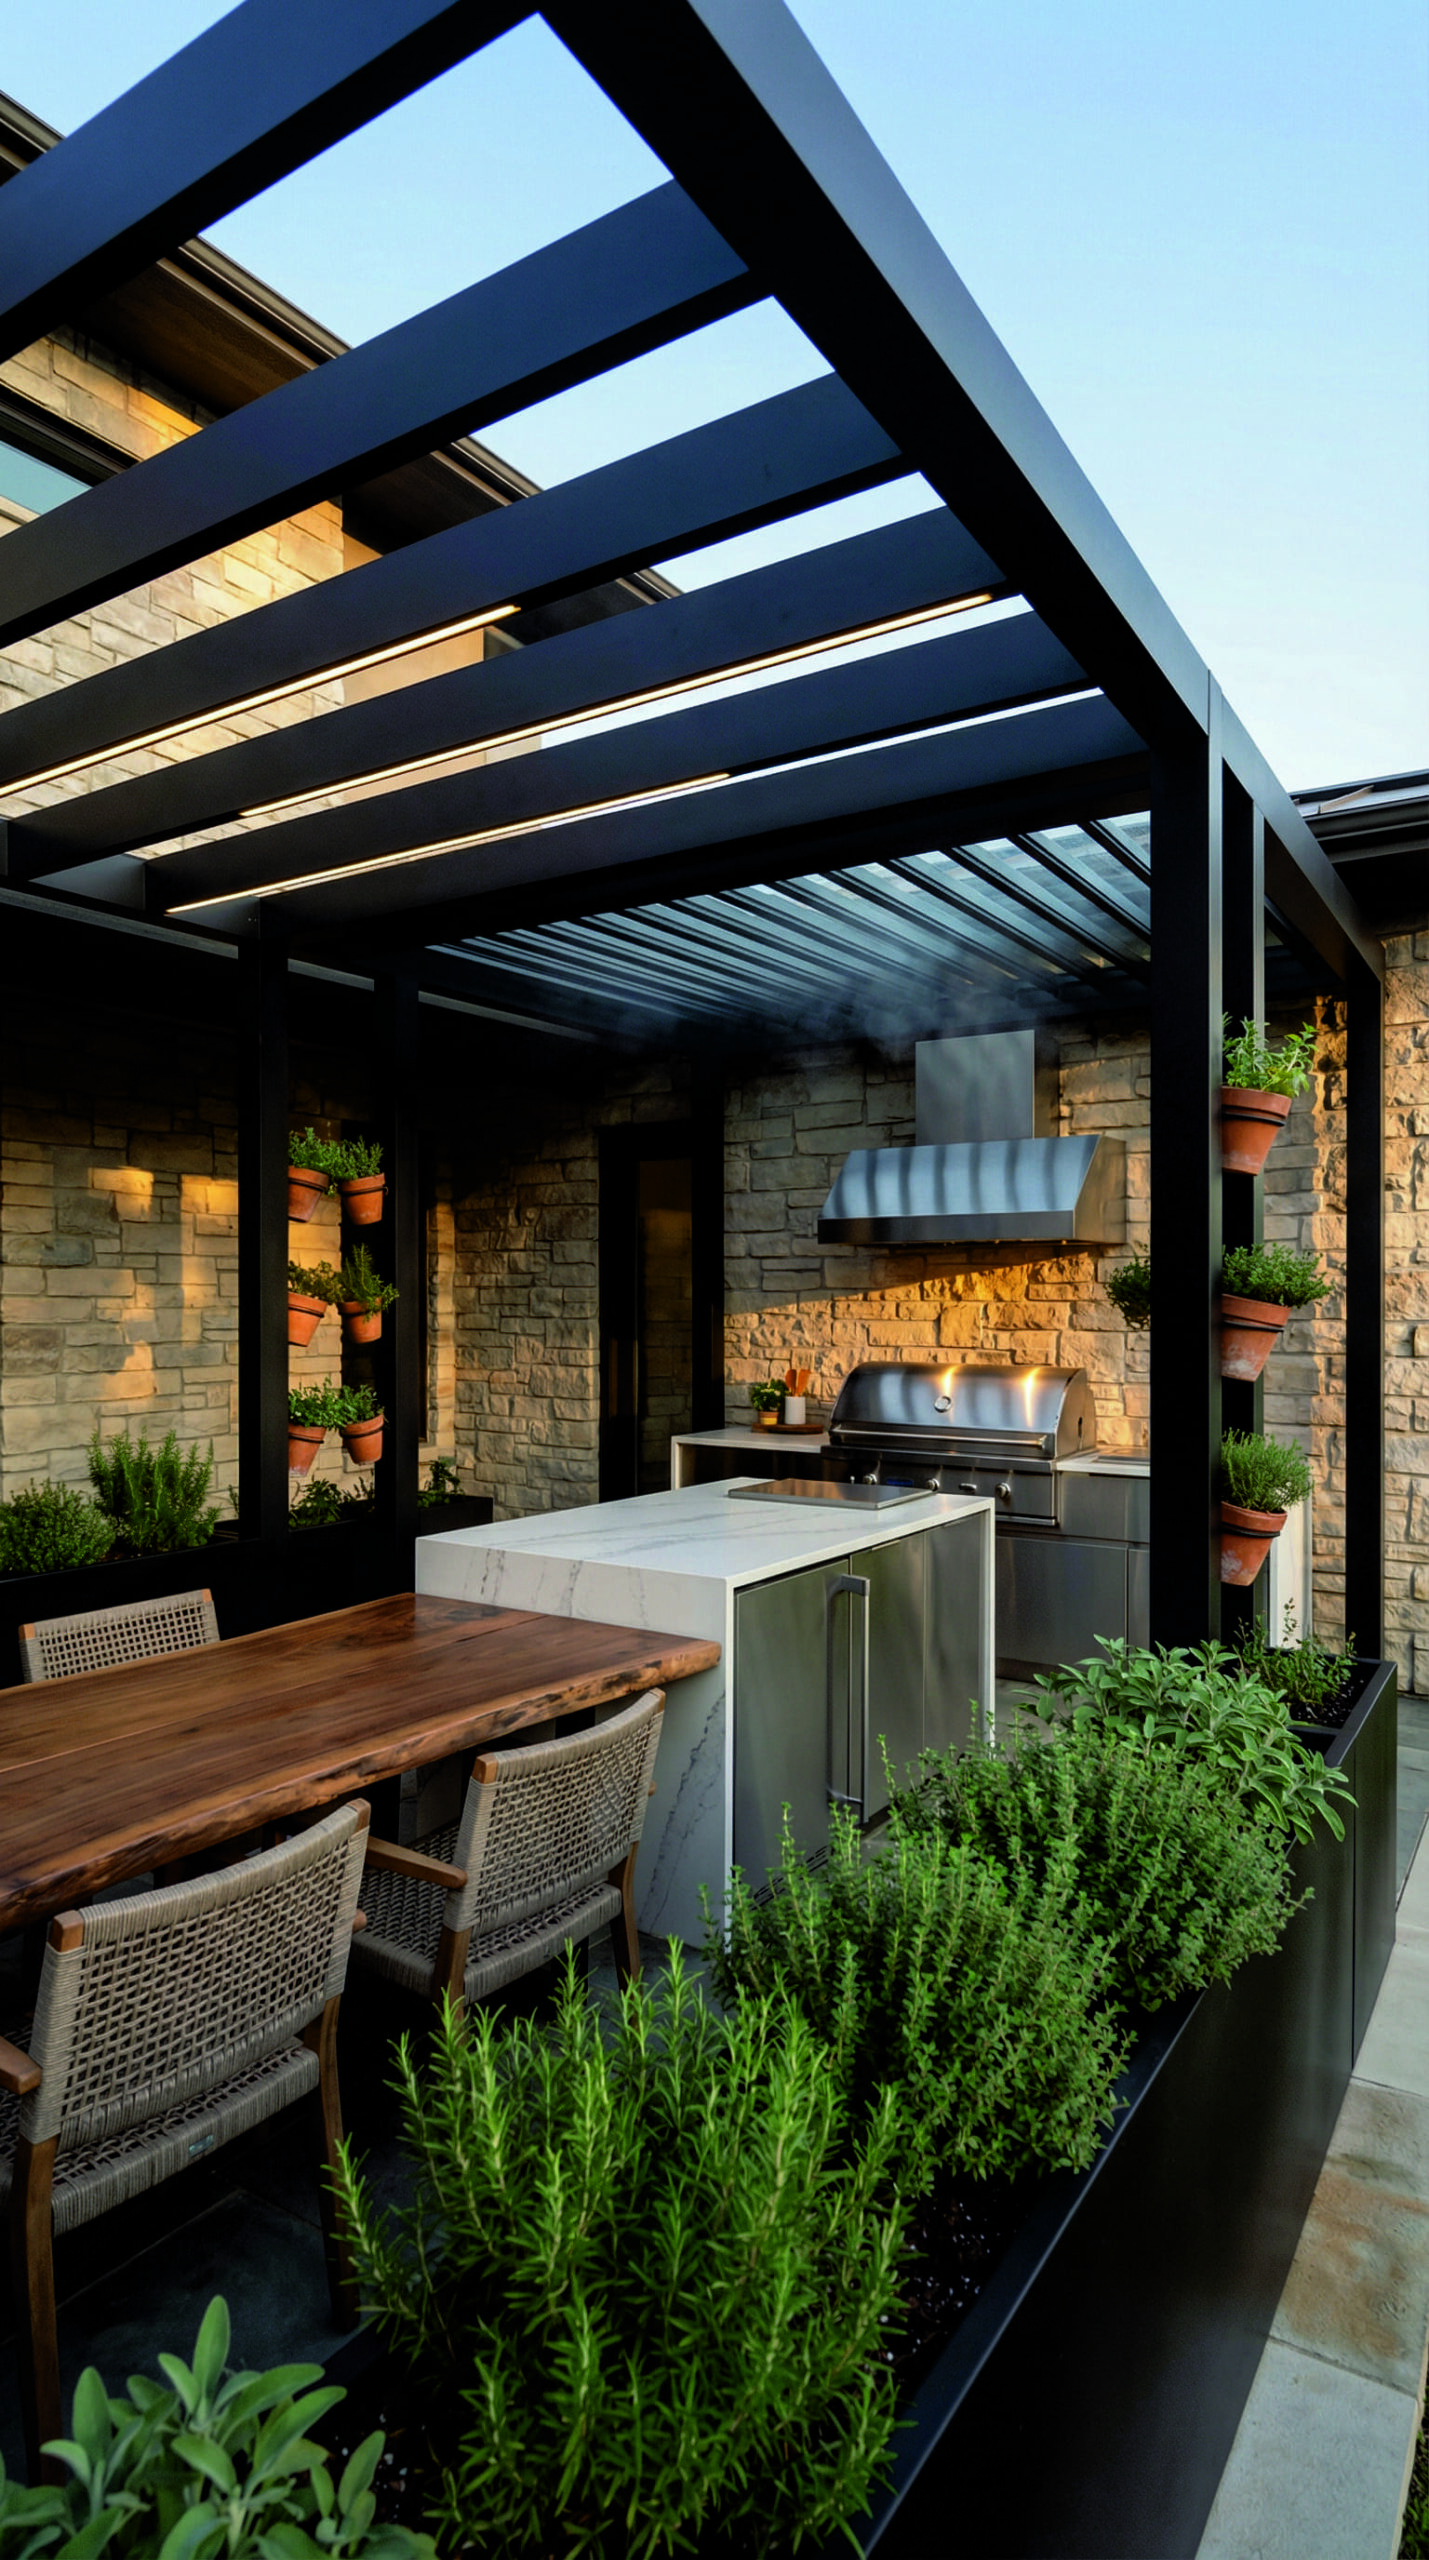
Why Open Slats Make Sense Above Cooking Zones
It seems counterintuitive at first, wouldn’t a solid roof provide better protection above an outdoor kitchen? Actually, the pergola’s open design solves a problem solid roofs create: trapped heat and smoke. When you’re grilling or using a pizza oven, rising heat needs somewhere to escape. A solid overhead surface reflects that heat back down onto the cook and traps smoke in the breathing zone. A pergola’s open framework allows heat and smoke to dissipate naturally while still providing welcome shade from direct sun.
Position your pergola thoughtfully relative to cooking and prep zones. Shade the food preparation counter and dining area, where people linger longest, but consider leaving the actual grill surface in partial sun. You’ll appreciate being able to see your food clearly without squinting or casting shadows across the cooking surface. This nuanced approach acknowledges that different activities within your outdoor kitchen have different environmental needs.
Material Matters Near Heat Sources
Safety first: any pergola installed above or adjacent to cooking equipment must use non-combustible materials. Aluminum excels here, maintaining structural integrity well above typical grill temperatures. Maintain minimum clearance of 36 inches between your highest heat source and the lowest beam, a distance that satisfies most fire codes while allowing comfortable movement beneath the structure. Some designers incorporate heat-resistant tempered glass panels within aluminum frames directly above grills for added protection without sacrificing the open-air feel elsewhere beneath the pergola.
Plant Partners That Elevate Your Design
Choosing Climbers to Suit
The relationship between pergola and plant is a long-term commitment, choose companions wisely. Fast-growing trumpet vine delivers quick coverage but demands aggressive management; its vigorous roots can invade foundations if planted directly in-ground. Contain it in large pots at the pergola’s base for dramatic vertical growth without underground invasion. Wisteria offers breathtaking spring blooms and graceful structure but requires patience, expect three to five years before significant flowering. Its woody vines become substantial over time, so ensure your pergola structure can support mature weight.
For edible elegance, consider grapevines. They provide dappled shade through summer, transform into fiery color come autumn, and reward your patience with harvests of fruit for eating fresh or making small-batch preserves. Train them along removable horizontal wires stretched between posts rather than letting tendrils grip beams directly, this preserves your pergola’s finish and simplifies winter pruning.
The Evergreen-Deciduous Balance
Create year-round interest by layering plant types. Pair deciduous climbers like clematis (which lose leaves in winter) with evergreen jasmine trained along lower post sections. When clematis goes dormant, jasmine maintains green presence and releases its famous fragrance on warm winter evenings. This thoughtful layering ensures your pergola never looks bare or neglected during off-seasons, it simply transitions through moods with the calendar.
Your Design Checklist Before Breaking Ground
Five Questions That Prevent Regret
Before you finalize plans or contact contractors, walk your space at different times of day with these questions in mind:
Where does shade need to fall at your peak usage hour? Stand in your intended seating area at 4 p.m. in July, that’s when many families actually use their outdoor spaces. Note where the sun hits hardest, then position your pergola to intercept those rays precisely where people will sit.
Does the scale feel generous without overwhelming? Use garden hoses or landscape spray paint to outline your proposed pergola footprint on the ground. Live with those lines for a few days. Walk through the space. Set up chairs within the outline. Does it feel spacious or cramped? Adjust dimensions before committing to construction.
Will the material harmonize with existing architecture? Collect paint chips or material samples from your home’s exterior. Hold them against pergola finish options in natural light at different times of day. Colors that look warm in a showroom may read cool in your north-facing yard.
Have you planned for tomorrow’s desires today? Run empty conduit through beam channels for future lighting, speakers, or even a ceiling fan, even if you won’t install these immediately. The cost of adding conduit during construction is minimal; retrofitting later is expensive and often compromises aesthetics.
Have you checked permit requirements? Regulations vary widely by municipality. Freestanding structures under 200 square feet often fly under the permit radar, but attached pergolas almost always require approval. A quick call to your local building department prevents costly dismantling later.
Your Canopy Awaits
That moment when you flip the louver switch as clouds roll in and dinner continues uninterrupted. When you pause beneath twinkling lights to breathe in night-blooming jasmine as conversation lingers past bedtime. When your morning coffee ritual moves seamlessly from kitchen counter to shaded patio without missing a beat, this is why we build.
Having a pergola isn’t about copying a magazine photo or chasing trends. It’s about designing the quiet overhead presence that makes your outdoor space feel unmistakably like yours, a place where light falls just so, where weather becomes texture rather than obstacle, where ordinary moments stretch into something more memorable simply because the space invites you to stay awhile longer. Start with one thoughtful beam. The rest, the laughter, the quiet mornings, the spontaneous gatherings, will grow beautifully around it.