Succulent Planter Ideas That Look Good and Thrive
No one wants you bring home a gorgeous succulent planter that looks perfect on day one… and then two weeks later has started to struggle.? The good news is, it’s rarely “you’re bad with plants.” It’s about setting the planter up so the plant can do what succulents are built to do: store water, dry out, and grow slowly in bright light.
We want to keep thingds easy. So below we will loook at the basics, how to choose a pot that doesn’t sabotage you, how to build a mix that drains fast, and how to arrange succulents so they look full right away (and still look good months later). By the end, you’ll have a simple formula you can repeat for porch pots, tabletop bowls, wall planters—whatever fits your space.
Pick the right succulent planter first
Drainage is your best friend
If you remember one thing, let it be this: succulents hate sitting in wet soil. A container with drainage holes is the simplest way to keep roots healthy, because extra water has somewhere to go.
If you’ve fallen in love with a cute pot that has no hole, you still have options. You can drill one (often easier than it sounds), or use the “two-pot” setup: plant your succulents in a plain nursery pot with holes, then set that inside your decorative container like a sleeve. That way, you can water at the sink and let it drain properly before it goes back to its pretty spot.
Size matters more than people think
Big pots look dramatic. But with succulents, oversized pots can stay damp for longer than the plant needs, which raises the risk of rot. A good rule is to choose a container that’s only a little wider than the root ball for a single plant, or just roomy enough to fit your planned arrangement with a bit of breathing space between plants.
There are exceptions. Outdoors, in hot or windy conditions, a slightly larger pot can help slow down drying so you’re not watering constantly. And in mixed arrangements, you’ll want enough room for several root systems without packing them like sardines.
Choose a material that matches your habits
Different pots behave differently, and this is where you can make your life easier.
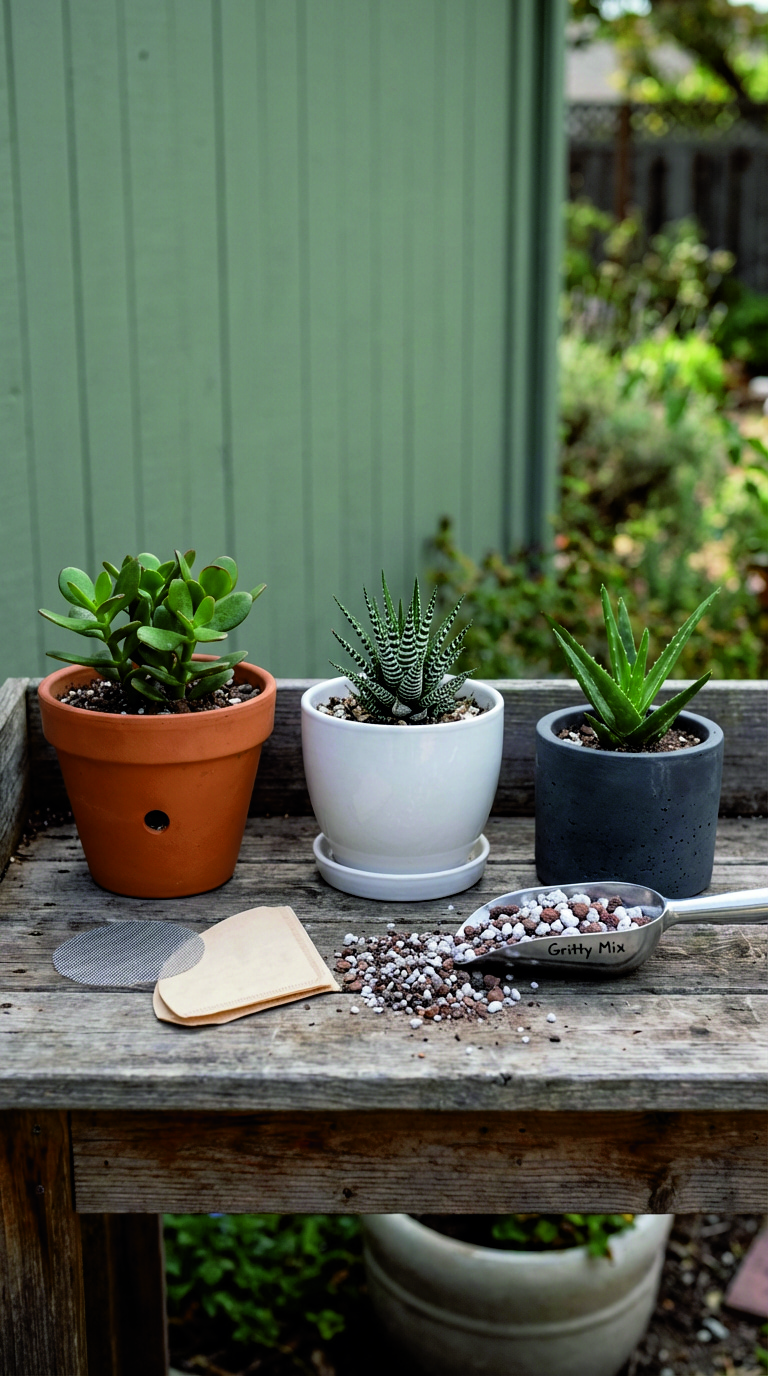
Terracotta breathes. It dries out faster, which is great if you tend to water too often or your home runs humid.
Glazed ceramic holds moisture longer. It’s gorgeous, but it can stay wet, especially indoors. If you’re forgetful and water lightly, it can work well. If you’re a “just a little splash every few days” person, it can be risky.
Concrete is sturdy and modern-looking. It’s also heavier and can stay cooler, which slows drying. Outdoors, that can be a plus in summer. Indoors, it just means you’ll want to be extra disciplined about watering only when dry.
Metal and wood can absolutely work, but think through drainage and liners. Metal can heat up fast in sun. Wood can rot if it stays damp. Both can be fine when the inside setup is right.
Build a soil and drainage setup that succulents actually like
What “well-draining” really means
Succulents don’t want rich, fluffy, water-holding soil. They want air around the roots. They want water to move through quickly. And they want the mix to dry out in a reasonable time frame.
Most standard potting soil is built to hold moisture, because most houseplants prefer that. Succulents are the opposite. When people say “my succulent rotted,” what they often mean is “the roots stayed wet too long.”
A simple mix strategy you can repeat
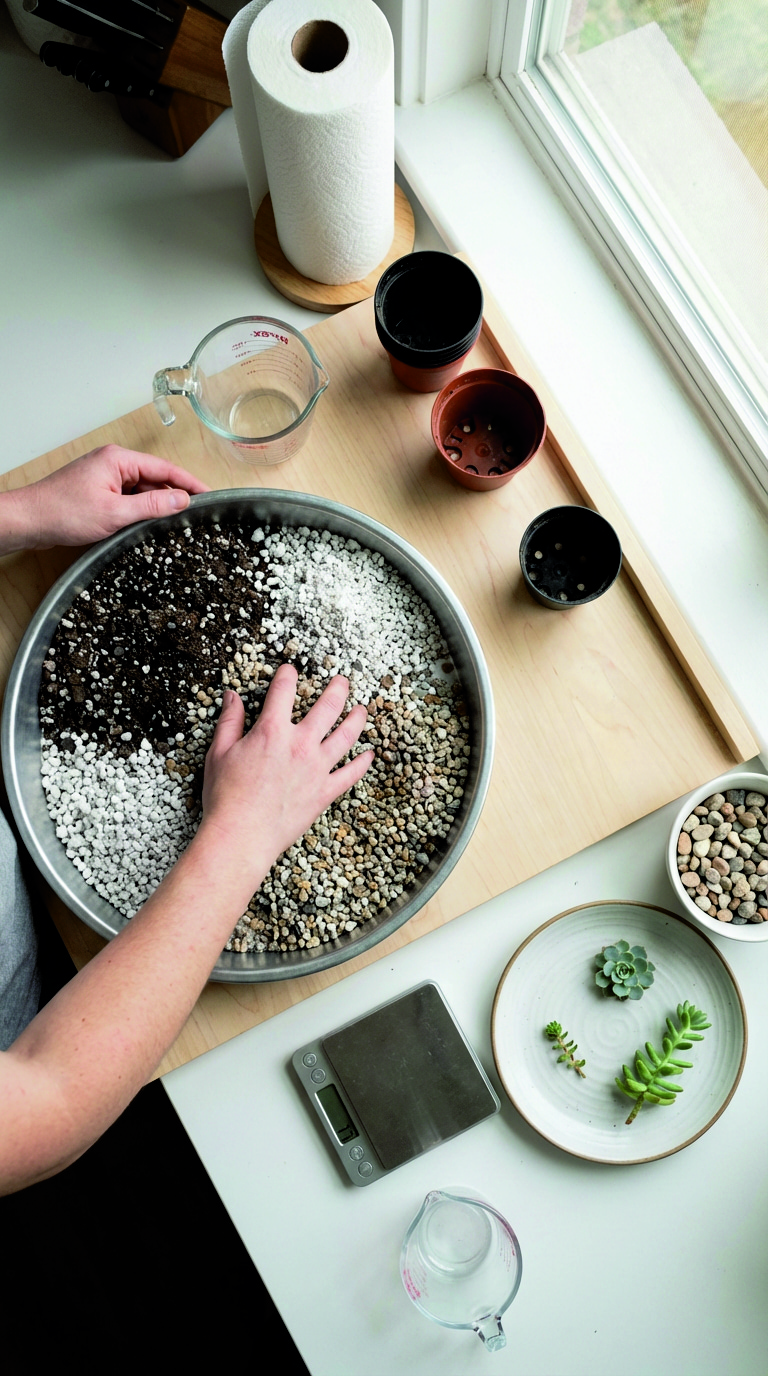
If you want the easiest route: start with a cactus/succulent mix, then make it drain faster.
You can do that by blending in a gritty, mineral component—something that creates air pockets and breaks up the spongey texture. Many gardeners use perlite or pumice. Some use coarse sand or small gravel meant for horticulture. The goal is the same: more texture, faster drying, less soggy soil around roots.
If you’re working with a bowl or a container that dries slowly (like glazed ceramic indoors), lean even more toward gritty. If you’re working with a terracotta pot outside in heat, you can keep it slightly less gritty so it doesn’t dry out in a day.
Skip the “rocks at the bottom” trick
A lot of people were taught to put rocks at the bottom of a pot to improve drainage. It sounds right. But in practice, it usually doesn’t do what you want. Water still saturates the soil above until it reaches a point where it can move into the rock layer, and that can leave roots sitting in a wetter zone than you expected.
A better fix is simpler: use one consistent, fast-draining mix from top to bottom, make sure the pot has drainage holes, and cover the holes with a small piece of mesh or a coffee filter if you’re losing soil.
Top dressing: the finishing touch
A thin top layer of gravel or grit can make a succulent planter look tidy, keep lower leaves cleaner, and reduce splashing when you water. Keep it thin. You still want air exchange and you don’t want to trap moisture against stems.
Light comes next, because it changes everything

Indoors: “bright room” isn’t always bright enough
Succulents usually need more light than we think. A room can feel sunny to you and still be dim to a plant.
If your succulents are stretching—long gaps between leaves, leaning hard toward the window—that’s a light issue. Move the planter closer to the light source, rotate it weekly so it grows evenly, and consider supplemental lighting if you’re in a darker home or dealing with short winter days.
And here’s a small detail that helps: clean the window. Seriously. Dusty glass and screens can cut light more than you’d expect.
Outdoors: ease them into sun
Outdoor light is stronger than indoor light, even in shade. If you take an indoor planter and plop it straight into full sun, sunburn can happen fast. Start in bright shade or morning sun, then gradually increase exposure over a week or two.
Think of it like getting your skin used to summer again. Slow is smooth. Smooth is healthy.
Watering a succulent planter without overthinking it
The “soak and dry” rhythm
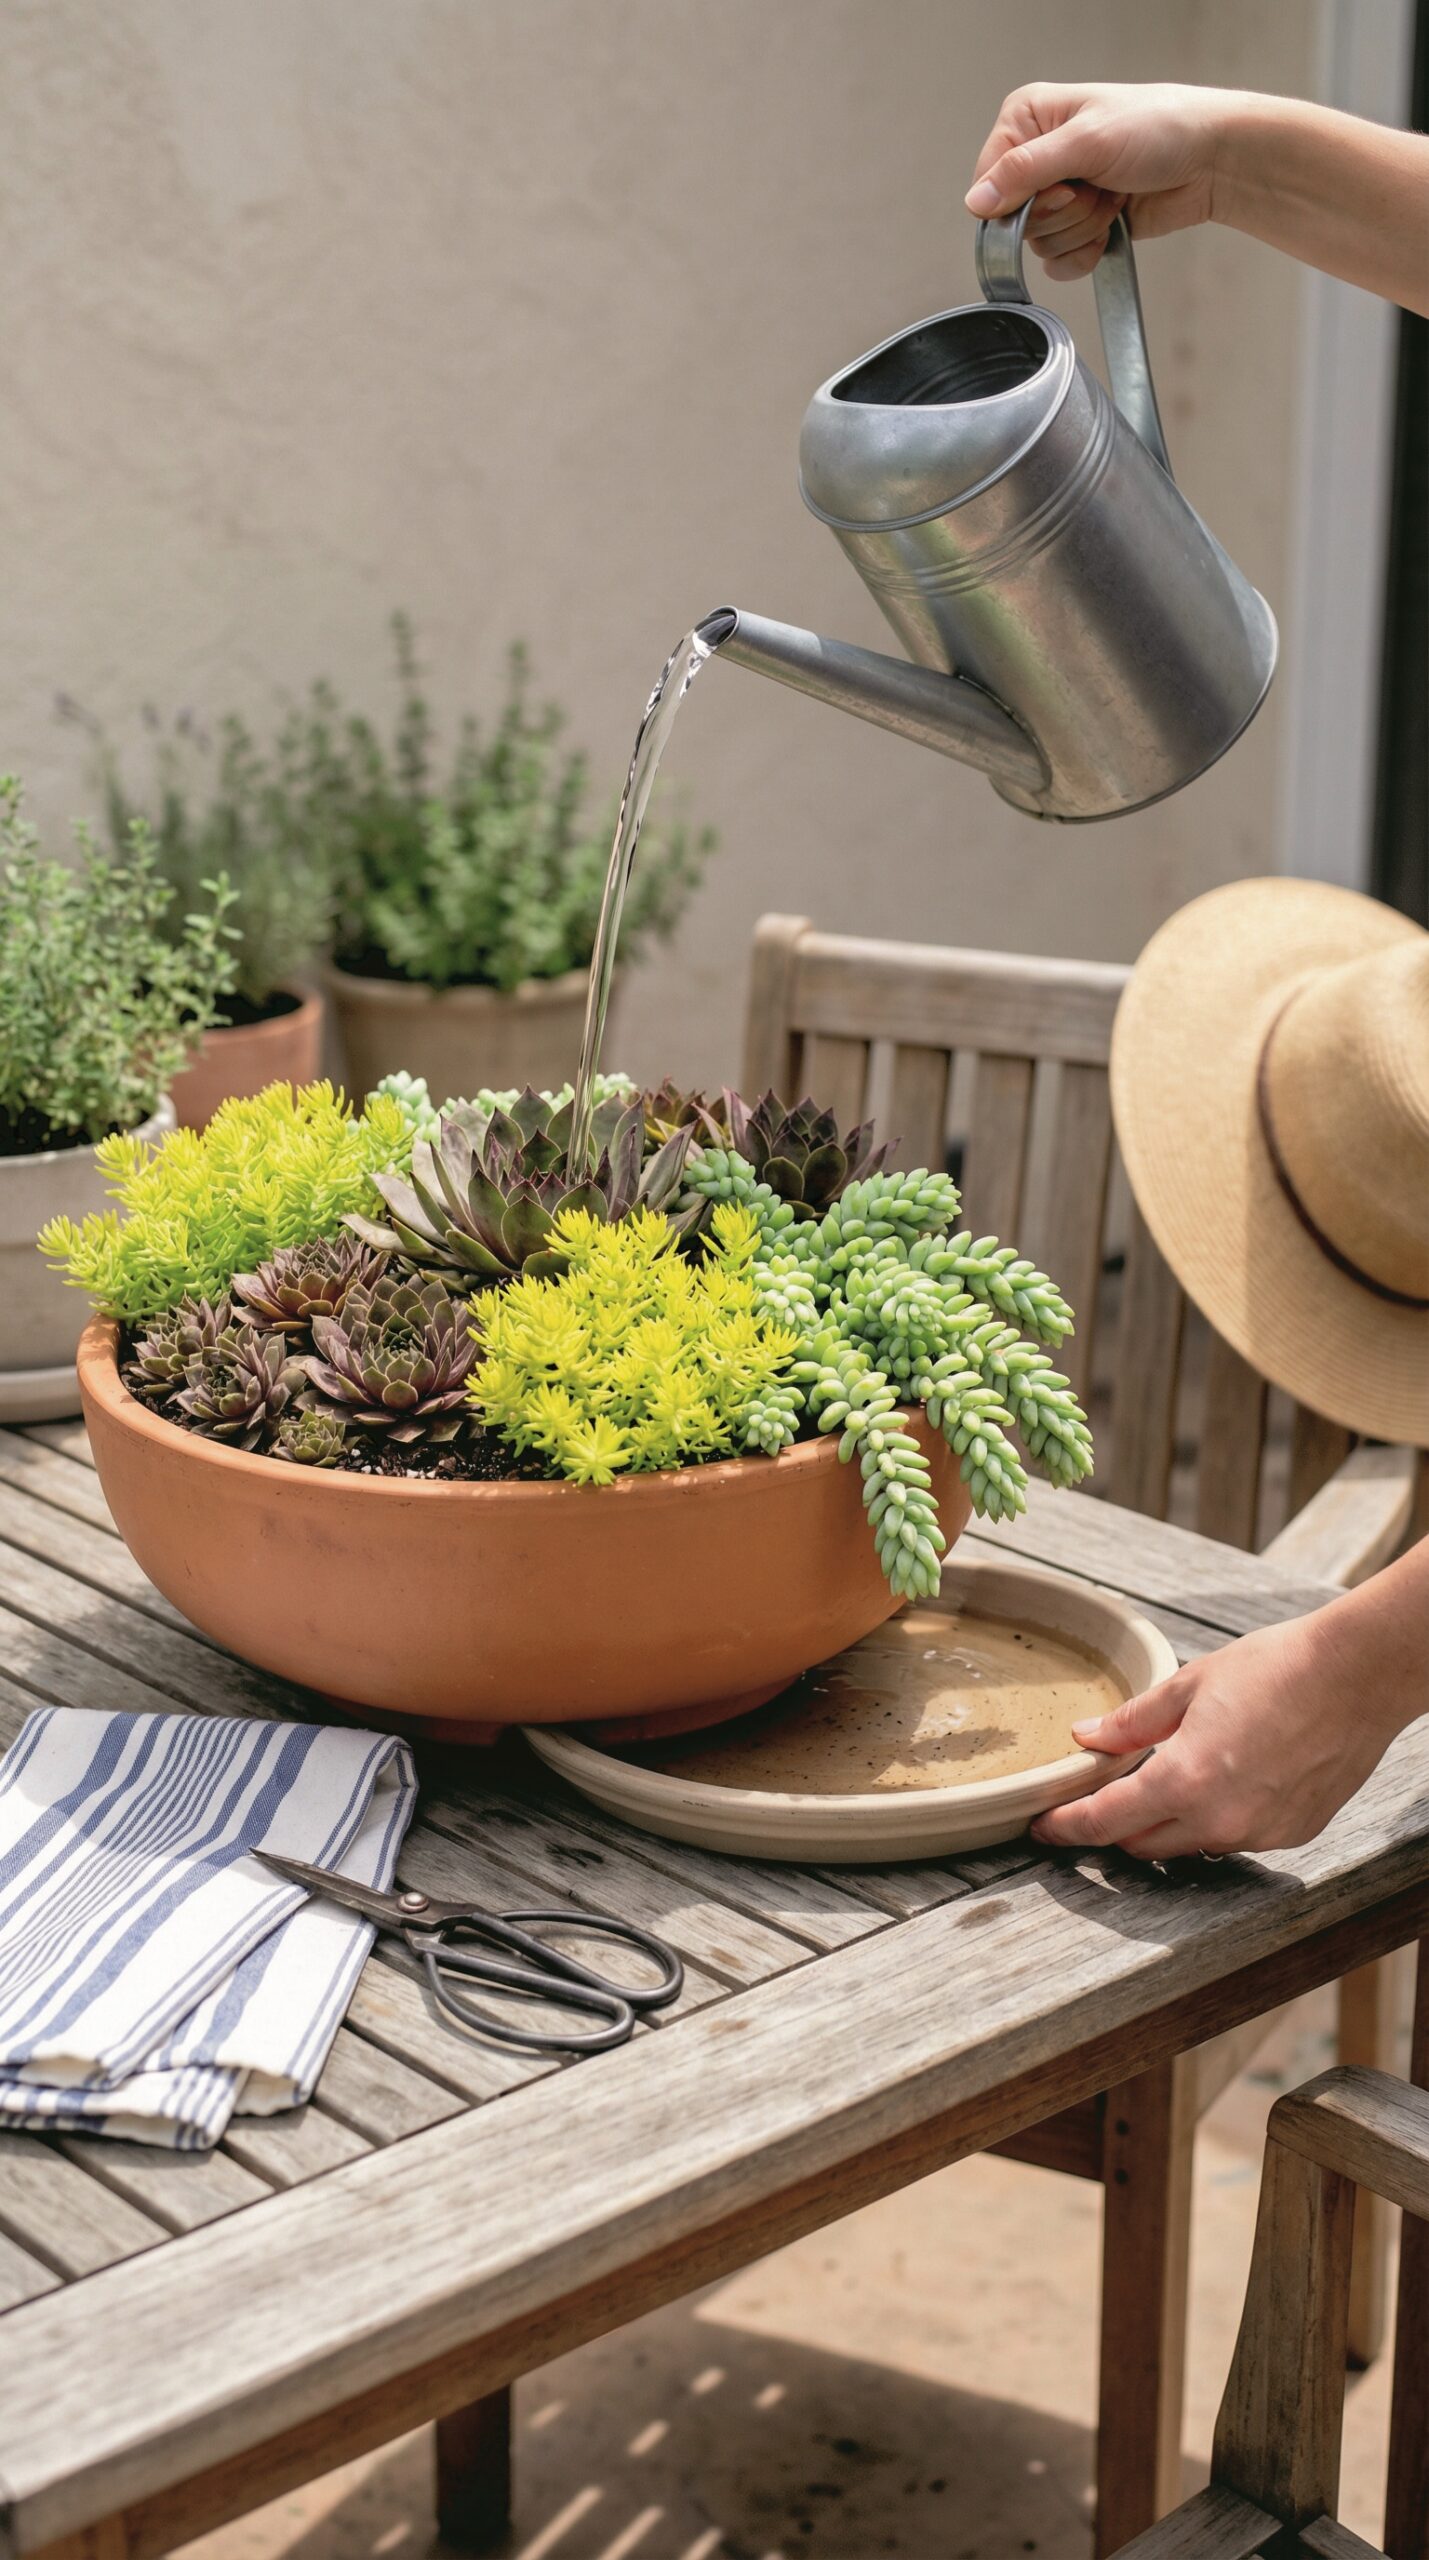
Succulents do best when you water thoroughly, then let the soil dry out before watering again. Not sips. Not daily sprinkles. A real soak, then a real dry period.
When you water, water until it runs out the bottom. That flushes salts and ensures the root zone gets hydrated. Then let it drain fully. And don’t water again just because the top looks dry—check below the surface.
Easy ways to know when it’s time
If you want a no-fuss check, lift the pot. When it’s freshly watered, it feels heavier. When it’s dry, it feels noticeably lighter.
You can also do a finger check or use a wooden skewer like you would for a cake. Push it down a couple of inches, pull it out, and see if it comes back damp and dark or dry and clean.
Seasonal shifts are real
In warm months with strong light, succulents use more water. In cooler months with less light, they slow down and need less. A lot of “winter rot” happens because watering stays the same even though the plant’s growth has slowed.
So if you’re unsure, err on the dry side. Succulents recover from thirst far better than they recover from rot.
Easy succulent arrangement formulas that look full
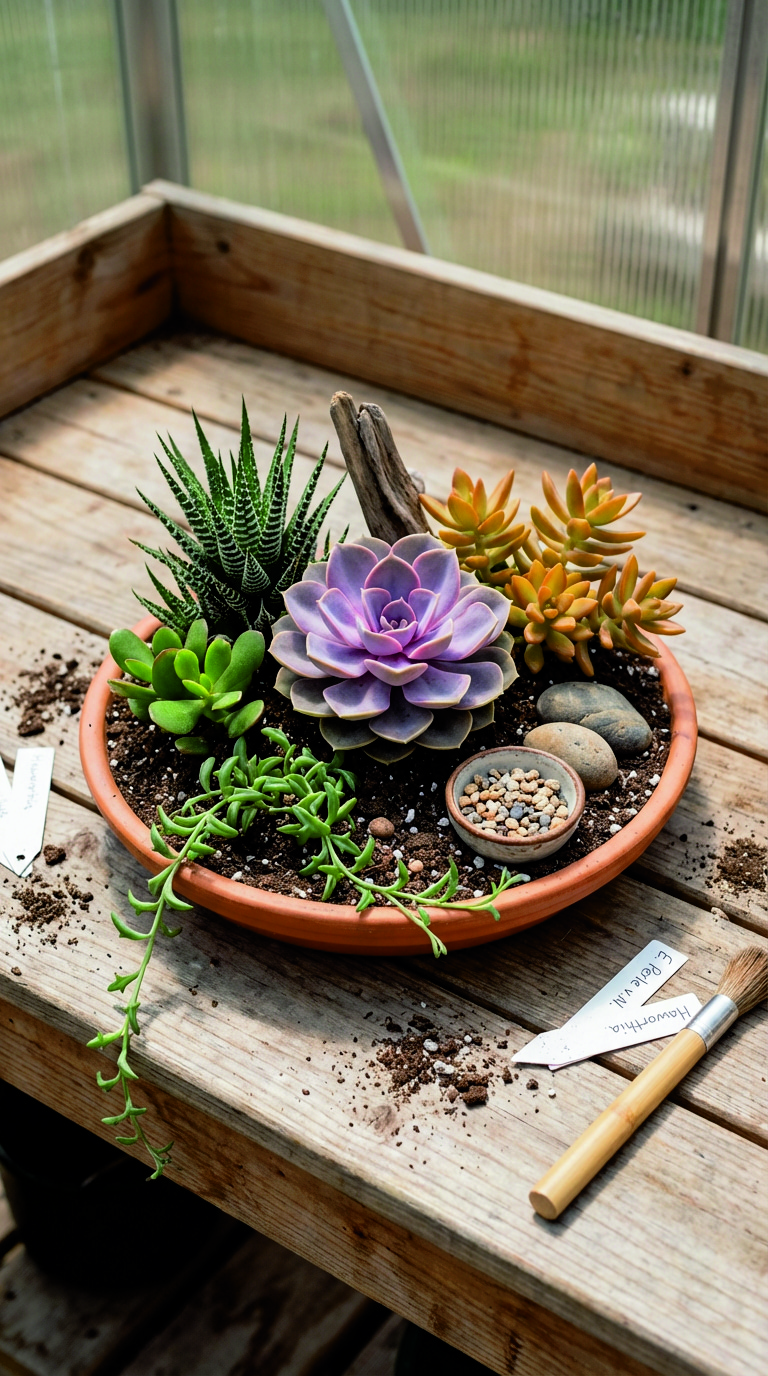
Start with a simple “cast”: one star, a few supporting textures
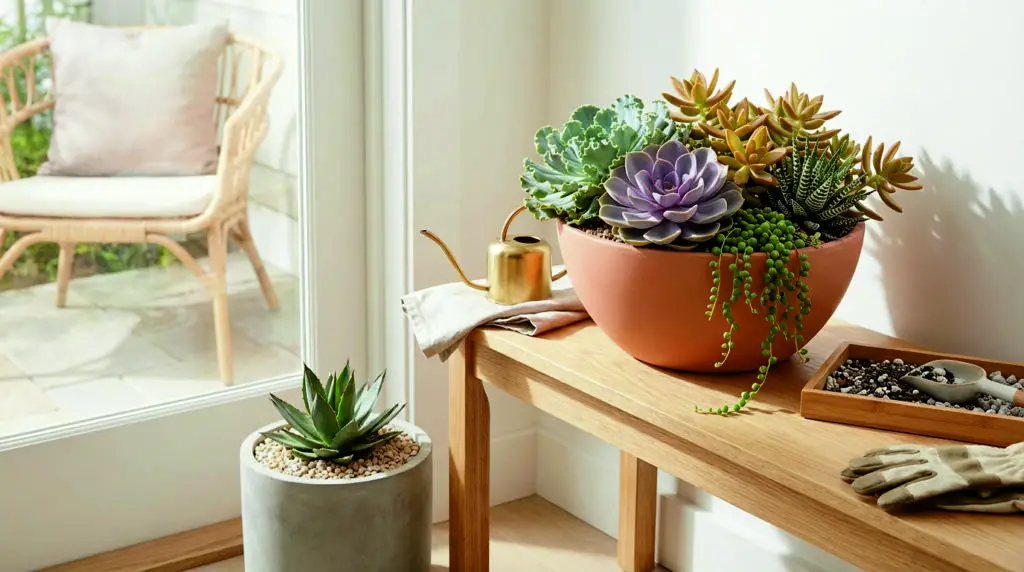
The prettiest succulent planters usually have a focal point and then a mix of shapes around it. Think of it like styling a shelf: one main object, then smaller pieces that make it feel balanced.
A classic look is a rosette succulent (your star) with smaller clustered succulents (fillers) and a trailing plant (spiller) near the edge.
You don’t need to memorize plant names to do this well. You’re looking for contrast:
- Big leaves next to fine texture
- Upright shapes next to low mounds
- A trailing edge to soften the rim
- A repeat of color so it doesn’t look random
Use odd numbers and give plants breathing room
Odd numbers tend to look more natural. Three main plants in a medium pot often looks better than four crowded ones.
And don’t pack them too tight. Succulents like airflow. Crowding traps moisture and invites problems. You can always fill in later with cuttings once you see how the arrangement settles.
Planting steps that keep things neat
- Dry soil in the pot first.
- Arrange your plants on top before you plant anything. Move them around until it looks right.
- Plant the largest first, then fill in around it.
- Firm the soil gently—don’t crush roots, but don’t leave big air gaps.
- Wait a few days before watering if you disturbed roots a lot. That small pause helps prevent rot.
And if you’re decorating with stones or driftwood, keep those pieces from pressing against plant stems. You want decoration near plants, not hugging them.
Bowls and dish gardens: the tabletop version of a succulent planter
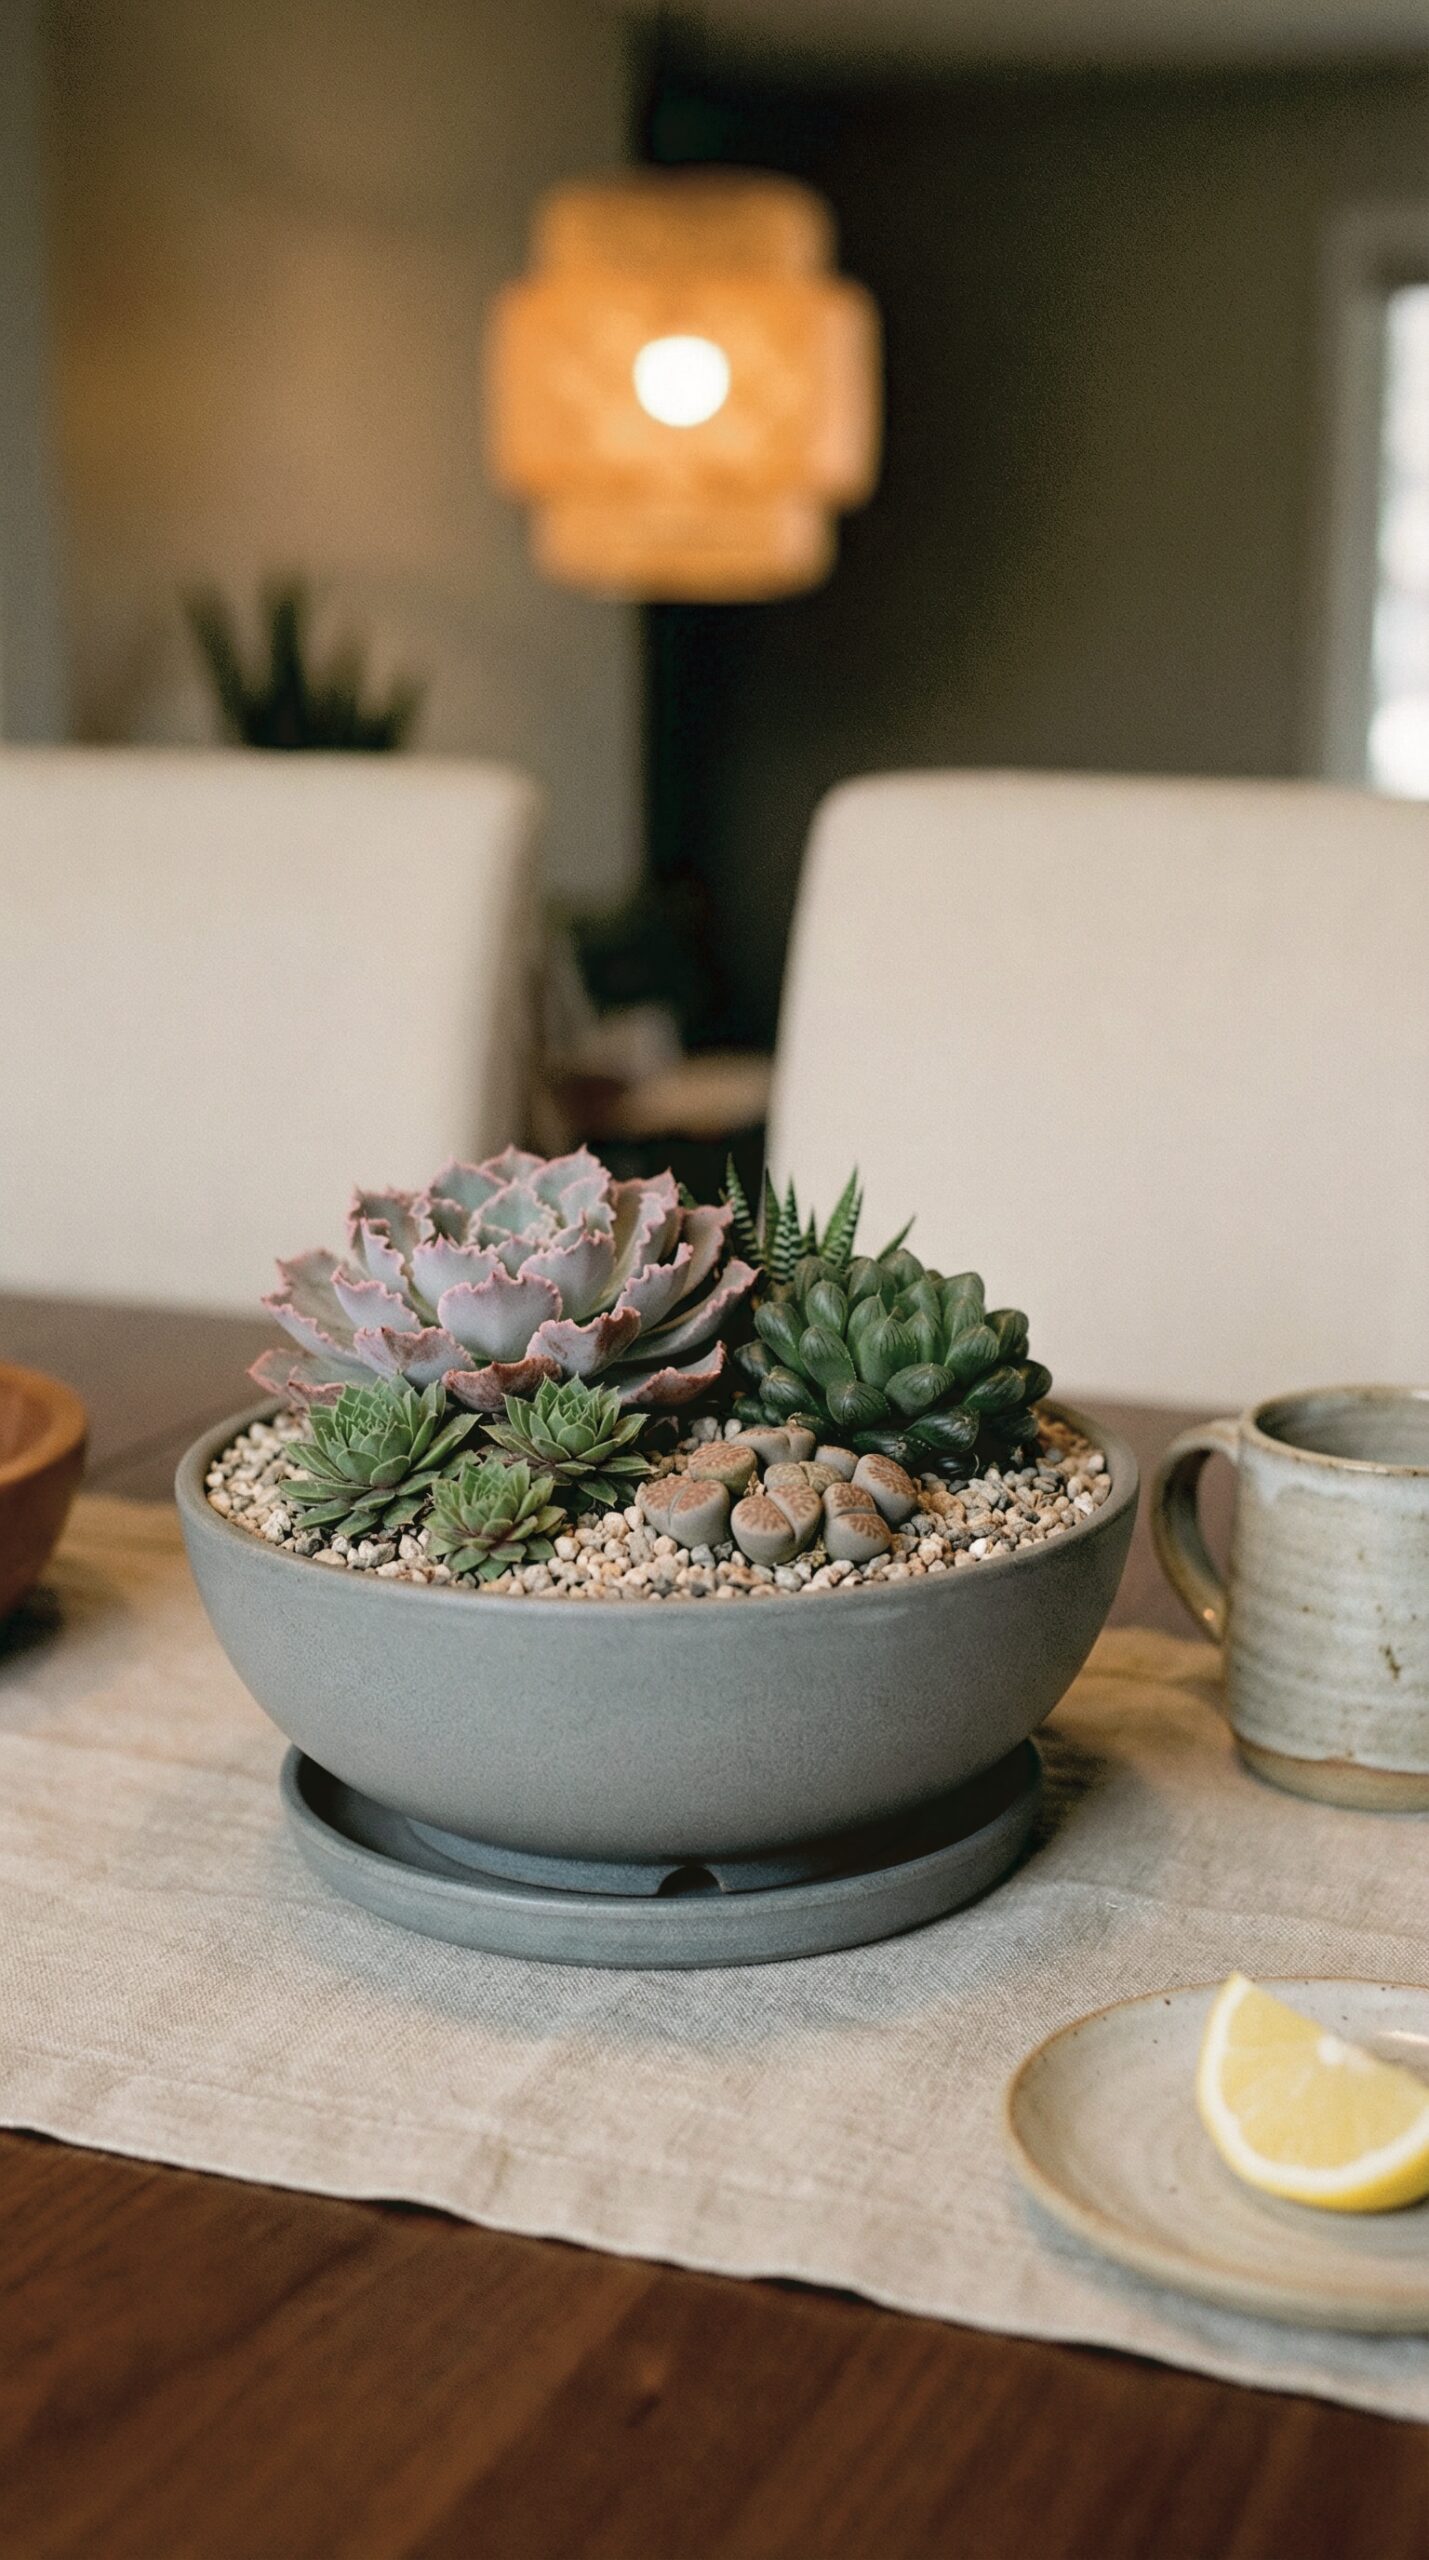
Why bowls are harder than they look
A shallow bowl dries faster, which can be great. But bowls are also the containers most likely to have no drainage holes—especially decorative ones. That’s where people get into trouble.
If you can, choose a bowl with drainage. If you can’t, treat it like a display piece that needs careful watering and a gritty mix. And keep it away from rain if it’s outdoors.
The easiest way to make bowls work
Use fewer plants than you think you need, and choose plants with similar water needs. Mixing a thirsty plant with a true drought-lover usually leads to one unhappy roommate.
Top dressing helps bowls a lot because it reduces splash onto leaves and keeps the surface tidy. And because bowls sit on tables, it’s worth thinking about saucers or trays that protect your furniture while still letting water drain (if you have holes).
Indoor succulent planter ideas that don’t fight your home
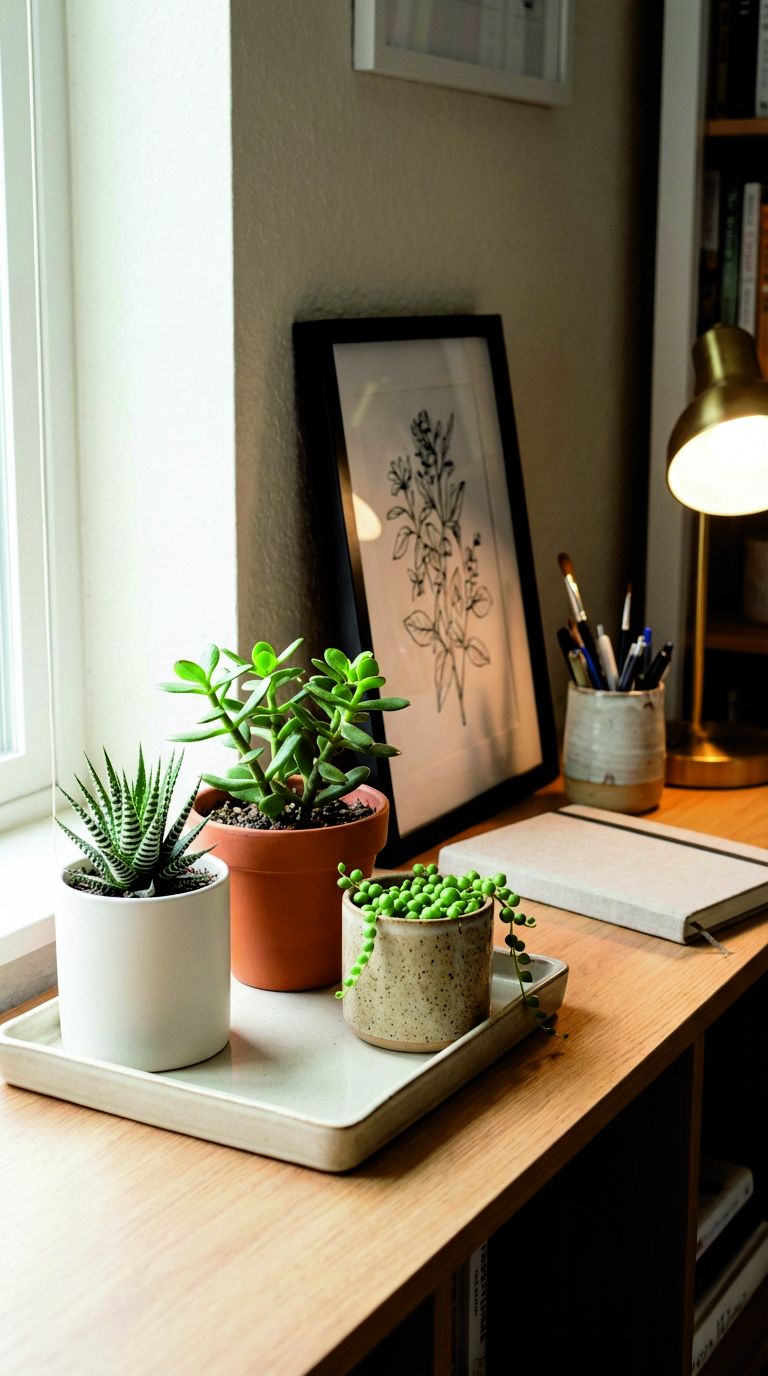
The best indoor spots
Succulents do well where light is strong and steady:
- A bright windowsill
- A shelf right next to a bright window
- A countertop near a sunny exposure
They tend to struggle when they’re used as “center of the room decor” far from a window. If you want a centerpiece, pick a spot that’s bright, or plan on rotating it into better light regularly.
Styling tricks that keep plants healthy
One of the best “pretty and practical” moves is using a nursery pot hidden inside a decorative cachepot. It looks clean, and it protects your plant from trapped water.
If you love a minimalist look, try a simple pot plus a matching saucer. If you love a cozy look, group three small planters together on a tray. That cluster look is very magazine-friendly and it’s also easy to move for better light.
Outdoor succulent planters for porch, patio, and big containers
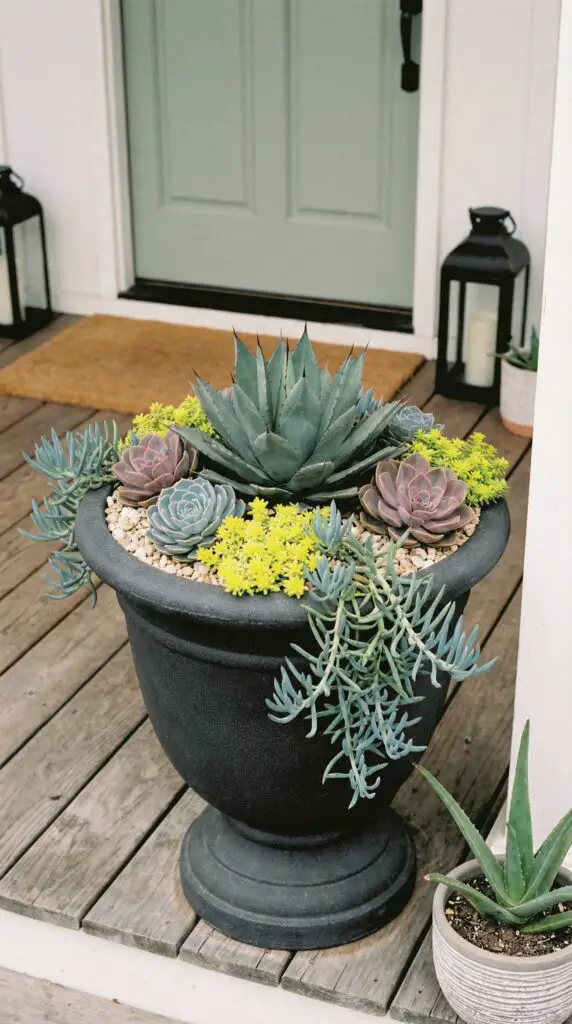
Plan for rain first
Outdoor succulents can thrive, but rain changes the equation. If your area gets heavy downpours, make sure the container drains fast and isn’t stuck in a spot where roof runoff pours into it.
A sheltered porch corner can be the sweet spot: bright light, less soaking rain, and easier monitoring.
Use scale and repetition
Outdoor planters look best when they feel grounded. A single tiny succulent pot can look lost on a wide porch. Try one larger statement container, or group several pots of different heights.
Repetition is your friend here. Repeat one plant type or one color in multiple containers to make the space feel pulled together without making it fussy.
Cold weather reality check
If your winters are cold, remember many succulents don’t love frost. Containers are great because they’re portable. You can move them under cover, closer to the house, or indoors when temperatures dip.
Wall, hanging, and vertical succulent planters for small spaces
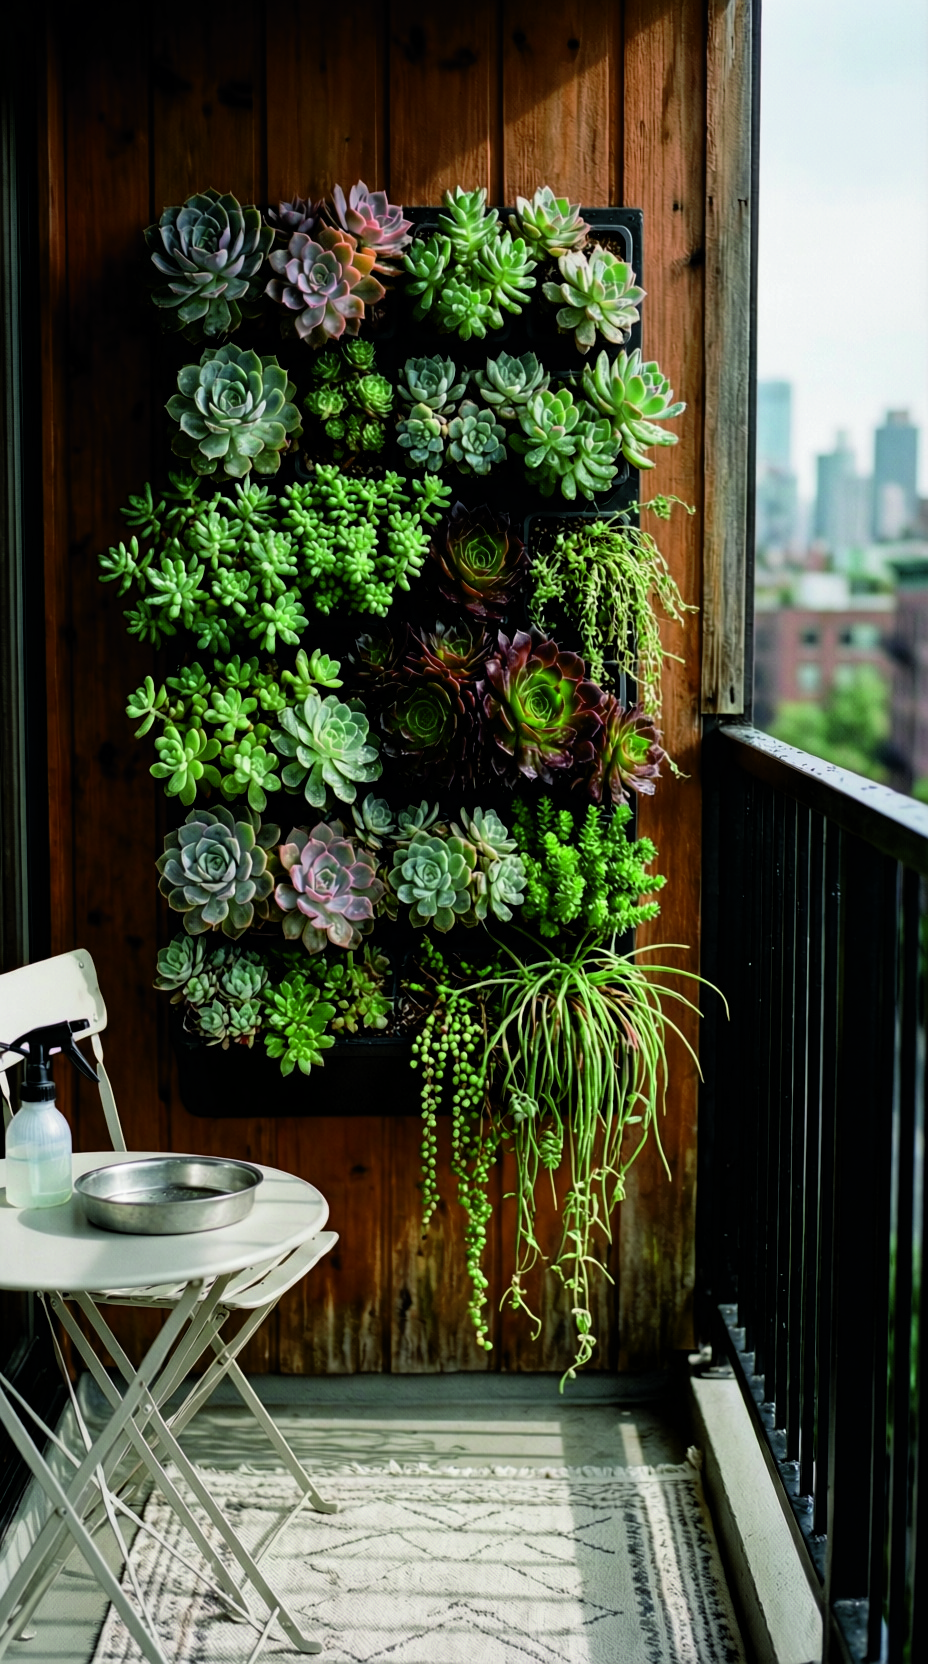
What makes vertical planters succeed
Vertical planters dry faster and can be trickier to water evenly. That’s not a dealbreaker—it just means you want:
- A very free-draining mix
- Plants that tolerate drying out
- A setup that allows excess water to escape
Trailing succulents are perfect for edges. Smaller plants with compact growth also do well because they don’t become top-heavy.
Keep maintenance realistic
A vertical display doesn’t have to be permanent. In fact, it works better when you treat it like a living arrangement you refresh over time. Swap out a tired section. Replace a stretched plant with a fresh cutting. You’ll keep the whole piece looking good without rebuilding from scratch.
Upcycled and quirky succulent planters that still work
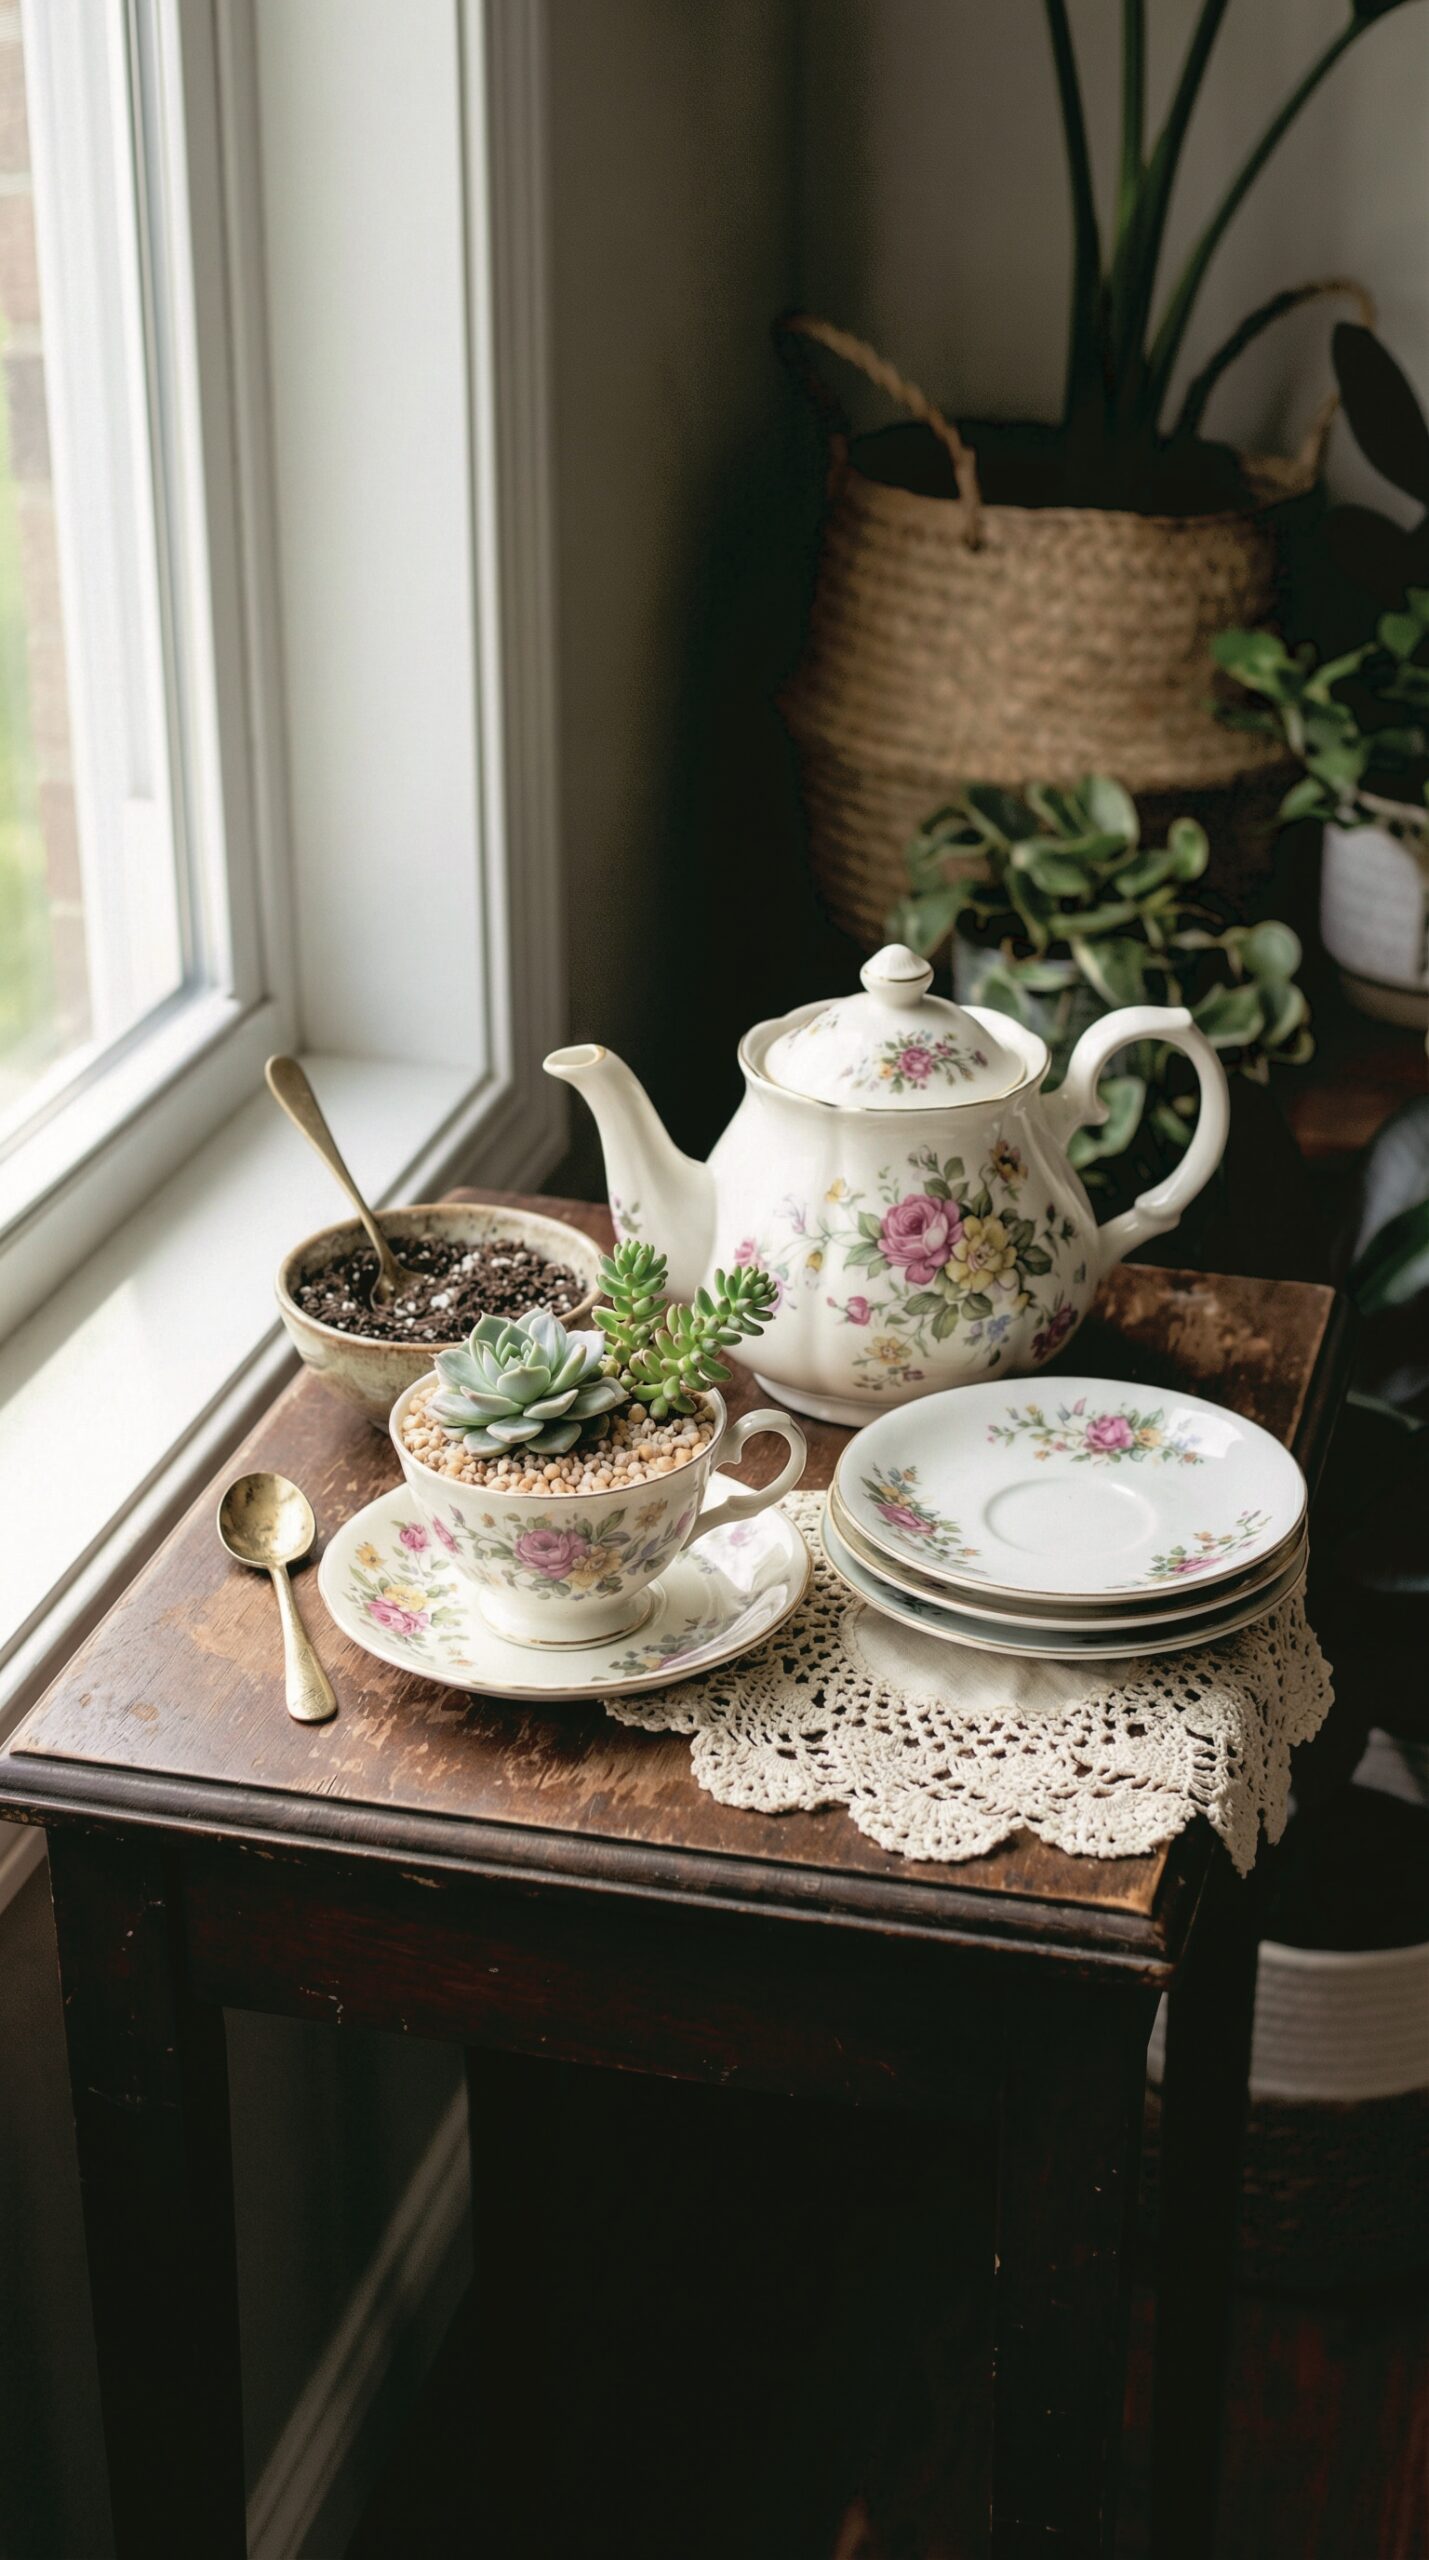
The one rule: no drainage means you must compensate
Teacups, teapots, vintage tins, little bowls—these are adorable and very pin-worthy. But they require careful watering and a gritty mix. If you can drill a hole, do it. If you can’t, keep it indoors where rain can’t soak it, and water lightly only when truly dry.
And here’s a helpful mindset: treat these as “display planters,” not “set-and-forget planters.” They’re like fresh flowers in a vase. They need a bit more attention.
A few fun ideas that photograph beautifully
- Teacup succulent planter on a windowsill
- A shallow thrifted bowl with mixed rosettes
- A driftwood or log planter (great outdoors)
- A set of small tins grouped on a tray
- A book-style planter (more art piece than forever container)
The trick is keeping the plant’s needs in the driver’s seat while you play with the container.
Keeping your succulent planter looking fresh over time
When to refresh
Even a great planter can start to look tired. Common signs:
- Soil stays wet too long
- Plants look stretched or sparse
- Centers die out while edges grow
- Roots are packed tight and the plant wobbles
Refreshing doesn’t have to mean “start over.” Sometimes it’s as simple as removing one plant, trimming it, replanting the top, and filling gaps with cuttings.
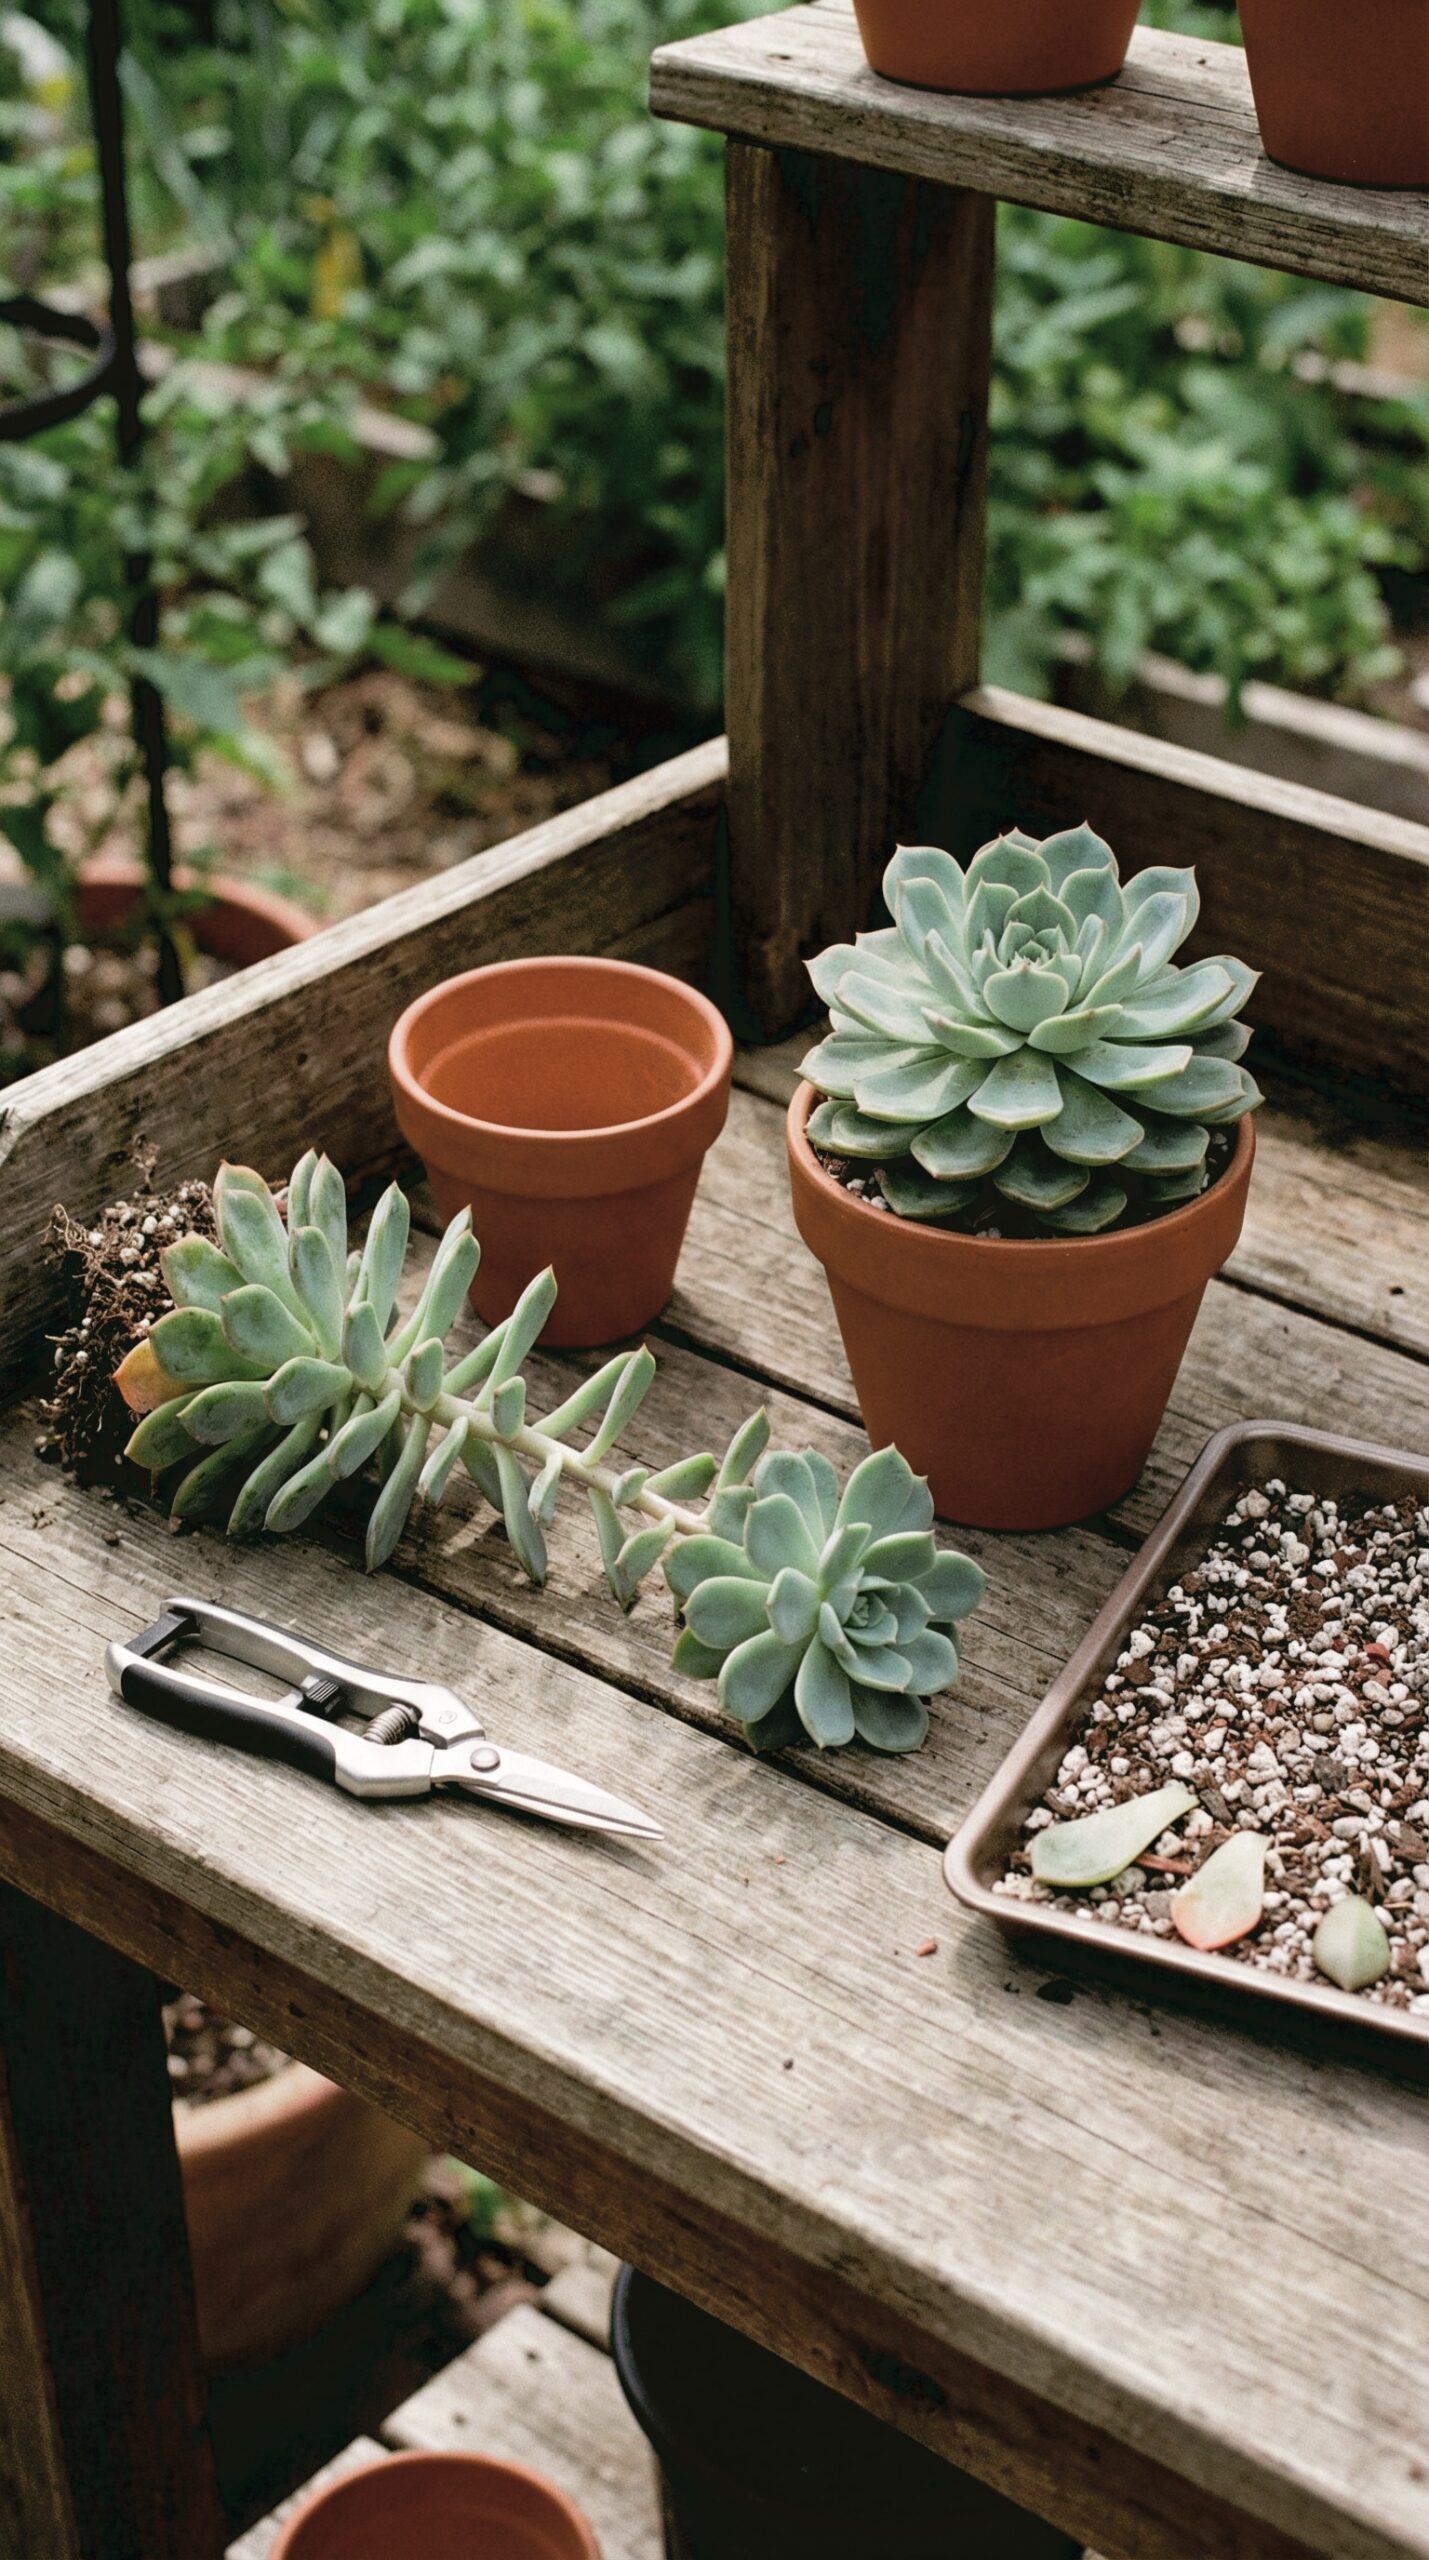
Propagation is your secret weapon
Succulents are generous plants. Many can be propagated from leaf or stem cuttings, which means you can “thicken up” an arrangement without buying more plants.
If a plant is leggy, cut the healthy top, let it callus for a couple of days, then replant. If leaves pop off, set them on dry soil and wait for baby plants to form. It feels a little like plant magic, honestly.
And it’s how succulent planters get that lush, layered look over time.
Troubleshooting without panic
Rot: soft leaves, mushy stems, a smell you don’t want
Rot is usually too much moisture for too long. The fastest rescue is to stop watering, let the soil dry, and remove any mushy parts. If the base is affected, take healthy cuttings from above the rot and restart them in dry, gritty mix.
Then adjust the setup: better drainage, grittier soil, and more light if the planter is indoors.
Stretching: tall, sparse growth that leans toward light
This is almost always a light problem. Move the planter closer to a bright window, rotate it, or add supplemental light. You can also prune and replant tops to restore a compact shape.
And don’t feel bad—stretching happens to the best of us. It’s a common indoor succulent story.
Sunburn: pale patches, brown scarring, crispy sections
Sunburn usually happens when a plant goes from indoor light to full outdoor sun too fast. Move it to bright shade and let it recover. The burned areas won’t “unburn,” but new growth can come in healthy once conditions are right.
Next time, ramp up sun exposure gradually.
Pests: mealybugs, tiny webs, and mystery stickiness
If something looks off, isolate the planter first. A quick rinse, a gentle wipe, and careful removal of visible pests can solve a lot. The key is catching issues early, especially with indoor planters where pests spread easily.
And if you bring home new succulents, keep them separate for a week or two before they join your main collection. It’s a simple habit that saves a lot of frustration.
Final thoughts: a succulent planter is a system, not a guessing game
Once you see succulent planters as a system—drainage, mix, light, and a calm watering rhythm—they stop being mysterious. You’ll start making choices that stack the odds in your favor: a pot that drains, soil that breathes, a spot that’s bright, and watering that respects dry time.
Start with one container you truly like, set it up well, and live with it for a month. Then scale up: a dish garden for the table, a porch pot for curb appeal, maybe a wall planter if you’re feeling bold. That’s how you build a collection that looks good in photos and also survives real life.