Trench Composting In Winter
- Look to dig your trenches while the soil is still soft enough to easily work. Late fall is often a good time.
- Using a multi-trench system that you rotate through provides the most effective use of the area where your winter trenches will be dug.
- Speed up the decomposition process by adding fermented organic matter either before or to your trench.
- Ensure you have the correct carbon-to-nitrogen ratio, and the right size organic pieces, and then add thermophilic organisms or other activators to your trench.
Trench composting in winter is one of a number of ways to keep your composting going through cold weather. It is also a great way to continue turning your food scraps, and other organic materials, into high-quality humus, all year long. If you live in an area with warm or moderate winters, digging through unfrozen soil is fairly easy, but even in places with harsher winters, you can still utilize the process.
Although cooler winter temperatures might be chilly enough to slow a regular compost pile, it won’t affect trench composting at all. And by burying the materials, there should be no worry about unpleasant smells or odors! To get the most out of trench composting through winter though, it is essential you plan.
Digging Composting Trenches in Winter

The principle of trench composting is very easy and trench composting over winter is much the same process. The important thing to think about is the ease with which you can dig through the soil. In truth, you need to have your trench and materials ready before the ground freezes over.
Preparing for Trench Composting: Navigating Winter Conditions
Early November is often a good time to dig, the earth should still be soft and you will likely have an abundance of organic material from fall.
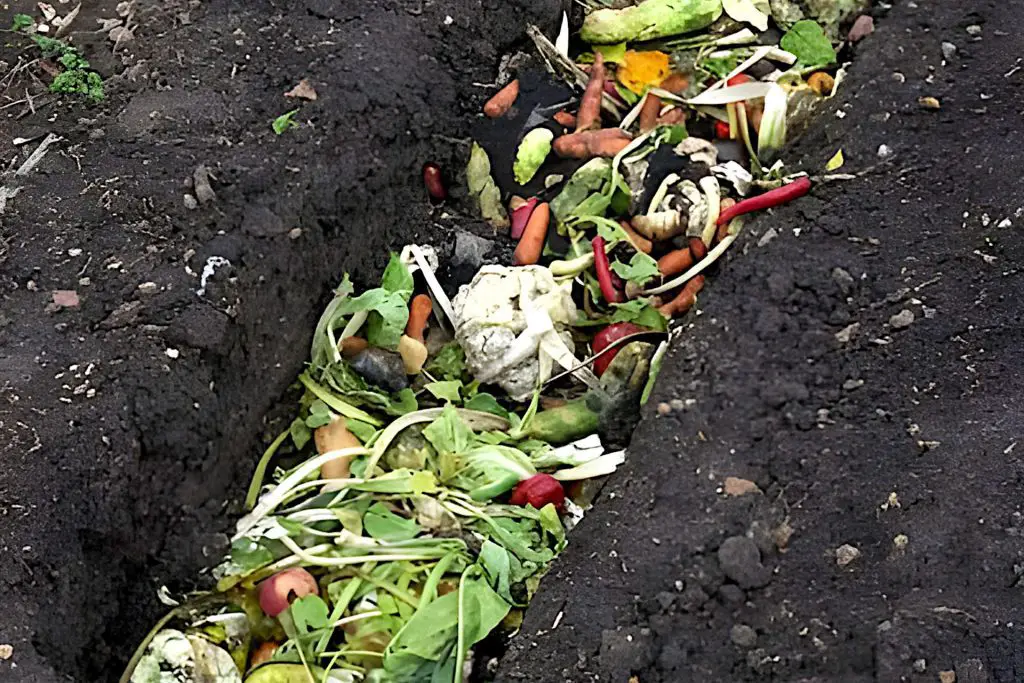
On an area of unused soil, you dig a hole or trench about a foot deep. The width of the trench is likely to depend on the size of the area available and the amount of organic material you are composting, but in general, it is best to make it between ½ a foot and 2 feet wide.
After you have dug your trench you can fill it with your organic materials. Once filled you backfill the trench with soil until the ground is flat. If you have a trench system planned it is best to mark the area.
Frosty Grounds, Hard Soil – Trench Composting in Winter
When the frost visits, it can turn your garden soil into a hard, impenetrable surface. Digging trenches in frosty conditions can be akin to chiseling through stone.
Preparation Tip: Monitor weather forecasts. If a frost is predicted, try to dig your trenches a day or two in advance. If you’re late and the ground is already hard, consider covering the area with a dark tarp during the day. The dark color can absorb sunlight, helping to thaw the ground slightly.
Snow-Covered Gardens
A blanket of snow, while picturesque, can hide the ground, making it challenging to locate your desired trench spot.
Preparation Tip: Mark out your trench areas before heavy snowfalls using stakes or other visible markers. This way, even with snow cover, you’ll know exactly where to dig.
Soggy and Wet Conditions
Melting snow or winter rains can saturate the soil, making it muddy and challenging to work with.
Preparation Tip: If you anticipate wet conditions, dig your trenches slightly earlier when the ground is drier. Alternatively, consider adding coarse sand or fine gravel to the bottom of your trench to improve drainage.
Using Holes vs. Trenches: Which is Best for Limited Organic Material?

It is possible that you may not have enough organic material to fill a trench or you need somewhere to dispose of kitchen scraps generated over the winter.
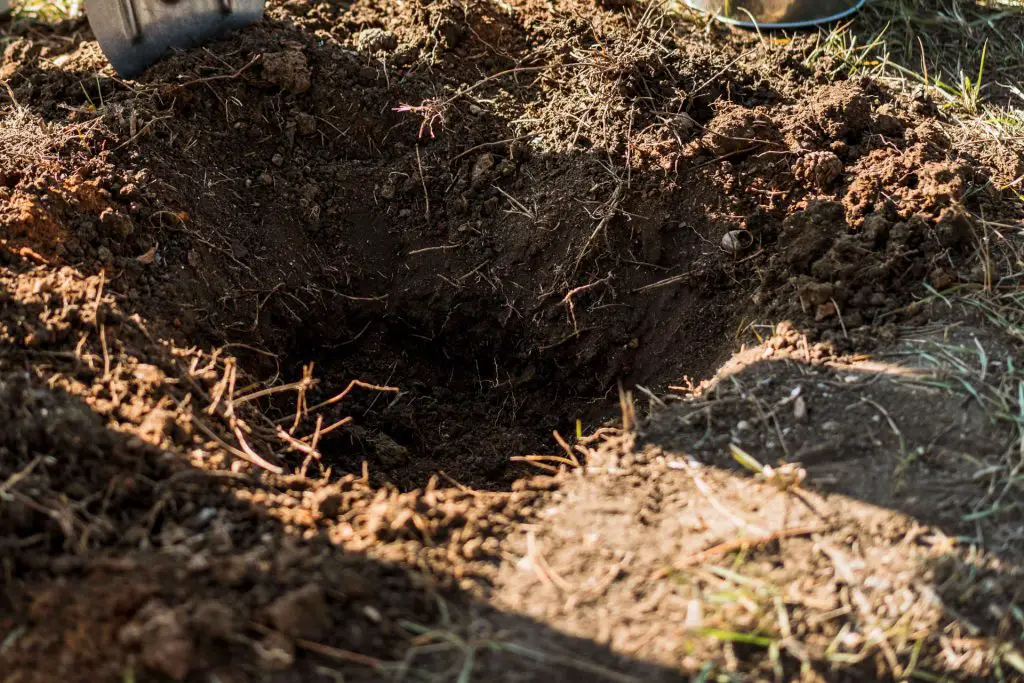
An alternative method you can use for this scenario is that, rather than dig a trench, instead, you dig a series of holes, again in the fall, while the ground is still soft enough. The holes can be up to a foot wide and two feet deep.
You can then lay a board, such as a piece of ¾ inch marine ply, over the top of each hole. When you have organic material to dispose of you can lift the boards and add your material. If you are feeling creative you can even build a lift-up door on each piece of board.
When the holes are full and the weather warms so the soil is again soft enough to work with, lift the boards and backfill the holes until the ground is level. Again mark the area and the date of the holes as part of your trench plan. Store the boards for reuse next year.
Advantages of Hole Composting
- Efficiency for Small Amounts: If you often find yourself with just a handful of kitchen scraps, digging a hole is quicker and more efficient than preparing a trench. Simply dig, drop, and cover!
- Space-Saving: For gardeners with limited space, hole composting is a godsend. It allows you to compost directly where you’ll plant next, optimizing space usage.
- Less Labor-Intensive: Digging a trench can be back-breaking work. With hole composting, you only dig where and when you need it, saving energy and time.
- Flexibility: You can dig holes wherever you have an empty spot in your garden. This flexibility means you can compost in different areas, benefiting multiple planting spots.
- Reduced Soil Disturbance: By composting in holes, you disturb less soil compared to trenches. This means fewer disruptions for the beneficial microorganisms in your garden.
Planning Your Trenches
When trench composting, whether you are digging and filling your trench in the spring, summer, or late fall, it is important to plan. This is because it will generally take around a year for the organic material to have decomposed and for the trench to be ready to plant.
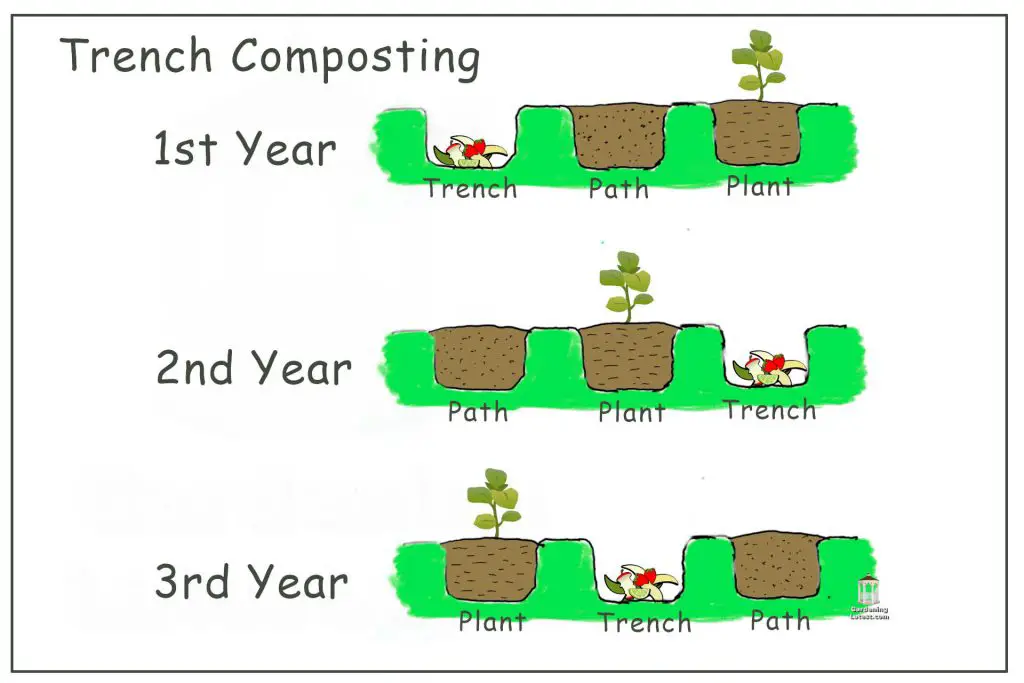
Therefore if you dig and set your trench for late fall or early winter, it will be around the same time the following year that you can use it, perhaps to plant winter vegetables. For this reason, it pays to plan out a multi-trench system whereby you divide up the area so that you always have more than one trench to plant, and another composting for the following year.
The most effective system is the three-trench system which has one actively composting trench, one trench to plant, and a final trench that can act as a path. You rotate the trenches each year with one re-dug and composted, one planted, and one being the pathway.

Speeding Up the Winter Trench Composting Decomposition Process
As you will have noticed, the major issue is the length of time that it takes for a trench to be plantable. Usually, this will be a year but if you are following the multi-trench system it can be two years before you actually plant on the trench.
Trench composting is an anaerobic process, this means that the decomposition takes place without oxygen. The process, sometimes referred to as anaerobic digestion causes the organic materials to break down through bacteria that don’t require oxygen but instead thrive on nitrogen and phosphorous.
Adding Fermented Organic Matter
There are ways to speed up the process. The easiest is to pre-ferment the material before you put it into the trench.
You can purchase fermented organic matter such as Bokashi powder at most garden centers, nurseries, or online. The fermented matter contains the bacteria that are necessary to decompose the organic material quickly.
If you don’t have the facilities to pre-ferment your organic material, you can instead add the fermented organic matter, with the organic material you are composting, directly to the trench. By adding fermented matter the decomposition time can be reduced from months to weeks.
The main drawback of fermented matter is that it restricts the type of material you can add to your trench. It is mainly used in conjunction with nitrogen-rich materials. Food scraps, grass clippings, and leaves (if combined with food scraps). You can’t add items such as cardboard, paper, and wood chips as this will slow the process back down.
The good news is that if you set your winter trench up with suitable organic material and add fermented matter then there is no reason why it wouldn’t be available to plant in early spring.
Compost Activators
If you want your winter trenches to be available for planting next year but don’t want any restrictions on what can be composted, then you need to get set your trench up correctly. This involves reducing the size of the individual pieces of organic material, having the right carbon-to-nitrogen ratio (C/N), and using an activator.
With most forms of composting, getting the carbon-to-nitrogen ratio correct is crucial to the speed at which your material will break down. The more carbon-heavy the longer the process. To speed up the process you should look to have a ratio of between 25:1 and 30:1 C/N.
In addition, you should look to shred all the organic material, reducing it to the smallest size pieces possible. This gives the microorganisms more of the surface area of the material to attack.
Lastly, you should kick-start the decomposition process by adding an activator. One of the best things to use is any recently created humus. This will contain thermophilic organisms which will help boost the breakdown of the material. You can also look to add other commercial compost activators/starters.
By preparing your pile efficiently and adding a starter you should be able to bring the decomposition process down to around six months allowing your winter trench to be ready for planting sometime in spring.
Trench Composting Challenges
The colder weather can bring its share of challenges for the avid gardener, especially when trench composting. While this method offers numerous benefits, it’s essential to be aware of potential problems that can arise during these months.
Frozen Soil
As we have seen above, one challenge can be the frozen ground. When temperatures plummet, the soil can become as hard as concrete, making it nearly impossible to dig trenches.
Solution: Plan ahead. If you anticipate a freeze, dig your trenches before the ground hardens. Alternatively, use a dark tarp to help thaw the area, as mentioned earlier.
Incomplete Decomposition
Cold temperatures can slow down the decomposition process. You might find that organic material doesn’t break down as quickly as it would in warmer months.
Solution: Boost decomposition by adding compost activators or fermented organic matter. Ensure a proper carbon-to-nitrogen ratio and shred organic material for faster breakdown.
Rodent Intruders
The promise of food can attract rodents to your compost trenches, especially during winter when food sources are scarce.
Solution: Bury your organic material deep enough and ensure it’s well-covered with soil. Consider adding a layer of wire mesh below your trench to deter burrowing critters.
Waterlogged Trenches
Melting snow or excessive rain can lead to waterlogged trenches, which can hinder the decomposition process and lead to a smelly mess.
Solution: Improve drainage by adding coarse sand or gravel to the trench’s base. Ensure your garden has proper grading to direct water away from composting areas.
Final Thoughts: Trench Composting In Winter
Trench composting in winter is not just about turning food scraps and organic materials into nutrient-rich humus. It’s a testament to the cycle of life, where even in the harshest conditions, nature finds a way to rejuvenate and prepare for the seasons ahead. By understanding the intricacies of this process, from the challenges of frozen soil to the nuances of decomposition, gardeners can harness the power of nature to enrich their gardens.
Moreover, the act of trench composting serves as a reminder that even in the heart of winter, when the world seems dormant, life continues beneath the surface. The organic materials we bury are slowly transforming, preparing to nourish the plants that will soon emerge with spring’s arrival.
For those who have embarked on this winter composting journey, the rewards are manifold. Not only do you contribute to a sustainable gardening practice, but you also play an active role in the circle of life, ensuring that nothing goes to waste.
