
DIY Garden Shed Building Plans: Choose Your Size and Plan Your Build
A garden shed earns its space when you can reach your tools and roll out the mower without moving half the contents. Anyone who has wrestled a bicycle past a bag of compost knows how storage can become an obstacle course. Building your own shed gives you a chance to arrange things around the equipment you use, with a doorway wide enough to get it outside again.
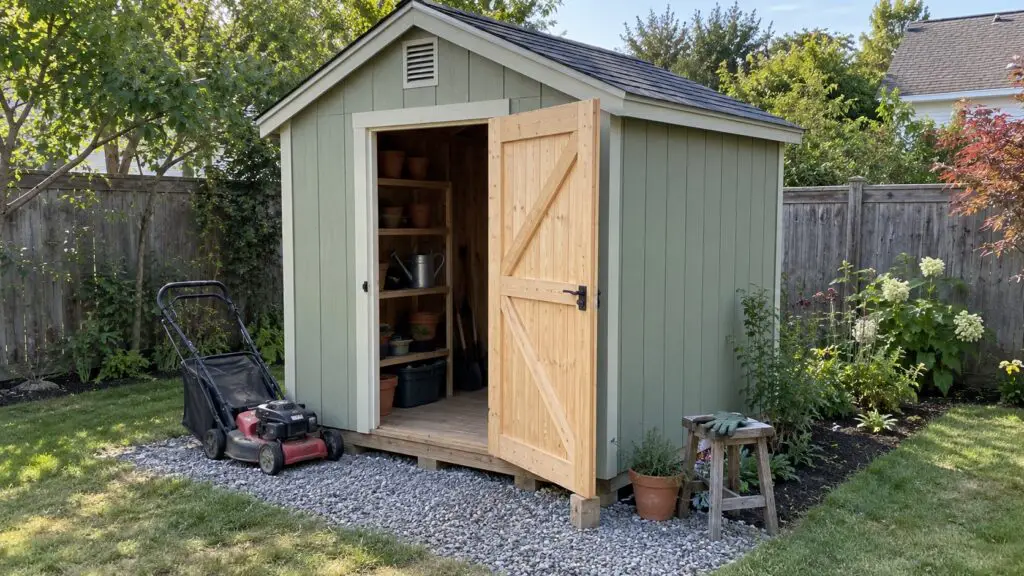
Our downloadable DIY garden shed building plans cover compact tool storage, larger garden sheds and a reclaimed pallet-board version. The drawings handle the measurements and construction details. Here, we’ll look at choosing a size, preparing the site and making room for the jobs you want to do inside. Before buying timber, spend a little time with a tape measure. It’s easier to move a line on the grass than a finished wall.
Download FREE Garden Shed Plans
Build your own garden shed with our FREE 34-page plans and guide Included are measured diagrams, interior layouts and practical instructions. Explore small, medium and large designs, plus a pallet cladding option, with material lists and storage layouts..
What’s Included in the Downloadable Garden Shed Building Plans
The 34-page PDF includes 6×4 ft and 8×8 ft small sheds, 10×10 ft and 10×12 ft medium options and a 12×16 ft storage and work shed. There’s also a 10×12 ft version finished with reclaimed pallet boards over a new timber frame. Each build uses shared construction details alongside its own layout and material allowances, so you can follow the relevant pages without working out every joint from scratch.
You’ll find measured drawings, floor cut lists and building steps, plus door details and storage arrangements. Read your chosen layout alongside the shared instructions. These are planning and assembly drawings for detached, unheated storage sheds, with local checks still needed for foundations, structural loads and permissions. Dimensions refer to the outside of the timber floor frame. Cladding and roof overhangs add to the space the finished shed occupies in the garden.
Download the Garden Shed Building Plans PDF
Choosing Between Small, Medium and Large Shed Building Plans
A bigger shed takes more of the garden and brings a longer material list, so start with what you need to store. Measure equipment with handles, pedals and other protruding parts included. Then allow space for movement. Both a mower and a bicycle may fit inside a taped rectangle while still being awkward to move past each other on a wet morning.
Small Shed Building Plans: Comparing 6×4 ft and 8×8 ft
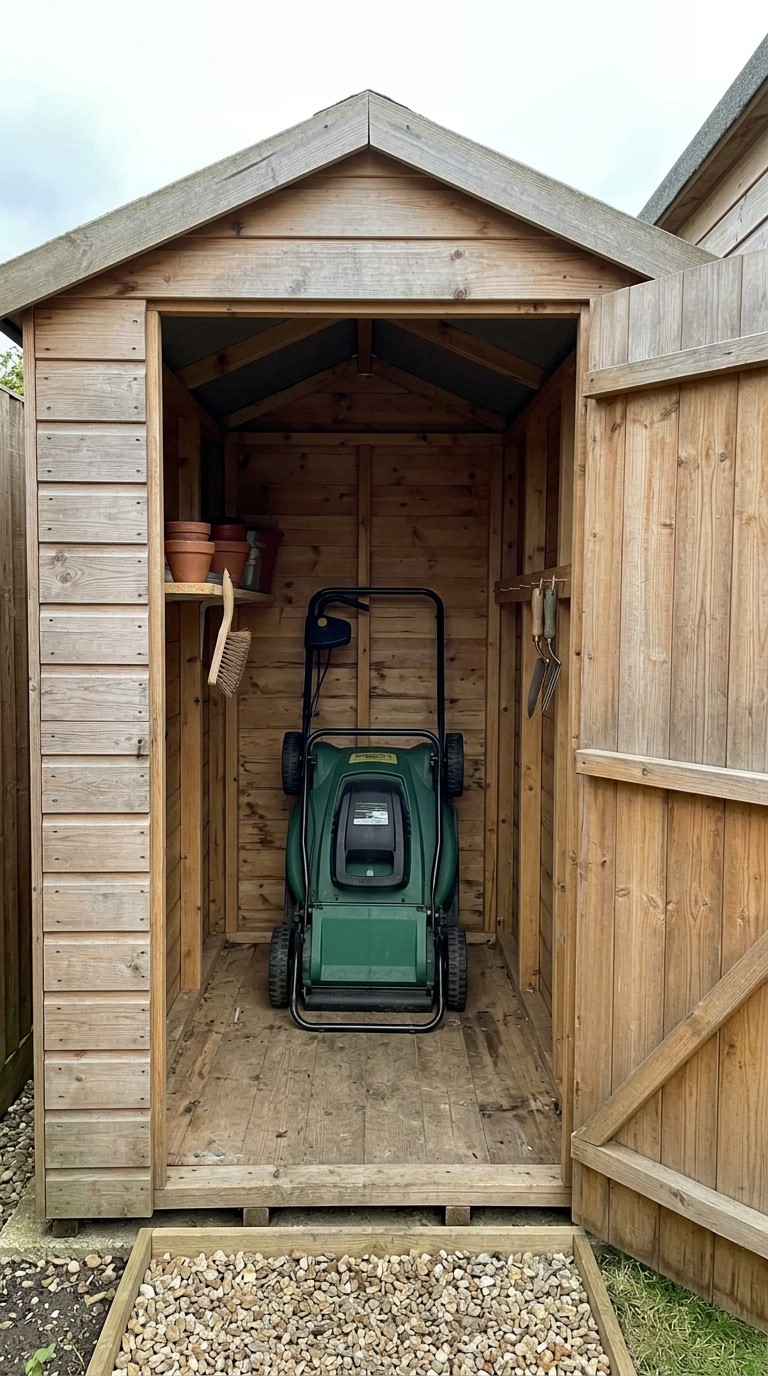
For small sheds usually, a 6×4 ft option suits a tight garden where tools need a dry home. Think of it as storage you reach into from the doorway. Once a mower is parked inside, standing room is limited. The drawing shows a folded mower, so check that your machine folds as its manufacturer allows and measure it in that position. An extended handle can take up a surprising amount of the available depth.
Choose the 8×8 ft shed if you want to walk inside and reach shelves beside a push mower. Its layout includes shallow shelving and a tool rail, with an approximately 36-inch clear doorway target. Test your mower through an opening that width before settling on the plan. A rake hooked behind the door is useful only if you can still open the door and get hold of it.
Medium Shed Building Plans: Choosing 10×10 ft or 10×12 ft
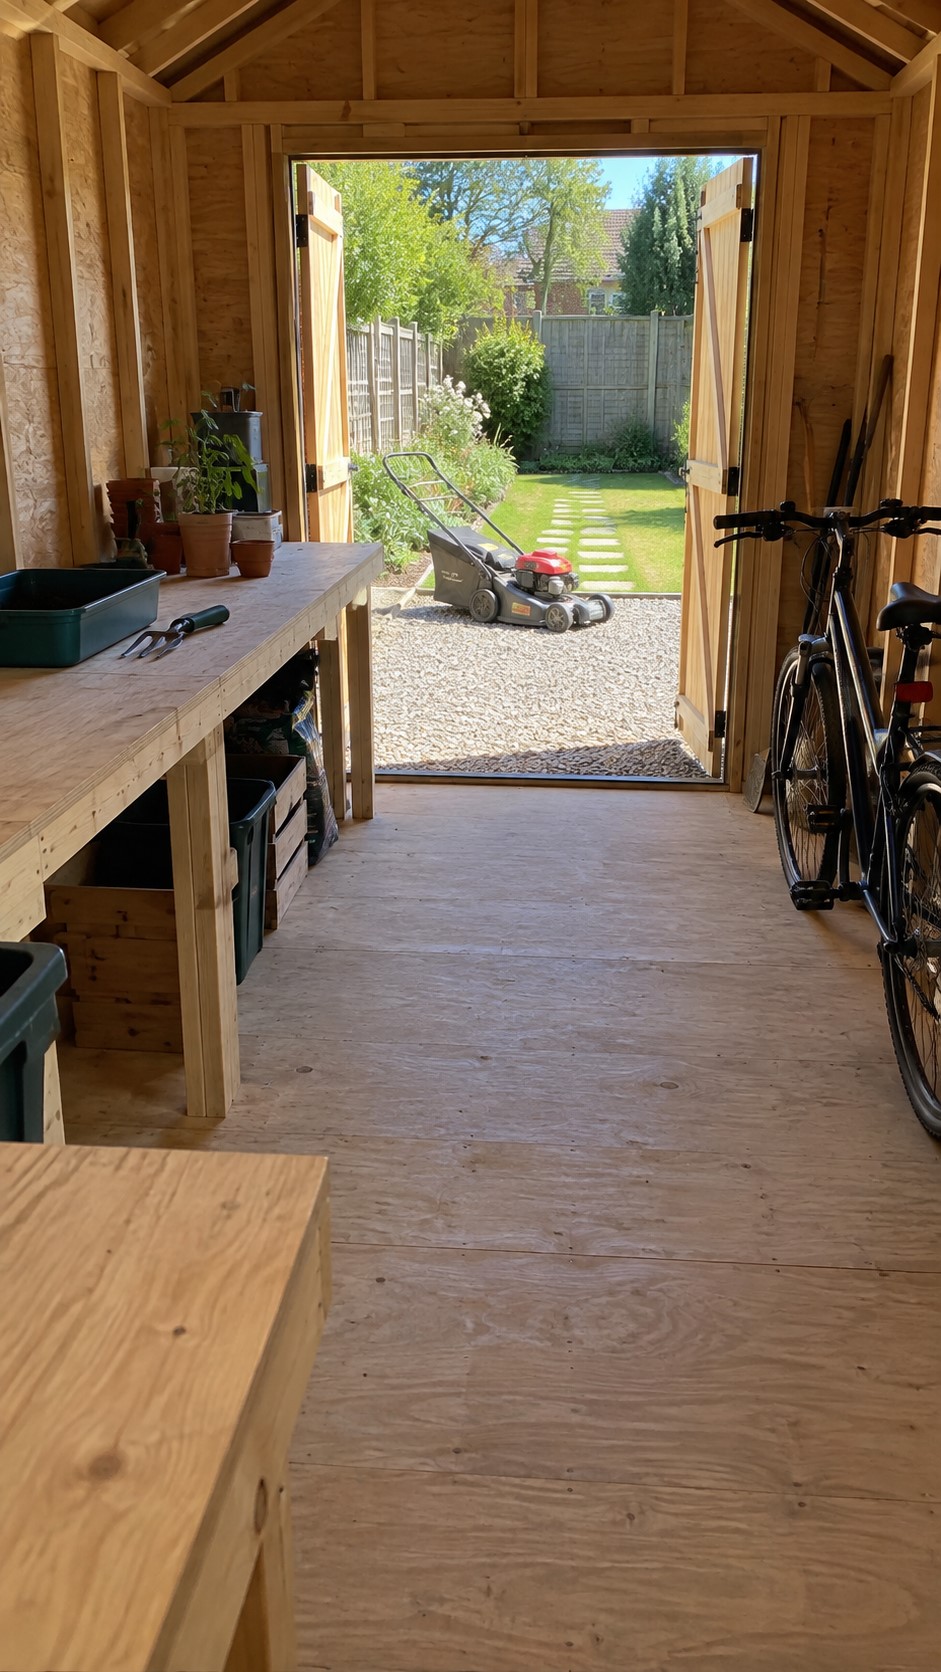
Medium sheds give bicycles and garden supplies room alongside the mower. Both versions have double doors targeting about 60 inches of clear opening, which helps with wider equipment. The 10×12 ft layout also includes a rear bench. There’s a practical compromise, though: when the larger illustrated mower occupies the entrance bay, you need to roll it outside for full access to that bench. Plan around how often you’ll use the work surface.
The 10×10 ft version loses two feet of depth, enough to change what fits at the back. Shallow shelving takes the place of the larger bench arrangement. For a push mower and bicycles, that may suit your needs. A riding mower needs more than a rectangle drawn on the floor. Its dimensions, wheel loads and access ramp must suit the checked floor design before it goes inside.
Large Shed Building Plans: A 8×16 or 12×16 ft Storage and Work Area
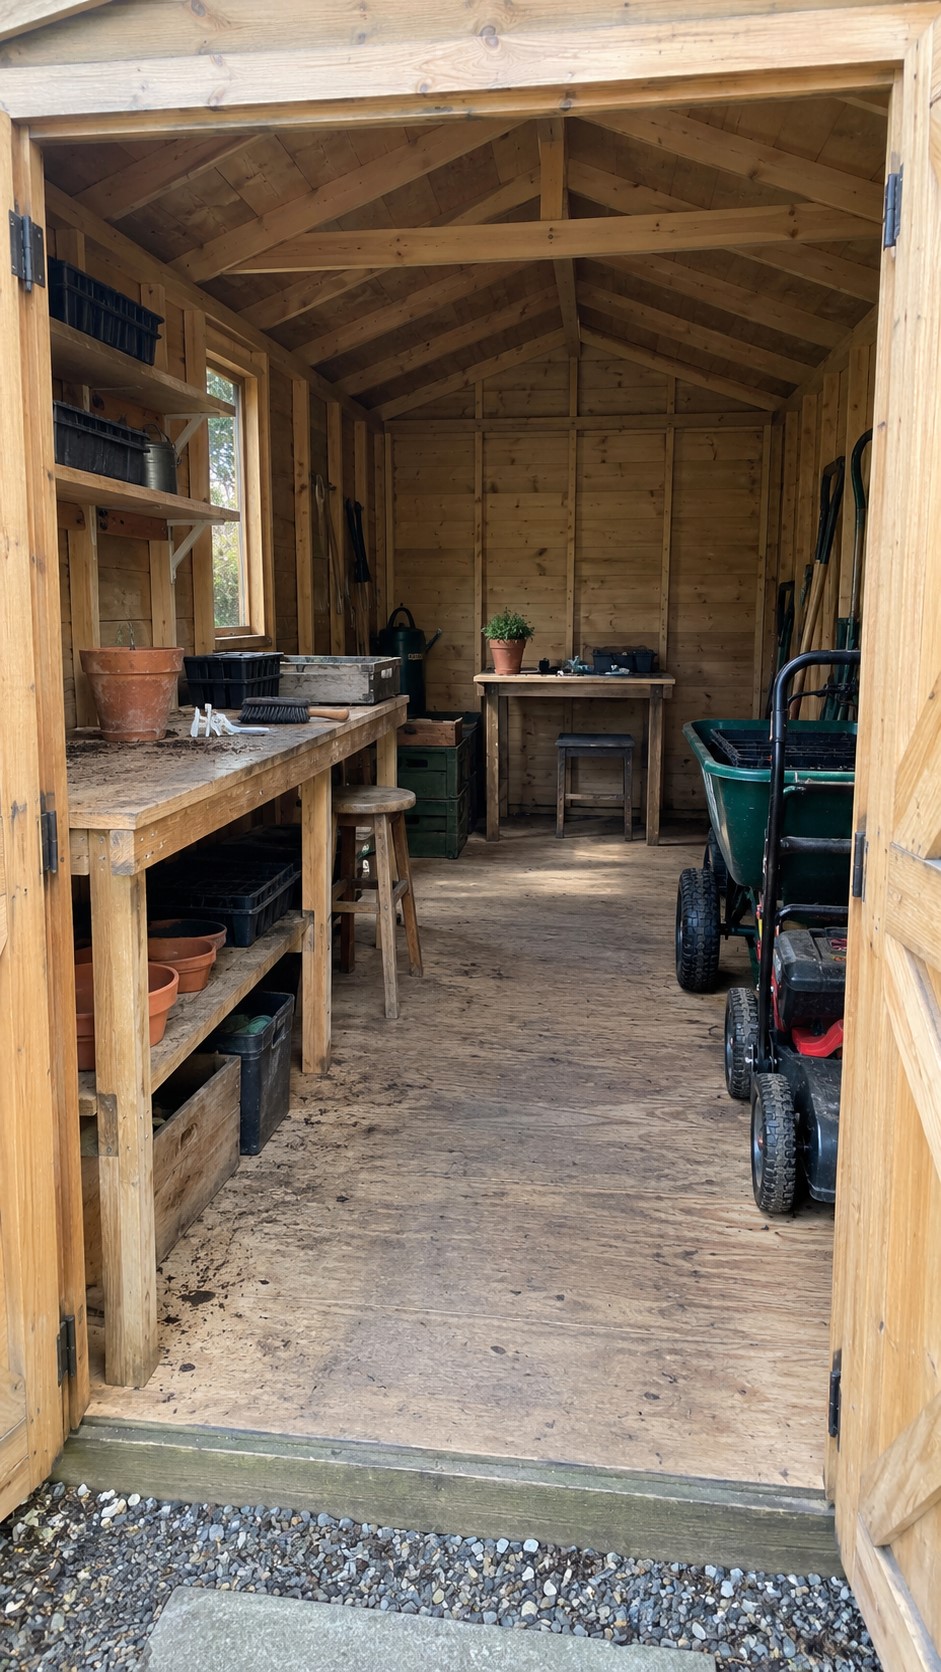
The 12×16 ft shed separates a large equipment bay from a walking route and work area. It has space shown for a bench and project table, with double doors targeting about 72 inches of clear opening. That makes sense if you repair garden tools or want somewhere to pot up plants while equipment stays under cover. Keep the use within the guide’s storage and occasional-work scope. Heavy machinery, heating or conversion to a gym or occupied hobby room needs further design checks. Measure the work surface you need before choosing this footprint, because spare corners have a habit of filling themselves.
Before Using Your DIY Shed Building Plans, Check the Site
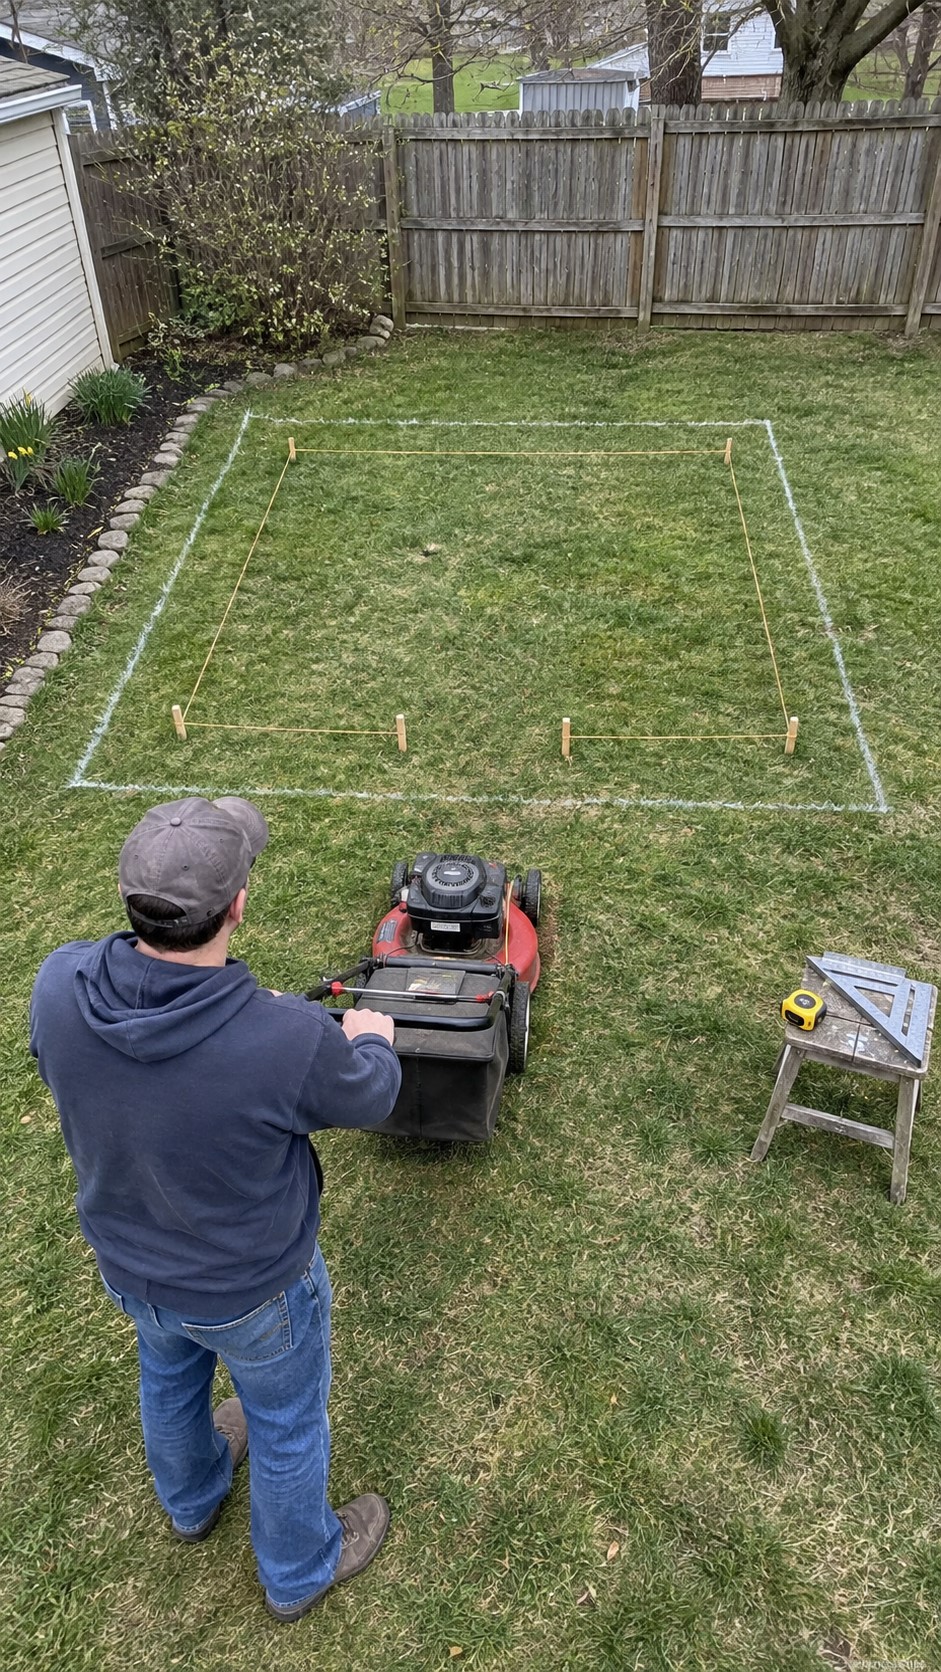
Mark the proposed shed on the ground with string, then mark the doorway and your largest equipment. Walk through the arrangement. You should be able to approach the entrance, open the doors and turn the mower without hitting a fence or squeezing past a border. Include the gravel apron and roof overhangs in your site measurements. Leave access for future repairs, too. A narrow gap behind the shed becomes less appealing when you’re trying to repaint the lower boards.
The guide’s gravel-and-skid base assumes suitable firm ground with good drainage. Soft soil, flooding or a slope needs a different foundation assessment. Check buried services and local requirements for positioning, height and approval before digging. The raised floor also affects equipment access: even a modest rise can require a long ramp. Settle its space and load requirements while the shed is still a set of lines on the ground, with the guide’s site checks beside you.
What to Buy for for Building Your Shed
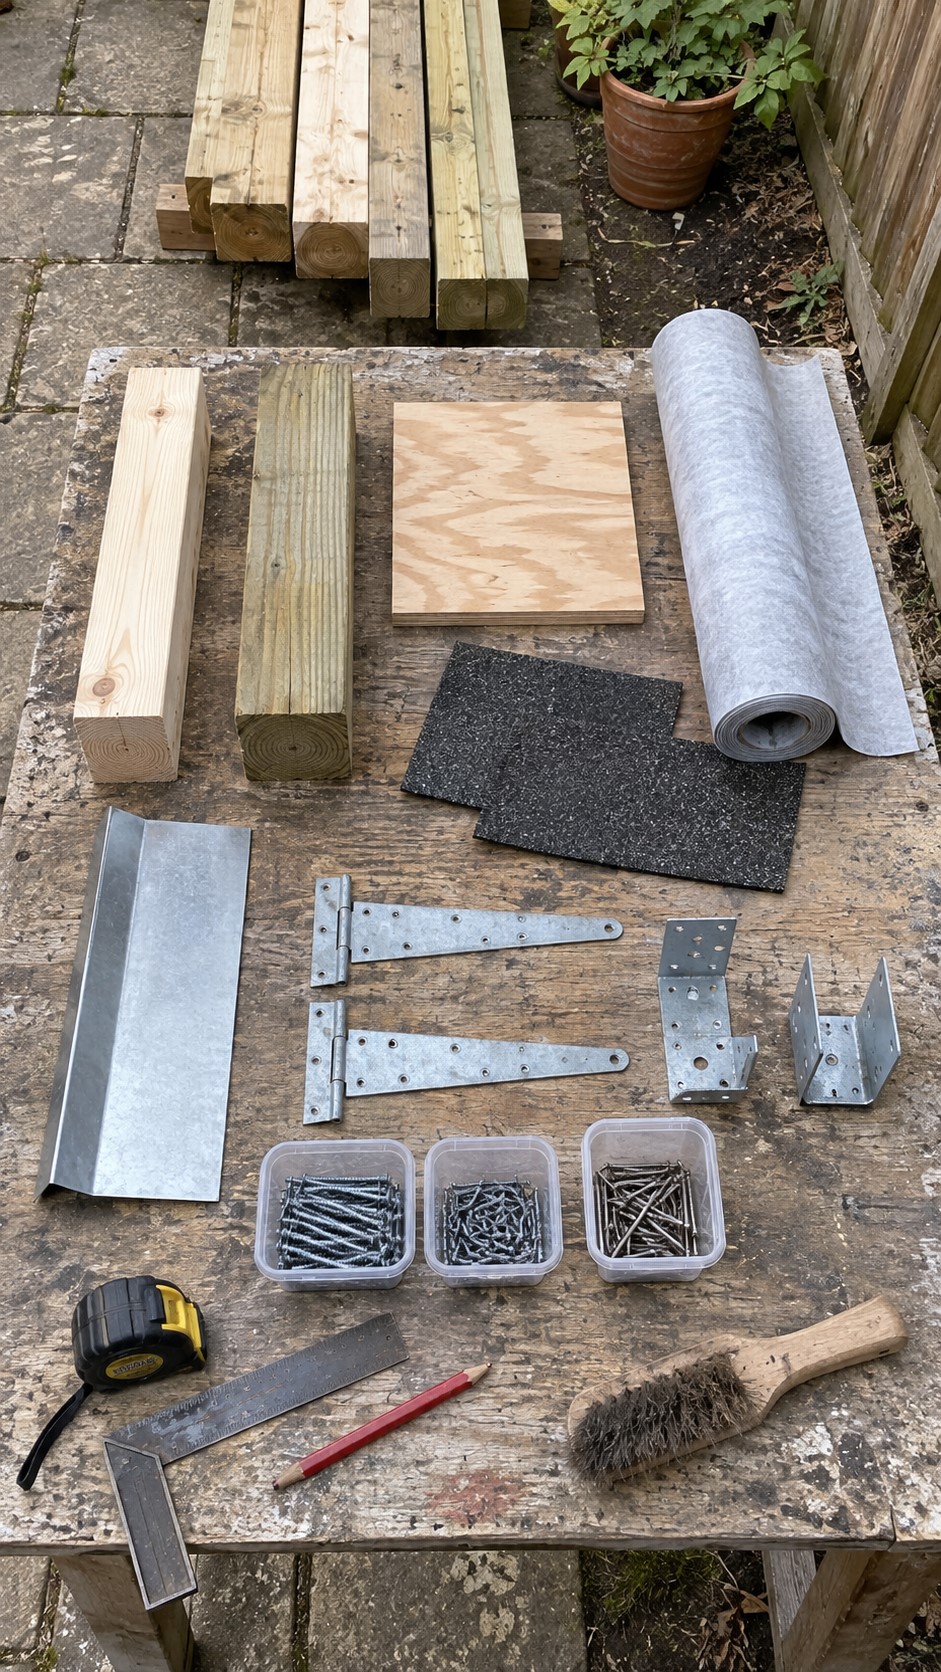
Most of the shopping list will look familiar at a timber yard: graded framing timber, treated base components, structural sheet materials and exterior cladding. The less visible parts deserve a place in the budget. A water-resistive barrier, the protective membrane behind the cladding, works with flashings to direct rain outward. Compatible exterior fixings and the correct connectors belong on the first order. Leaving them until the frame is standing can bring work to a halt.
The roof uses supplier-designed trusses, so arrange that package before cutting the frame. Take your chosen plan and local design requirements to the supplier. Check actual timber dimensions as well, since a familiar name such as 2×4 doesn’t describe its finished size. The PDF’s cuts use North American dressed timber sizes. Different local stock needs recalculation. Gather prices for delivery, ground preparation and roofing as well as timber, and treat the material quantities as buying allowances to check against the products you select.
Check your tools before the delivery arrives. The guide calls for measuring and marking equipment, a saw with a guide, a drill/driver and clamps, alongside hand tools and suitable access equipment. Include eye and hearing protection and dust control for cutting. Borrowing a tool can help with costs, but make sure you’re comfortable using it before starting on the shed. Arrange helpers for lifting walls and trusses while you’re sorting the rest of the kit.
A Practical Build Order for Simple Shed Building Plans
Start With Shed Base Preparation and Floor Framing
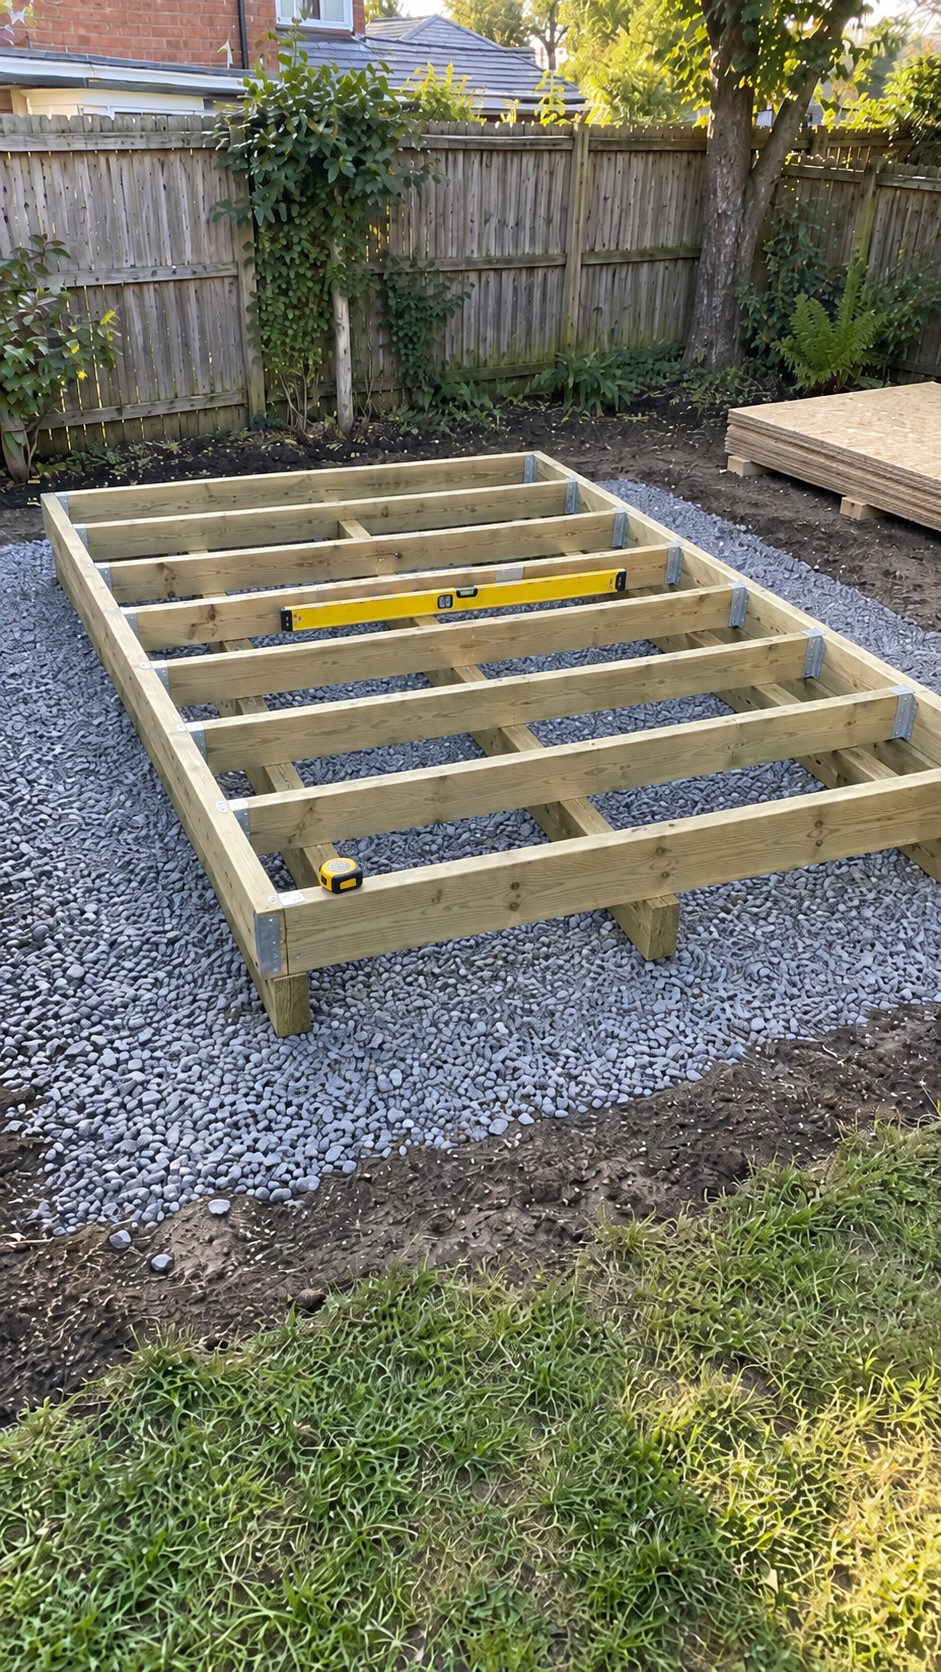
A level base makes the later stages easier to get right. Prepare the ground and supports using the checked foundation arrangement, then assemble the floor frame and compare its diagonals. Equal diagonals help confirm that the rectangle is square. Check level as well. Problems here tend to turn up again when walls meet or doors catch. Use the floor schedule for your selected size and resolve support or drainage issues before covering the frame. This is a good stage to take your time, even if the wall timber is waiting beside you.
Follow Shed Wall Framing With the Supplied Roof Package
Build the wall sections on the deck, then raise them with enough helpers and brace them as you go. The PDF explains the assembly sequence, while the accepted connection details govern how the structure is tied together. Roof trusses need the supplier’s lifting and bracing instructions, along with suitable working platforms. Arrange help around those tasks. A shed build usually breaks into several sessions, and wet weather or delayed materials can stretch the timetable. Leave each stage stable and protected when you stop for the day.
Finish Weather Protection Before Adding Garden Shed Shelving
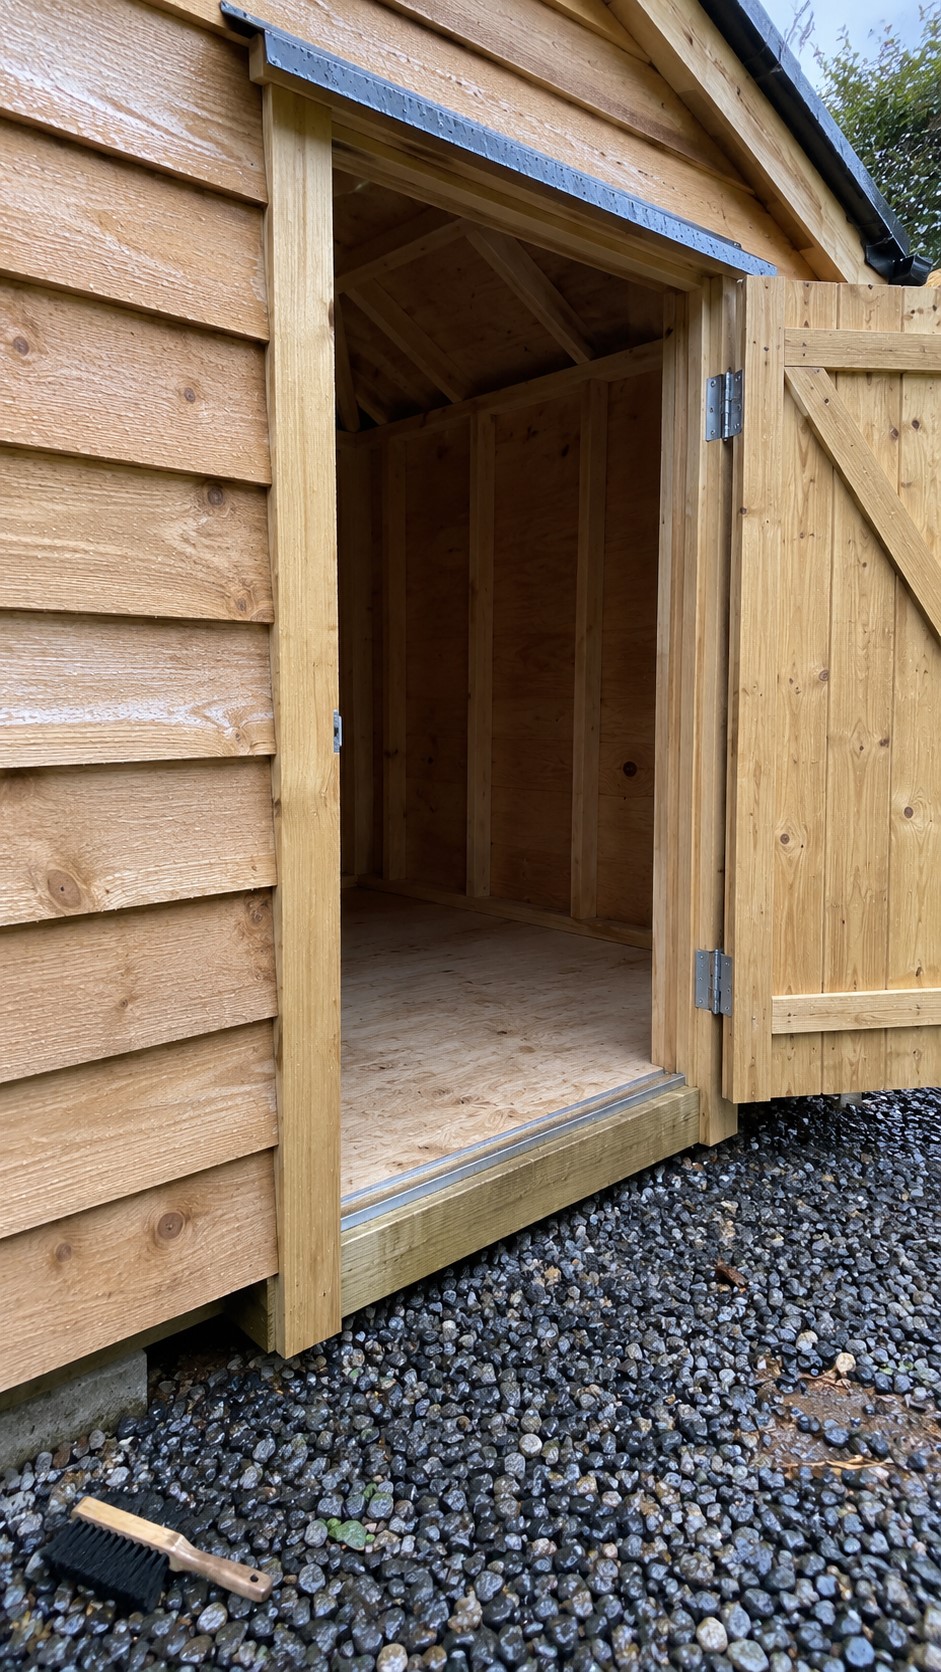
Get the shell dry before filling it. Roofing, wall membrane and flashings need to work together, followed by cladding, doors and the specified vents. The guide sets out their order and details. Shelving can wait until rain stays outside and the floor has dried. After the first heavy shower, check the door head, threshold and wall base for water tracks. Correct a leak while you can still see and reach it. That is a much easier job before the shelves hold seed trays and spare pots.
Pallet Shed Building Plans With a New Timber Frame
Choosing Reclaimed Timber Cladding for a Garden Shed
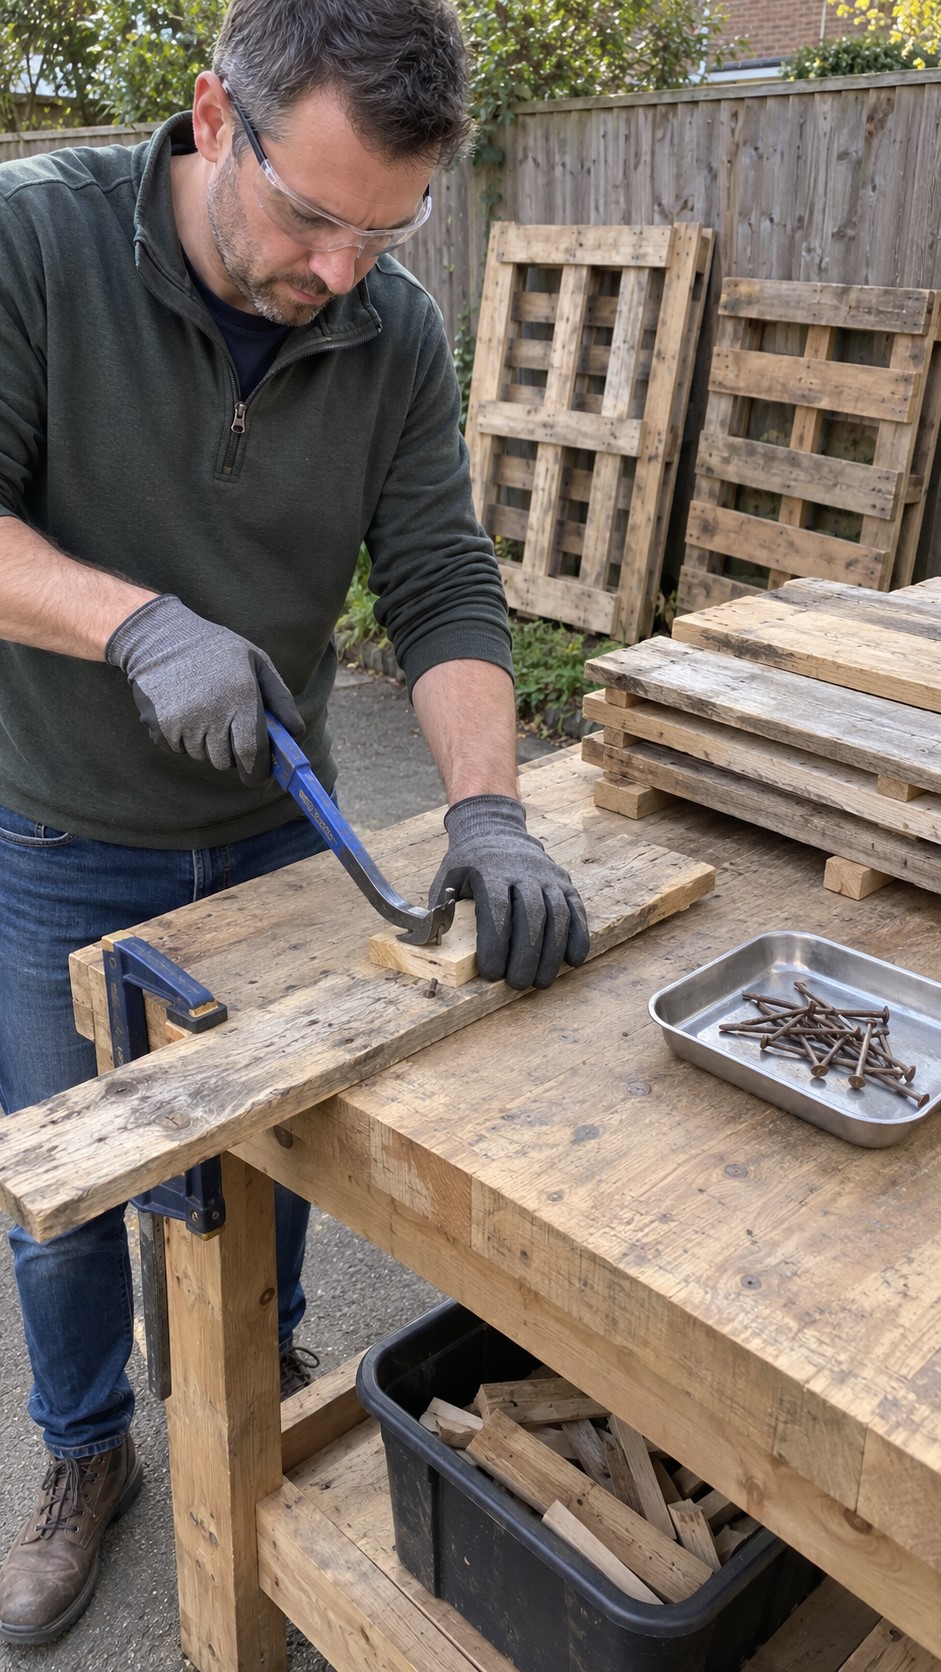
Weathered pallet boards give the shed a less uniform finish, with changes in grain and colour across the walls. In these plans, they provide cladding over a new frame, structural sheathing and weather protection. New specified materials carry the building loads. Choose pallets you have permission to take, with a known clean history and the treatment marking required by the guide. An HT stamp records heat treatment for pests. It doesn’t prove the timber is clean or suitable for structural work. Reject stained, rotten or suspect boards and check for hidden metal before cutting.
Allow Time for Pallet Shed Construction
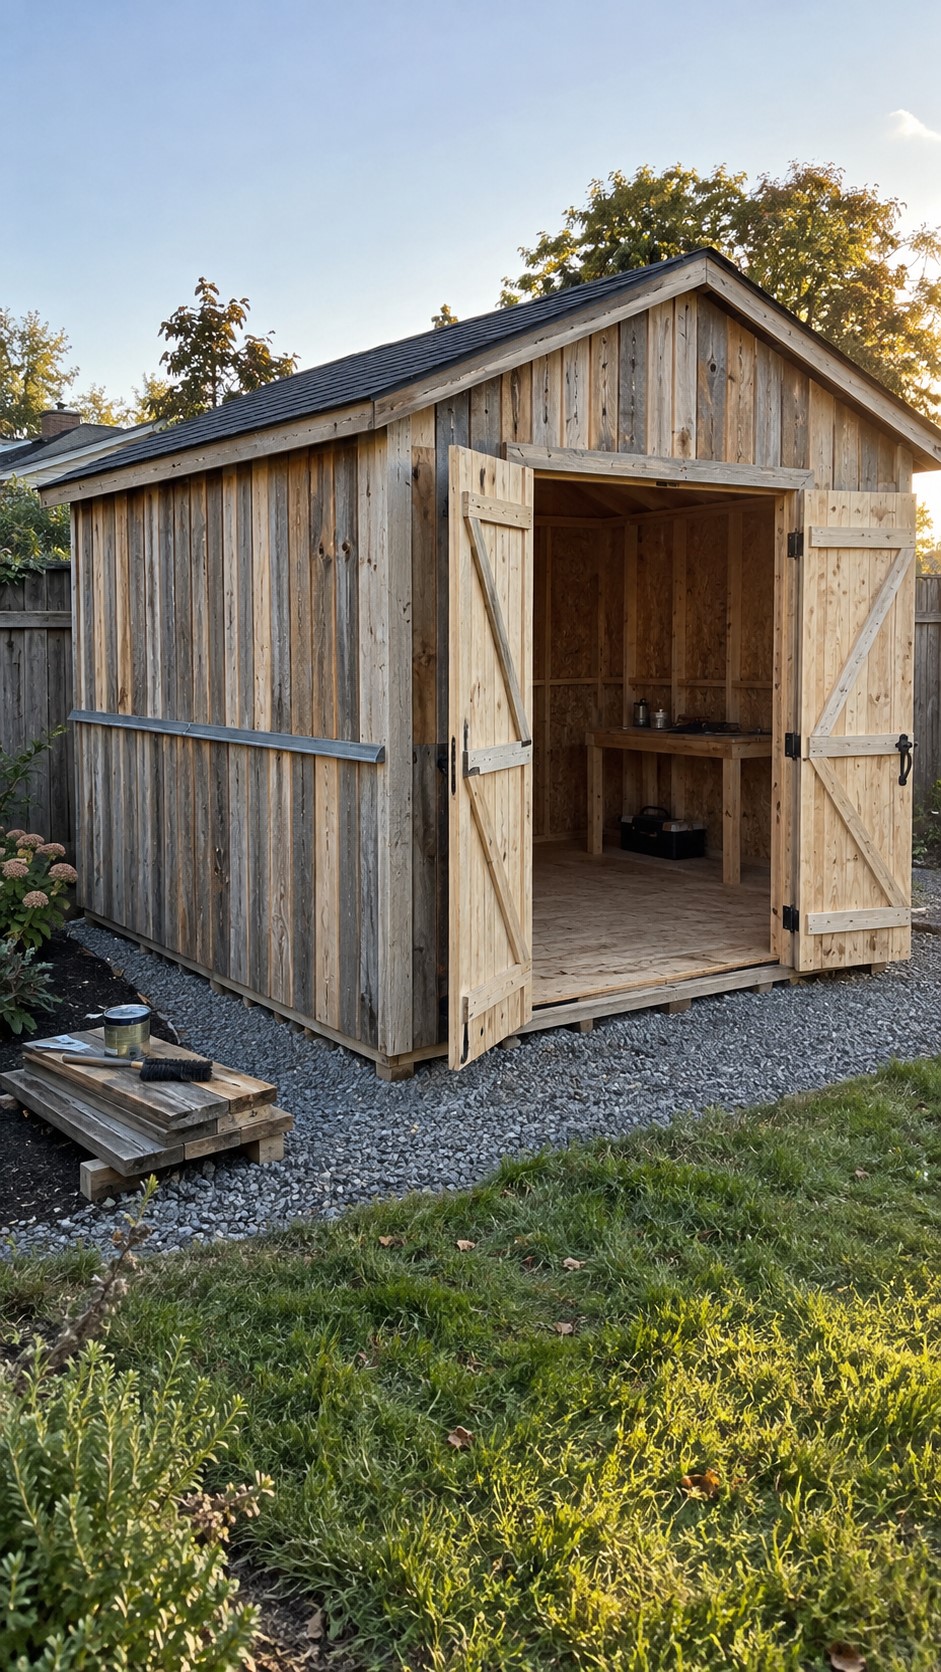
Collecting pallets is the beginning of the work. Dismantling, removing nails and sorting usable boards can take longer than expected, especially when ends split as you pull them apart. Measure the sound timber you recover before estimating how many more pallets you need. The PDF includes a worked example and details for a drained wall with protected board joints. Reclaimed cladding can reduce the amount of purchased siding, but the frame, roof and fixings remain substantial costs. Choose this version because you like the finish and can spare the preparation time. Cheap boards don’t guarantee a cheap shed.
Make Storage Shed Building Plans Work for Everyday Use
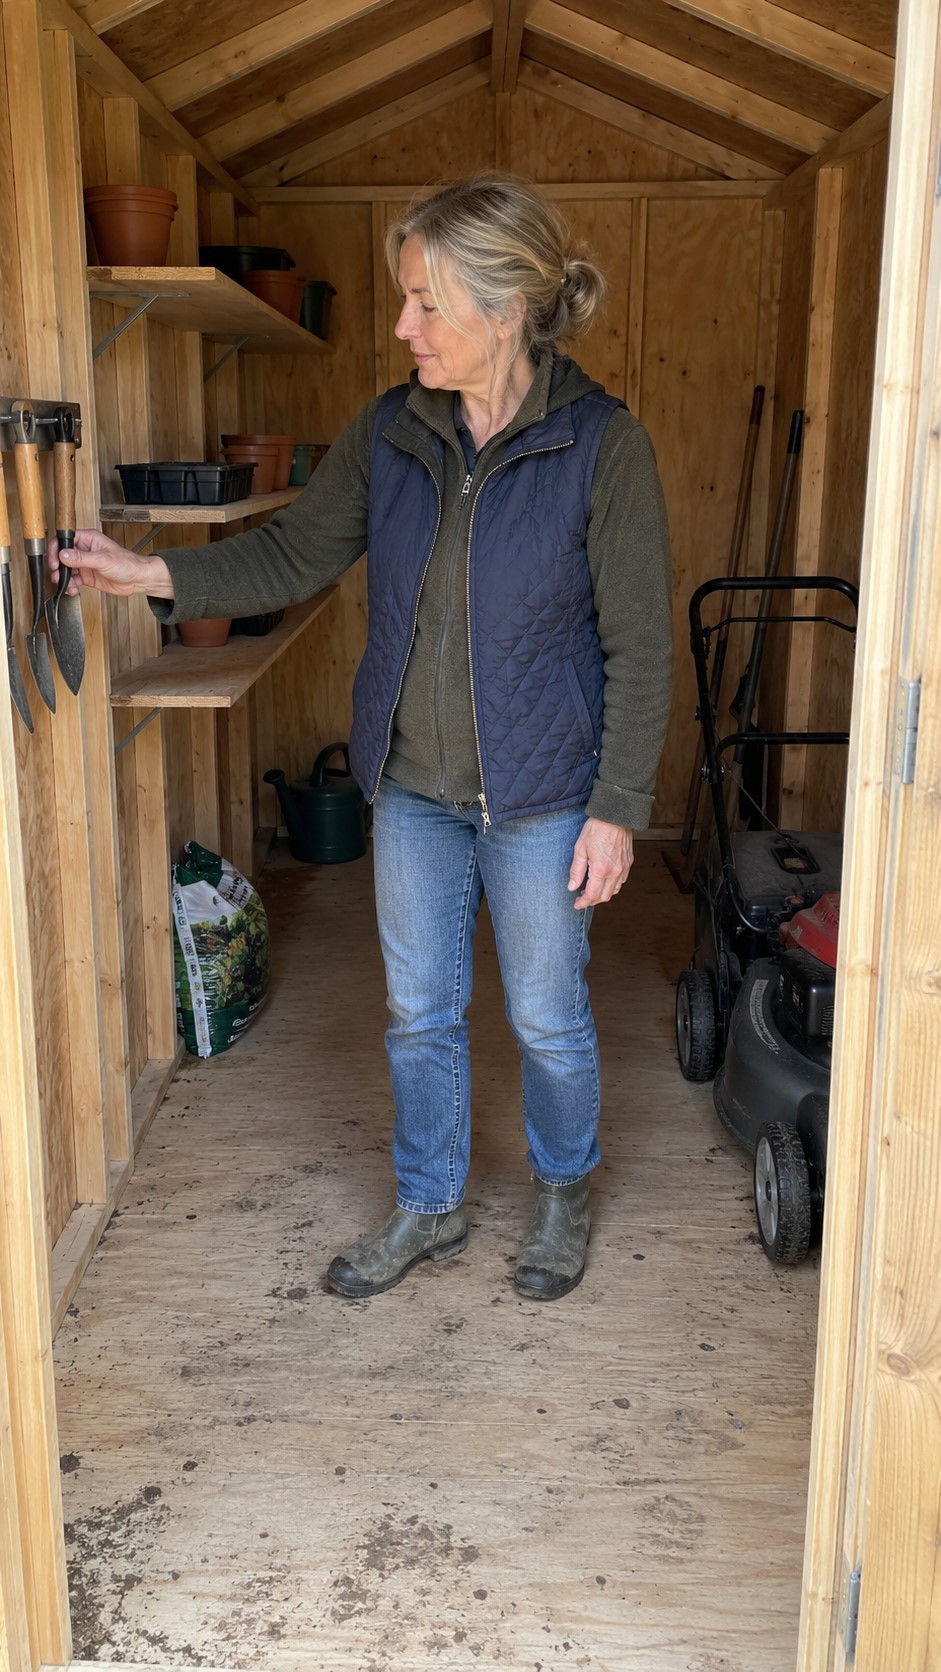
Try the storage arrangement with your actual equipment before fixing shelves in place. Put the tools you reach for most near the entrance, with long handles secured to rails fixed into suitable framing. Shallow shelves help stop small things disappearing behind larger pots. Keep heavy items low and match shelf supports to their loads. Roof trusses aren’t provided as supports for hanging bicycles or extra shelving. If the mower blocks the route you planned to keep open, adjust the fittings before they become permanent.
Once the shed is in use, give it a quick check as the seasons change. Clear leaves from roof edges, keep vents open and look for water marks around doors or board joints. A door that starts dragging may indicate movement in the base, so investigate before trimming it. Keep soil and vegetation away from the lower walls. Small repairs are easier when you can see the problem, which is another reason to preserve access around the outside.
Start With Your DIY Garden Shed Building Plans and a Tape Measure
Begin with the mower, bicycle or bench that needs the most room. Measure it, mark your preferred shed size and test how you’ll move around the space. Then use the downloadable guide to check the construction details and prepare for local advice and material orders. You don’t need to choose every hook or paint colour yet. Get the footprint and access right first. The reward is a shed you can open on a busy gardening morning, find what you need and get back outside.
Download the Garden Shed Building Plans PDF
