The Ultimate Guide to DIY Hydroseeding: Achieve a Lush Lawn with Step-by-Step Instructions
Ever wondered how to achieve a lush, vibrant lawn that turns heads and makes neighbors green with envy? You’re in the right place! Hydroseeding, a cost-effective and efficient method, has gained popularity among homeowners and lawn care enthusiasts for its remarkable results.
In this comprehensive guide, we’ll delve into the ins and outs of DIY hydroseeding, offering step-by-step instructions, expert tips, and insightful knowledge to help you transform your landscape. Whether you’re a gardening novice or a seasoned green thumb, you’ll find valuable insights and practical advice to make the most of this innovative lawn care technique.
Discover the benefits of hydroseeding, learn about the essential equipment and materials, and explore the best practices for soil preparation and post-hydroseeding care. We’re here to equip you with the know-how to nurture and maintain a thriving lawn that stands the test of time.
So, roll up your sleeves, and let’s embark on this exciting adventure to unlock the secrets of DIY residential hydroseeding and elevate your lawn to new heights!
Understanding Hydroseeding
What is Hydroseeding?
Hydroseeding is a planting process that uses a slurry of seed and mulch. It’s a fast, cost-effective way to have a lush, green lawn in a relatively short time. Originating in the United States in the early 1950s, this technique has revolutionized the way we approach lawn growth and restoration.
Here’s a quick overview of the hydroseeding process:
- Mixing Slurry: Seeds, mulch, fertilizers, and bonding agents are mixed with water to form a slurry.
- Spraying: The slurry is sprayed onto the ground.
- Germination: With proper care, seeds begin to germinate, and your lawn starts to form.
Why Hydroseed?
Wondering why hydroseeding has become a go-to method for many homeowners and lawn care professionals? Here are some compelling reasons:
- Cost-Effective: Compared to sod, hydroseeding is a more affordable option, making it accessible for various budgets.
- Efficient: Hydroseeding promotes quick seed germination, resulting in faster lawn growth.
- Versatile: Suitable for both residential and commercial applications, from small gardens to large landscapes.
- Erosion Control: The mulch in the slurry helps in controlling soil erosion, making it ideal for slopes and uneven terrain.
Table: Benefits of Hydroseeding vs Traditional Seeding
| Aspect | Hydroseeding | Traditional Seeding |
|---|---|---|
| Cost | More affordable than sod | Can be labor-intensive and costly |
| Time Efficiency | Faster germination and growth | Slower growth and establishment |
| Versatility | Adaptable to various landscapes | Limited adaptability |
| Erosion Control | Excellent due to mulch | Less effective in controlling erosion |
Environmental Benefits
Hydroseeding is not just about achieving a green lawn; it’s also about being green! The method is known for its environmental benefits:
- Water Conservation: The mulch retains more water, reducing the frequency of watering needed.
- Reduced Erosion: The immediate protection of the soil surface decreases the risk of erosion.
- No Weed Seeds: The hydroseeding mulch doesn’t contain weed seeds, unlike straw or hay.
Understanding the basics of hydroseeding and its myriad benefits is the first step in your DIY hydroseeding adventure. With its efficiency, versatility, and environmental advantages, it’s no wonder this method has gained widespread popularity among gardening enthusiasts and professionals alike.
Next, we’ll explore how to prepare for DIY hydroseeding, ensuring you have the right knowledge and tools to get started on the right foot.
Preparing for DIY Hydroseeding
Embarking on a do it yourself hydroseeding project requires meticulous preparation. From assessing your climate and gathering the right supplies to choosing the appropriate equipment, each step is pivotal for a flourishing outcome. Let’s navigate through the essentials of preparing for hydroseeding!
Assessing Climate and Choosing Grass Types
Climate significantly influences your hydroseeding success, dictating the type of grass suitable for your lawn and the optimal timing for seeding.
- Warm-Season Grasses: Ideal for hot summers and mild winters, with examples like Bermuda grass and Zoysia grass.
- Cool-Season Grasses: Suited for cold winters and moderate summers, including Kentucky bluegrass and Fescue.
Timing: The best time to hydroseed is during the growing season of the chosen grass type. For cool-season grasses, spring and fall are optimal, while warm-season grasses thrive when planted in late spring to early summer.
Sourcing Hydroseeding Supplies
With the right grass type identified, it’s time to procure the essential supplies:
- Seed: Purchase grass seed suited to your climate from local garden centers, home improvement stores, or online retailers.
- Mulch: Wood fiber or paper mulch is available at gardening stores or online.
- Fertilizer: Choose a starter fertilizer with balanced nutrients. Available at most gardening supply stores.
- Tackifiers: These can be sourced from specialized suppliers or online marketplaces
Shopping Tips:
- Price Comparison: Ensure value for money by comparing prices across sellers.
- Review Examination: For online purchases, scrutinize product reviews and ratings.
- Local Support: Consider supporting local businesses for personalized advice and community contribution.
Soil Preparation
Soil preparation is a pivotal step in the hydroseeding process. Here’s a step-by-step guide to get your soil ready:
- Soil Testing: Start by testing your soil’s pH, nutrient levels, and texture. This will help you determine any amendments needed.
- Weed Removal: Clear the area of weeds, rocks, and debris to create a smooth surface.
- Soil Amendments: Based on the soil test results, add any necessary amendments to improve soil fertility and structure.
- Leveling: Level the area to prevent water pooling and ensure even grass growth.
- Watering: Lightly water the area to moisten the soil before hydroseeding.
Table: Soil Amendments and Their Benefits
| Soil Amendment | Benefits |
|---|---|
| Lime | Adjusts soil pH, improving nutrient availability |
| Compost | Enhances soil structure and provides nutrients |
| Gypsum | Improves soil structure in clay soils |
| Sand | Improves drainage in compacted soils |
Equipment Acquisition: Buying or Renting a Hydroseeder
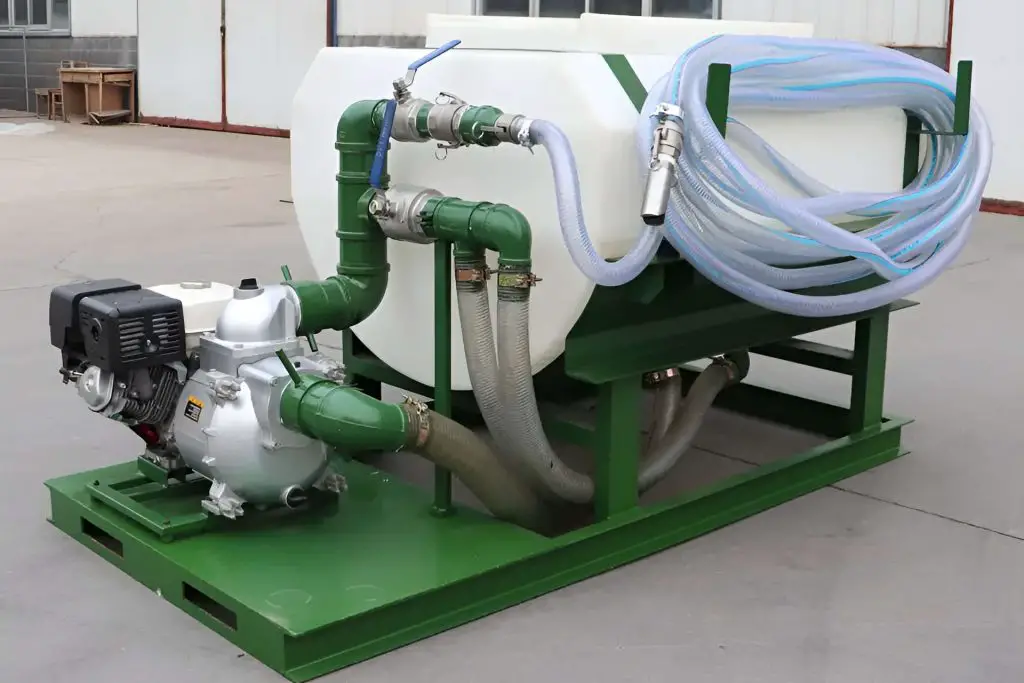
When it comes to hydroseeding a domestic lawn, a Jet Agitated Hydroseeder stands out as the most suitable choice of DIY hydroseed machine for homeowners. This hydroseeder machine is designed for ease of use, and efficiency, and is ideal for smaller-scale projects like residential lawns.
Assessing Capacity Needs:
- Lawn Size: Measure the area of your lawn to determine the capacity of the hydroseeder you’ll need. Typically, a machine with a 100-300 gallon capacity is suitable for most domestic lawns.
- Terrain: Consider the terrain of your lawn. For uneven or sloped terrains, a hydroseeder with a powerful agitation system is beneficial.
Where to Buy:
- Local Dealers: Check with local equipment dealers for availability and pricing. They often offer demonstrations and can provide valuable advice.
- Online Retailers: Websites like Amazon and eBay have listings for new and used hydroseeders. Be sure to read reviews and check seller ratings.
- Manufacturer’s Website: Purchasing directly from the manufacturer ensures you receive a genuine product, often with warranty and support.
Table: Considerations for Choosing a Hydroseeder
| Consideration | Description |
|---|---|
| Capacity | Match the machine’s capacity to the size of your lawn. |
| Agitation System | Jet agitation is effective for mixing and spraying the slurry. |
| Price | Compare prices from different sellers to find the best deal. |
| Warranty & Support | Consider the warranty period and customer support available. |
- Buying Options: Explore local dealers, online retailers, and manufacturers for new or second-hand machines.
- Renting Alternatives: Consider rental stores or online platforms for economical one-time use.
Acquisition Tips:
- Demonstration Request: Assess machine functionality through a live demo.
- Warranty Check: Prioritize products with reliable warranties and support.
- Price Negotiation: Don’t shy away from negotiating the price of second-hand machines.
Safety Precautions
Safety should always be a priority. Here are some safety tips:
- Wear Protective Gear: Protect your eyes, skin, and lungs by wearing appropriate gear.
- Pets: Keep dogs and cats away from the hydroseeding machine when you are spraying
- Follow Instructions: Adhere to the manufacturer’s guidelines for equipment and materials.
- Stay Hydrated: Hydroseeding can be labor-intensive, so drink plenty of water, especially in hot weather.
Thorough preparation is the cornerstone of a triumphant DIY hydroseeding endeavor. By diligently assessing your climate, sourcing quality supplies, preparing the soil, and acquiring the right equipment, you lay a robust foundation for a verdant lawn. Following we will delve into the hands-on hydroseeding process.
How to Hydroseed Yourself
As you will see, to hydroseed yourself is not a difficult process if you have the right equipment and properly prepared the area you are going to hydroseed. Below, we will go through all the necessary stages of DIY hydroseeding, from creating the perfect slurry and applying it effectively by using the right hydroseed spraying technique to ensure your lawn flourishes.
Assessing Area and Calculating Materials
Before diving into the mixing process, it’s essential to assess the area you intend to hydroseed and calculate the quantities of materials required:
- Measuring the Area: Use a tape measure to determine the length and width of the lawn. Multiply these to get the total square footage.
- Calculating Seed Quantity: Refer to the seed packaging for recommended seeding rates. Multiply the rate by the lawn area to determine the seed quantity.
- Mulch, Fertilizer, and Tackifier Quantities: Similarly, follow the manufacturer’s recommendations on the packaging to calculate the required amounts.
Table: Material Calculation Example
| Material | Recommended Rate | Lawn Area (sq ft) | Quantity Required |
|---|---|---|---|
| Seed | 6 lbs/1000 sq ft | 5000 | 30 lbs |
| Mulch | 50 lbs/1000 sq ft | 5000 | 250 lbs |
| Fertilizer | 10 lbs/1000 sq ft | 5000 | 50 lbs |
| Tackifier | 5 lbs/1000 sq ft | 5000 | 25 lbs |
Detailed Mixing of the Slurry
Creating the perfect hydrodeeding slurry mix is an art. It’s the nutritious concoction that will feed your lawn and help it grow lush and green. Here’s a detailed guide on how to mix it:
- Pre-Soaking the Seed: Before mixing, pre-soak the seed in water. This helps the seed absorb water, which is essential for germination.
- Water: Begin by filling the tank to half its capacity with water.
- Seed Addition: Gradually add the pre-soaked seed, ensuring it’s evenly distributed throughout the mixture.
- Fertilizer Incorporation: Introduce a balanced starter fertilizer for your hydroseeding mix to provide the initial nutrition the grass needs.
- Mulch Integration: Add wood fiber or paper mulch. This component is crucial as it retains moisture and protects the seed.
- Tackifier Application: If your lawn is sloped, adding tackifiers is essential. They prevent the slurry from washing away and aid in soil stabilization.
- Thorough Mixing: Agitate the mixture well. The slurry should have a smooth, homogeneous consistency before application.
Table: Slurry Components and Their Roles
| Component | Role |
|---|---|
| Seed | Determines the grass type and characteristics. |
| Mulch | Retains moisture and protects the seed. |
| Fertilizer | Provides essential nutrients for germination. |
| Tackifiers | Aids in soil stabilization and erosion control. |
Calibrating the Sprayer
Calibration is key. Properly calibrating your hydroseeding machine ensures an even application and optimal coverage. Adjust the spray nozzle to achieve a uniform spray pattern and conduct a test run on a small area to ensure accuracy.
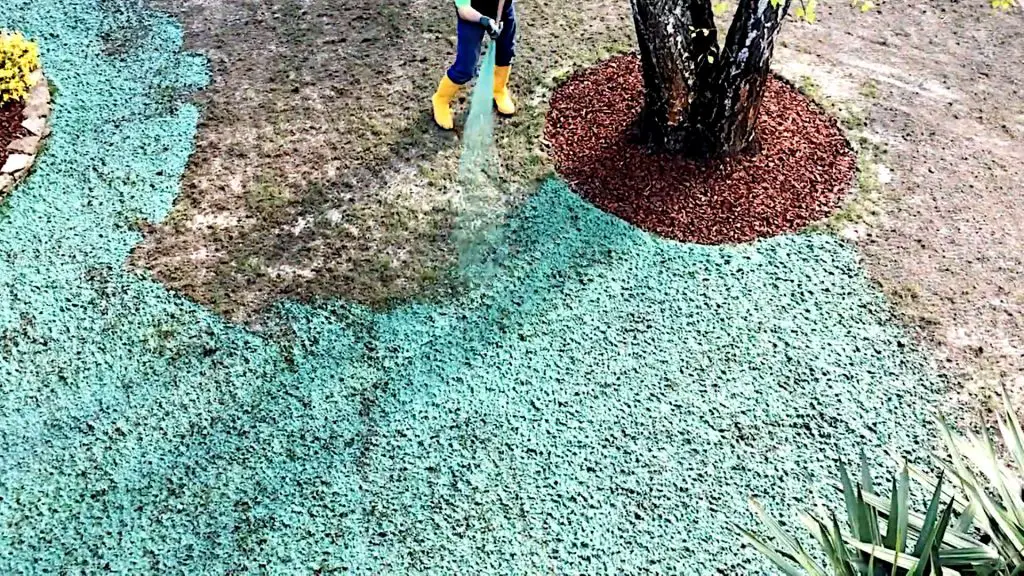
Equipment Acquisition: Buying or Renting a Hydroseeder
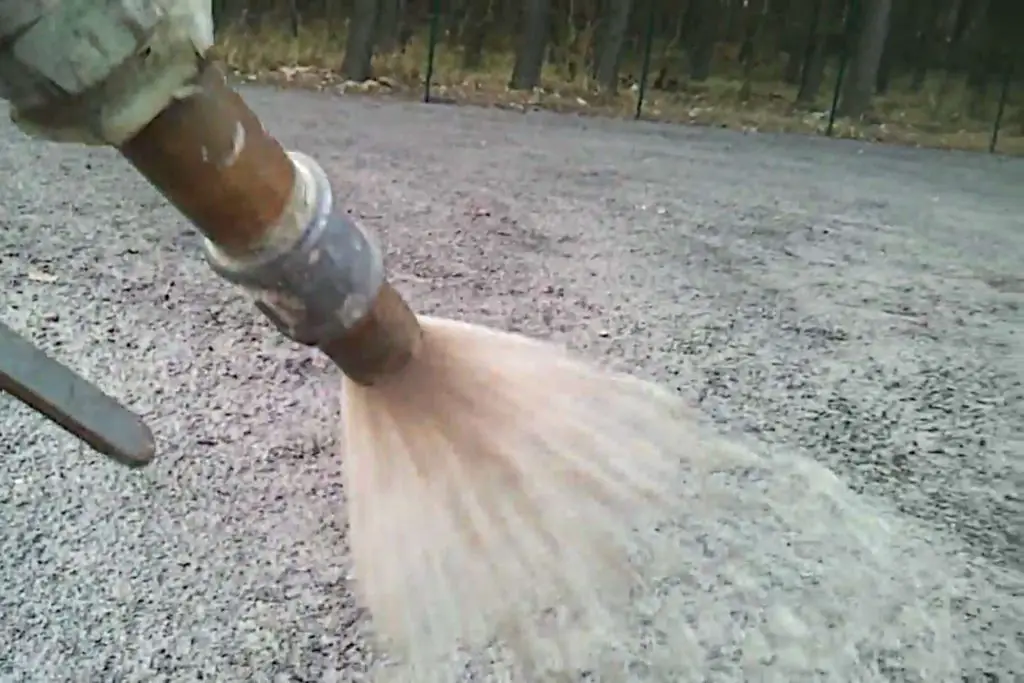
With a perfectly mixed slurry and a calibrated sprayer, you’re set to transform your lawn. Walk at a consistent pace, spraying in a back-and-forth motion, ensuring each pass slightly overlaps the previous one. Special attention is needed around the edges and corners, and it’s vital to avoid oversaturation.
Mastering all the different elements of the DIY hydroseeding process is not as daunting as it sounds. It might be a good idea to practice a little first, both with mixing and your spaying technique, before you embark on hydroseeding your lawn.
By getting the slurry mix right and ensuring you apply the mixture evenly with your diy hydroseed sprayer, you’re setting the stage for a lush, vibrant lawn.
Once you have sprayed your lawn it is time to watch the grass develop into a beautiful lawn. Following, we’ll talk about essential tips and tricks for maintaining your newly hydroseeded lawn.
Post-DIY Hydroseeding Care and Maintenance
Congratulations! You’ve successfully navigated through the DIY hydroseeding process, laying the foundation for a lush, green lawn. But the journey doesn’t end here. Proper post-hydroseeding care and maintenance are crucial to ensure the longevity and health of your new lawn.
Watering Regimen
Water is the lifeblood of your newly seeded lawn. Here’s a guideline to keep it adequately hydrated:
- First Two Weeks: Maintain consistent moisture across the lawn. Water lightly multiple times a day to prevent the soil from drying out.
- Weeks 3-4: Gradually reduce the frequency, allowing the soil to firm up, promoting root growth.
- Beyond One Month: Transition to a regular watering schedule, focusing on deeper, less frequent watering to encourage deep root development.
Table: Watering Schedule
| Time Frame | Frequency | Watering Depth |
|---|---|---|
| First 2 Weeks | Multiple times/day | Light |
| Weeks 3-4 | Daily | Moderate |
| Beyond 1 Month | 2-3 times/week | Deep |
Mowing and Trimming
Patience is key when it comes to mowing your new lawn. Wait until the grass reaches approximately 3-4 inches in height before the first mow. Ensure your mower blades are sharp to avoid pulling and damaging the young grass.
Fertilization Schedule
Nutrition is essential for your lawn’s growth and health. After the initial fertilization during hydroseeding, follow a balanced fertilization schedule:
- First Month: Avoid additional fertilization to prevent burning the young grass.
- Second Month: Apply a balanced, slow-release fertilizer to promote growth.
- Ongoing: Adapt the fertilization schedule based on soil tests and seasonal needs.
Table: Fertilization Schedule
| Time Frame | Fertilizer Type | Application Rate |
|---|---|---|
| First Month | None | – |
| Second Month | Balanced, slow-release | Follow manufacturer’s recommendation |
| Ongoing | Seasonal | Based on soil tests and grass needs |
Weed and Pest Control
Vigilance is essential to keep weeds and pests at bay. Regularly inspect your lawn for signs of infestation and address issues promptly with appropriate treatments. Avoid using harsh chemicals that could damage the young grass.
Addressing Bare Spots
It’s not uncommon to encounter bare spots. Should they appear, lightly rake the area, reapply a small amount of slurry, and maintain moisture until the grass establishes.
Post-hydroseeding care is the linchpin for transforming your efforts into the perfect, thriving lawn you desire. By adhering to a proper watering, mowing, fertilization, and maintenance regimen, you ensure the vitality and longevity of your green oasis. Enjoy the fruits of your labor and the satisfaction of a DIY hydroseeding success!
Troubleshooting and Solutions
Embarking on a DIY hydroseeding project is an exciting venture, but like any gardening endeavor, it may present challenges. This section aims to guide you through common issues and provide practical solutions to ensure your lawn thrives.
Uneven Grass Growth
Issue: Patches of uneven growth can mar the appearance of your lawn.
Solution: Assess the area for possible causes such as uneven slurry application, poor soil conditions, or inadequate watering. Address the specific issue by reapplying slurry, amending soil, or adjusting the watering schedule.
Weed Infestation
Issue: The presence of weeds can compete with grass for nutrients and space.
Solution: Regularly inspect and promptly remove weeds by hand or use a selective herbicide designed for young grass. Maintain a balanced fertilization schedule to support healthy grass growth.
Erosion and Washouts
Issue: Sloped areas or heavy rainfall can lead to soil erosion and slurry washouts.
Solution: Install temporary erosion barriers such as straw wattles or silt fences. Reapply slurry to affected areas and consider using additional tackifiers for soil stabilization.
Pest Intrusion
Issue: Pests such as grubs and insects can damage the lawn.
Solution: Identify the specific pest and apply the appropriate pesticide or biological control. Ensure the chosen treatment is safe for young grass.
Fungal Diseases
Issue: Overwatering or high humidity can lead to lawn fungal diseases like dollar spot or brown patch.
Solution: Adjust the watering schedule to prevent over-saturation and improve air circulation. Apply a suitable fungicide if necessary, following the manufacturer’s guidelines.
Table: Troubleshooting Guide
| Issue | Possible Causes | Solutions |
|---|---|---|
| Uneven Grass Growth | Uneven slurry, poor soil, inadequate watering | Reapply slurry, amend soil, adjust watering |
| Weed Infestation | Competition for nutrients | Remove weeds, use selective herbicide, balance fertilization |
| Erosion and Washouts | Slopes, heavy rainfall | Install erosion barriers, reapply slurry, use tackifiers |
| Pest Intrusion | Grubs, insects | Identify pest, apply appropriate control |
| Fungal Diseases | Overwatering, high humidity | Adjust watering, improve circulation, use fungicide |
Troubleshooting is an integral part of maintaining a healthy, vibrant lawn post-hydroseeding. By staying vigilant, promptly addressing issues, and applying practical solutions, you can overcome challenges and ensure the success of your DIY hydroseeding project. Your lush, green lawn is a testament to your dedication and hard work!
Final Thoughts
Embarking on a DIY hydroseeding project is exciting but can have challenges. The joy of witnessing the fruits of your labor makes it worth it. From understanding the intricacies of hydroseeding, preparing meticulously, executing the process with precision, to navigating post-seeding care and troubleshooting, every step is pivotal in cultivating a lush, vibrant lawn.
This guide has looked to provide you with comprehensive knowledge, practical insights, and actionable solutions to make your hydroseeding project a resounding success. Remember, the beauty of a thriving lawn is not just in its aesthetic appeal but in the fulfillment derived from nurturing it to fruition. The seeds you sow today, both literally and metaphorically, lay the foundation for a green oasis that will bring joy for years to come.
Commonly Asked Questions About DIY Hydroseeding
How long does it take for grass to grow after hydroseeding?
Typically, you should start seeing grass sprouts within 7-14 days after hydroseeding, depending on the grass type, weather conditions, and proper care. Full lawn establishment usually takes around 1-2 months.
Can I walk on my lawn after hydroseeding?
It’s advisable to minimize foot traffic on the newly hydroseeded area until the grass is well-established, usually after the first mowing. This helps prevent soil compaction and disturbance to the young grass.
When is the best time of year to hydroseed?
The optimal time for hydroseeding is during the growing seasons of spring and early fall when temperatures are moderate, and rainfall is more abundant. However, it can be done successfully at other times with proper care and watering.
How often should I water my hydroseeded lawn?
During the first two weeks, maintain consistent moisture by watering lightly multiple times a day. Gradually reduce the frequency over the next few weeks, transitioning to deeper, less frequent watering after one month.
Can I use any grass seed for hydroseeding?
While generally any variety of grass seeds can be used, it’s important to choose the right type suited to your climate, soil, and lawn usage. Warm-season and cool-season grasses have different growing requirements and optimal planting times.
What should I do if I notice bare spots or uneven growth?
Bare spots can be addressed by lightly raking the area, reapplying a small amount of slurry, and maintaining moisture until the grass is established. Uneven growth may require assessing and addressing issues like uneven slurry application, soil conditions, or watering.
Is DIY hydroseeding cost-effective compared to sod or traditional seeding?
DIY hydroseeding as an alternative to sod, which can be expensive, can be cost-effective. It often provides more uniform coverage and better erosion control compared to traditional seeding, making it a viable option for many homeowners.
Can I hydroseed over an existing lawn?
Yes, hydroseeding over an existing lawn is fine and it will improve density, fill in bare spots, and introduce more resilient grass varieties. Proper preparation, such as mowing and aerating, is essential for successful overseeding.
Do I need special equipment for DIY hydroseeding?
While specialized hydroseeding machines are available for purchase or rent, homeowners can also use a garden sprayer for smaller areas. The key is to achieve a uniform application of the slurry mixture.
How can I prevent weeds and pests in my new lawn?
Regular inspection, prompt removal of weeds, balanced fertilization, and appropriate treatments can help prevent and manage weed and pest infestations. Avoiding harsh chemicals and choosing treatments safe for young grass is crucial.