Hot Composting | Better Compost in a Shorter Time
Hot composting is a popular composting technique for producing finished compost more quickly than the more traditional cold composting method. In addition to the significantly shorter period of time it takes, most gardeners consider the resulting finished compost of a higher quality.
As we shall see hot composting involves generating significant heat inside the compost pile to aid the speedier decomposition of the composting material.
What is hot composting?
Hot composting is all about the temperature. It is a technique of producing compost in a shorter amount of time than the cold composting process. It involves heating the compost pile to a high temperature with controlled ventilation.
Because the pile heats up to significantly higher temperatures than cold composting hot composting kills more weed seeds and pathogens than traditional cold composting methods. So, while cold composting is the simpler option, it can be argued that hot composting yields greater results.
One of its main advantages is that you can reduce the organic material and kitchen waste to a finished rich compost state in around three to four weeks.
Hot Composting Method
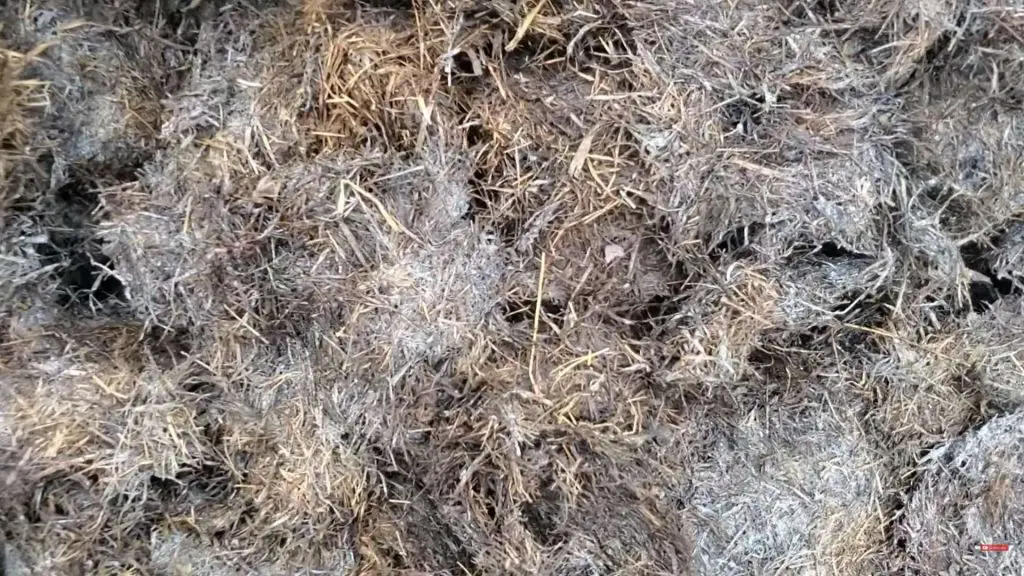
Unlike cold composting where you layer the different types of organic material with food scraps, with hot composting, you combine the materials. To do this effectively you should use small pies of material than you would with a layering process. The richer the mix of materials the higher the quality of the resulting finished compost.
What should go into a hot compost pile?
Starting your hot compost pile is a good time to clear out your fridge and freezer of food that is past its use-by date and food you thought was a good idea to buy at the time but has languished at the bottom of your freezer as you had second thoughts. This should be used in conjunction with the usual food scraps that you are looking to compost as well as all the organic materials and debris the garden has thrown up over the previous few months. Weeds you have pulled up, grass clippings, leaves etc.
Simple right? Well, it is not quite as simple as just combining all the materials. Hot composting works because the materials combine to cause a chemical reaction that creates the heat to break do
The science behind how composting works is important to understand if you want to get the best possible finished compost in the shortest period of time. The decomposition of the composting material is caused by microbial breakdown.
For this to take place you need both carbon and nitrogen which are present in differing amounts in composting material. Carbon serves as both an energy source and a fundamental building element, accounting for around half of the microbial cells. Nitrogen, on the other hand, is an essential component of proteins, acids and enzymes, all of which are required for microbial development and function.
So, right from the outset, we need a big quantity of organic matter with the proper carbon to nitrogen ratio. The optimal ratio for composting of carbon and nitrogen is 30 parts carbon for every one component nitrogen by weight. However, in terms of hot composting, the nitrogen levels need to be increased meaning the ratio for this would be twenty-five parts carbon to one part nitrogen.
The hotter you want your compost pile the higher the nitrogen component needs to be. It is not though, just a question of adding more nitrogen. The downside of increasing the nitrogen content beyond the normal 30:1 ratio is that beyond this cause the production of excessive ammonia gas, which can be dangerous (at extreme temperatures, ammonia gas may break down, releasing highly flammable hydrogen and poisonous nitrogen dioxide) and also result in unpleasant aromas. So going too much below a ratio of 25:1 is not advised.
Carbon and nitrogen content of composting material
Clearly, most gardeners are not chemists and are unlikely to know exactly what the carbon and nitrogen content of the brown material and green material that they are composting is.
Below is a table that will give you a good idea of the carbon to nitrogen ratio of the most common composting materials. You can also take some simple steps to ensure that you have got your ratios about right.
Probably the most important step is to keep an eye on the core temperature of the compost pile. There are of course various compost thermometers that you could buy that will do this, and you are looking for an optimal temperature of 130-150 degrees Fahrenheit. If it is much higher than this then you will be producing excess ammonia and below this and the process, won’t be working as quickly as it should.
If you don’t want to buy or have a thermometer to hand then you can use a hollow steel tube and plunge it into the center of the compost pile. This will allow you to touch test the top of the tube to gauge the heat and also help with controlled ventilation.
Composting Materials Carbon to Nitrogen Ratios
| Materials High in Carbon | Carbon:Nitrogen Ratio |
|---|---|
| leaves | 30-70:1 |
| straw and hay | 50-100:1 |
| wood shavings or sawdust | 100-300:1 |
| tree bark | 120:1 |
| general paper | 100-200:1 |
| corrugated cardboard | 500:1 |
| Materials High in Nitrogen | Carbon:Nitrogen Ratio |
|---|---|
| vegetable peelings and scraps | 20:1 |
| coffee grounds | 20:1 |
| grass cuttings | 15-30:1 |
| animal manure | 5-30:1 |
When to Turn a Hot Compost Pile
Once you have assembled your compost pile you should ideally leave it be for around two or three days. Leaving it will help bacteria establish themselves and the moisture to spread through the pile both necessary for the process to of decomposition to work evenly and efficiently.
After three or so days you should start to notice that pockets of hot air are being formed. At this point, you should look to turn the pile remixing it and then cover it. This will allow oxygen, which is also crucial for the decomposition process, to get into the whole compost pile.
Ideally, you should repeat this process every two to three days over a couple of weeks while constantly checking that the temperature at the piles core is still in the 130-150 F range. You should be able to see steam and feel the heat during this period. If you see the presence of white ash-like residue on fragments of plant material in the heap it is evidence that the process is working.

Toward the end of the second week, the temperature of your compost will reduce, but it is essential that keep turning and aerating the pile for another seven days. At this stage, the decomposition of the composting material is virtually complete. It is, however, a good idea to let it rest as the compost will continue to improve. This time will help the bacteria in the pile to stabilize.
Hot composting without turning
If you are not keen or are unable to turn your pile every few days while the compost material breaks down then there are a couple of different ways in which you can aerate your hot compost pile.
It is impossible to avoid aerating your pile since the process works through activating the aerobic bacteria in the material and for them to thrive they require a certain amount of oxygen.
Hot compost tumbler
The first solution is a hot compost tumbler. A tumbler does pretty much what its name suggests. It allows the composting mix to be turned from the outside of the tumbler bin. This means that there is a lot less effort required than in turning a pile with a spade and fork and you won’t get messy doing it. They usually are very good at maintaining good heat and moisture levels in the composting material and useful for hot composting in winter.
However, there are a number of drawbacks to using a tumbler.
- The first is that you still have to take the time to actually tumble the mix on some bins this can still be quite an energetic task depending on the tumbling mechanism employed
- Secondly, the tumbler compost bins are relatively small limiting the quantity of compost that you can make in any given use.
- Thirdly, the better ones can be expensive to buy.
Aerobin hot composter
Another solution is an aerobin. This again uses a bin to create your finished compost but with this device, once you have assembled and mixed your material, you can let the bin do the work.
An aerobin filly utilizes the aerobic method in composting which can substantially reduce greenhouse gas emissions. An aerobin with the proper mix of composting material creates the necessary conditions that trigger aerobic composting.
An aerobin works by using a central aeration shaft which allows oxygen to penetrate right through the composting material. They have insulated sidewalls and is a covered device allowing hot composting in winter as the heat is preserved inside the bin. With this aeration system, There is no need to spin or agitate the compost material inside.. You can just dump it in and forget it!
Aerobins do however have some drawbacks. Like hot compost tumblers, they can be expensive and you are again limited to the amount of compost that you can produce.
DIY Aerobin type solution
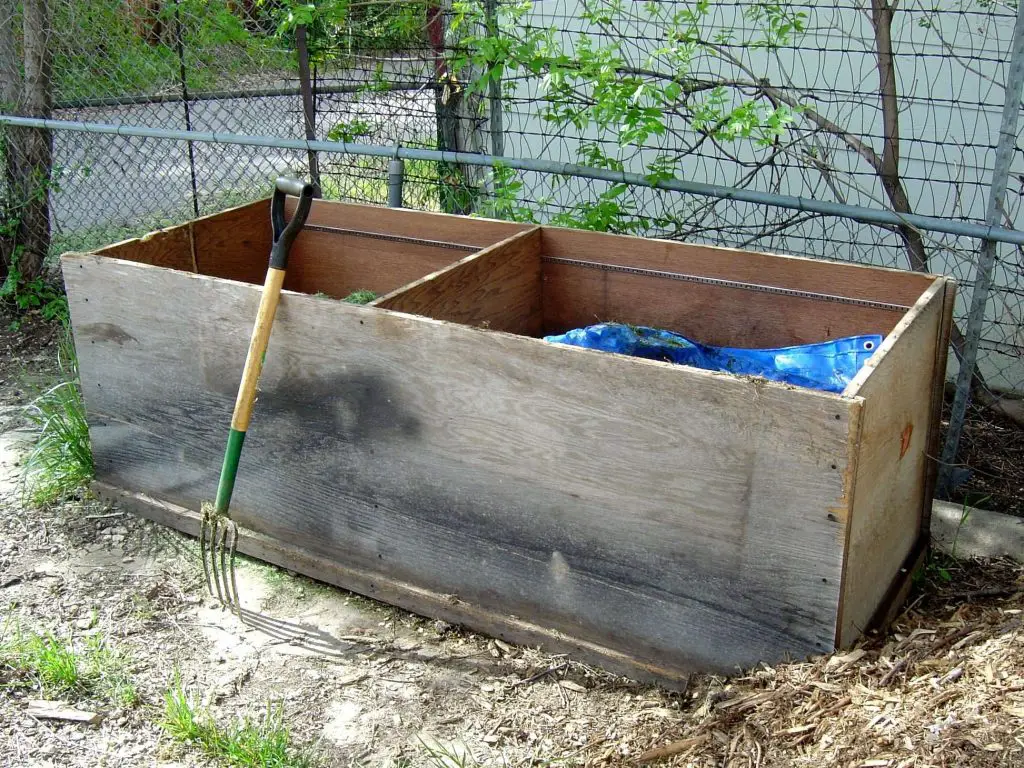
As you can see the principle of aerating a compost pile is reasonably straightforward. As such it is not too difficult to replicate the process in your pile or even build a hot compost box aerator.
The first step to building a hot compost aerator box is to shutter the area where you are going to have the compost pile. This can be done with some exterior ply or even out of old pallets.
The key element is to ensure that there will have an even flow of air across the whole structure. To achieve this you can run some PVC pipes through the box. Dill holes in the shuttering walls to pass the pipes through and then drill small holes all along the length of the pipes that are inside the box.
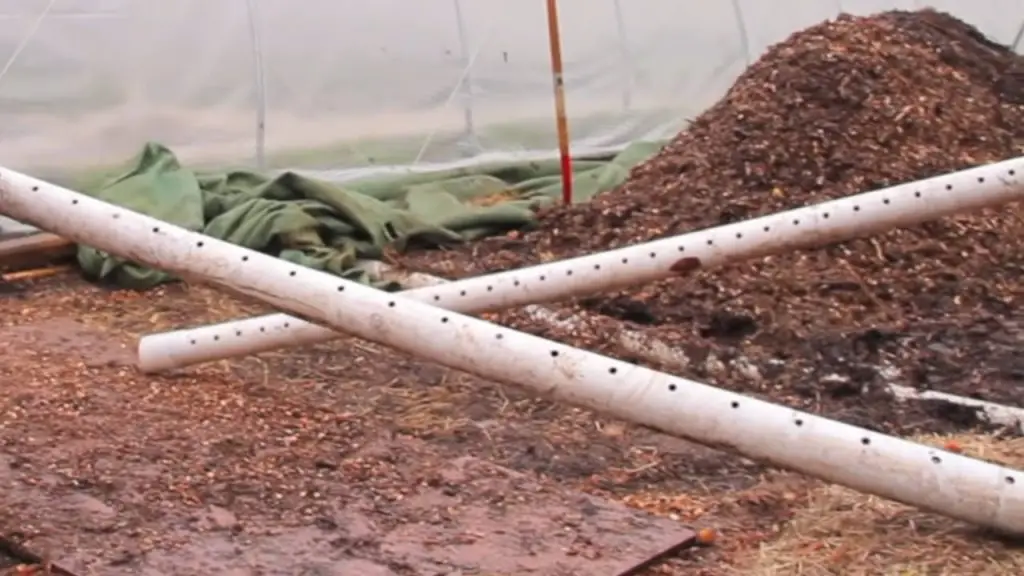
At least two pipes should run vertically and the others horizontally and at angles so that as much of the box as possible has pipes running through.
All of the pipes must protrude from the pile through the sides of the box enabling wind and breezes to push air through the pipes opening and move through the pile, escaping via the holes that you bore in the pile’s foundation. This works because of “the chimney effect”, which causes air to circulate inside the pile as a result of the difference in air pressure between the interior and outside of the box.
Line the floor of the box with a layer shredded cardboard on and then fill it with big wood chips. Because of their irregular shape, these will naturally have gaps between allowing air circulation.
Then add your composting material mixture and put a lid on the shuttering. In three to for week you should find finished compost in the box.