Small Vegetable Garden Layouts: 15 Tiny Plot Ideas That Actually Work
A little patch of sun can mess with your head, it looks too small to matter, yet it’s exactly the kind of space that rewards smart planning. Give it a layout that fits your life, your light, and your watering habits, and that “tiny” bed starts producing in a way that feels almost unfair.
Most gardeners don’t fail because they can’t grow vegetables, they stall because the space never gets a clear job. A layout fixes that. Beds become reachable, paths stop feeling like wasted room, and plants land where they’ll actually thrive instead of competing in a crowded tangle.
What makes a tiny garden feel big
A compact setup works best when every decision reduces friction. Easy access means you weed more often, a consistent path means you stop stepping on soil, and grouped plantings make watering simpler. Productivity tends to follow the boring stuff, not the flashy stuff.
Start with a realistic promise: fresh greens often come first, herbs follow close behind, then fruiting crops arrive once warmth and sun line up. A small plot can still give steady harvests, yet it does it through rhythm, not volume.
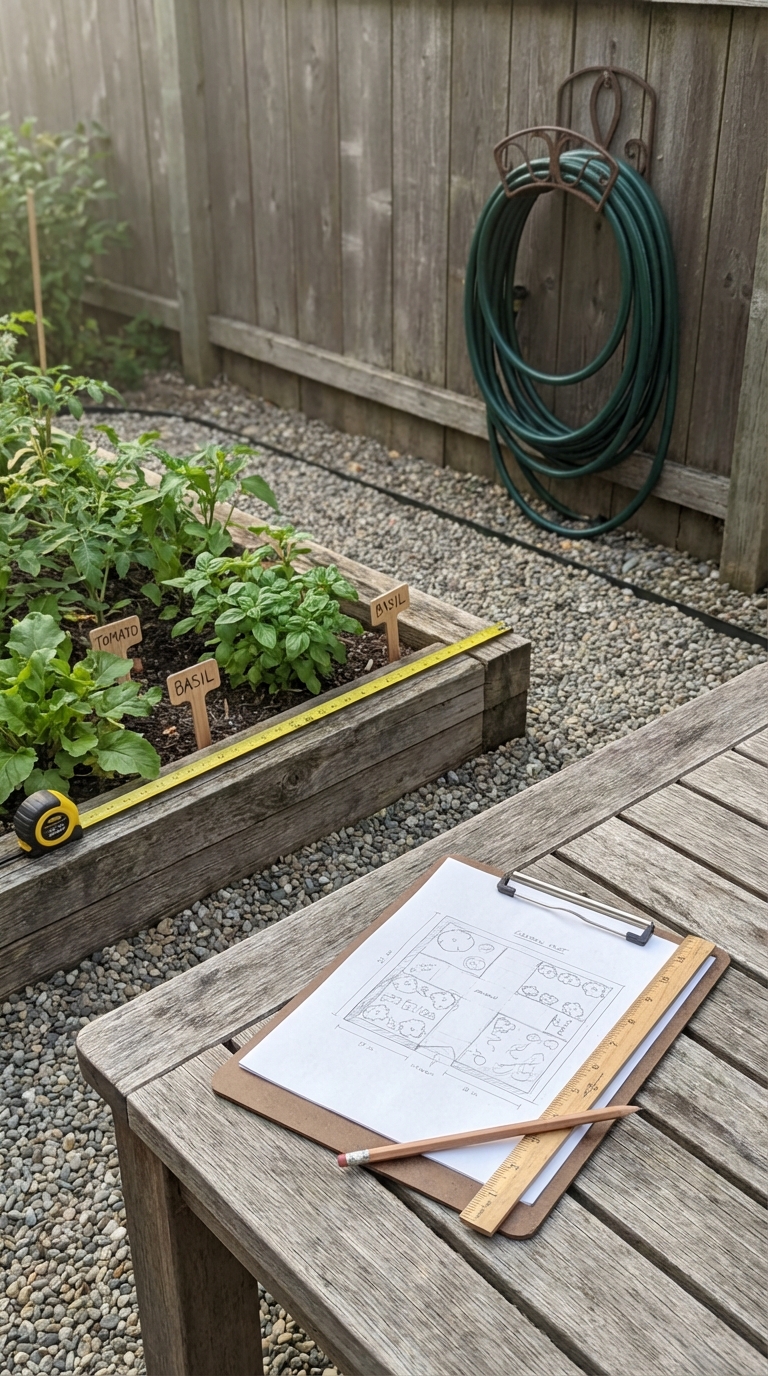
Measure first, then choose a plan
Step 1: Map your sunlight in five minutes
Check the garden spot three times in one day, morning, midday, late afternoon. Note where shadows linger. Fruiting crops, tomatoes, peppers, cucumbers, eggplant, usually want the longest, brightest window. Leafy greens can handle less, so they make perfect “edge fillers” near partial shade.
Sun changes across seasons, too. A corner that looks bright in March can get shaded in July once trees leaf out. Keep the notes, future-you will be grateful.
Step 2: Pick bed and path sizes that feel comfortable
Reach matters. Beds around 3–4 feet wide let you tend plants from the sides, without stepping into the growing area. Gardeners who push wider beds often end up compacting soil just to pull a weed, then wonder why plants struggle.
Paths deserve real space. A walkway around 18–24 inches stays usable even when foliage spills over, and it feels wide enough for a bucket, a watering can, or a child “helping” beside you.
Step 3: Choose a layout style you’ll enjoy maintaining
Two approaches fit small spaces especially well.
Square-foot grids break the bed into 1-foot squares, each square holds a set number of plants based on spacing. Order-loving gardeners adore it, so do beginners who want fewer decisions.
Block planting groups vegetables into rectangles or clumps, with tight spacing and minimal bare soil. Harvesting feels fast, watering feels efficient, and the bed looks full in a pleasing way.
A hybrid works nicely, grid for the first season, blocks later once you learn what grows well in your conditions.
A simple spacing mindset, no charts required
Think in four “sizes,” then swap within the size group.
Tiny spacing fits carrots, radishes, scallions, beets, and similar roots.
Small spacing suits spinach, bush beans, and compact herbs.
Medium spacing works for lettuces, chard, parsley, and many brassica seedlings you’ll thin later.
Large spacing covers broccoli, cabbage, peppers, eggplant, and any plant that becomes a wide, leafy dome.
Once you see crops as space categories, planning becomes much easier.
How to read the 15 layouts below
Each plan includes a footprint, a planting logic, and a vibe. Pick the footprint that matches your space, then choose the vibe you’ll keep up with. A beginner who loves neatness should lean toward grids. A busy gardener who wants fewer steps should lean toward blocks.
Every layout can be tweaked. Swap crops, shift the trellis, widen a path, shorten a bed. Layouts are guides, not rules.
The 15 tiny plot plans
1) The 4×4 “First Bed” Grid
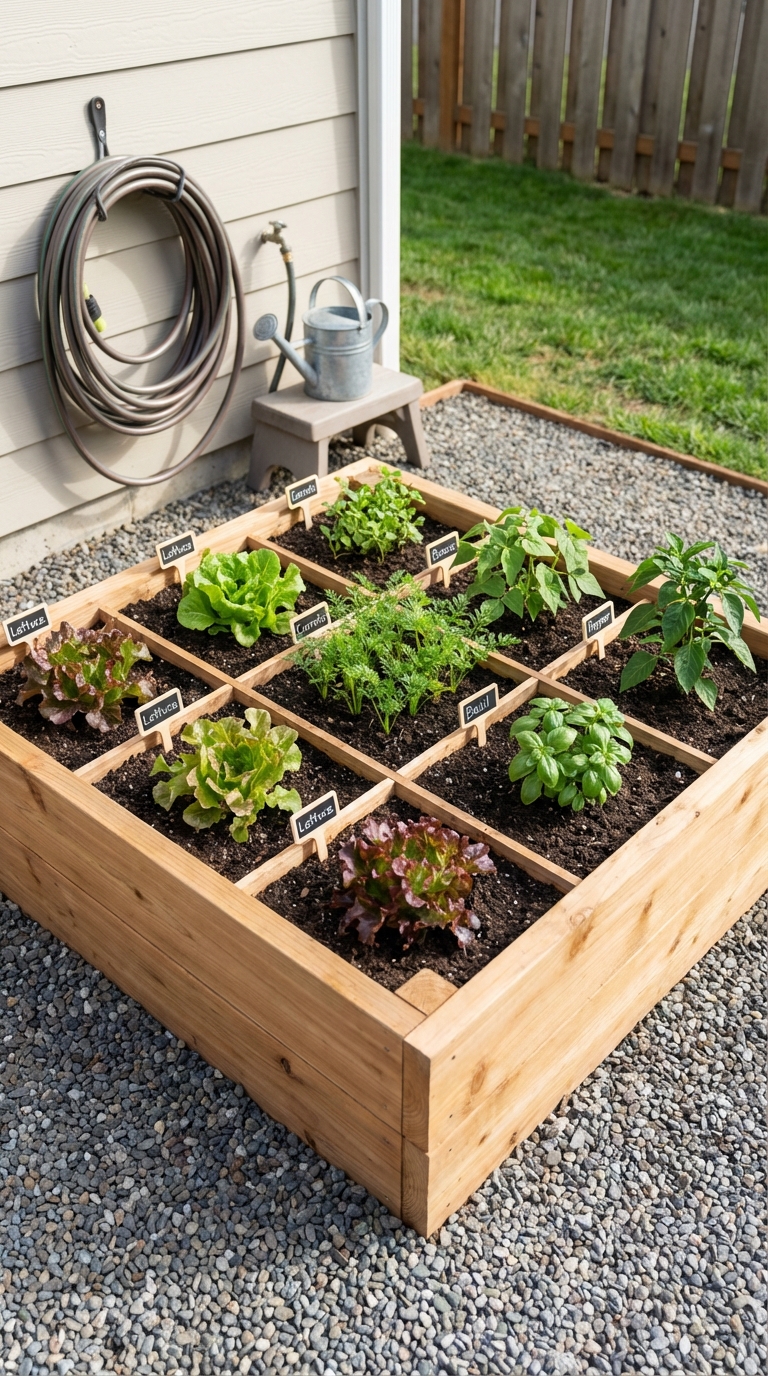
A single 4×4 raised bed can hold a surprising range without feeling chaotic. Divide it into sixteen squares, then assign roles rather than exact crops. Put fast harvest squares near the path, think lettuce, spinach, herbs. Reserve a couple squares for larger plants, like a pepper or broccoli. Keep the remaining area for roots and quick fillers.
Seasonal bonus: after radishes come out, slide in basil or another warm-season herb.
2) The 4×4 “Salad All Season” Bed
Aim this bed at repeat harvests. Dedicate half the squares to cut-and-come-again greens, then sprinkle in quick roots and herbs along edges. Plant one “feature” crop, maybe a pepper, in a corner so it won’t shade everything else.
Greens become your reliable win, even in weeks when you ignore the garden. Harvest a handful, water, walk away, still feels like success.
3) The 4×4 “Kid-Friendly Reach” Bed
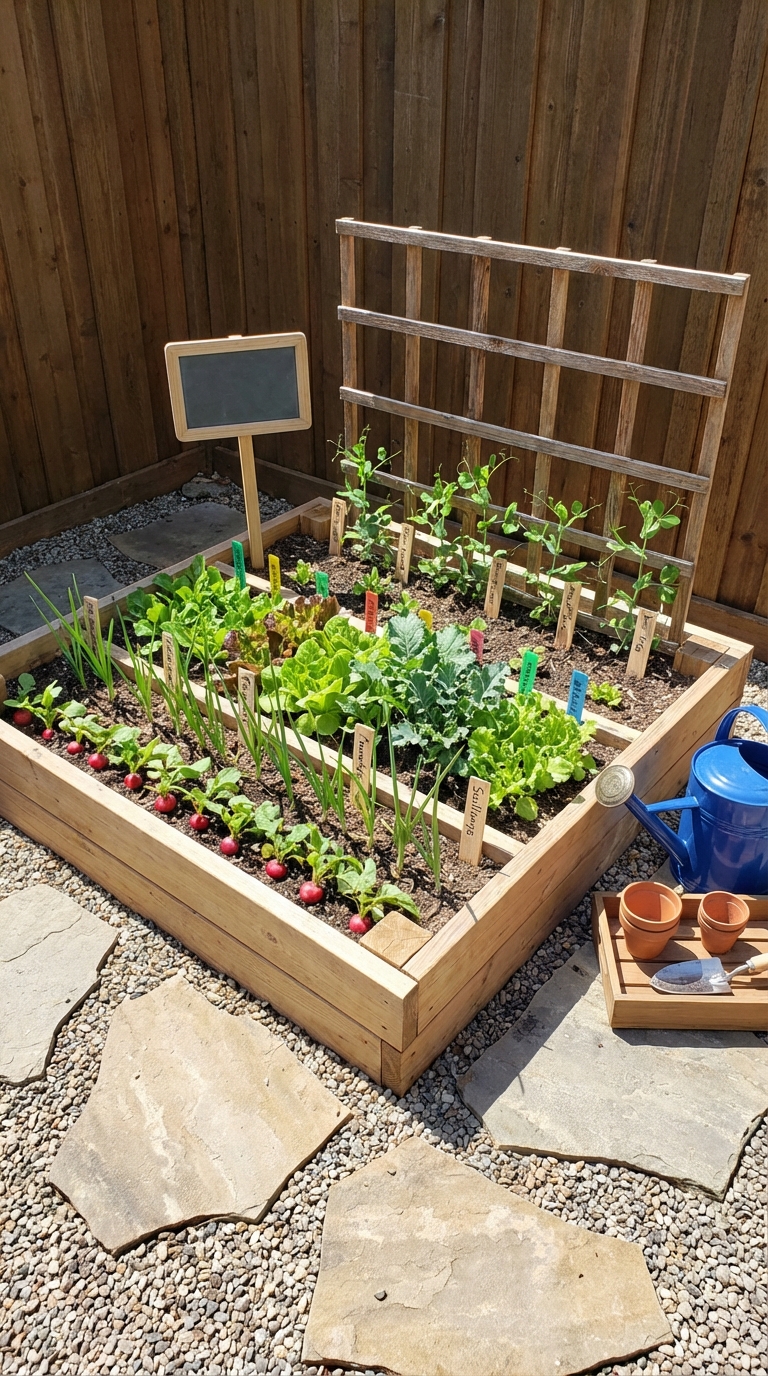
A smaller reach makes gardening more inviting for kids, and it keeps adult maintenance easy too. Use block planting in short strips: roots in front, greens in the middle, taller plants in back. Add a narrow trellis on the far side for climbers if the spot gets strong sun.
Tidy paths around the bed let kids circle, pick, and water without trampling plants.
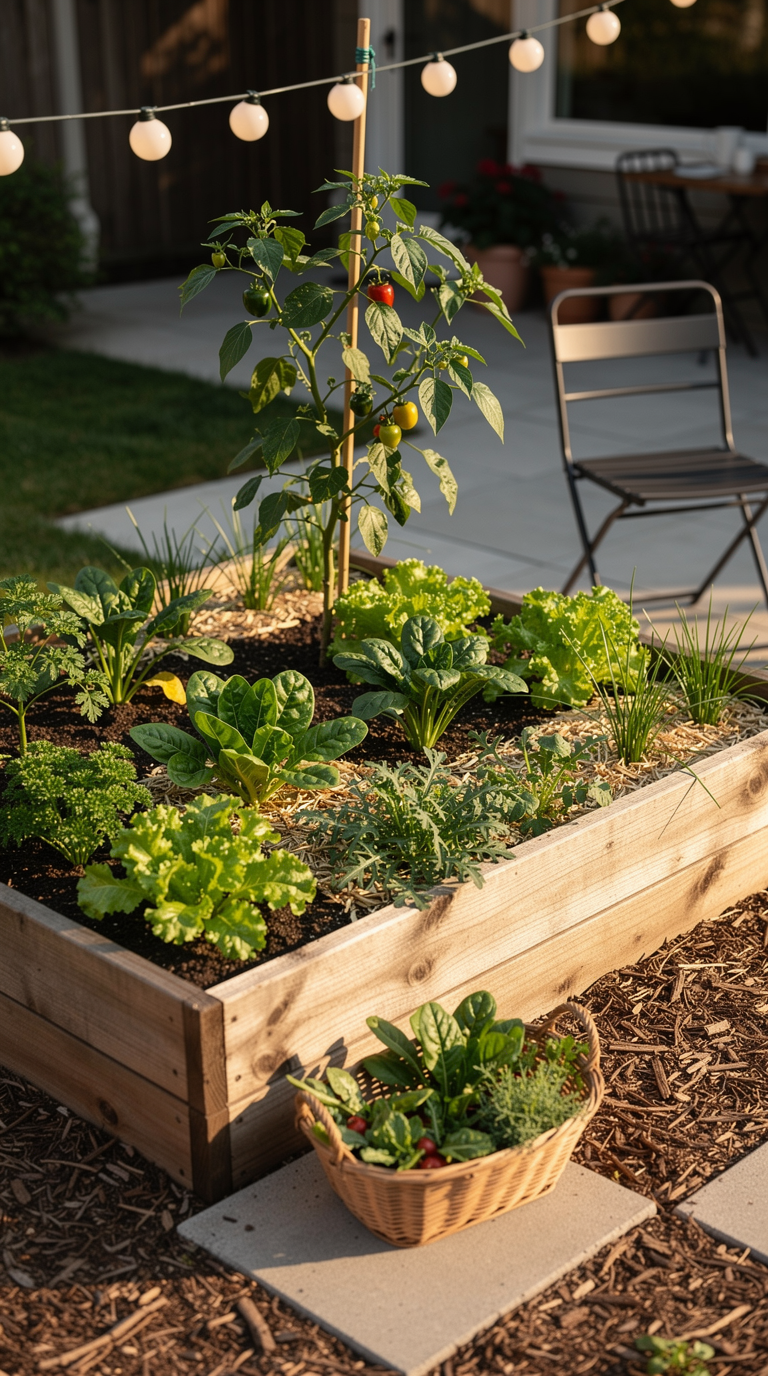
4) The 4×8 “Family Sampler” Layout
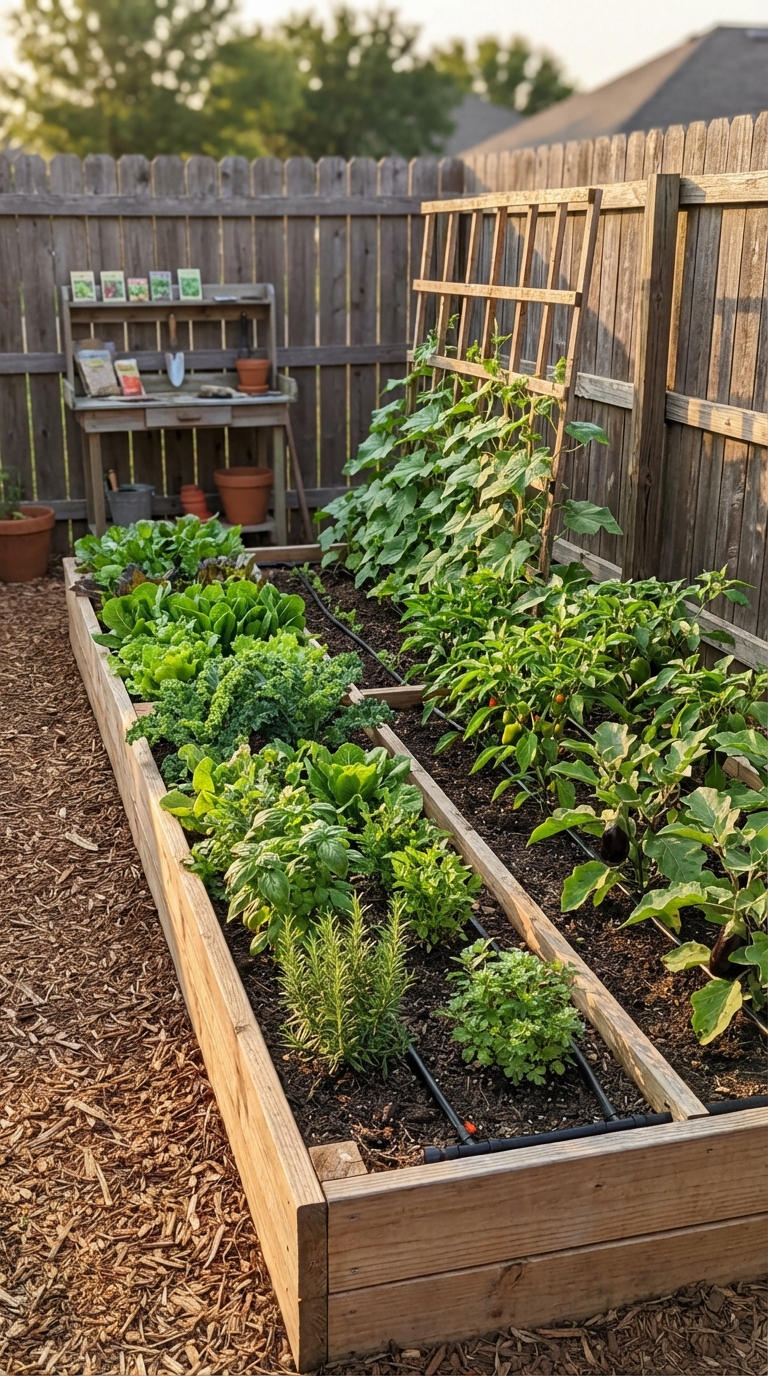
A 4×8 bed hits a sweet spot, large enough to feel like a real garden, small enough to manage. Split the bed lengthwise into two zones. Keep one side for steady producers, herbs, leafy greens, compact roots. Use the other side for fruiting crops, peppers, eggplant, and one trellised plant at an end.
A simple rule keeps it calm: tall plants stay on the north or back side, shorter crops stay in front.
5) The 4×8 “Two-Season Switch”
Build this bed around timing. Plant cool-season crops in one half, then warm-season crops in the other half. As heat arrives, replace the cool-season half with warm crops or heat-tolerant greens. Once the hottest stretch passes, bring back quick cool-season options in the space freed up by spent summer plants.
Gardeners who like a plan love this, it turns the bed into a rotating stage instead of a one-time show.
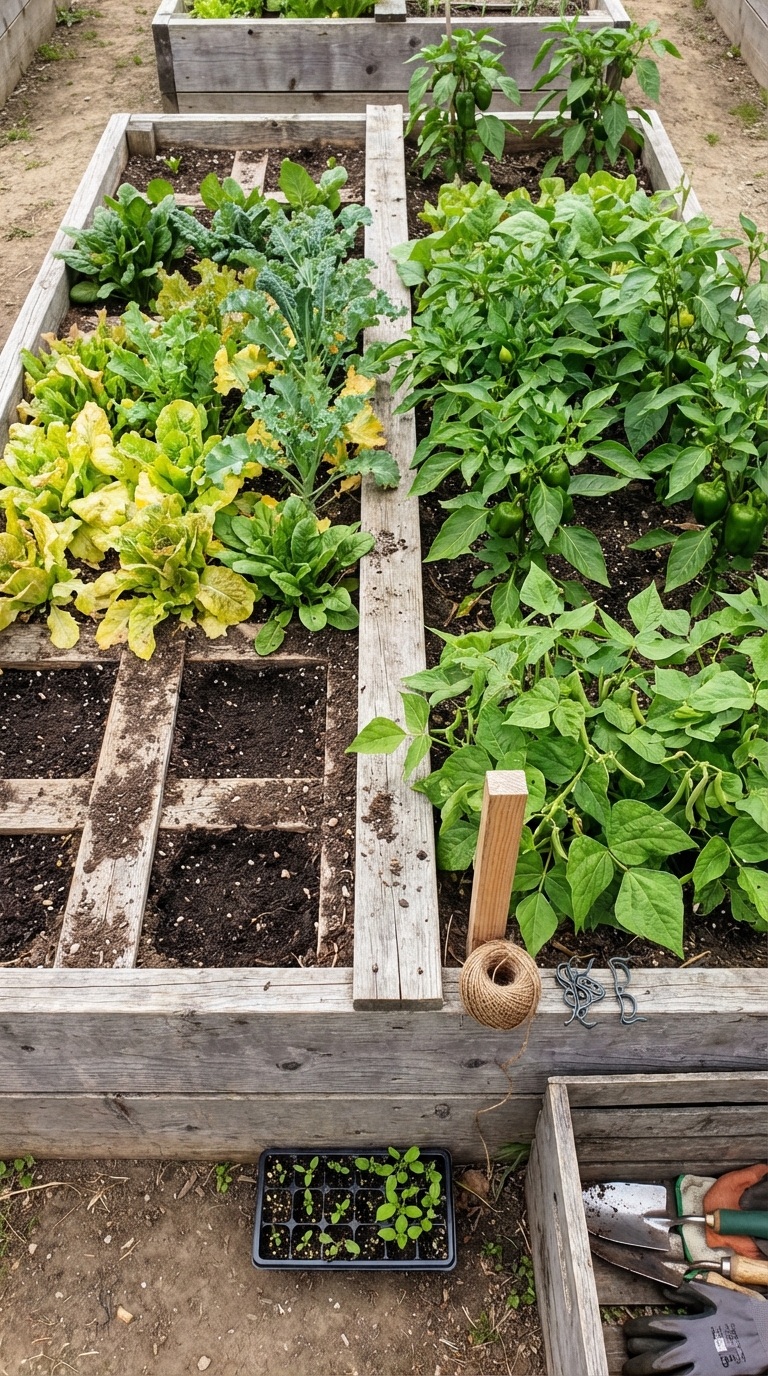
6) The 8×4 “Block Planting Classic”
Same footprint as a 4×8, just rotated, which matters for sun and access. Divide the bed into four blocks. Assign each block a category: leafy, roots, fruiting, herbs. Keep a trellis on the back edge of the fruiting block, and suddenly the bed holds much more than you’d expect.
Weeding becomes easier because each block has a clear boundary. Harvesting gets faster because you know where everything is.
7) The 2.5×8 “Fence-Line Producer”
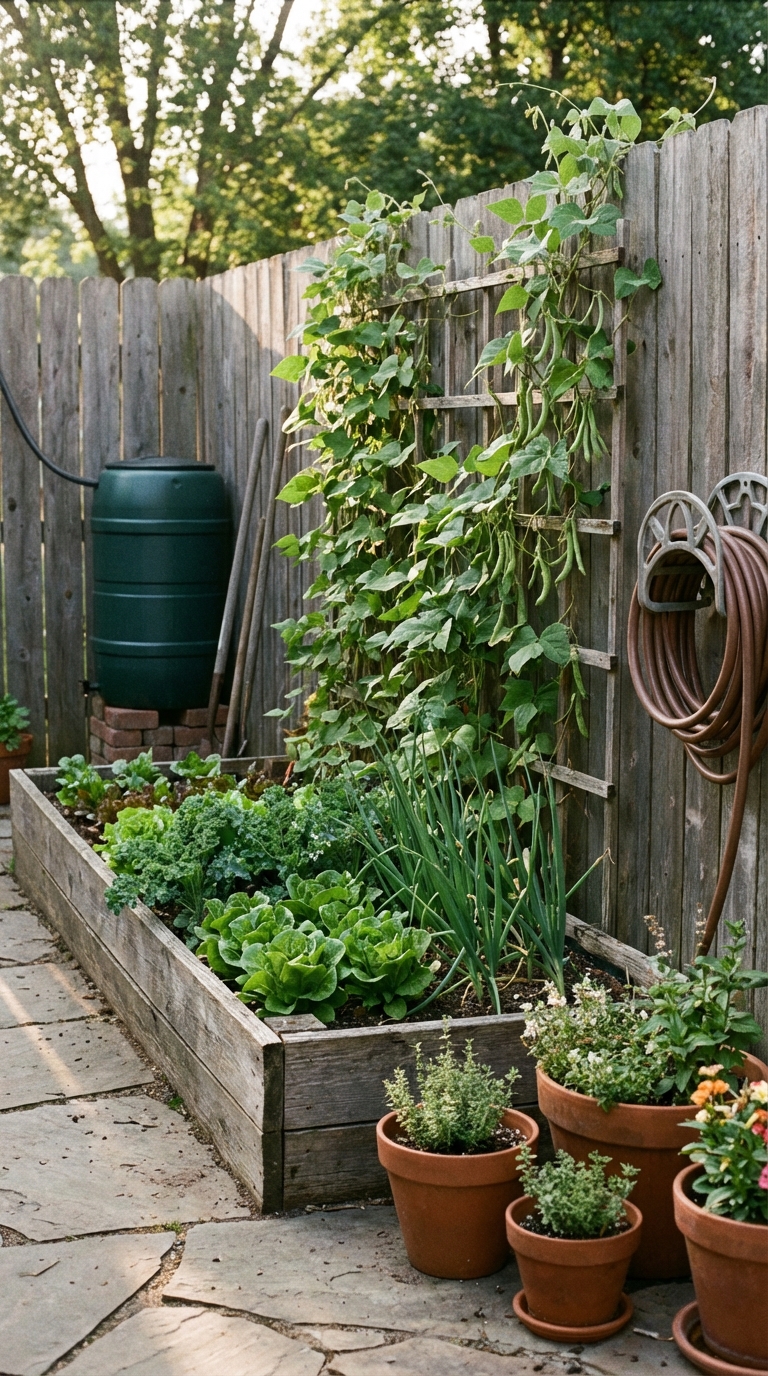
Many yards have a strip along a fence that stays unused. Keep the bed narrow, so every plant is reachable from the path side. Place the trellis against the fence, grow climbers upward, then fill the front with compact crops that don’t mind partial shade from taller growth.
A narrow bed also warms quickly, which helps early planting. Watering stays simple because the soil volume is smaller than a full-width raised bed.
8) Twin 4×4 Beds With a Practical Path
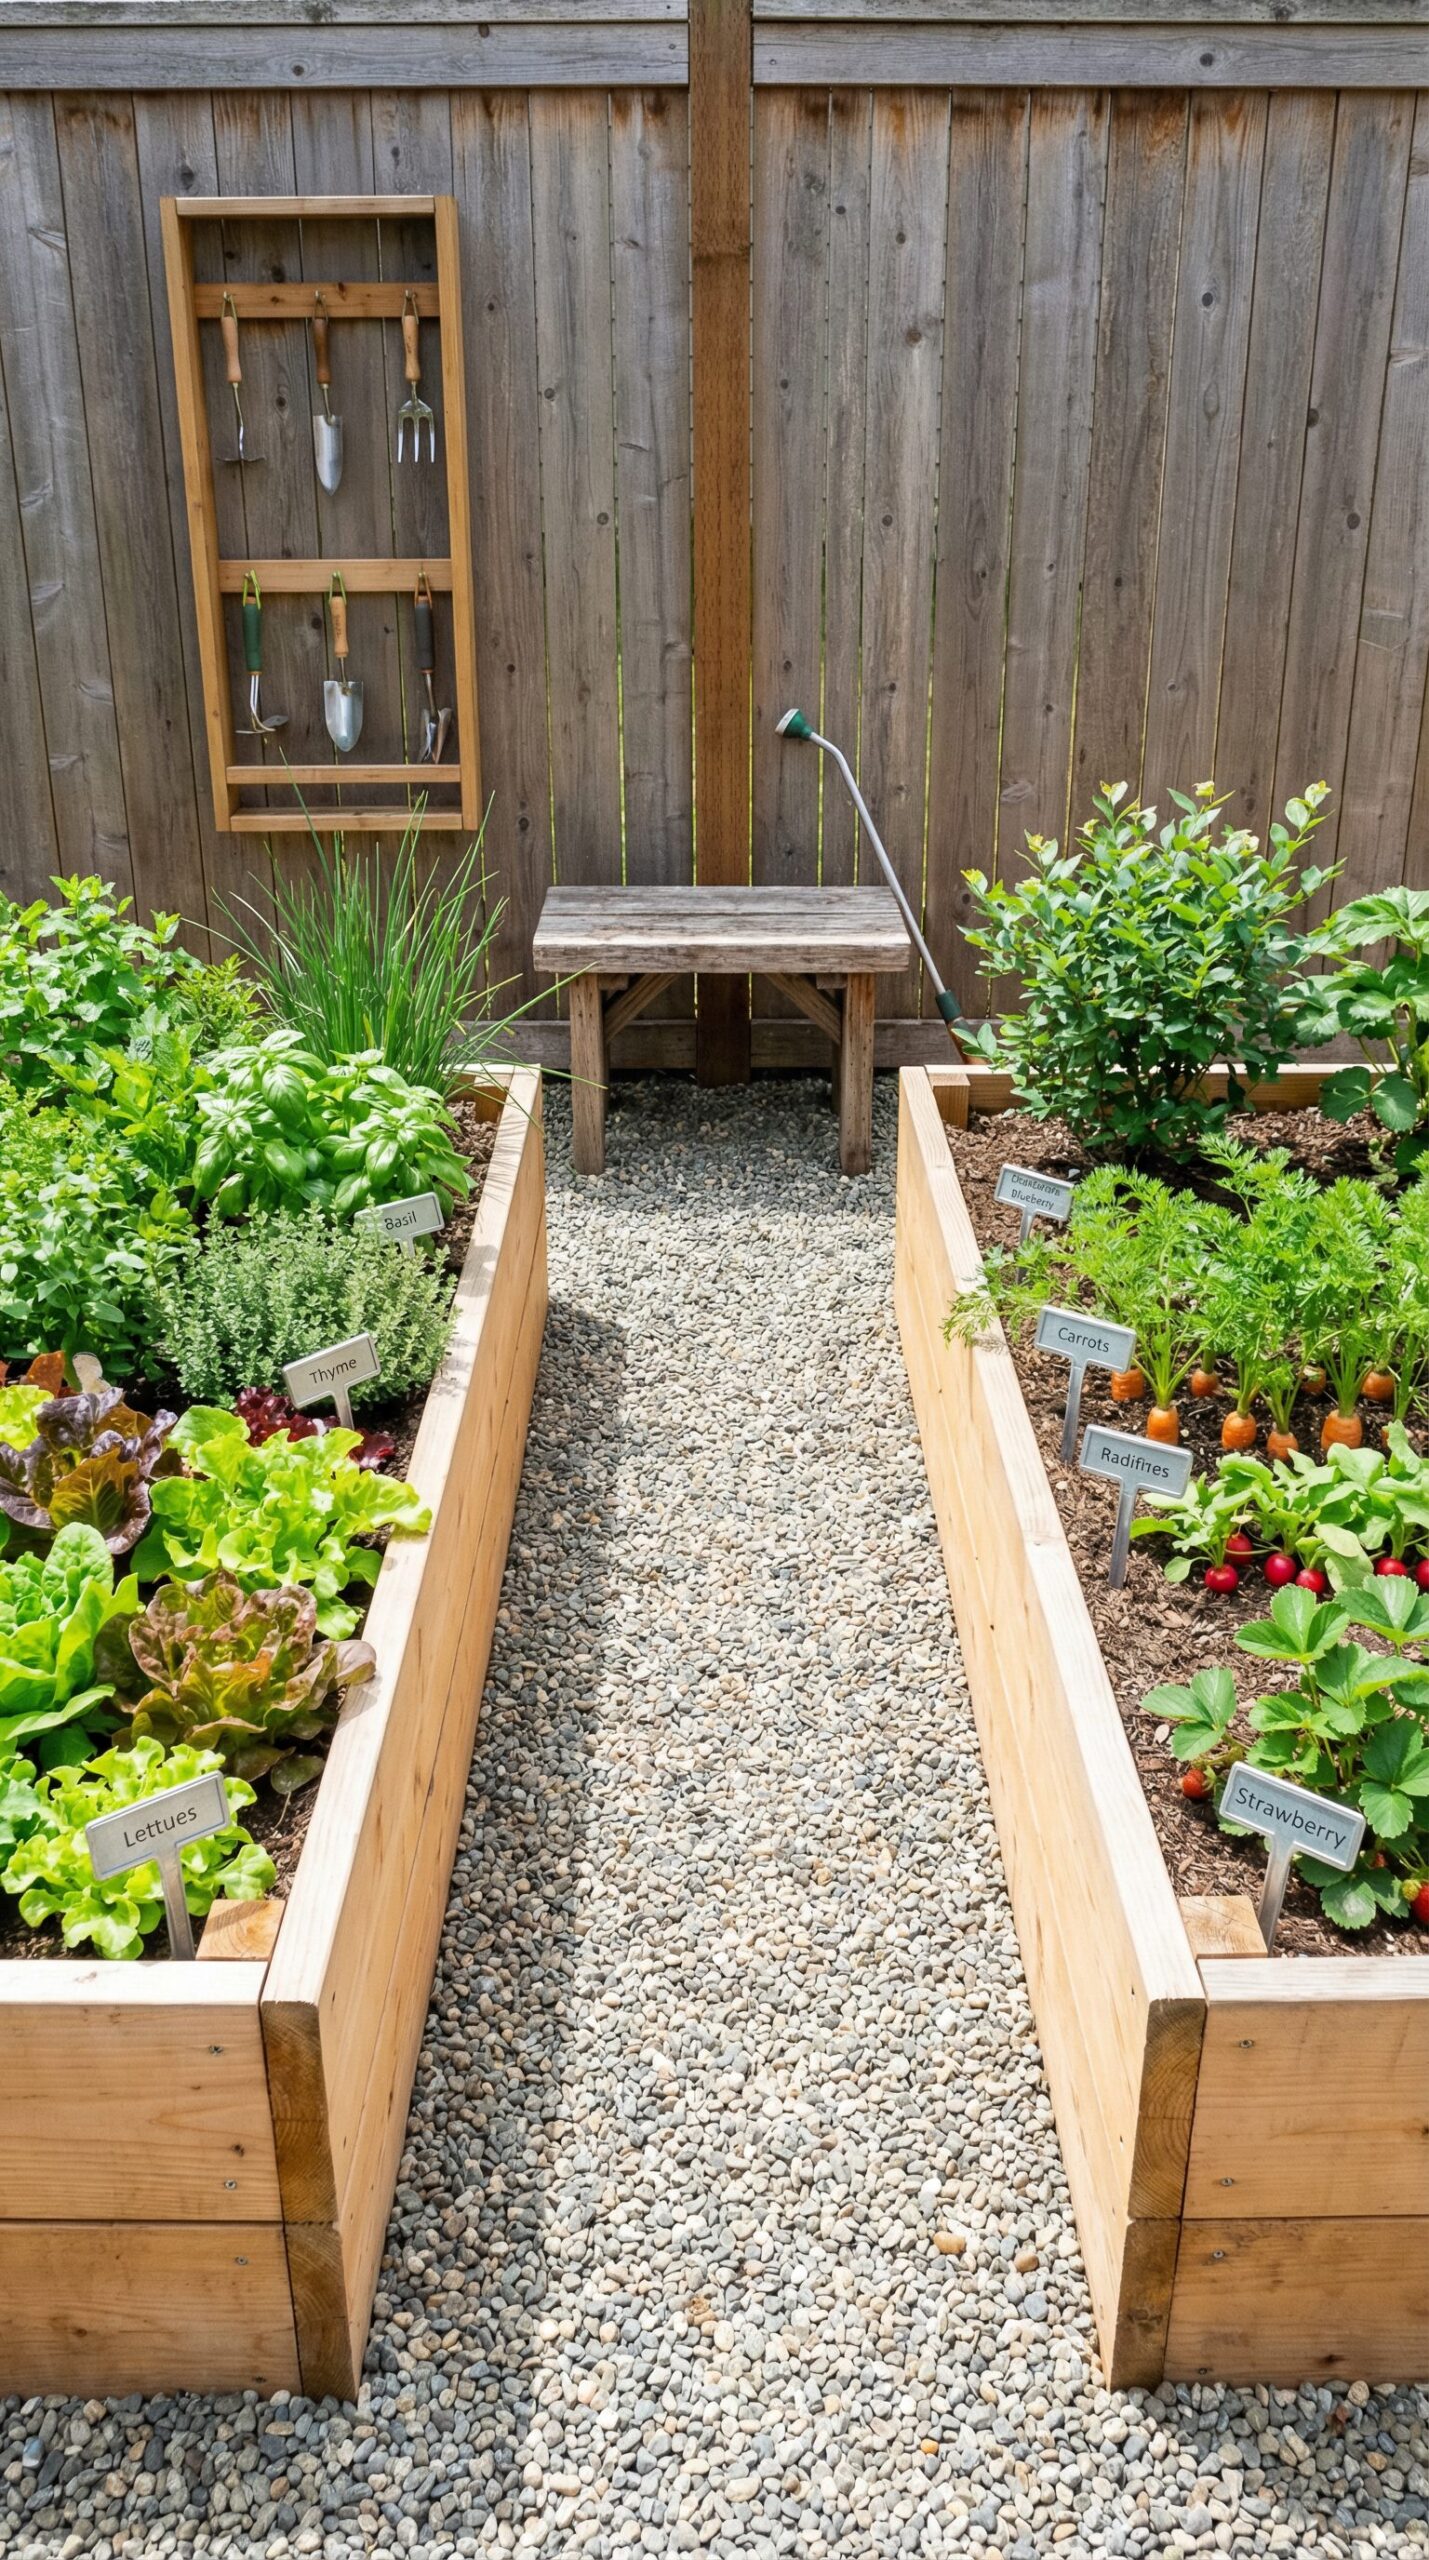
Two small beds separated by a comfortable path feel more usable than one giant bed. Put high-maintenance crops, salad greens, herbs, in the bed closest to your door or hose. Put lower-maintenance crops, roots and sturdier fruiting plants, in the second bed.
A path between beds becomes your working lane. Add mulch, keep it consistent, and gardening feels less like crouching in chaos.
9) Two Beds With a “Trellis Bridge”
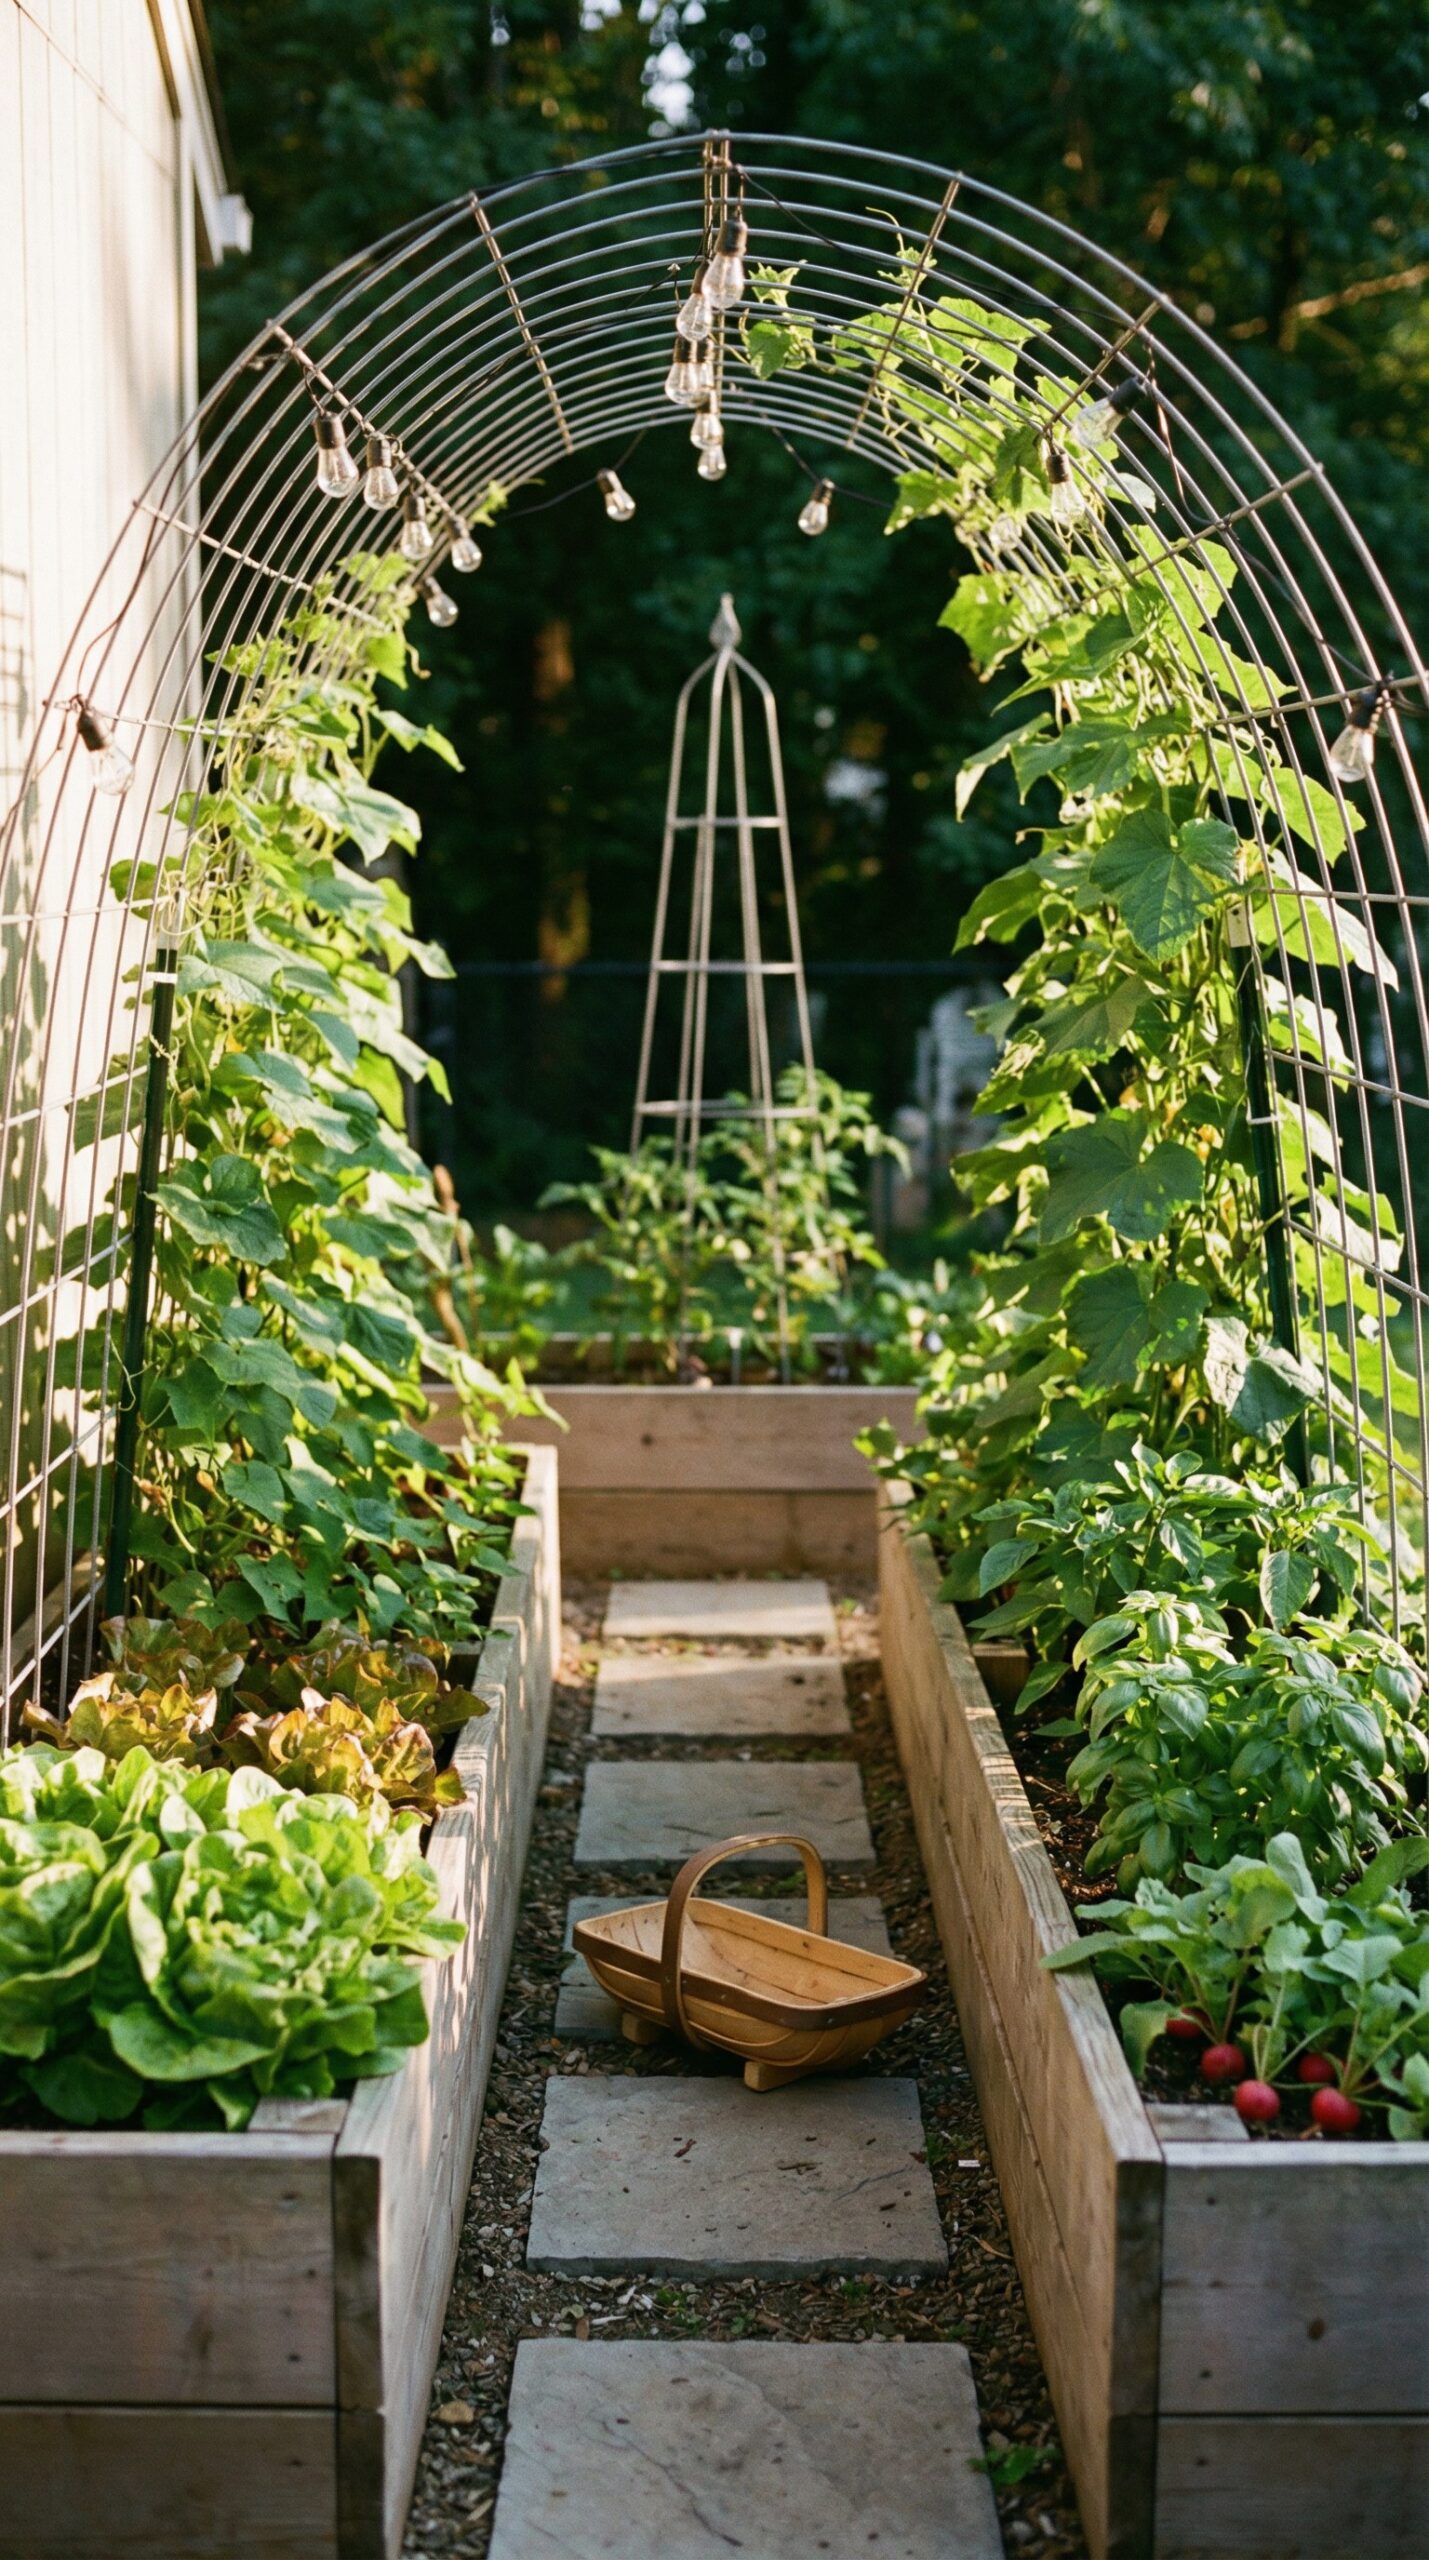
Set two beds parallel, place a trellis between them like an arch or wall, and you create a vertical garden without losing ground space. Train beans or cucumbers up the center, then plant lower crops on both sides. Harvest becomes a quick walk-through instead of a hunt.
Wind and airflow often improve in this layout, especially if the trellis runs with prevailing breezes. Plants dry faster after rain, which can help reduce leaf problems.
10) The “Three Bed Symmetry” Setup
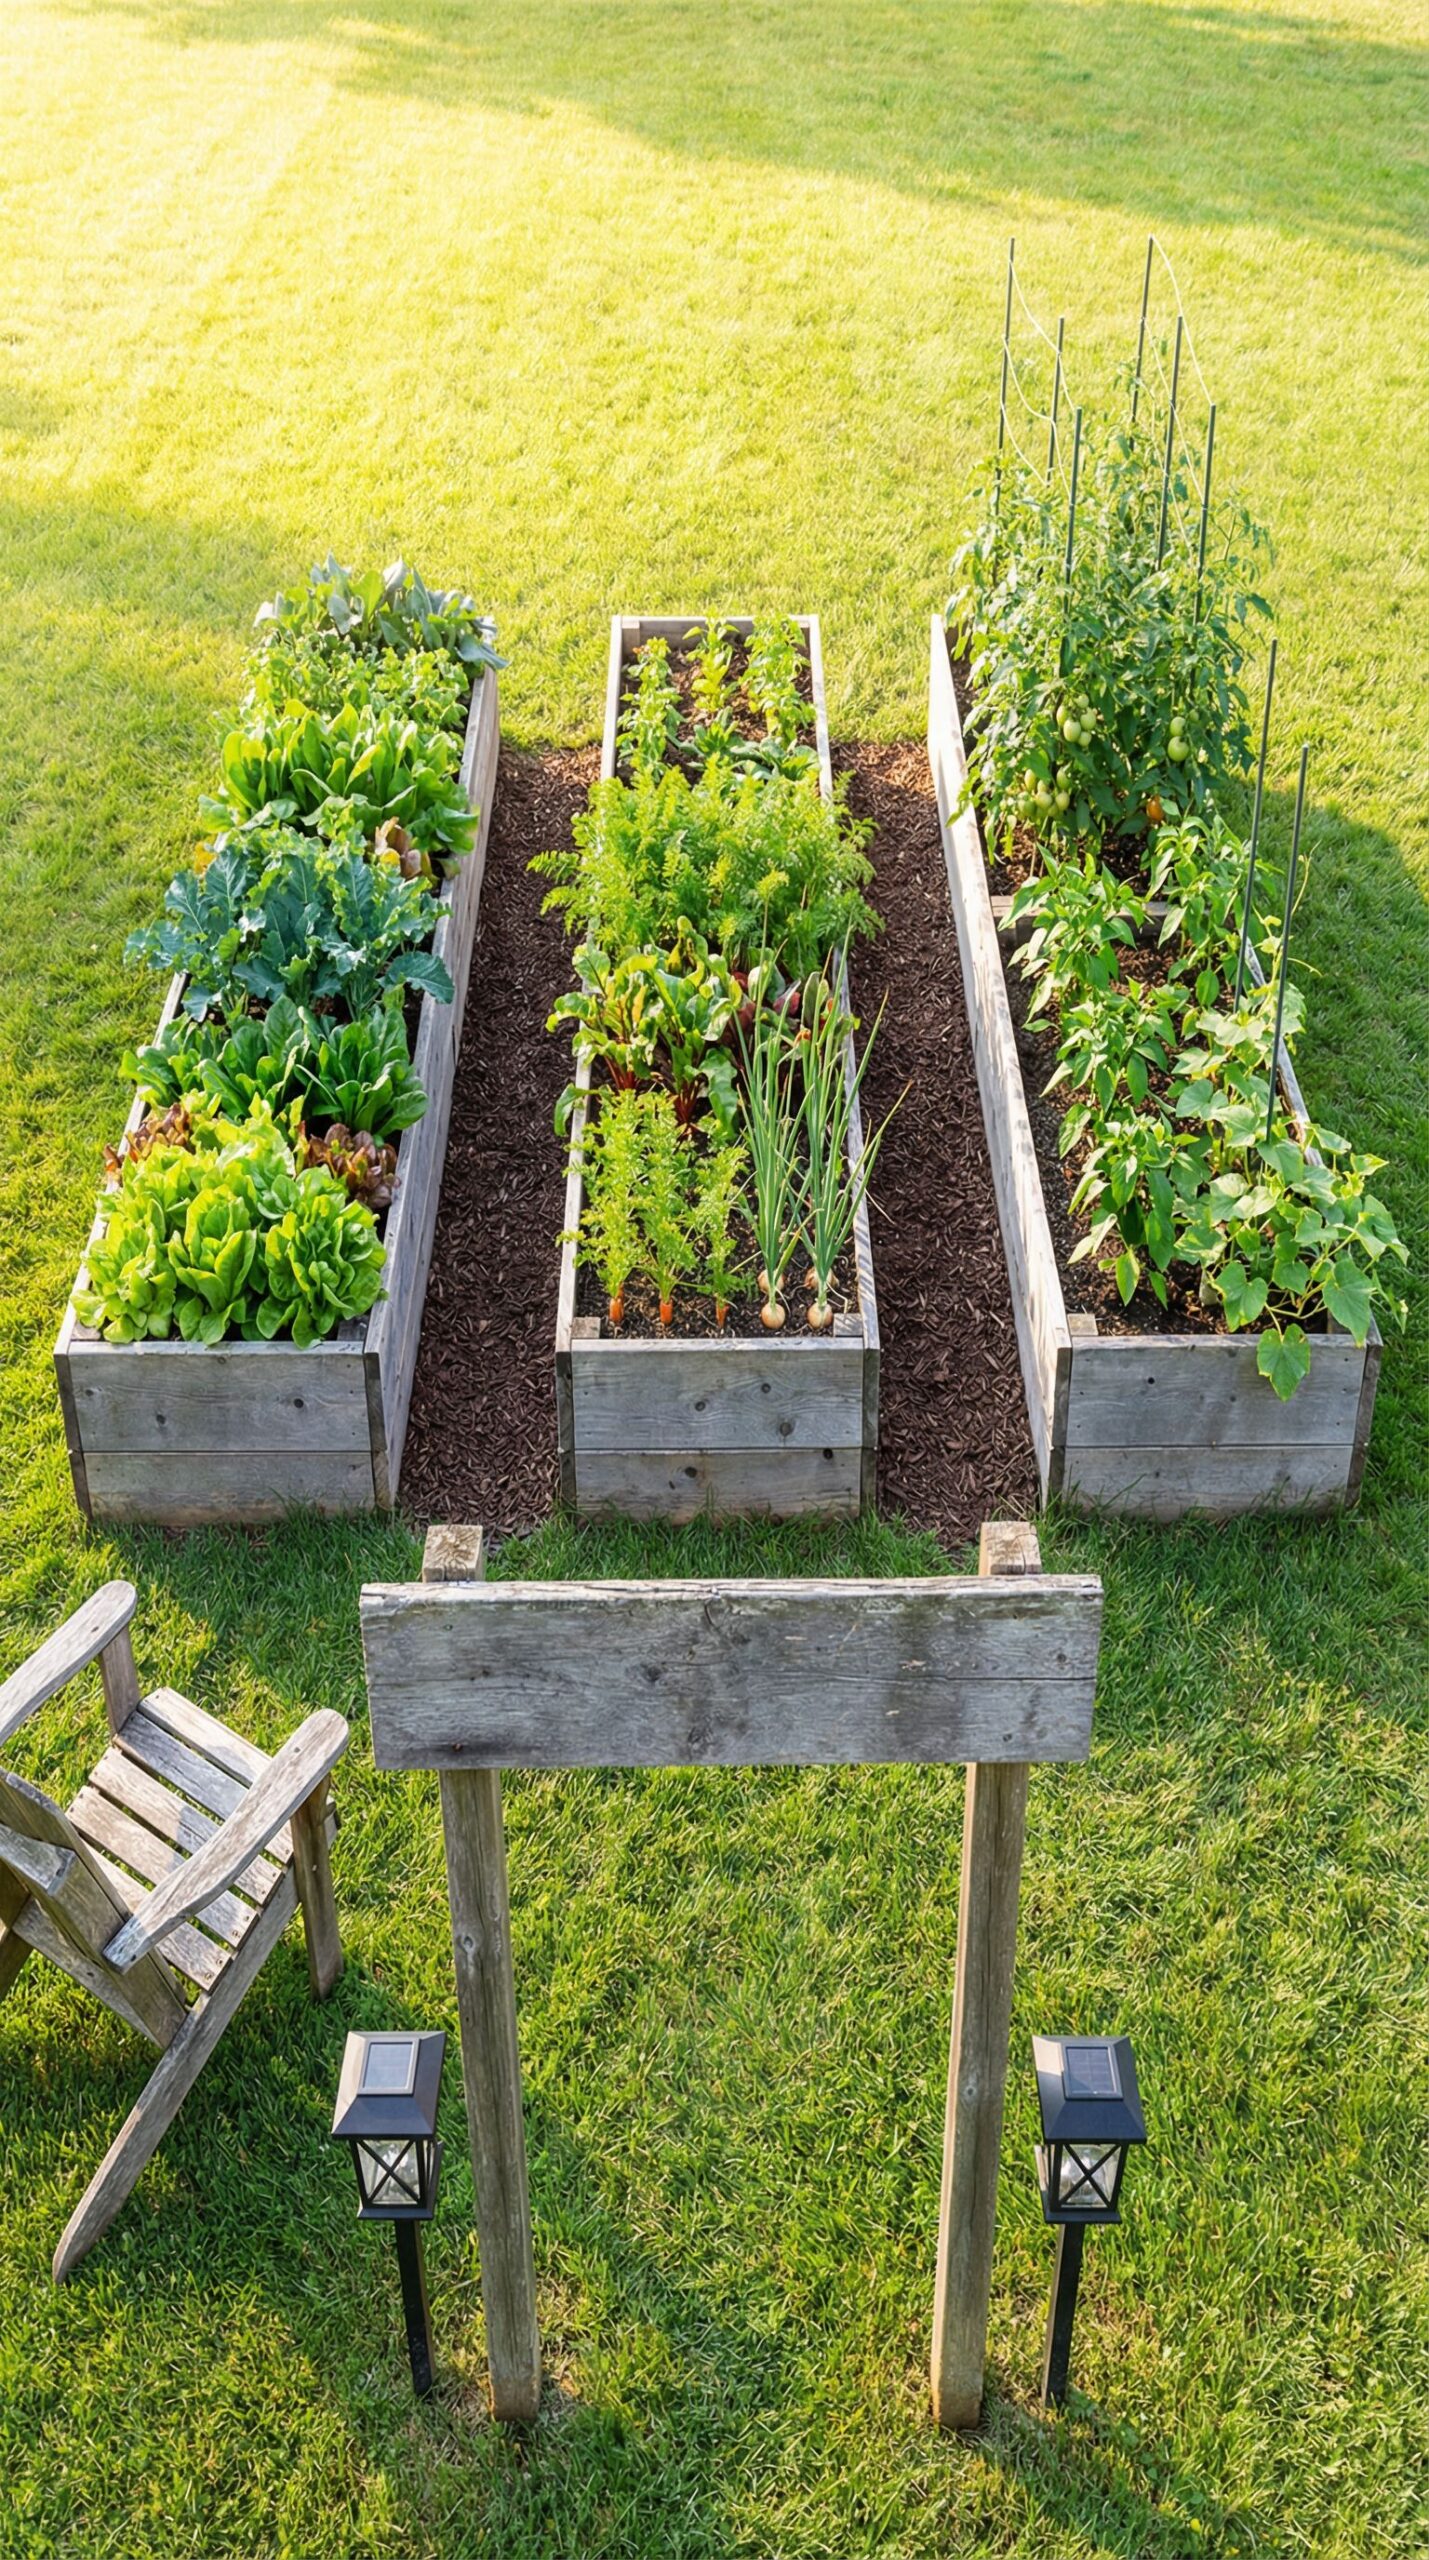
Three matching beds instantly look intentional. Arrange them in a row or a shallow U, depending on the yard. Assign each bed a theme: one for greens and herbs, one for roots, one for fruiting crops. Rotation gets easier because the categories move as units each season.
Photography-friendly gardens often keep repeating shapes, and repeating shapes also make planning easier. A magazine-worthy look ends up being practical, not just decorative.
11) The “Beds in a Line” Side-Yard Plan

Long, narrow spaces love repetition. Build two or three beds along the boundary, keep them the same width, then connect them with one consistent path. Put trellises at the back edges so vines climb up, not out into your walkway.
A lined layout works well beside a house where shade shifts through the day. Move sun-hungry crops to the sunniest bed, then plant greens in the bed that gets less light.
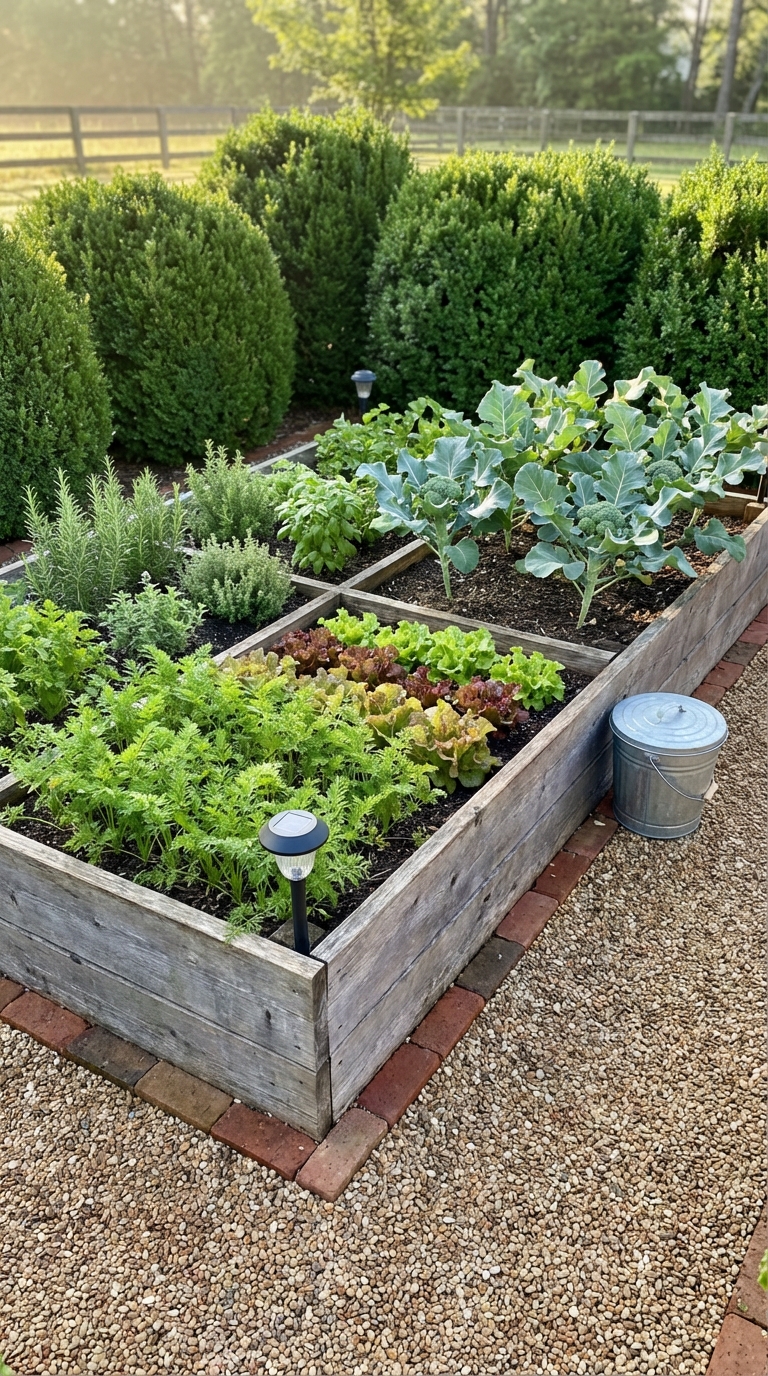
12) The 10×10 “Four-Square Garden Room”
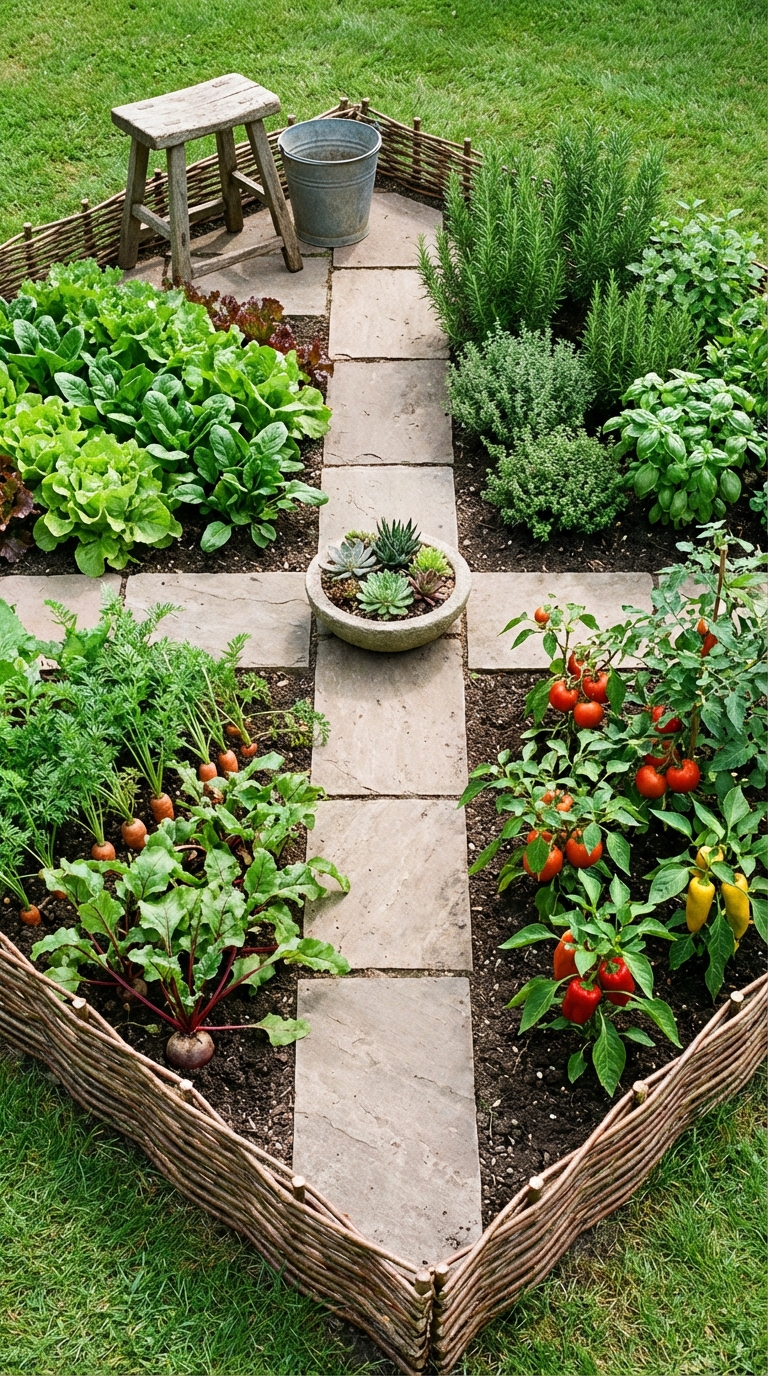
A 10×10 area can hold four small beds with a cross-shaped path through the middle. Each bed becomes a mini garden with its own role. One bed for leafy crops, one for roots, one for fruiting plants, one for experiments, flowers, or extra herbs.
A central path cross makes everything reachable, and it creates a pleasant “garden room” feel. Add a bucket, a stool, or a small compost container at the corner, and the space starts to feel like a place you want to visit.
13) The 10×20 “Zoned Harvest” Layout
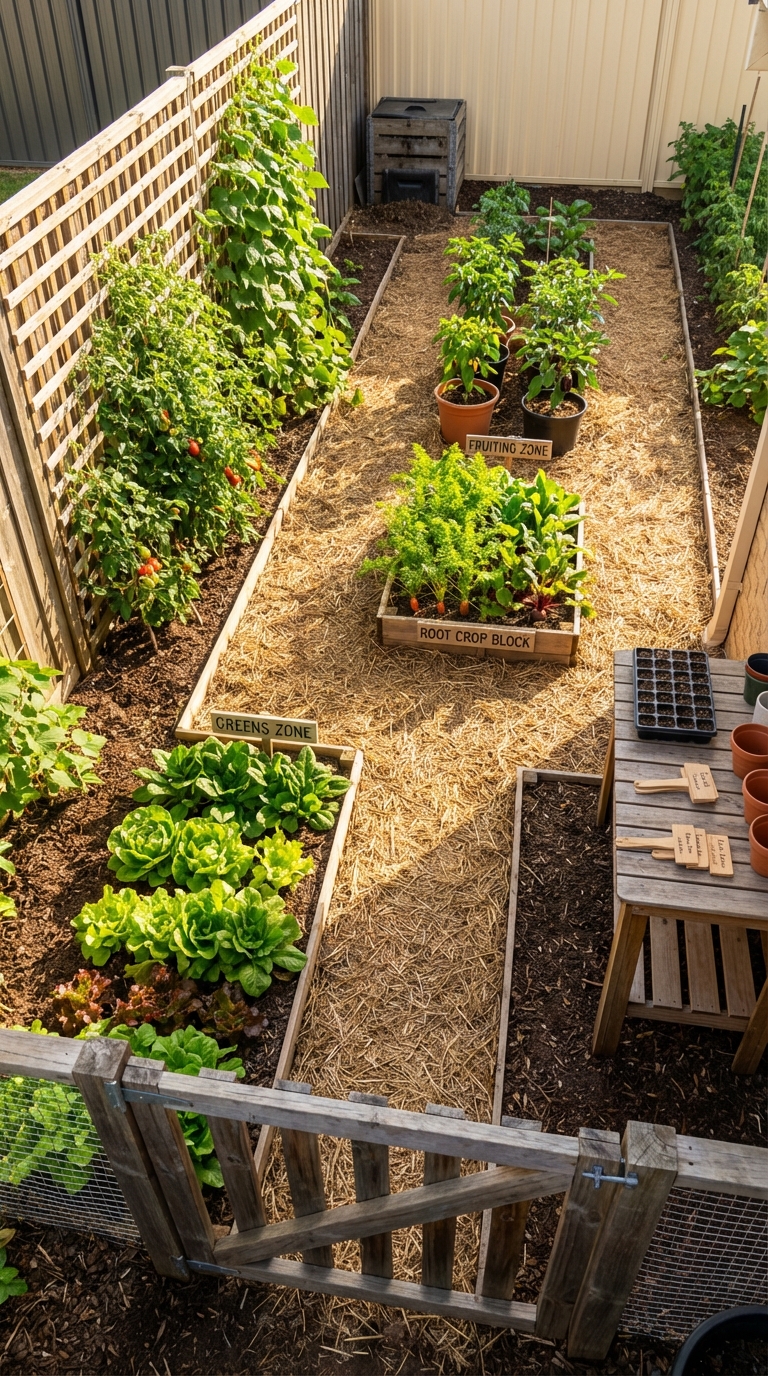
A larger compact plot can still be low effort if you zone it well. Place a trellis zone along one long side. Keep a greens zone near the most convenient access point, so harvesting stays easy. Put roots in a block that gets consistent sun, then use the remaining area for fruiting crops.
Zoning helps with watering, too. Greens often like steadier moisture, fruiting plants tolerate slight drying between watering. Separate zones let you tailor water without thinking too hard.
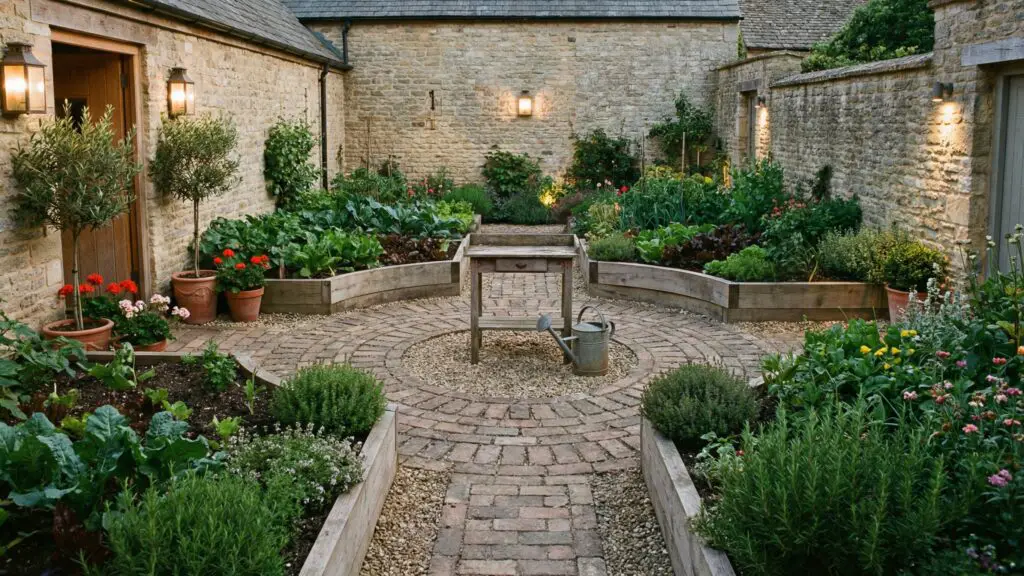
14) The Courtyard-Style Compact Garden
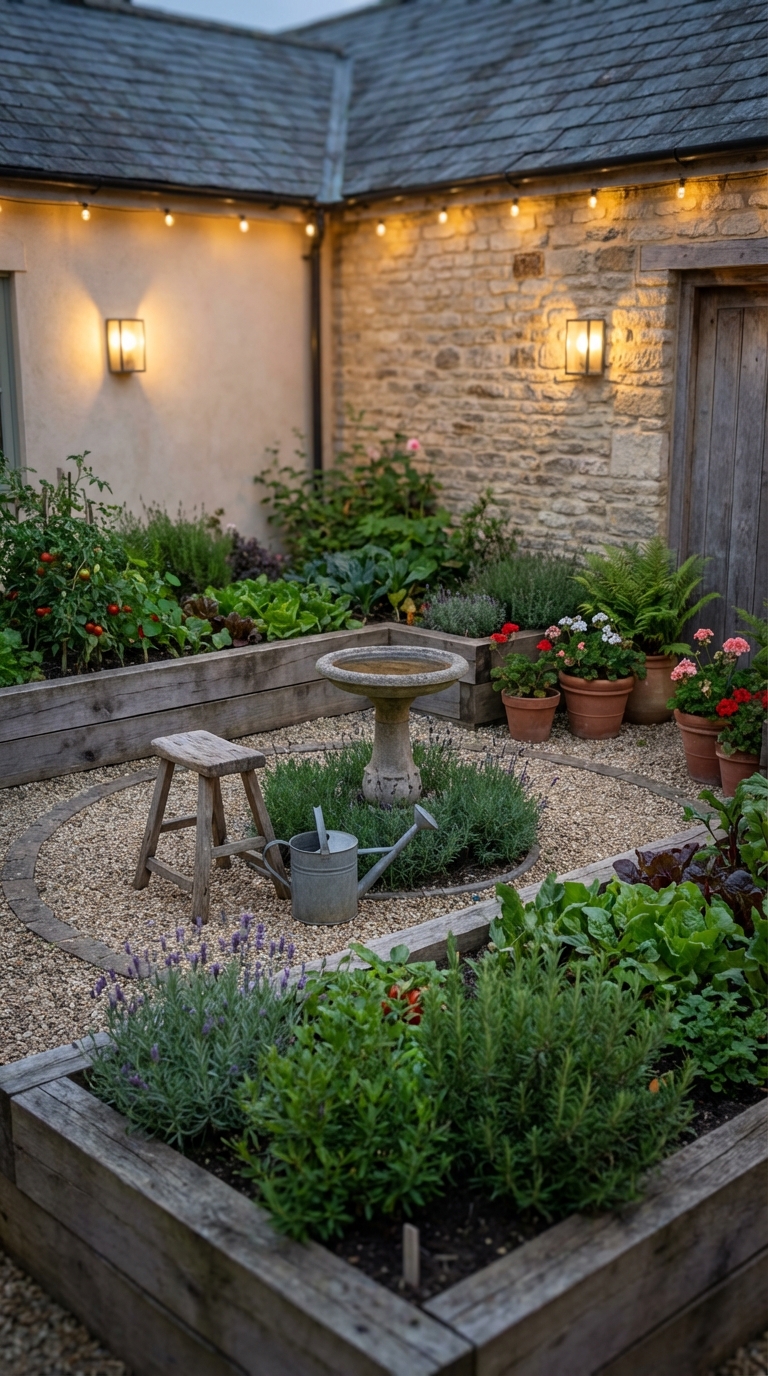
Arrange beds around a small center feature, a water barrel, a chair, a potting stool, or even a simple stepping-stone circle. Beds stay narrow and reachable, paths wrap around. Gardening becomes a loop, water, prune, harvest, done.
Courtyard layouts shine in small backyards and patios. A contained space also helps keep tools, watering cans, and harvest baskets close. Maintenance drops, because you spend less time walking back and forth.
15) The Corner L-Shape “Dead Space Fix”
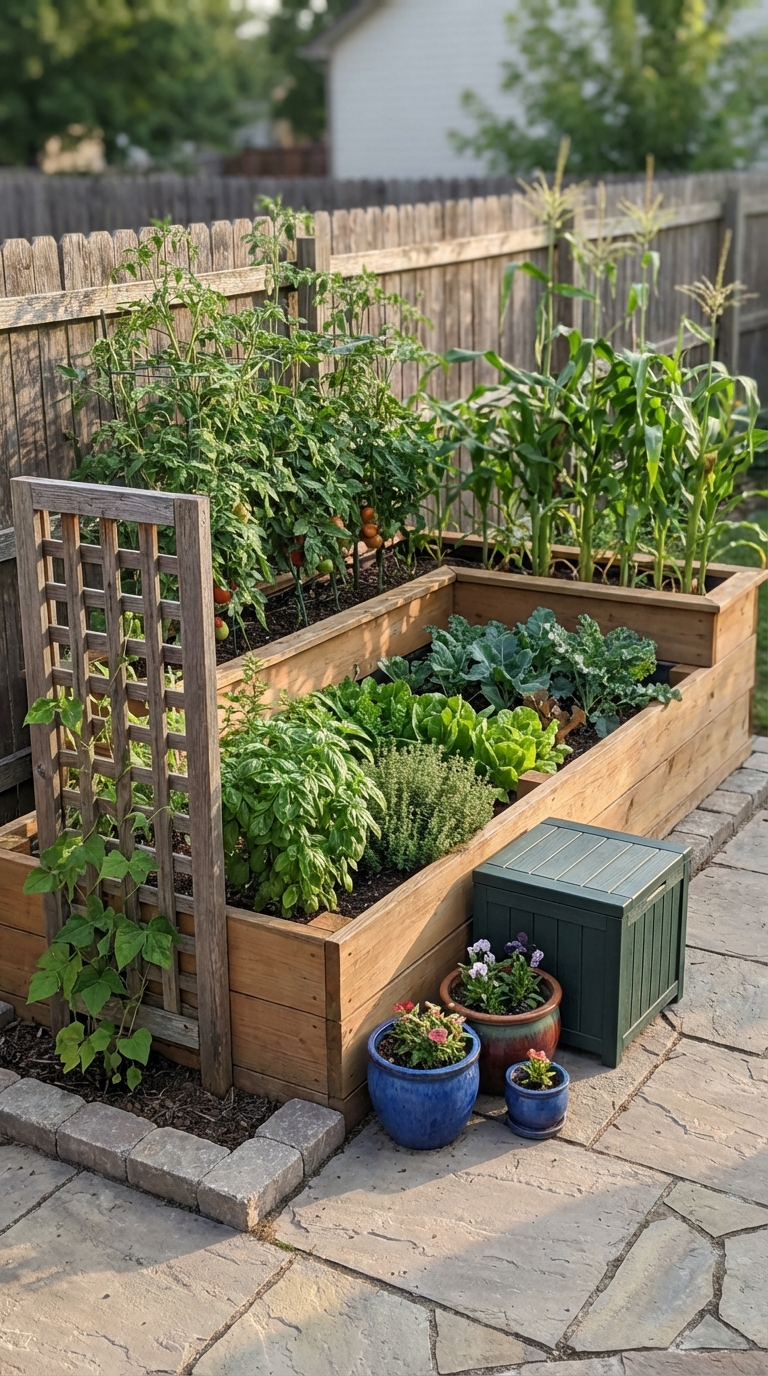
Corners often become dumping zones for pots and random stuff. An L-shaped bed turns that into food. Keep the arms narrow enough to reach, then place taller plants toward the outer edges. Use the inner corner for herbs or greens, where your hands can reach easily.
L shapes work especially well if the corner gets uneven sun. Put fruiting plants on the brighter arm, greens on the shadier arm, and the bed still earns its space.
How to choose crops that suit tiny plots
A small setup loves dependable crops. Leafy greens give quick wins. Herbs fill gaps and add flavor value far beyond their footprint. Compact roots feel satisfying because you can plant many in a small area.
Fruiting crops take more sun and time, so pick them strategically. One or two pepper plants can be more satisfying than a row of sprawling vines that swallow the bed. Climbers can work beautifully, yet they need a trellis and attention, otherwise they sprawl and shade everything.
For a calm first season, aim for a mix that includes:
- at least one quick crop, radish or baby greens
- at least one steady crop, chard or leaf lettuce
- at least one flavor crop, herbs
- one “feature” crop, pepper or eggplant, placed where it won’t dominate
The tiny-garden secret: vertical space
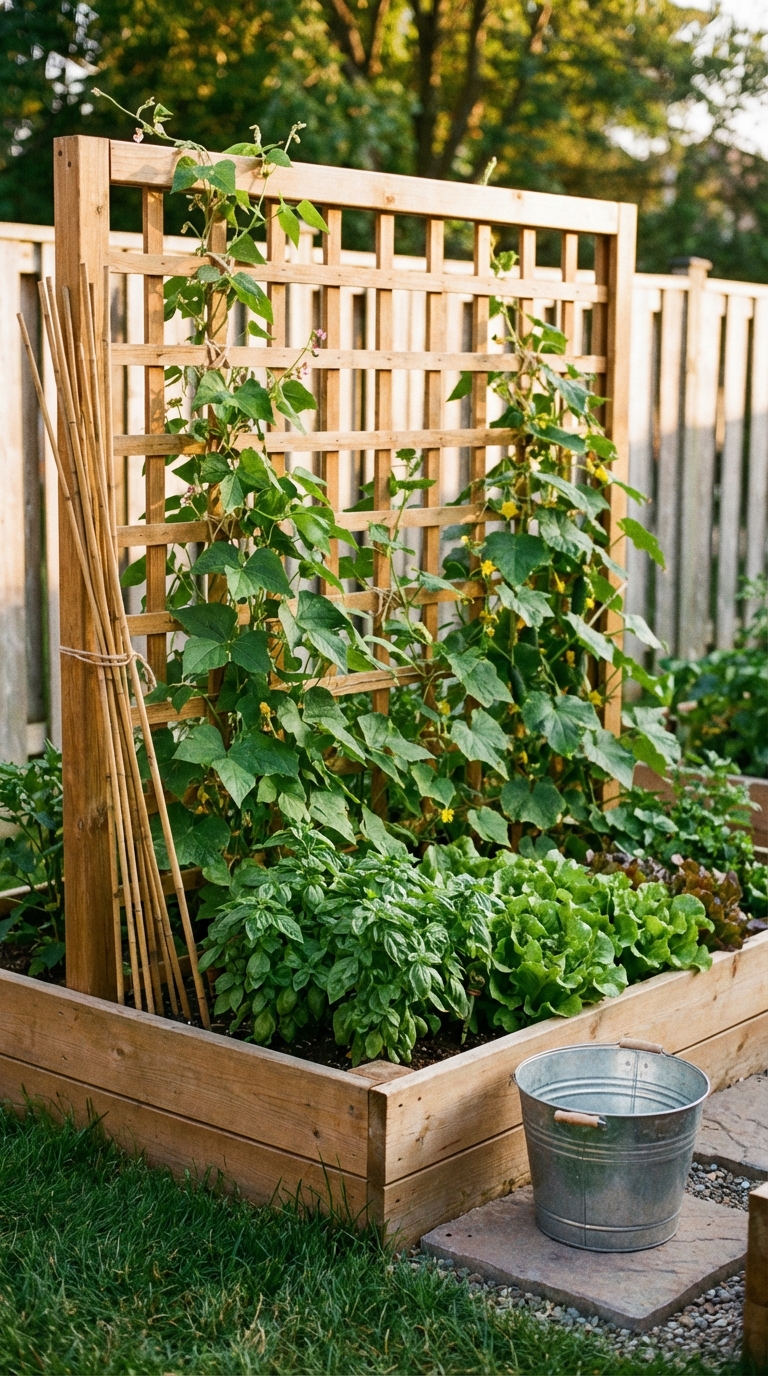
Vertical growing is the easiest way to stretch harvests without adding beds. A trellis lets you grow beans, peas, cucumbers, and some squash varieties upward. Leaves get better airflow, fruits stay cleaner, and you gain planting room at the base for smaller crops.
Keep it simple. One sturdy trellis on the back side of a bed often beats three wobbly supports scattered around. Place the trellis where it won’t cast long shade across your shortest plants, usually on the north side if you’re in the northern hemisphere, or along the edge that gets the least critical sun.
Succession planting without the spreadsheet
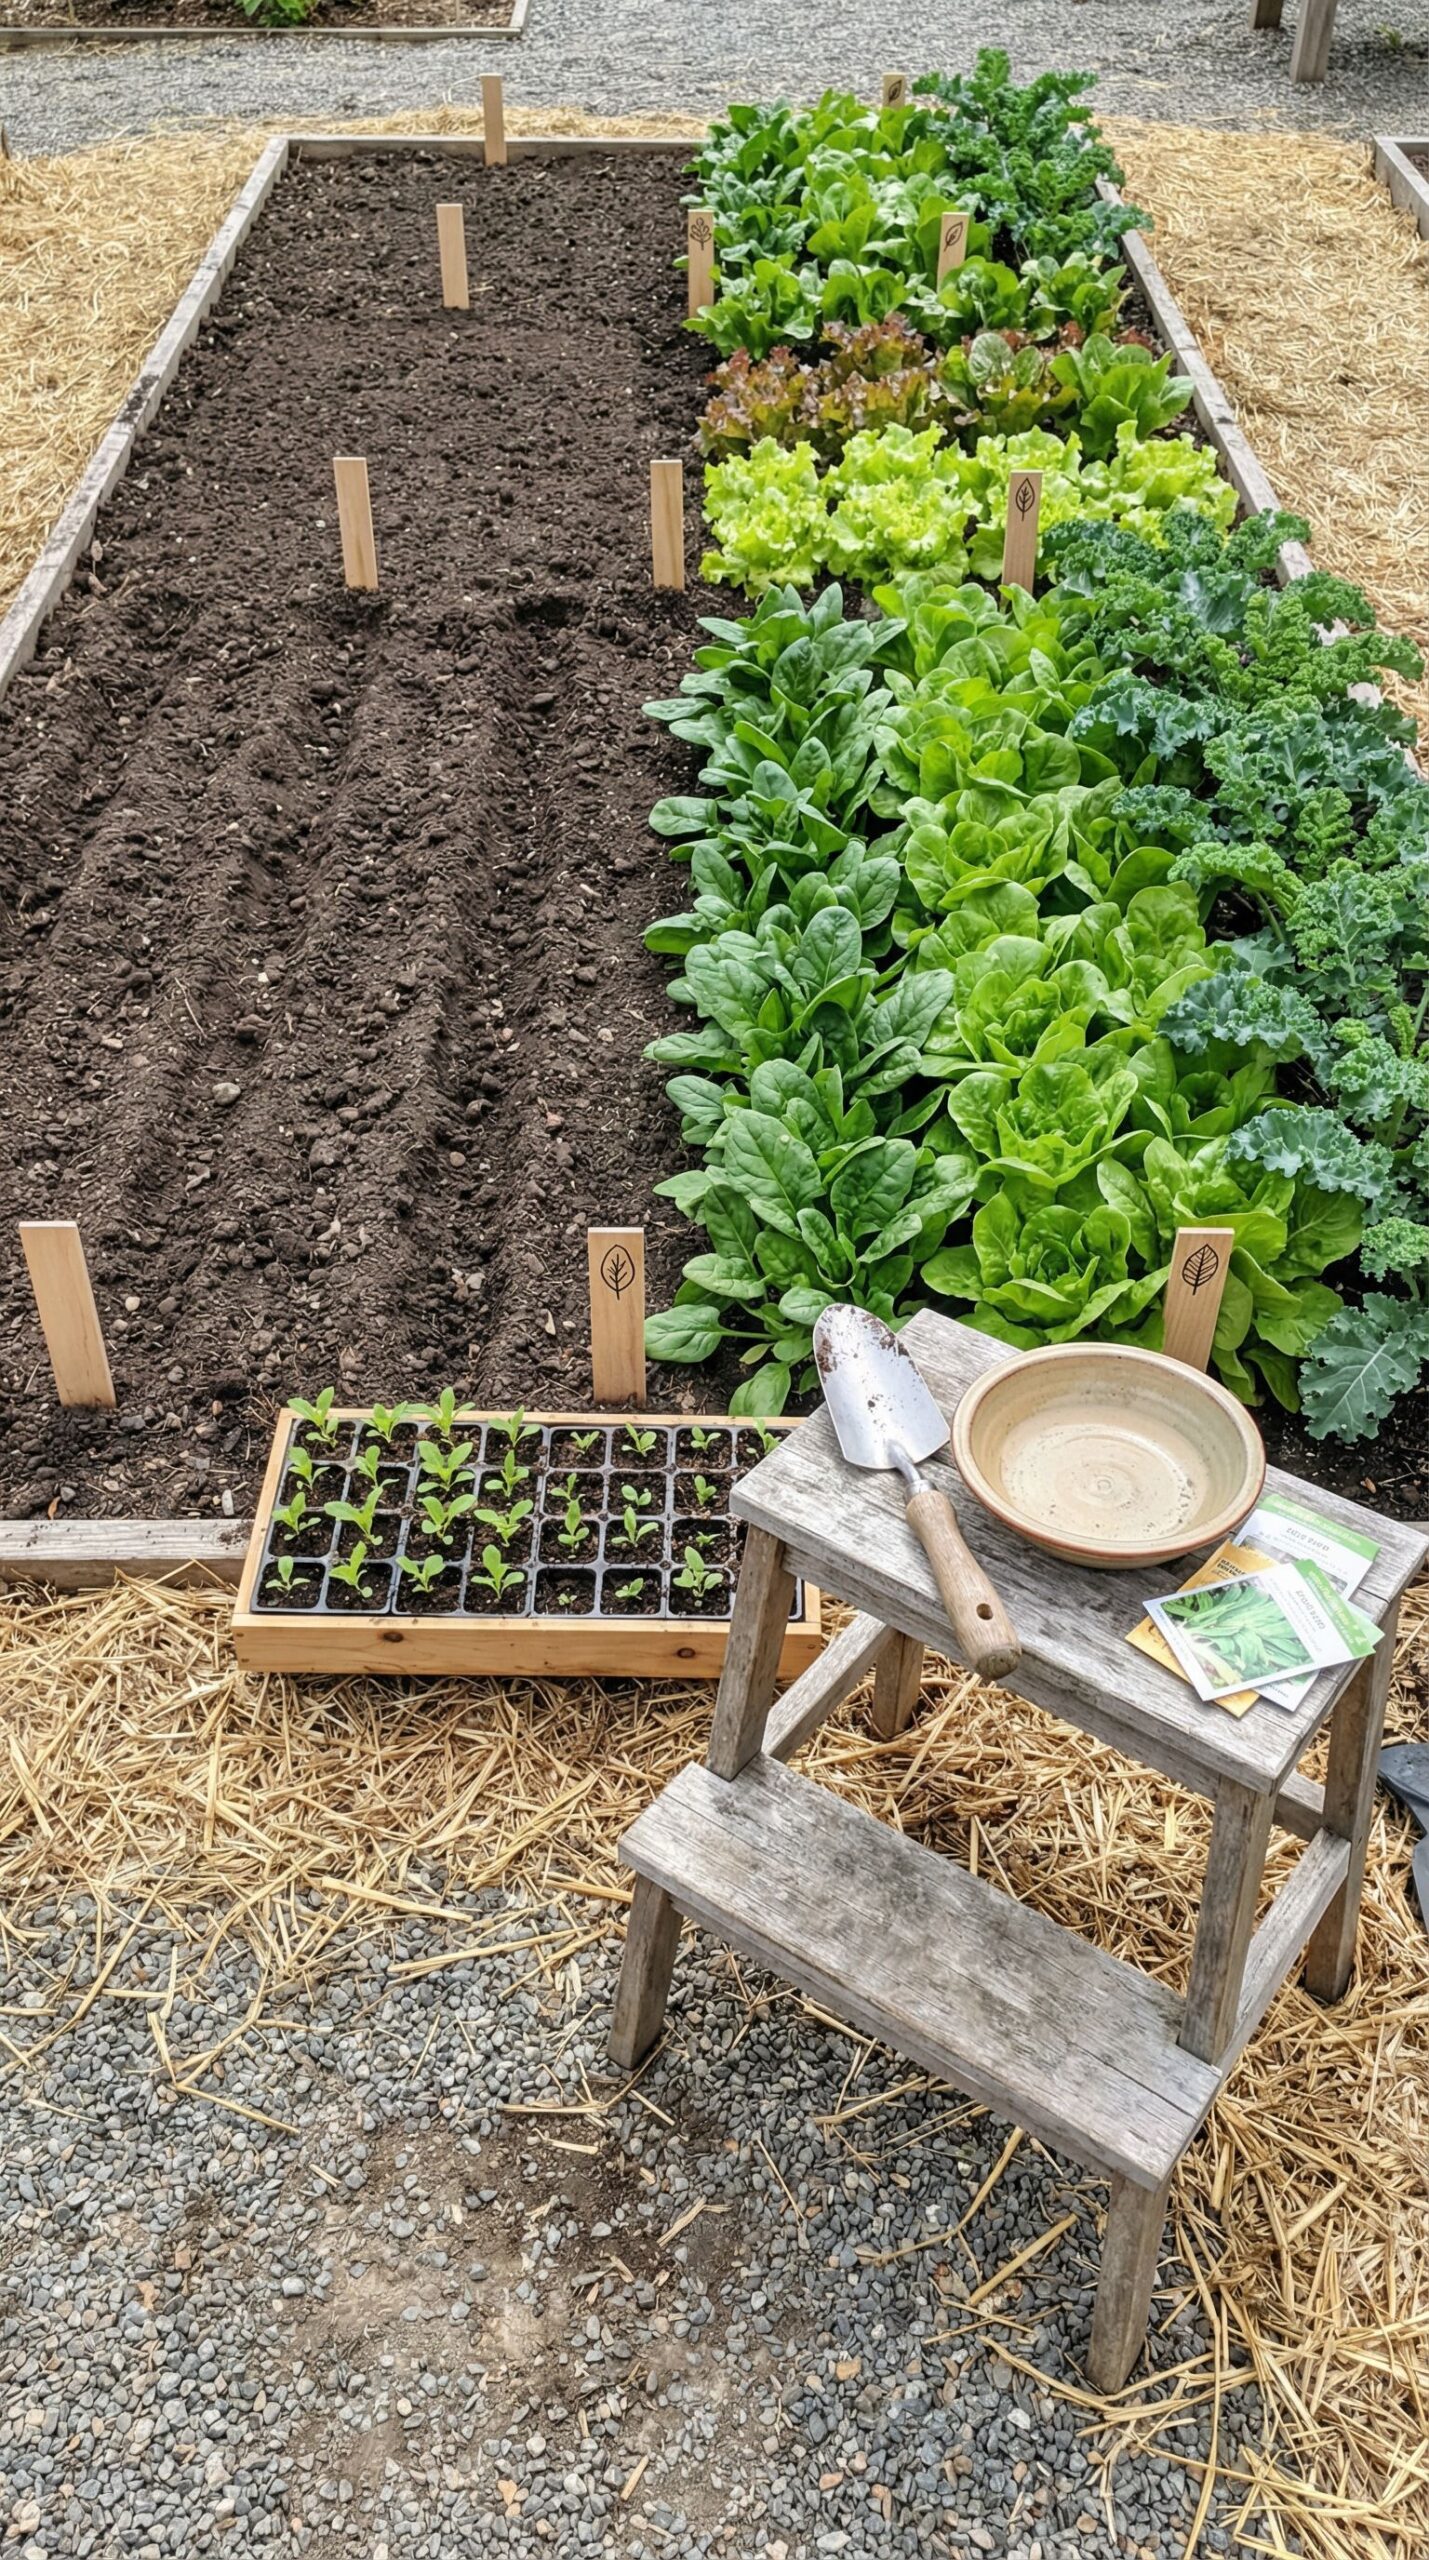
A small garden becomes productive through repeats. After a fast crop finishes, plant something else immediately. Radishes come out, basil goes in. Early greens bolt, bush beans replace them. Garlic or onions mature, that gap becomes a late-season greens patch.
Keep a tiny “next up” list in your phone. Two to four standby crops are enough. A short list prevents decision fatigue, and it keeps the bed from slipping into empty patches.
A practical rhythm looks like:
- early season: greens and quick roots
- mid season: fruiting crops and climbers
- late season: heat-tolerant greens, herbs, quick roots again if temperatures ease
Watering and soil: the part nobody pins, yet it matters
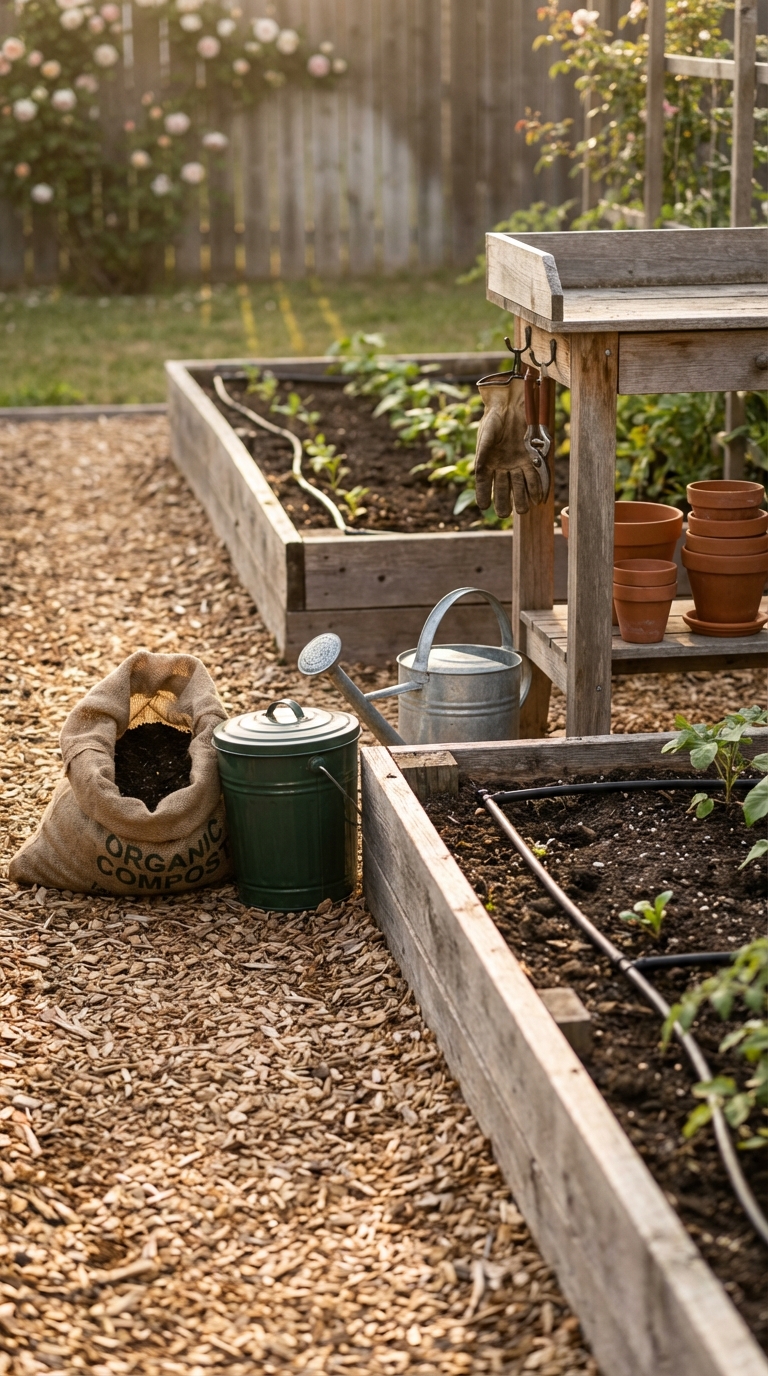
Small beds dry faster than in-ground plots, especially raised beds and containers. Consistent moisture matters most during germination and early growth. Water deeply, then let the surface dry slightly between waterings, aiming for a steady pattern rather than constant dampness.
Mulch makes tiny gardens easier. A thin layer of straw, chopped leaves, or similar organic mulch reduces evaporation and softens splashes during heavy rain. Soil stays more stable, weeds drop, and you spend more time harvesting.
Compost helps in small spaces because you’re asking a lot from limited soil. A top-dress each season, even a light one, keeps fertility moving in the right direction.
Common small-garden mistakes, and easy fixes
Beds too wide. Reaching becomes annoying, then stepping into the bed happens, then soil compacts. Fix it by narrowing the bed or adding a stepping stone only where needed for harvest, not for routine care.
Too many big plants. A few sprawling crops can crowd out everything else. Fix it by choosing one big plant per bed section, then supporting it with trellises or pruning.
No clear path. Bare soil paths become muddy, then gardening becomes unpleasant. Fix it with mulch, cardboard topped with wood chips, or even stepping stones, anything that makes you want to walk there.
Planting everything at once. Harvest gluts feel exciting for two days, then feel like stress. Fix it by staggering sowings, especially for greens and roots.
A warm-climate note for small spaces
Hot, humid weather can turn a dense bed into a jungle fast. Wider spacing helps airflow. Trellises help even more. Morning sun with afternoon shade can be a gift for leafy crops in very warm months, while fruiting crops often need the brightest spot you have to set flowers and mature well.
Heavy rain can flatten seedlings, so start some plants in small containers, then transplant into the bed once stems are sturdy. A light mulch also reduces soil splash, which keeps leaves cleaner.
Bringing it all together
A Small Vegetable Garden becomes easier the moment the space gets a clear plan. Pick a footprint that matches your yard, keep beds reachable, keep paths comfortable, then use a layout style that suits your personality. Grids calm the mind. Blocks reduce effort. Trellises multiply what you can grow.
One good season teaches more than a dozen pinned ideas. Choose a plan from the fifteen, plant it, observe what thrives, then tweak one thing next season. Tiny gardens reward that steady learning, and they keep paying you back in fresh food long after the novelty fades.