Spring Window Boxes That Look Full From Day One
Spring window boxes deliver the quickest “home looks cared for” change you can make while the rest of the garden is still stretching awake. A bright strip of flowers at eye level reads from the street, lifts a plain façade, and makes even a small home feel welcoming. Best part, you don’t need rare plants or fancy gear, you need a solid box, good drainage, and a planting plan that suits early-season weather.

A spring display also rewards you fast. Cool days help blooms last, mild sun keeps color crisp, and the light shifts of the season make a window box sparkle at different times of day. Build it right once, then treat it like a seasonal frame you can refresh through late spring, summer, and fall.
Start with the box, not the plants

A window box acts like a shallow garden bed, except it dries faster, heats faster, and has no safety net if water can’t escape. Begin by choosing a box with enough depth to hold moisture without turning swampy. Deeper boxes buffer temperature swings, they also give roots room to branch out, which keeps plants steadier during windy weeks.
Aim for sturdy materials and reliable mounting hardware. Soil and water add surprising weight, so brackets should feel overbuilt rather than “just enough.” If you rent, or if drilling is a headache, consider a box that sits on a wide sill, or a railing-style planter that locks securely.
A quick sizing guide
- Length: match the window width, or go slightly wider for a more intentional look
- Depth: deeper is kinder to plants, especially in breezy spots
- Drainage: holes are non-negotiable, more than one is better
If you fall in love with a box that has no holes, treat it as a decorative sleeve. Set a smaller plastic liner pot inside it, and let that inner container handle drainage.
Light and exposure decide your plant list
Before you buy a single flower, take two minutes to “read” the site. Morning sun is gentle, afternoon sun can be intense, even in spring. Wind matters as much as light, because it pulls moisture from leaves and soil, making a box look tired in a hurry.
Stand by the window at three times of day, morning, midday, and late afternoon. Notice how long direct sun hits the box, and whether the area sits under an eave that blocks rainfall. A box under a roof overhang often needs more hand watering than you expect.
Match your planting to the window’s personality
- Bright, sunny exposure: pick tougher bloomers, plan on more watering
- Part shade: lean into flowers that stay fresh in cooler light
- Shady sites: choose foliage-driven combos, use blooms as accents
Spring weather can swing wildly, so favor plants that tolerate cool nights and variable days. Early-season annuals tend to hold up better than warm-weather favorites that sulk in chilly spells.
Soil and drainage, the foundation of a long-lasting look
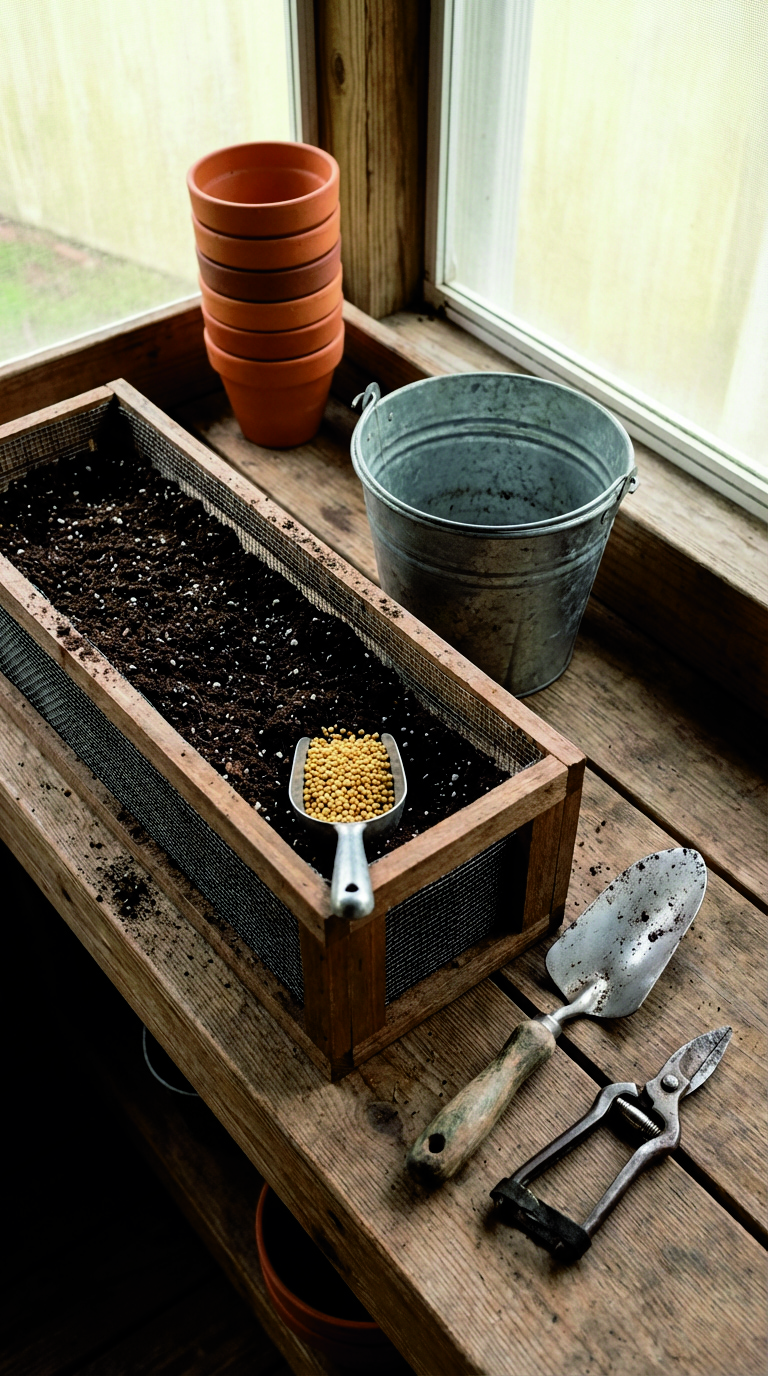
A window box should drain freely, hold moisture evenly, and stay airy around the roots. Regular garden soil usually fails on all three. It compacts in containers, drains unevenly, and can become heavy enough to stress brackets.
Use a high-quality potting mix labeled for containers. It stays lighter, drains better, and resists compaction longer. If your box sits in strong sun or wind, blend in a small amount of moisture-holding component suggested for containers, or choose a potting mix designed for planters.
Skip the old habit of adding gravel at the bottom “for drainage.” In a container, a coarse layer can keep water perched higher in the soil, leaving roots sitting in a wet zone. Drainage comes from holes and a good mix, not from a rock layer.
A simple setup that works
- Cover holes with mesh or a scrap of breathable fabric to keep soil in
- Fill with potting mix, leave a little space at the top for watering
- Water the empty mix once, let it settle, top up as needed
A slow-release fertilizer mixed into the potting soil can help, especially if you want the box to look strong for weeks with minimal fuss. Keep the dose modest, spring plants usually prefer steady nutrition over heavy feeding.
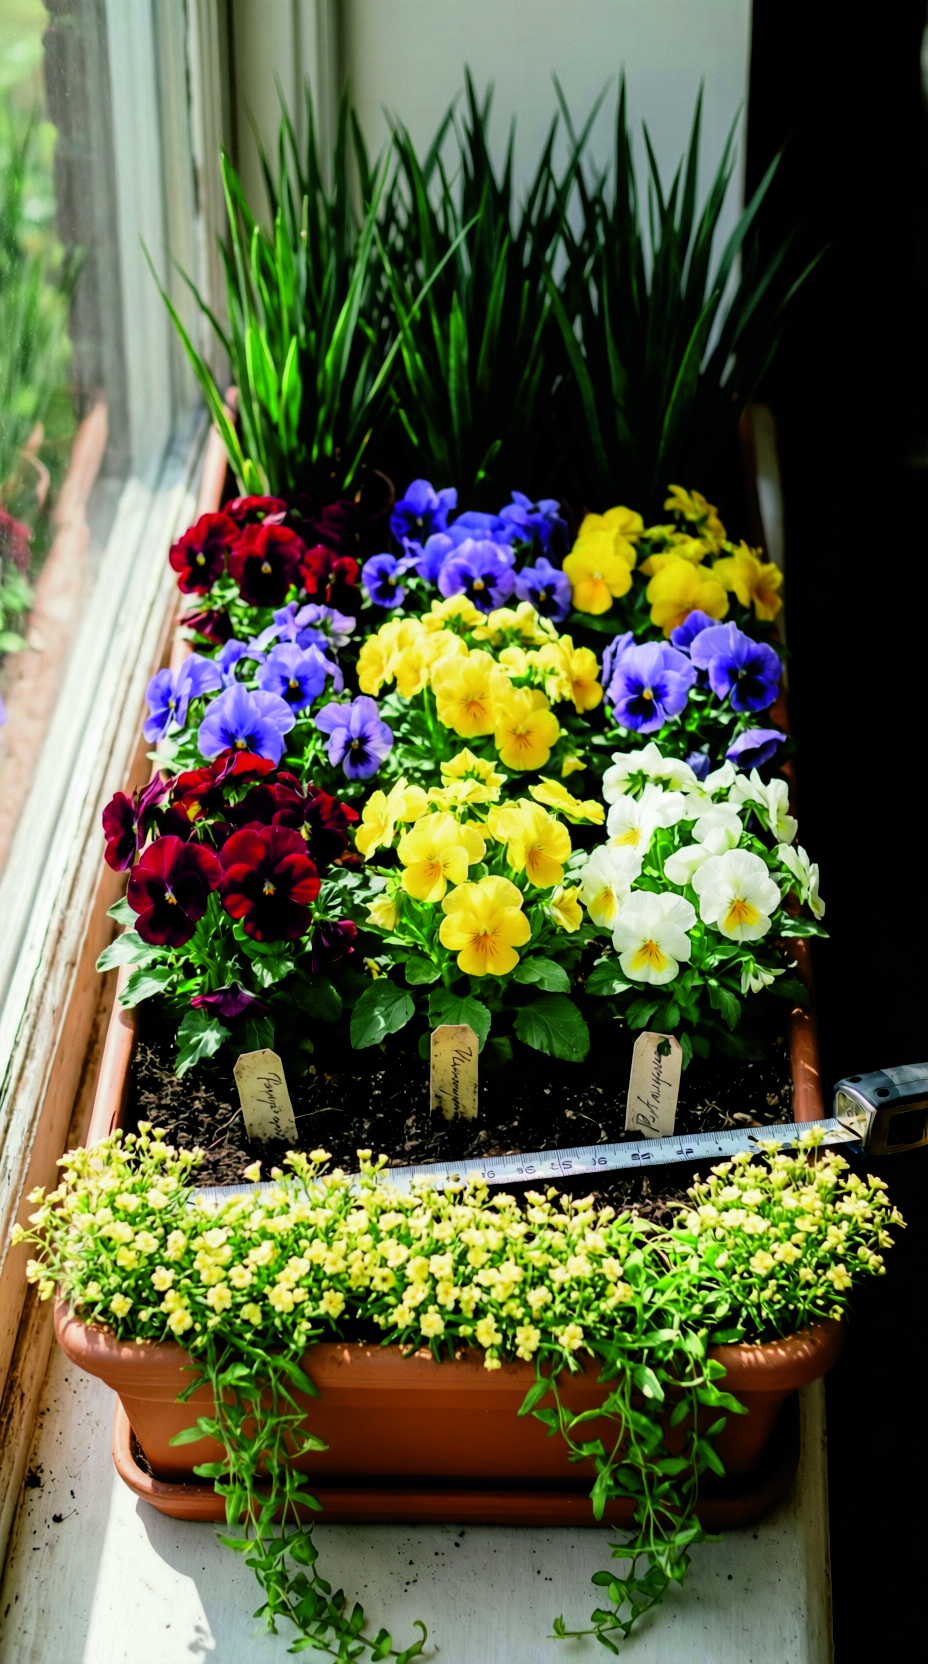
Design a window box like a miniature border
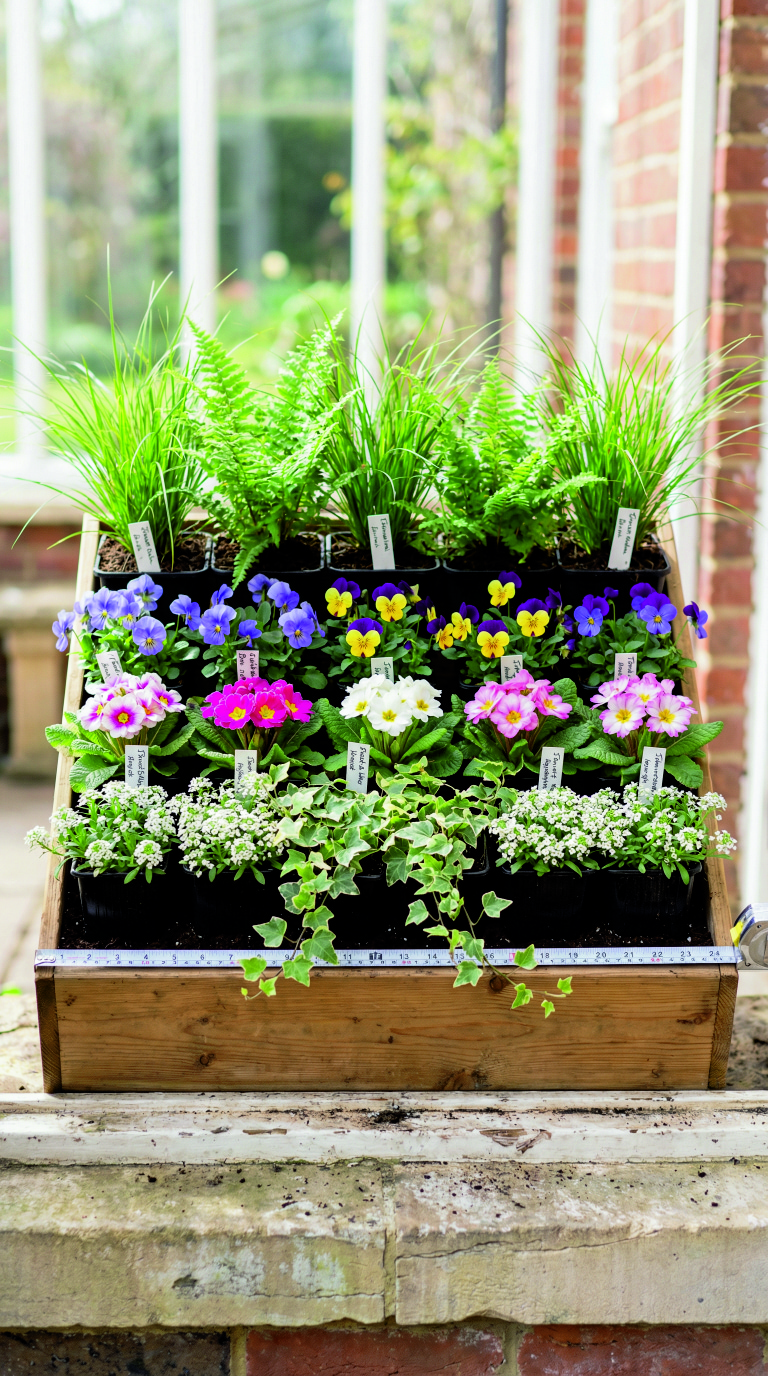
Window boxes look best when they feel “finished” from the start, even before plants bulk up. That effect comes from structure, repetition, and a clear shape. Think in layers: height at the back, fullness through the middle, and a soft edge that trails slightly over the front.
Many gardeners use a simple three-part approach: one focal element, supportive mid-height plants, then spillers to soften the lip. Use the idea as a guide, not a rulebook. A narrow box may look better with two layers instead of three.
Easy design moves that read as professional
- Repeat key colors: choose one main shade, echo it along the length
- Use multiples: three of one plant often looks calmer than seven singles
- Balance bloom and leaf: foliage gives “body,” flowers give sparkle
- Mind scale: tiny blooms can get lost from the curb, bigger faces pop
If your home’s exterior is busy, brick pattern, bold trim, strong paint color, keep the planting quieter. If the wall is plain, give the box more contrast.
A dependable spring plant palette
Spring window boxes shine with cool-season plants. They handle crisp nights, keep color in mild days, and often look better in spring than they do later. Build your palette from a few categories, then mix and match based on sun and style.
Early color that takes a chill
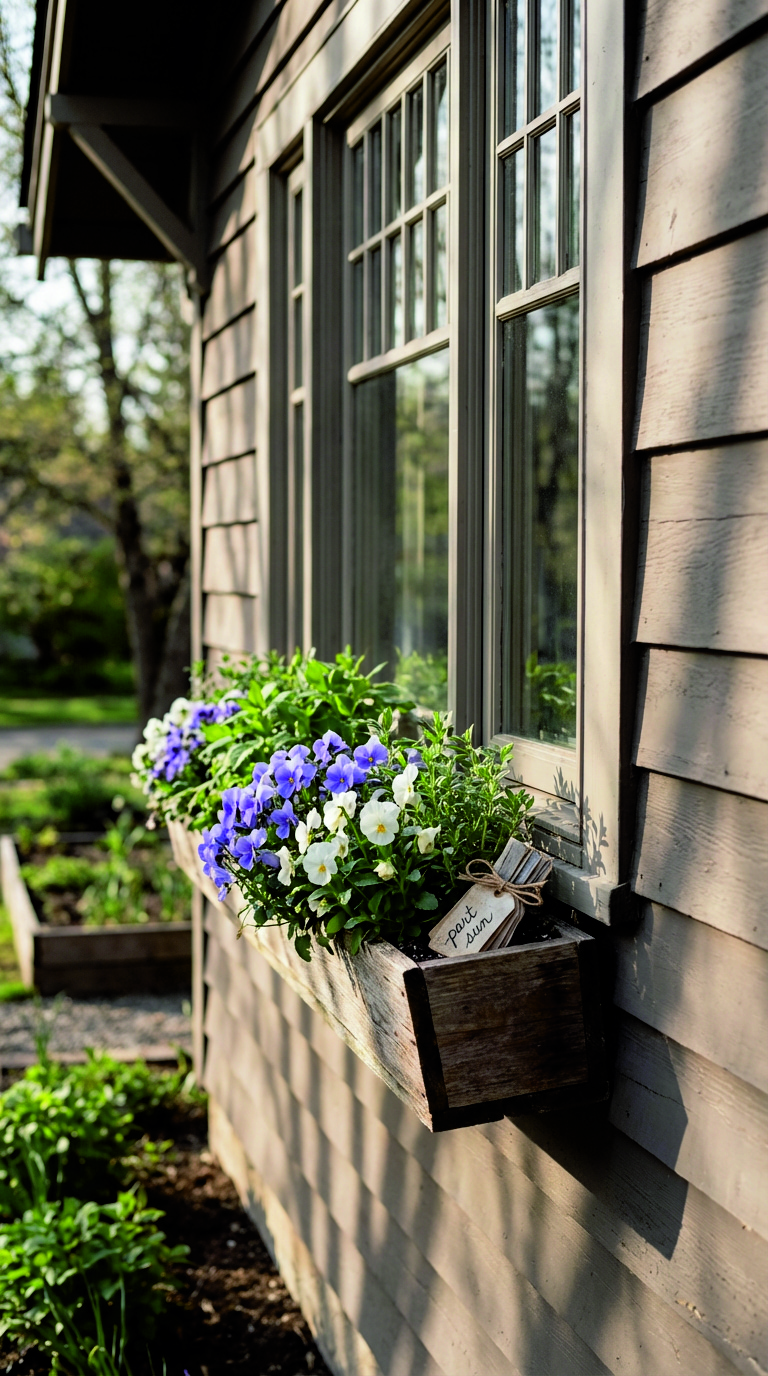
Pansies and violas are classic for a reason. Their “faces” read from a distance, the colors come in nearly every mood, and they bounce back after cool nights. Violas usually flower more freely with smaller blooms, pansies give bigger pops of color.
Primroses bring a soft, cottage feel and can look like little bouquets tucked into the soil. They prefer even moisture, so pair them with companions that don’t demand drought-dry conditions.
Sweet alyssum creates a light edge, often with a gentle scent, and it knits plantings together as it spreads. Use it to soften gaps and blur the line between individual plants.
Bulbs that shout “spring”
Bulbs give instant seasonal identity. Daffodils, hyacinths, small tulips, grape hyacinths, and crocus can all work in a window box, either planted in place or dropped in as potted bulbs you can swap later.
For the easiest maintenance, tuck small nursery pots of flowering bulbs into the box, then disguise the pot rims with surrounding plants. After the blooms fade, lift the pots out and replace them with fresh spring annuals or warmer-season choices.
Foliage that keeps the box looking full
Leaves do the heavy lifting in a long-running display. Variegated ivy, small euonymus, trailing greens, and compact grasses can add structure. Choose foliage that matches your light exposure, then use flowers as highlights.
In part shade, foliage choices often outperform bloom-heavy selections. A mix of crisp greens, silver leaves, and variegation can feel fresh and clean without relying on constant flowering.
Trailers and softeners
A trailing edge makes a box look abundant. Bacopa can cascade nicely in mild spring, and it pairs well with pastel palettes. For a softer, meadow look, choose trailers with small leaves and fine texture rather than thick, heavy vines.
Keep spillers from dragging onto siding or resting on the ground. A neat cascade looks intentional, a muddy tangle looks accidental.
A note on edible accents
Herbs can be charming in a spring box, but they’re picky about companions. Rosemary and thyme like brighter light and drier cycles than many spring flowers. If you want edibles, treat them as the focal in a sunnier box, then pair with plants that enjoy similar care.
Three spring window box “recipes” that look good fast
Use these as templates, then swap colors to match your home’s trim or your personal style. Each combo is designed to look full early, while still having breathing room to grow.
1) Pastel cheer with bulbs and soft spill
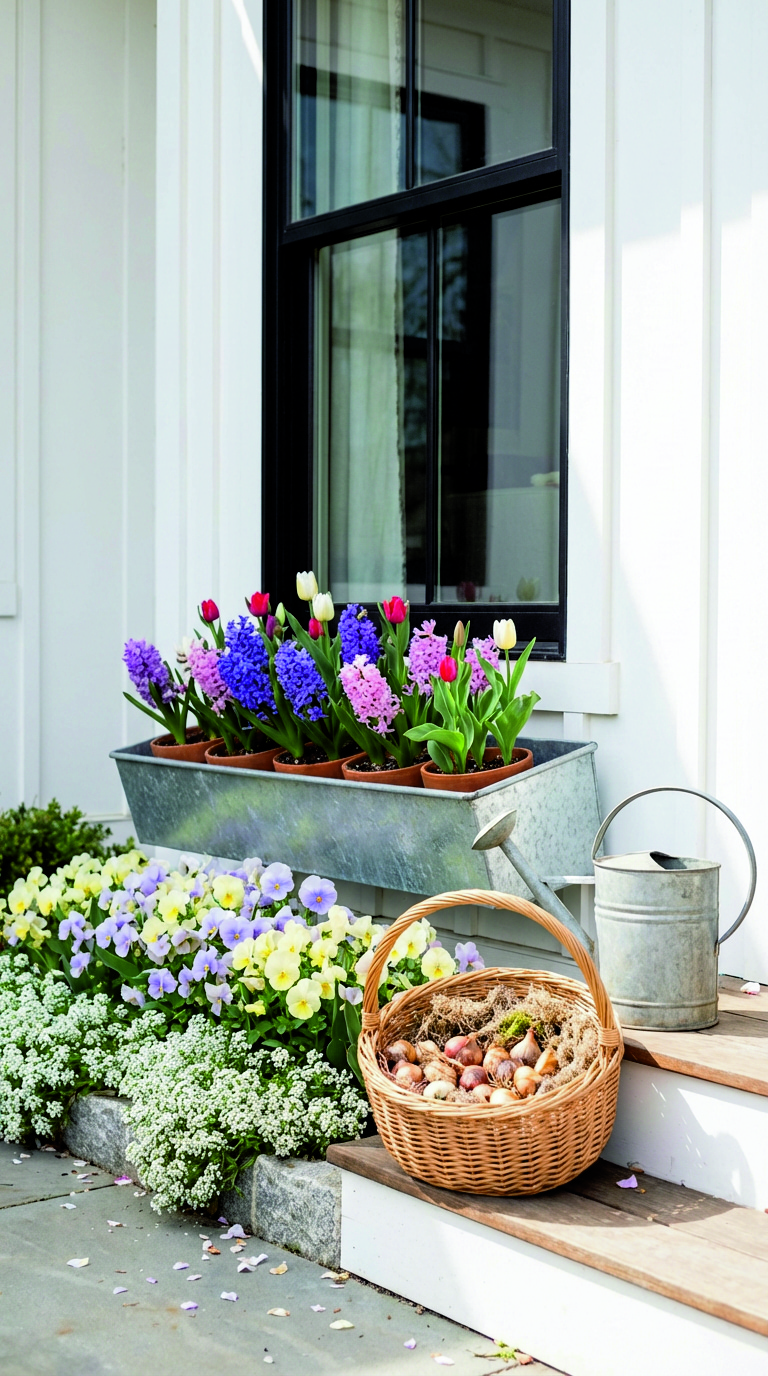
Mood: bright, friendly, classic spring
Best for: part sun to sun
- Back layer: potted hyacinths or small tulips spaced along the length
- Middle: pansies in pale yellow, lavender, and cream
- Front edge: white or soft-purple alyssum, tucked close for a frothy lip
- Texture accent: a small trailing green to connect sections
Keep the bulb pots slightly back so the flowers rise above the pansies. As bulbs fade, lift the pots and replace with a fresh plant of similar size, or use a compact leafy filler for continuity.
2) Crisp green-and-white that suits modern homes
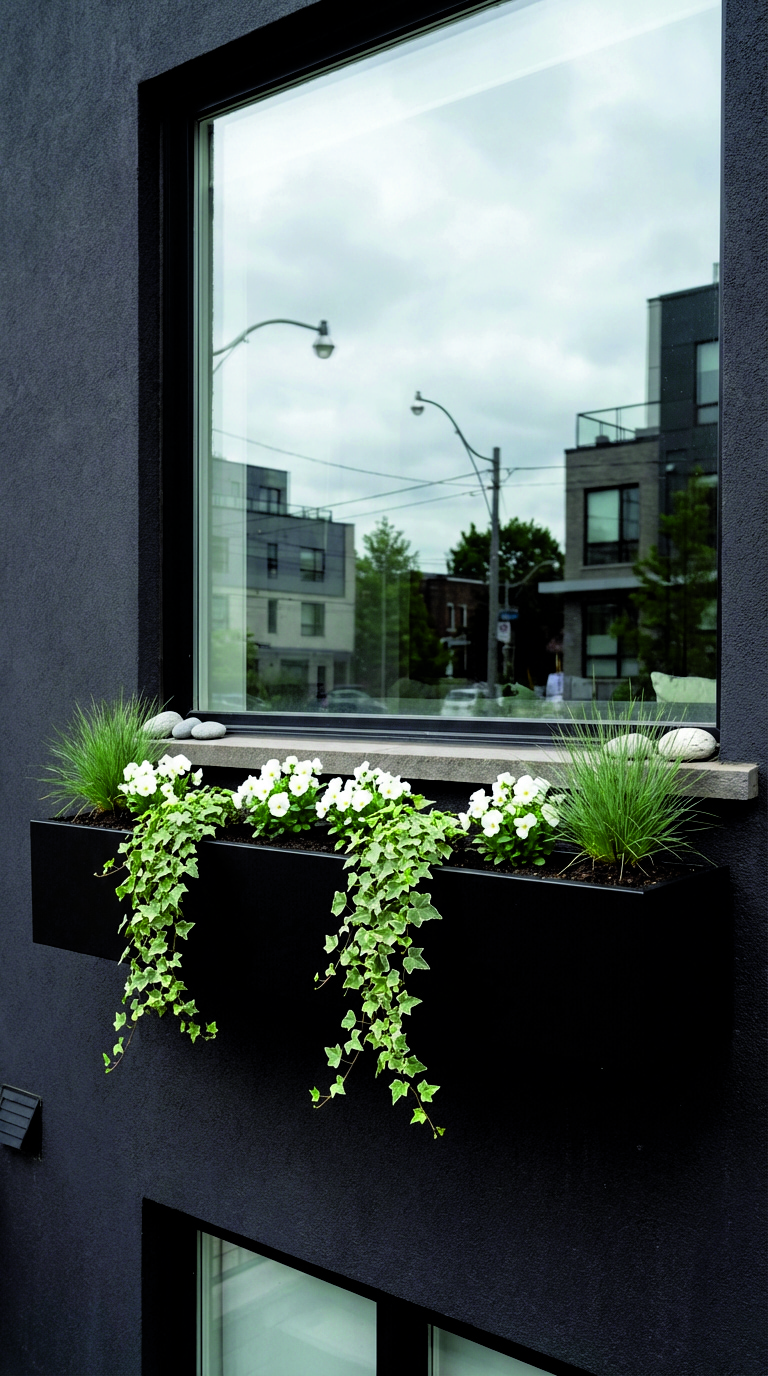
Mood: clean, calm, intentional
Best for: bright light, or filtered sun
- Back layer: slim, upright foliage plant or a compact grass-like accent
- Middle: white pansies or white violas in repeating groups
- Front edge: alyssum in white, plus a small trailing variegated leaf
Limit your color palette to white and green, then vary texture instead. Repetition is the secret here. A simple rhythm of plant groups reads polished from the sidewalk.
3) Deep tones with a fresh pop

Mood: bold, slightly dramatic, still spring-forward
Best for: sun to part sun
- Back layer: compact foliage in chartreuse or bright green
- Middle: deep purple pansies or violas, planted in clusters
- Front edge: a small trailing plant in green, plus a few lighter blooms to lift the mix
Deep purple can look almost black in shade, so aim for at least a few hours of light. Add one lighter accent color, even a soft cream, to keep the planting from going too heavy.
Step-by-step planting that avoids the usual mistakes
Planting day is where a window box either becomes easy, or becomes a weekly struggle. Slow down for ten minutes at the start, you’ll gain weeks of better performance.
- Check drainage and stability
Confirm holes are open, and confirm the box sits securely on brackets. Wiggle it gently, it should feel solid. - Pre-moisten the potting mix
Dry mix can repel water at first. Lightly dampen it in a bucket or water it in the box, then fluff it. - Arrange plants on top before planting
Set everything in place while still in nursery pots. Step back and look from the street if you can. Adjust spacing, then adjust again. - Plant in layers
Start with the tallest plants toward the back, then fill the middle, then tuck in trailers at the front edge. Keep root balls at the same depth they were growing in their pots. - Firm and water deeply
Press soil gently around roots to remove big air pockets. Water until you see a steady flow out of the drainage holes, then let it drain fully. - Finish the surface
Top up soil if it settled, then clear any loose mix off leaves. A tidy surface makes the whole arrangement look more finished.
Spacing without guesswork
For a full look, plant closer than you would in a garden bed, but avoid cramming. Leaves should touch lightly, not stack in layers. Airflow matters, especially in cool, damp weeks.
Care that keeps the box looking “freshly planted”
Spring care is simpler than summer care, yet a window box still needs a consistent rhythm. Most failures come from uneven moisture, not from a lack of talent.
Watering in spring
Check moisture with a finger, not by the calendar. If the top inch feels dry, water thoroughly. If it still feels evenly damp, wait a day. Windy weather can dry a box even if the temperature feels cool, so pay attention after breezy days.
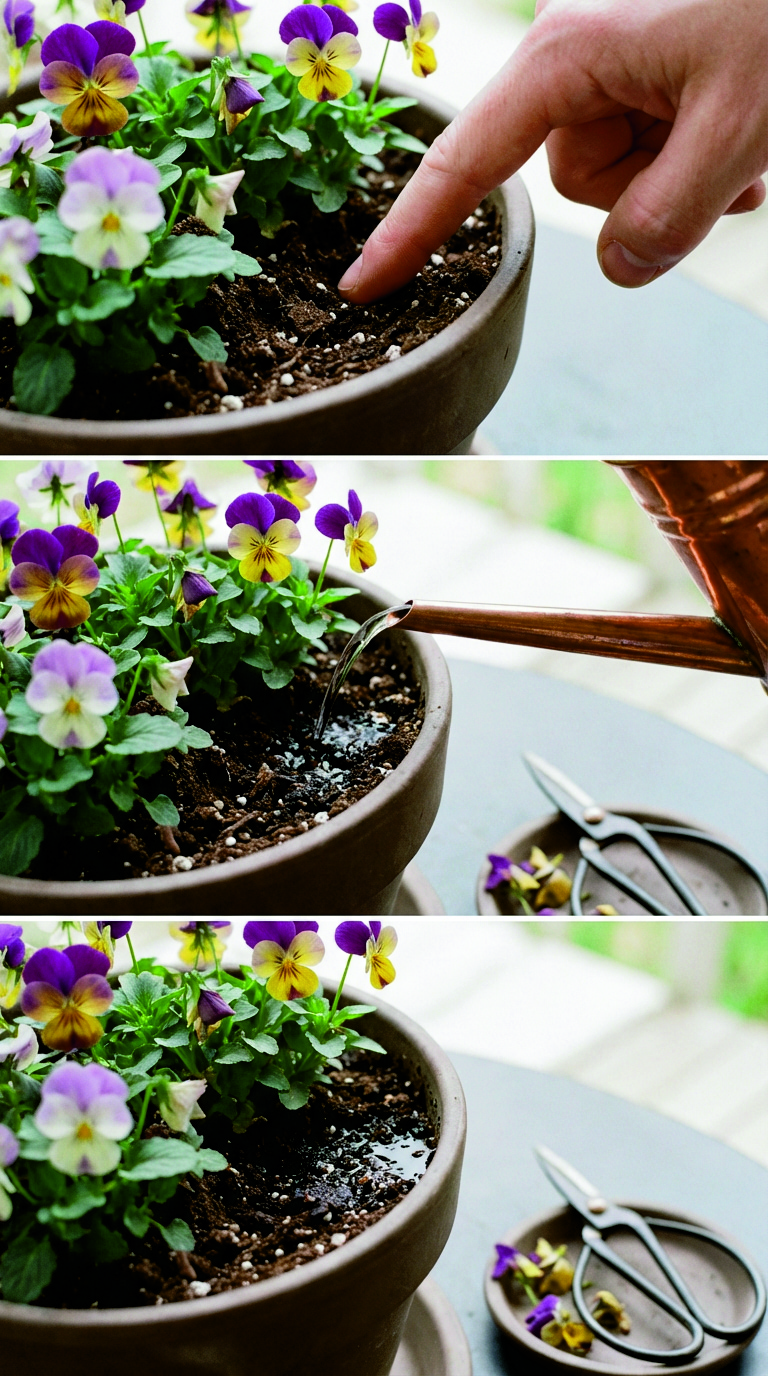
Water at soil level when you can. Wet leaves in cool weather can invite spotting on some plants, and it can shorten the crisp look of blooms.
Feeding without overdoing it
If you used slow-release fertilizer, you may not need liquid feed for several weeks. If growth slows or leaves pale, use a diluted liquid fertilizer, then return to a lighter schedule. Heavy feeding can push soft growth that flops in wind.
Grooming for nonstop appeal
Deadhead spent blooms on pansies and primroses, it encourages more flowers and keeps the planting neat. Trim trailers that grow unevenly, a light haircut often prompts branching and a fuller cascade.
Take five minutes once a week to remove yellowing leaves and tidy the surface. Small maintenance prevents the “suddenly messy” look.
Handling cold snaps, heavy rain, and spring wind
Spring throws curveballs. A box built with good drainage and cool-tough plants will handle most of them, yet a few simple habits can prevent setbacks.
Cold nights
Many spring flowers tolerate chilly nights, but a late cold snap can still damage open blooms. If a hard cold is forecast, protect the box with a breathable cover for the night, then remove it in the morning so plants can breathe and dry.
If your box is removable and safe to lift, moving it to a sheltered spot overnight can save flowers. Safety first, a heavy wet box can be awkward.
Heavy rain
Rain can be both helpful and harmful. It waters the planting, yet it can also flatten blooms and keep soil too wet. After prolonged rain, check that drainage holes aren’t clogged with soil. If the mix stays soggy, ease off watering until it dries slightly.
Wind
Wind steals moisture fast and can snap tender stems. If your site is exposed, choose sturdier plants, avoid tall, top-heavy focal elements, and use more compact fillers. A tighter, lower planting often performs better than a tall one in a gusty spot.
Refreshing the box for late spring, without starting over

A spring window box doesn’t need to be a one-time show. Treat it as a seasonal base, then swap pieces as the weather warms.
Bulbs fade first. If you used potted bulbs, lift them out once flowers finish, then replace with another cool-season bloomer or a leafy filler. Pansies and violas may keep going for a long time, especially in mild temperatures, but they can slow down once true heat arrives.
As late spring turns warmer, you have two paths:
- Keep the structure, swap the flowers: leave foliage and spillers, replace tired bloomers
- Shift the whole mood: pull spring plants and replant with warm-season choices in a new palette
Either way, reuse your best elements. A strong trailing plant or a crisp variegated leaf can bridge seasons and make the box feel continuous.
Common problems, solved quickly
A window box often looks “off” before it looks fully unhealthy. Catching issues early keeps the display beautiful with minimal effort.
Wilting even though you watered
Soggy roots can mimic drought symptoms. If soil feels wet and plants still droop, check drainage holes, then let the box dry slightly before watering again.
Patchy growth and gaps
Plants may be competing unevenly. Trim the most aggressive growers, then rotate the box if possible so light hits more evenly. If rotation isn’t possible, move a fast grower to a brighter section and tuck a slower plant into its old spot.
Flowers fading fast
Hot afternoon sun can bleach blooms. Add a bit more foliage shade in the middle layer, or swap to a tougher bloom color that holds better in your exposure.
A five-minute checklist for a window box that always looks good
Start with a sturdy, well-mounted box, make sure water can escape freely, then use a potting mix designed for containers. Choose plants that match your light and spring temperatures, and lean on foliage for fullness so the box still looks rich between bloom cycles. Plant in layers, water deeply, then keep a steady rhythm of light grooming and moisture checks.
A spring window box is more than a seasonal decoration, it’s a repeatable method you can use all year. Get the foundation right now, and every future planting, summer color, autumn texture, even winter greens, becomes faster, easier, and better looking from day one.