5 Budget-Friendly Backyard Ideas
Creating an inviting and beautiful backyard doesn’t have to break the bank. With a bit of creativity and some affordable materials, you can transform your outdoor space into a relaxing retreat. Whether you’re looking to add functionality, charm, or a touch of magic, there are plenty of budget-friendly backyard ideas to consider. In this article, we’ll explore five innovative ways to enhance your backyard without spending a fortune. From DIY garden beds to repurposed planters, these projects are sure to inspire and help you make the most of your outdoor area.
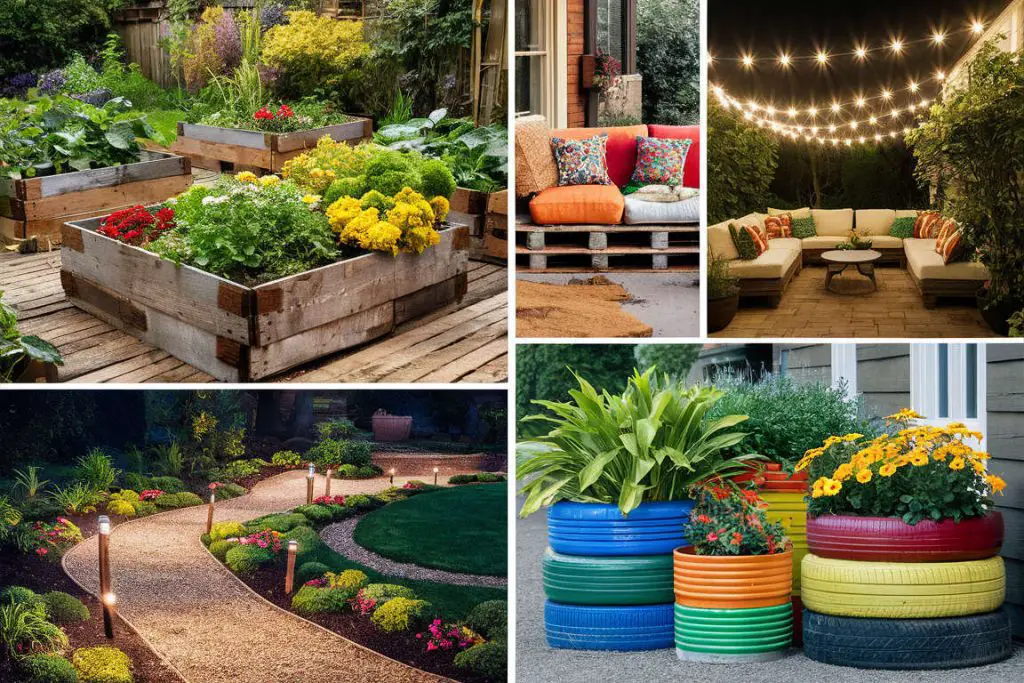
1. DIY Raised Garden Beds
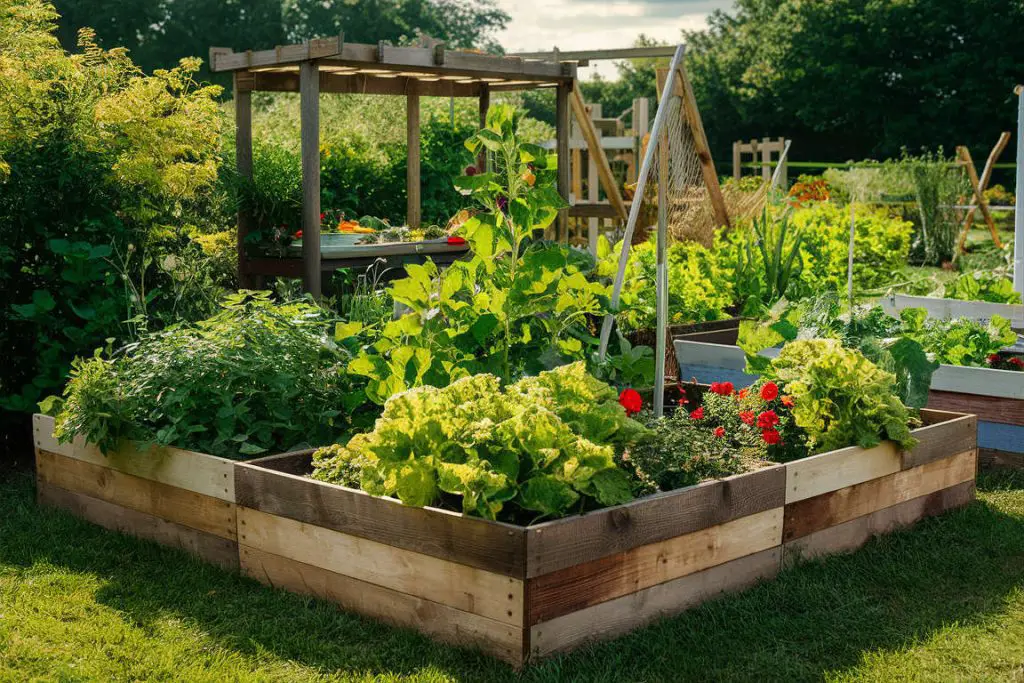
Transform your backyard into a lush garden with raised garden beds. These are not only practical but also add a charming touch to your outdoor space. You can build them using inexpensive materials like corrugated panels, reclaimed wood, cinder blocks, or even old pallets. Raised beds are perfect for growing vegetables, herbs, and flowers, making your backyard both beautiful and productive.
Benefits of Raised Garden Beds
Raised garden beds improve soil drainage, which is especially beneficial in areas with heavy rainfall. They also reduce the presence of weeds and pests, making gardening more manageable. Additionally, raised beds allow for better control over soil quality, enabling you to create the perfect growing environment for your plants.
Materials Needed
To build raised garden beds, gather the following materials:
- Reclaimed wood, cinder blocks, or old pallets for the frame
- Soil and compost to fill the beds
- Landscaping fabric to prevent weeds
- Screws or nails and a hammer or drill for assembly
Reclaimed wood or old pallets can often be found for free or at a low cost from local businesses. Cinder blocks are also an affordable option and provide a sturdy structure.
Steps to Build Raised Garden Beds
- Choose a Location: Select a sunny spot in your backyard with good drainage. Measure the area to determine the size of your beds.
- Prepare the Site: Clear the chosen area of grass and weeds. Lay down landscaping fabric to prevent future weed growth.
- Construct the Frame: Cut the wood or gather the cinder blocks to your desired dimensions. Assemble the frame using screws or nails for wood, or simply stack the cinder blocks. Ensure the frame is level and secure.
- Fill the Beds: Add a layer of gravel or small rocks at the bottom of the bed for drainage. Fill the rest of the bed with a mix of soil and compost, providing a nutrient-rich environment for your plants.
- Plant Your Garden: Choose plants suitable for the growing conditions in your area. Arrange them according to their spacing requirements and plant them in the prepared soil.
Maintenance Tips
Water your raised garden beds regularly, especially during dry periods. Mulch around your plants to retain moisture and reduce weed growth. Periodically add compost or organic fertilizer to keep the soil rich in nutrients.
2. Pallet Furniture
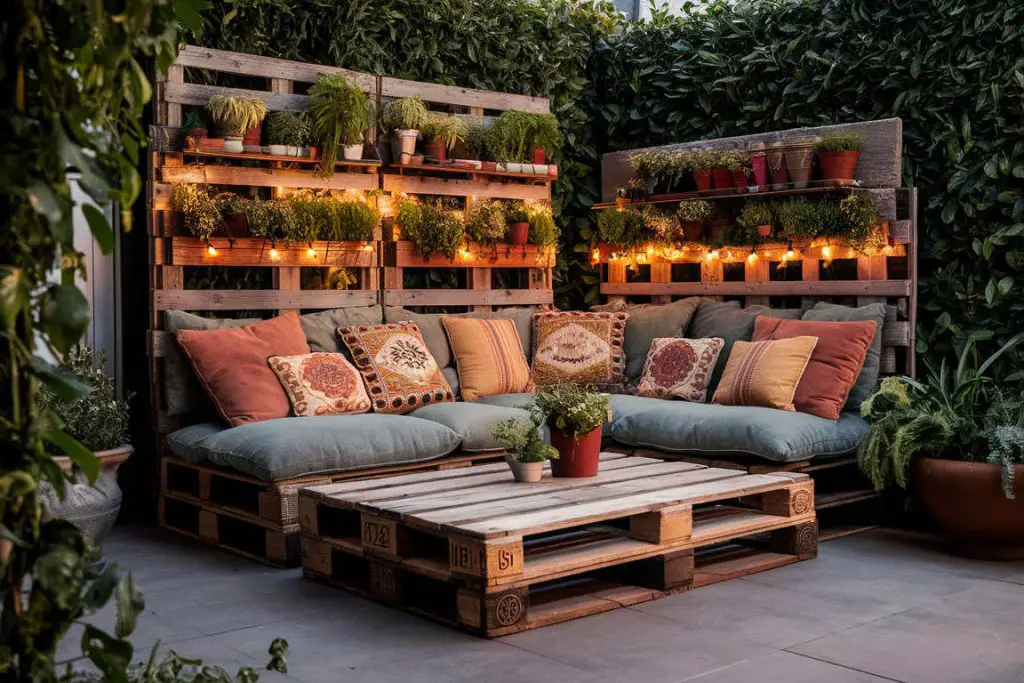
Create a cozy seating area with pallet furniture. Pallets are often available for free or at a low cost from local businesses. With a little creativity and some basic tools, you can turn them into stylish sofas, coffee tables, and lounge chairs. Add some cushions and throws for comfort and a pop of color. This budget-friendly option not only saves money but also gives your backyard a rustic, handmade feel.
Benefits of Pallet Furniture
Pallet furniture offers a cost-effective solution for outdoor seating and tables. It allows you to customize the design to suit your space and style preferences. Additionally, using pallets promotes recycling and sustainability, making it an eco-friendly choice.
Materials Needed
To create pallet furniture, gather the following materials:
- Wooden pallets (often available for free from local businesses)
- Sandpaper or a power sander to smooth rough edges
- Screws or nails and a hammer or drill for assembly
- Paint, stain, or sealant to protect the wood
- Cushions and throws for added comfort
Ensuring the pallets are in good condition and free of chemicals is crucial. Heat-treated pallets are safe for use, while those marked with “MB” should be avoided due to chemical treatment.
Steps to Create Pallet Furniture
- Select and Prepare Pallets: Choose pallets that are sturdy and in good shape. Sand down rough edges and surfaces to prevent splinters and create a smooth finish.
- Design Your Furniture: Decide on the type of furniture you want to create, such as sofas, coffee tables, or lounge chairs. Sketch your design and plan the dimensions based on the pallets you have.
- Assemble the Pieces: Arrange the pallets according to your design. For a sofa, stack two pallets for the seat and use one for the backrest. Secure the pallets together using screws or nails. Ensure all connections are tight and stable.
- Finish the Wood: Apply paint, stain, or sealant to protect the wood from weather damage. Choose a finish that complements your outdoor decor.
- Add Comfort: Enhance your pallet furniture with cushions and throws. These additions provide comfort and can introduce color and texture to your outdoor space.
Maintenance Tips
Regularly check for loose screws or nails and tighten them as needed. Reapply sealant or paint annually to protect the wood from the elements. Store cushions and throws indoors during bad weather to prolong their lifespan.
3. String Light Canopy
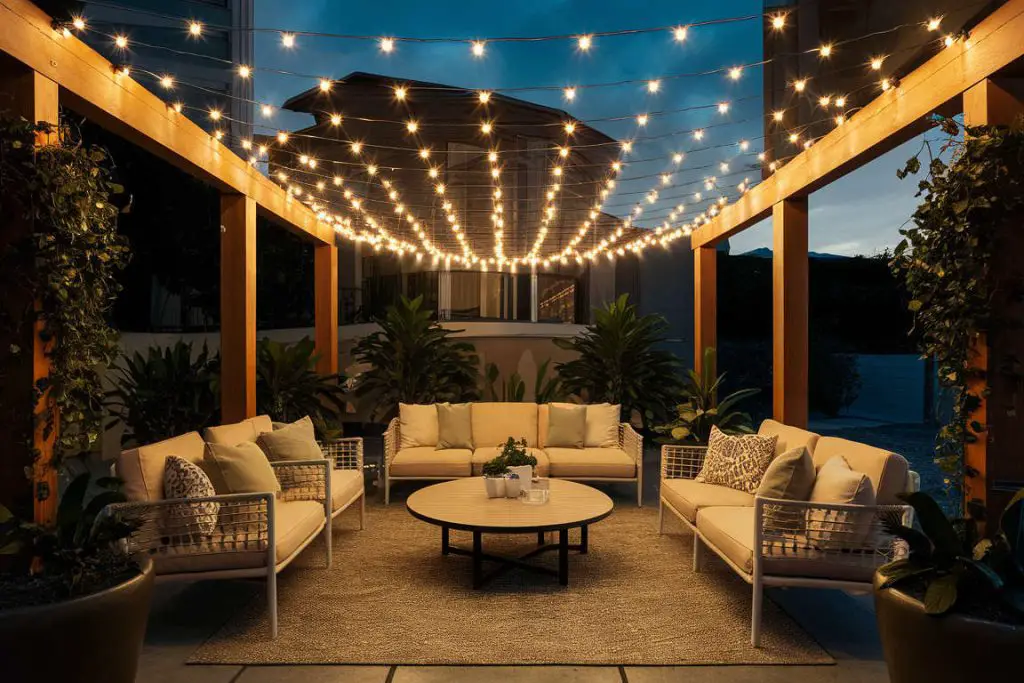
Enhance your backyard ambiance with outdoor lighting using a string light canopy. String lights are affordable and easy to install, instantly adding a warm, inviting glow to your outdoor space. You can drape them over a pergola, across your patio, or between trees. For a magical effect, consider using solar-powered lights to save on energy costs. This simple addition creates a cozy atmosphere perfect for evening gatherings or quiet nights under the stars.
Benefits of a String Light Canopy
String lights, being versatile, can fit into various backyard designs. They create a cozy, intimate setting and can be used year-round. Solar-powered string lights are an energy-efficient choice, reducing electricity costs and environmental impact.
What You Needed
To set up a string light canopy, you will need:
- String lights (solar-powered or plug-in)
- Hooks, nails, or adhesive clips to secure the lights
- Extension cords (if using plug-in lights)
- Poles or trees for support (if needed)
- Zip ties or twist ties for securing the lights
Choosing weather-resistant string lights ensures durability and safety for outdoor use.
Steps to Create a String Light Canopy
- Plan Your Layout: Decide where you want to hang the lights. Popular options include over a patio, between trees, or across a pergola. Measure the area to determine how many string lights you will need.
- Install Support: Use existing structures like trees, pergolas, or fences for support. If necessary, install poles to create the desired layout. Ensure the supports are sturdy and evenly spaced.
- Attach the Lights: Begin by attaching one end of the string lights to a support point. Use hooks, nails, or adhesive clips to secure the lights. Drape the lights across the area, attaching them to each support point. Make sure the lights are evenly spaced and hang at a consistent height.
- Connect Power Source: If using plug-in lights, connect them to an extension cord and plug them into an outdoor outlet. Ensure the cords are safely routed and do not create tripping hazards. For solar-powered lights, place the solar panel in a sunny location.
- Secure the Lights: Use zip ties or twist ties to secure any loose sections of the string lights. Check that all connections are secure and that the lights are functioning properly.
Maintenance Tips
Regularly inspect the lights for any damage or loose connections. Replace any broken bulbs or malfunctioning sections promptly. Clean the lights periodically to remove dust and debris, ensuring optimal brightness and longevity.
4. Gravel Pathways
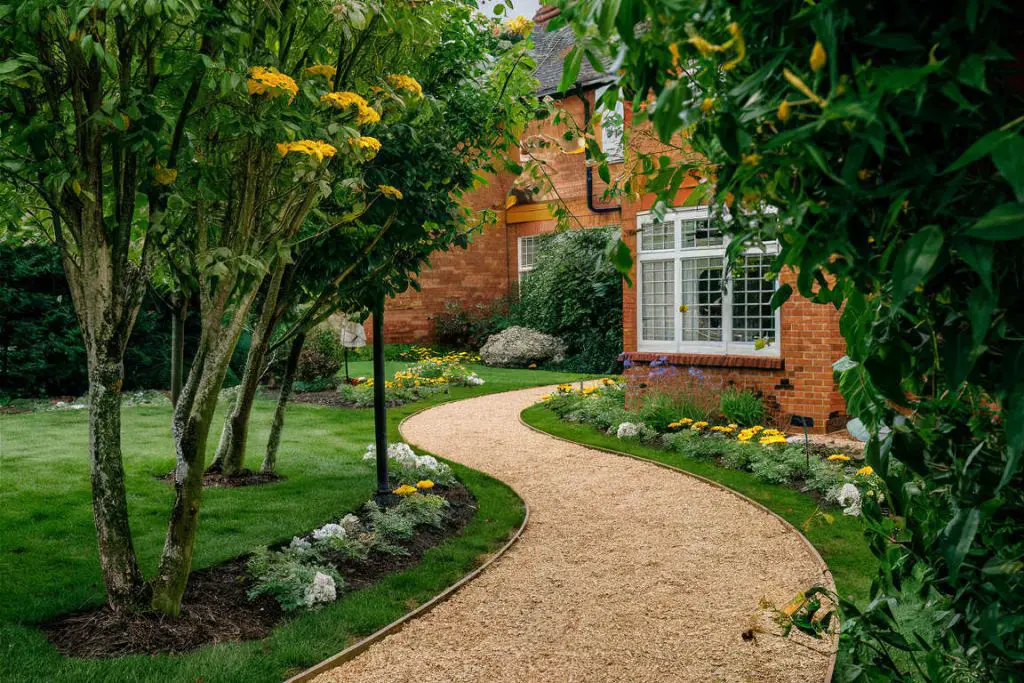
Define your garden spaces and create a visually appealing landscape with gravel pathways. Gravel is an inexpensive material that can be used to create winding paths throughout your backyard. It’s easy to install and maintain, making it a practical choice for any budget. Use edging stones or wooden borders to keep the gravel in place and add a polished look to your paths.
Benefits of Gravel Pathways
Gravel pathways improve drainage and prevent muddy areas, making them ideal for gardens and yards with poor drainage. They are low-maintenance and durable, providing a long-lasting solution for outdoor walkways. Additionally, gravel pathways are adaptable to various styles and can be easily modified as needed.
Materials Needed
To create gravel pathways, gather the following materials:
- Gravel (pea gravel, crushed stone, or decomposed granite)
- Landscape fabric to prevent weed growth
- Edging materials (such as bricks, metal, or plastic)
- Shovel, rake, and wheelbarrow for distribution
- Tamper or plate compactor to level and compact the gravel
Choosing the right type of gravel for your pathway ensures both functionality and aesthetic appeal. Pea gravel is smooth and comfortable for walking, while crushed stone provides a more stable surface.
Steps to Create Gravel Pathways
- Plan the Pathway: Determine the path’s layout and width. Use garden hoses or stakes and string to outline the pathway’s shape. Ensure the path is wide enough for comfortable walking.
- Prepare the Ground: Remove grass, weeds, and topsoil along the outlined path. Dig to a depth of about 4-6 inches, creating a trench for the pathway. Ensure the trench is even and free of debris.
- Install Landscape Fabric: Lay landscape fabric along the bottom of the trench. This barrier prevents weeds from growing through the gravel and stabilizes the pathway. Secure the fabric with landscape pins or stakes.
- Add Edging: Install edging materials along the sides of the trench. Edging keeps the gravel contained and maintains the path’s shape. Use bricks, metal, or plastic edging, securing it firmly into the ground.
- Distribute the Gravel: Pour gravel into the trench, spreading it evenly with a rake. Aim for a depth of about 2-3 inches. Use a tamper or plate compactor to level and compact the gravel, creating a stable and even surface.
Maintenance Tips
Regularly rake the gravel to maintain an even surface and fill in any low spots. Remove debris and weeds promptly to keep the pathway clean and tidy. Periodically add more gravel to maintain the desired depth and appearance.
5. Repurposed Planters
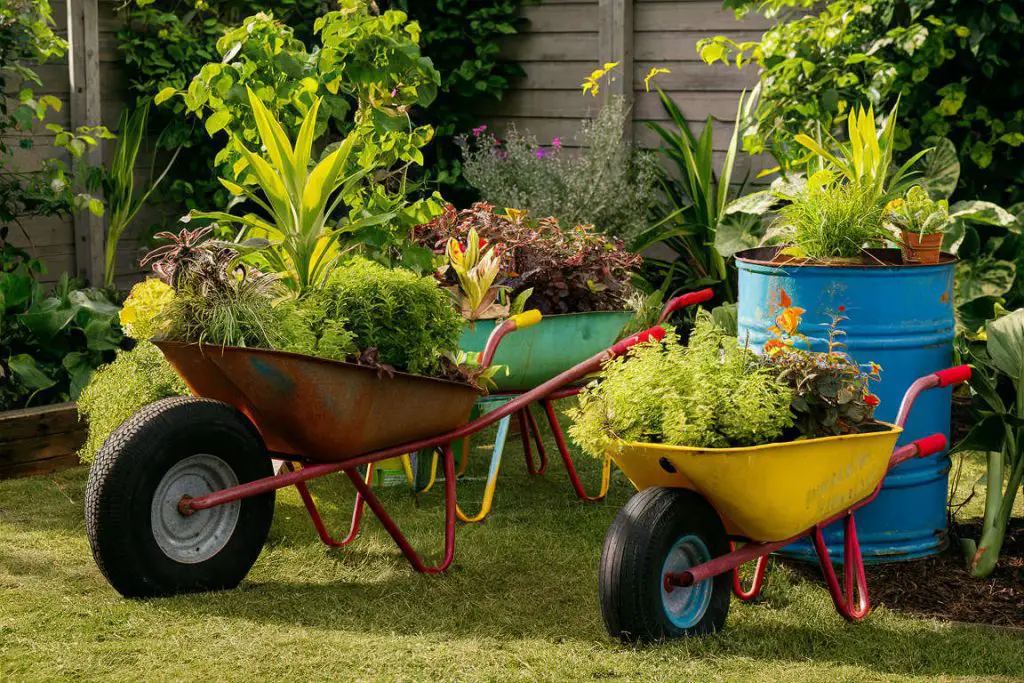
Get creative with repurposed planters to add character to your backyard. Look around your home for items that can be turned into unique planters, such as old tires, wooden crates, tin cans, or even broken furniture. With a coat of paint and some soil, these items can become charming homes for your plants. This eco-friendly approach not only saves money but also gives your garden a personalized touch, showcasing your creativity and resourcefulness
Benefits of Repurposed Planters
Using repurposed planters promotes recycling and reduces waste, making it an eco-friendly gardening choice. They provide a personalized touch to your garden, reflecting your creativity and resourcefulness. Additionally, these planters can be tailored to fit any garden style, from rustic to modern.
Materials Needed
To create repurposed planters, gather the following materials:
- Old or unused items such as tires, wooden crates, tin cans, or broken furniture
- Paint, stain, or sealant to protect and beautify the items
- Soil and compost for planting
- Drill or hammer and nails for making drainage holes
Choosing items that are sturdy and weather-resistant ensures the longevity of your planters. Adding a personal touch with paint or decorations enhances their visual appeal.
Steps to Create Repurposed Planters
- Select and Prepare Items: Choose items that can hold soil and support plant growth. Clean them thoroughly and make any necessary repairs. Drill drainage holes in the bottom to prevent waterlogging.
- Decorate the Planters: Paint or stain the items to match your garden’s aesthetic. Use weather-resistant paint to protect them from the elements. Adding patterns or designs can make your planters stand out.
- Fill with Soil: Add a layer of gravel or small rocks at the bottom for drainage. Fill the rest with a mix of soil and compost to create a nutrient-rich environment for your plants.
- Plant Your Garden: Choose plants that suit the size and depth of your repurposed planters. Arrange them according to their spacing requirements and plant them in the prepared soil. Water thoroughly after planting.
Maintenance Tips
Regularly check for signs of wear and tear, especially if the items are exposed to harsh weather. Reapply paint or sealant as needed to maintain their appearance. Ensure proper drainage to prevent root rot and promote healthy plant growth.
Final Thoughts – Budget-Friendly Backyard Ideas
Transforming your backyard on a budget is all about creativity and resourcefulness. By using inexpensive materials and repurposing items you already have, you can create a beautiful, functional outdoor space without breaking the bank. These ideas offer a starting point to inspire your backyard makeover, proving that a limited budget doesn’t mean you have to limit your imagination.