
DIY Thanksgiving Wreath Ideas Using Garden Cuttings
Your Thanksgiving wreath might already be growing outside the back door. Those faded hydrangea heads, fallen pinecones and red stems you pass on the way to the compost bin can make a handsome autumn welcome. Add a little evergreen foliage and a rust-colored ribbon, and the arrangement starts to take shape. There’s something pleasing about recognizing pieces of your own garden every time you come home, especially once the flower borders have begun to look bare.

The best place to begin is with a basket and a look around. Your garden might offer enough greenery for a full circle, or just a few flowerheads that would suit a smaller arrangement on a twig ring. These DIY Thanksgiving wreath ideas use a reusable frame and wire attachments, so you can change the design as you work. We’ll start with choosing materials, follow the assembly process and then look at four ways to make the wreath your own.
Choose Garden Cuttings for Your Thanksgiving Wreath
Evergreen Cuttings for a Full Wreath Base
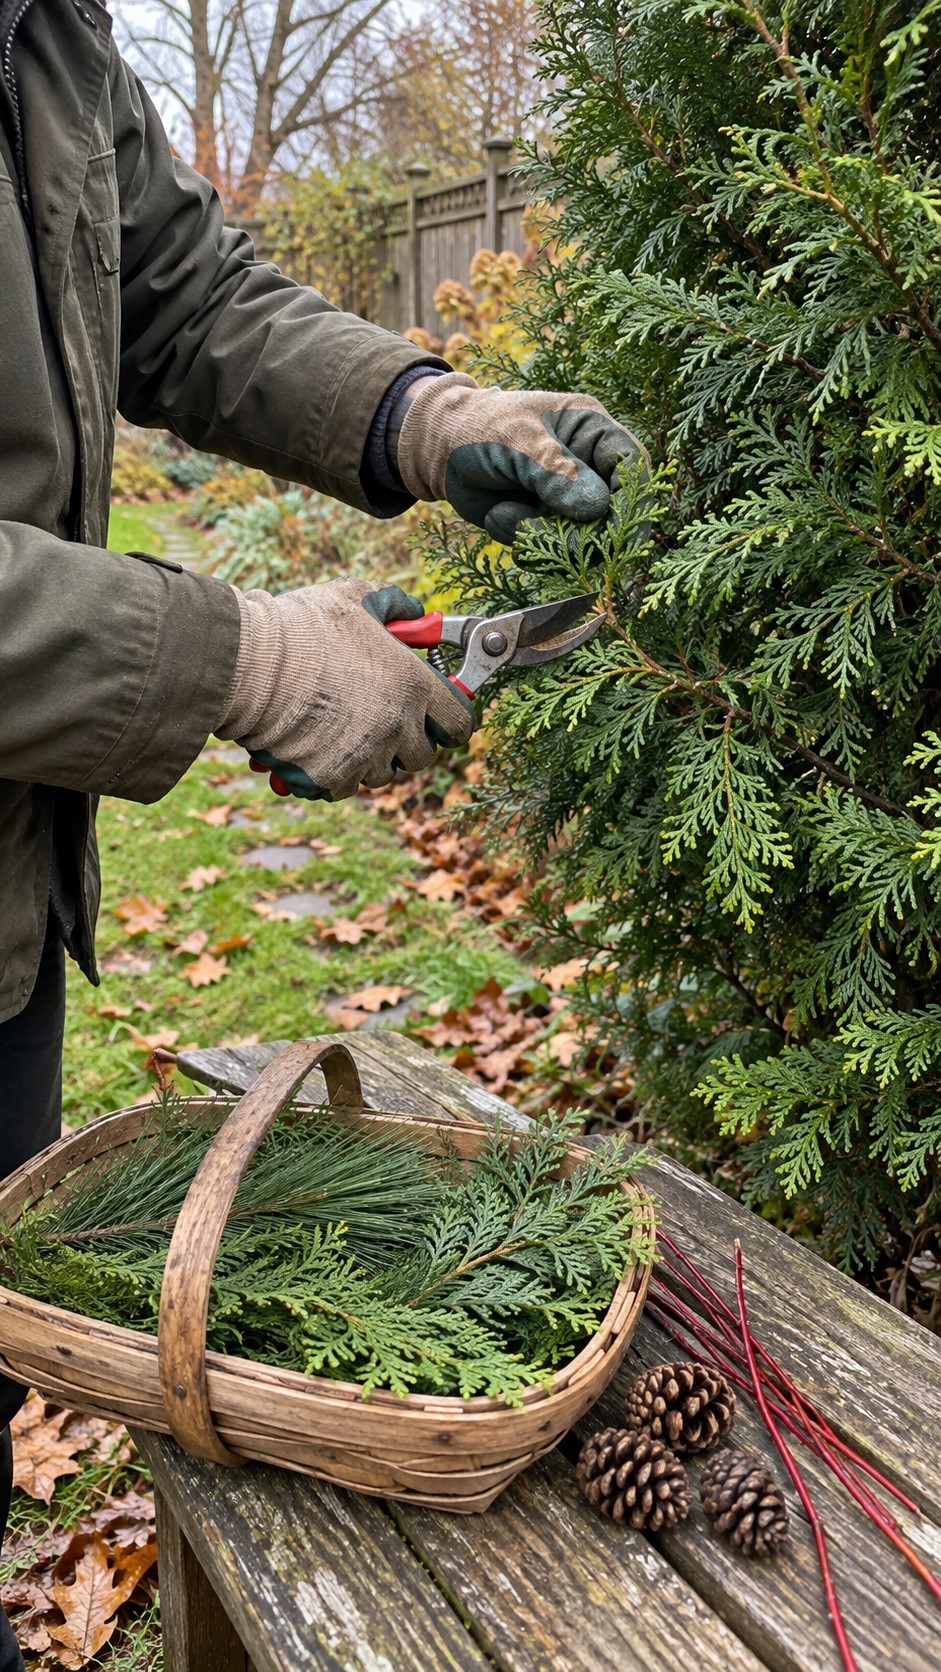
Pine, fir and garden-grown cedar can provide the green base, with different shapes that sit well together. Long pine needles soften the outline, while flatter sprays help cover the frame. Take small amounts from established plants and spread the cuts around, leaving healthy foliage on each branch. A wreath isn’t worth leaving a bald patch in a favorite shrub. Illinois Extension recommends distributing cuts to preserve the plant’s shape, and keeping harvested greenery in a cool place before use.1
Dried Hydrangeas for Soft Autumn Color
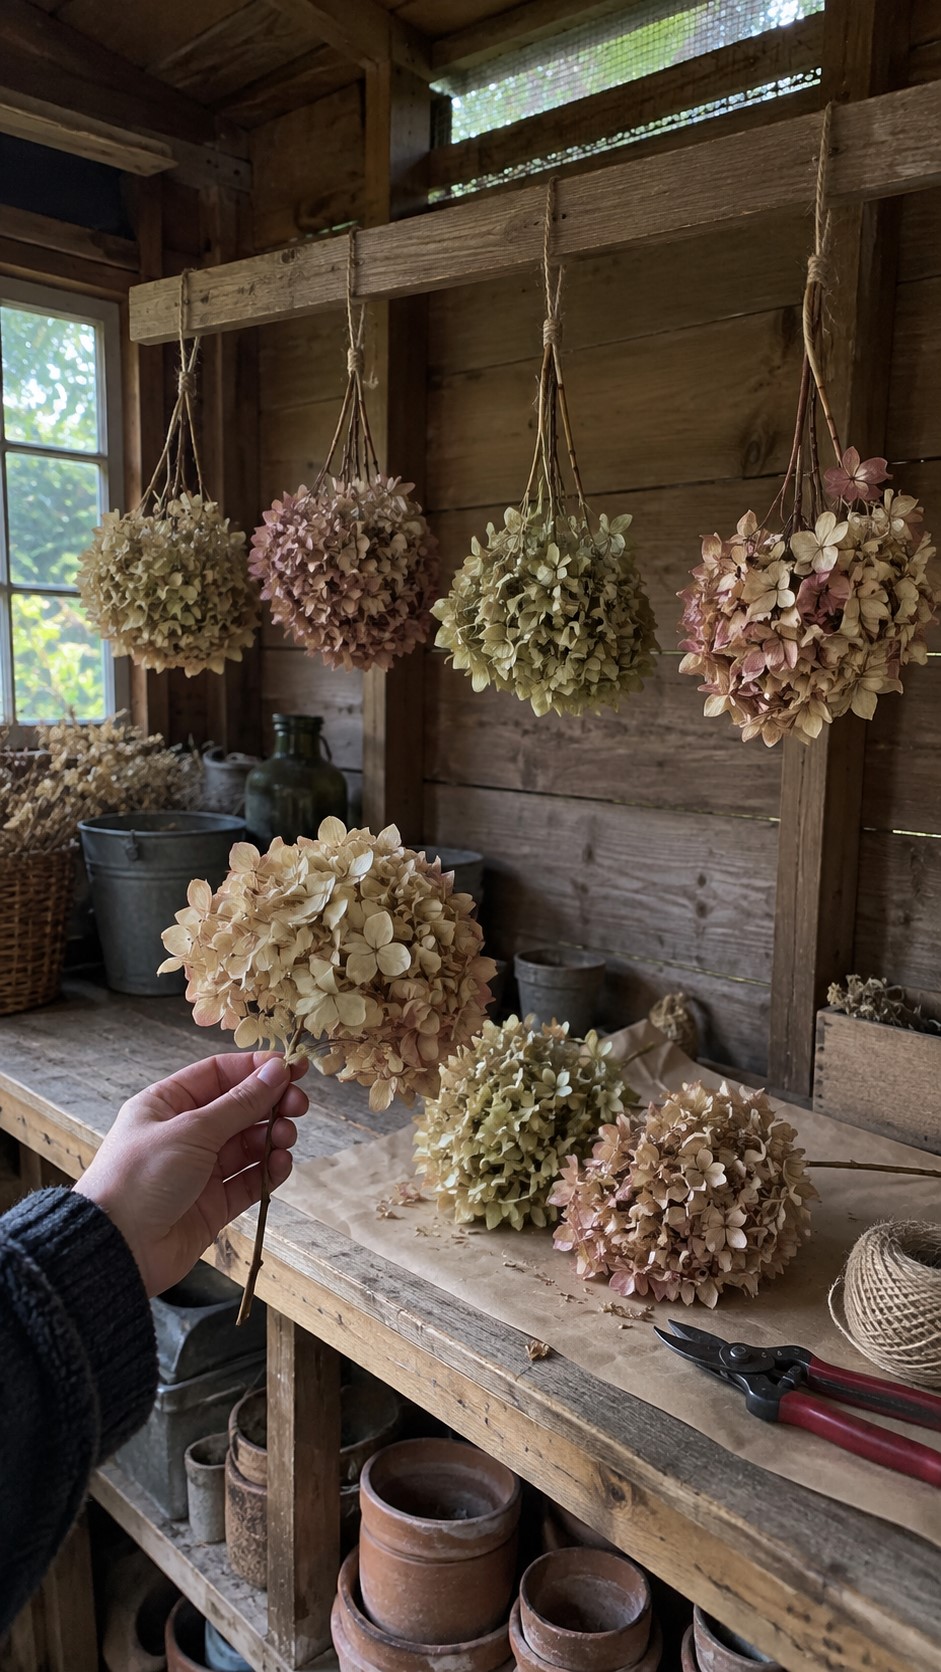
Dried hydrangeas bring faded pink, cream and green into a wreath without needing paint. Choose sound flowerheads that hold their shape when lifted by the stem. If you’re preparing ahead, remove the leaves and hang stems in small groups in a dark, ventilated room. Leave space around the heads so air can circulate. Check that they feel dry before using them, rather than working to a fixed date, because drying time changes with the flowers and the room.
Check which hydrangea you have before reaching for the pruners. Taking long stems from types that flower on existing wood can remove next year’s buds. In cold gardens, the RHS advises leaving faded mophead flowers in place over winter because they help protect the buds below. Use blooms you dried earlier if that applies to your plants. You can make a good wreath with fewer flowers, and there’s no need to sacrifice next summer’s display for a fuller ring.2
Pinecones and Colorful Twigs for Wreath Decorations
A handful of pinecones gives the wreath small, solid shapes among all those leaves and petals. Gather clean fallen cones, brush away loose debris and let damp ones dry before assembly. A few red dogwood stems or yellow willow twigs can carry the autumn color beyond the flowers. Choose slender pieces that are easy to fasten, and leave plenty on the plants for the winter display. Lay everything beside your ribbon before committing to a color scheme. Sometimes the garden has already chosen it for you.
Start with a Reusable Wreath Frame
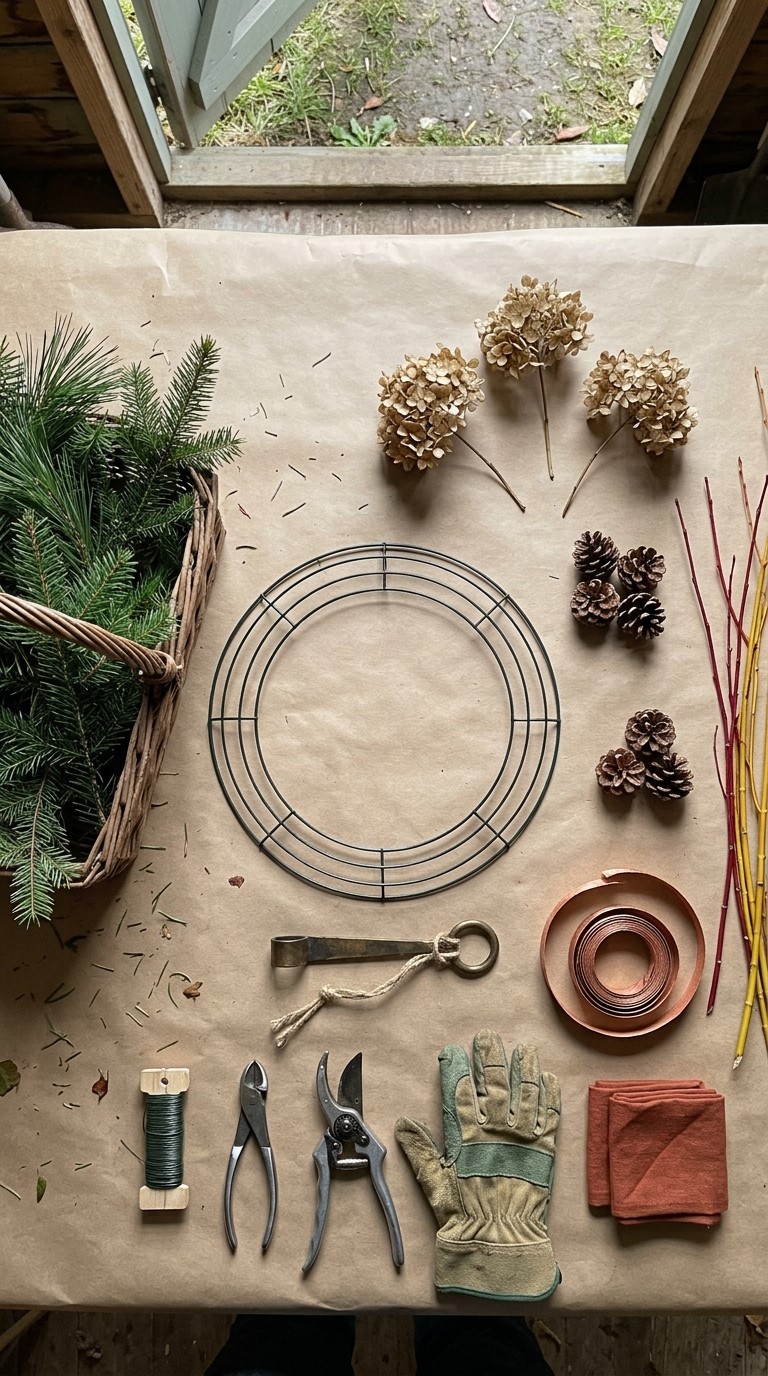
A sturdy wire wreath frame suits the full evergreen design below. For a wreath with part of its base showing, choose a sound grapevine ring instead. A 12- to 14-inch frame is a useful starting size, but hold it against the door before you begin. The greenery will extend beyond its edges. Allow room around the handle, and check the depth if your front door sits behind a storm door. A wreath that gets squashed every time you shut the door soon loses its appeal.
Gather your tools before the table fills with branches:
- Reusable wire frame or grapevine ring
- Florist wire on a roll
- Wire cutters and sharp pruners
- Gardening gloves
- A secure hanging loop and suitable door hook
- Copper or rust-colored ribbon
For that smaller frame, start with a basket of evergreen sprigs, three to five dried hydrangea heads, six small pinecones and several slender twigs. These are suggested quantities, so adjust them to the size of your materials and the design you prefer. Large flowerheads cover more space than small ones. Set some spare greenery aside for gaps, and keep the decorations loose until you’ve tried their positions against the base. Wire makes it possible to move them without pulling the whole wreath apart.
How to Make a Thanksgiving Wreath with Garden Cuttings
Attach Evergreen Bundles to the Wreath Frame
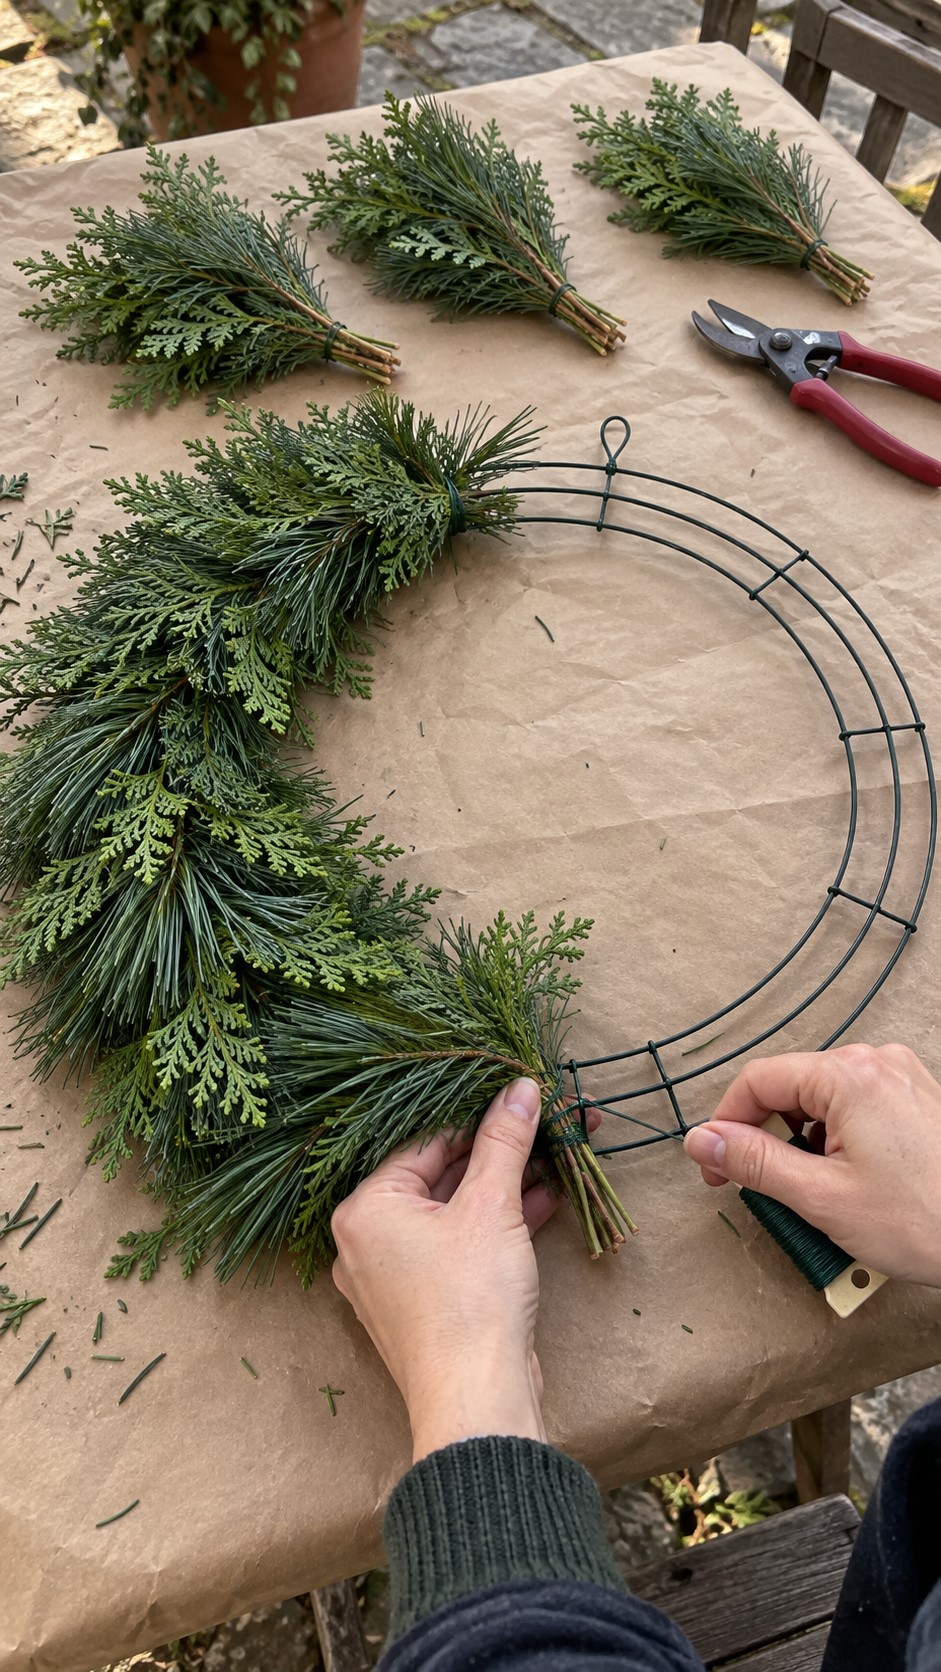
Cover the table and attach the hanging loop to the bare frame. Trim the greenery into pieces roughly 4 to 8 inches long, then make small bundles of similar thickness. Anchor the florist wire to the frame. Place the first bundle on it and wrap the wire around the stem ends and frame two or three times. Pull it snug enough to hold the stems when you lift the ring.
Lay the next bundle over the exposed stems of the first and fasten it with the same continuous wire. Work around the ring in one direction, keeping the bundles close in size. At the end, tuck the final stems beneath the foliage of the first bundle. Secure the wire at the back and fold the cut end inward. This overlapping method covers the fastenings as you build the base. Yard and Garden
Lift the wreath before adding anything else. A circle that looked even on the table may have a thick patch at the bottom or greenery filling its center. Turn it upright and check the outline against a plain wall. Trim a stray tip or reposition a bundle while you can still reach its fastening. Leave a clear center opening, with enough room for the door color to show through. Keep the closing join about the same thickness as the rest of the ring.
Secure Pinecones and Twigs to the Wreath
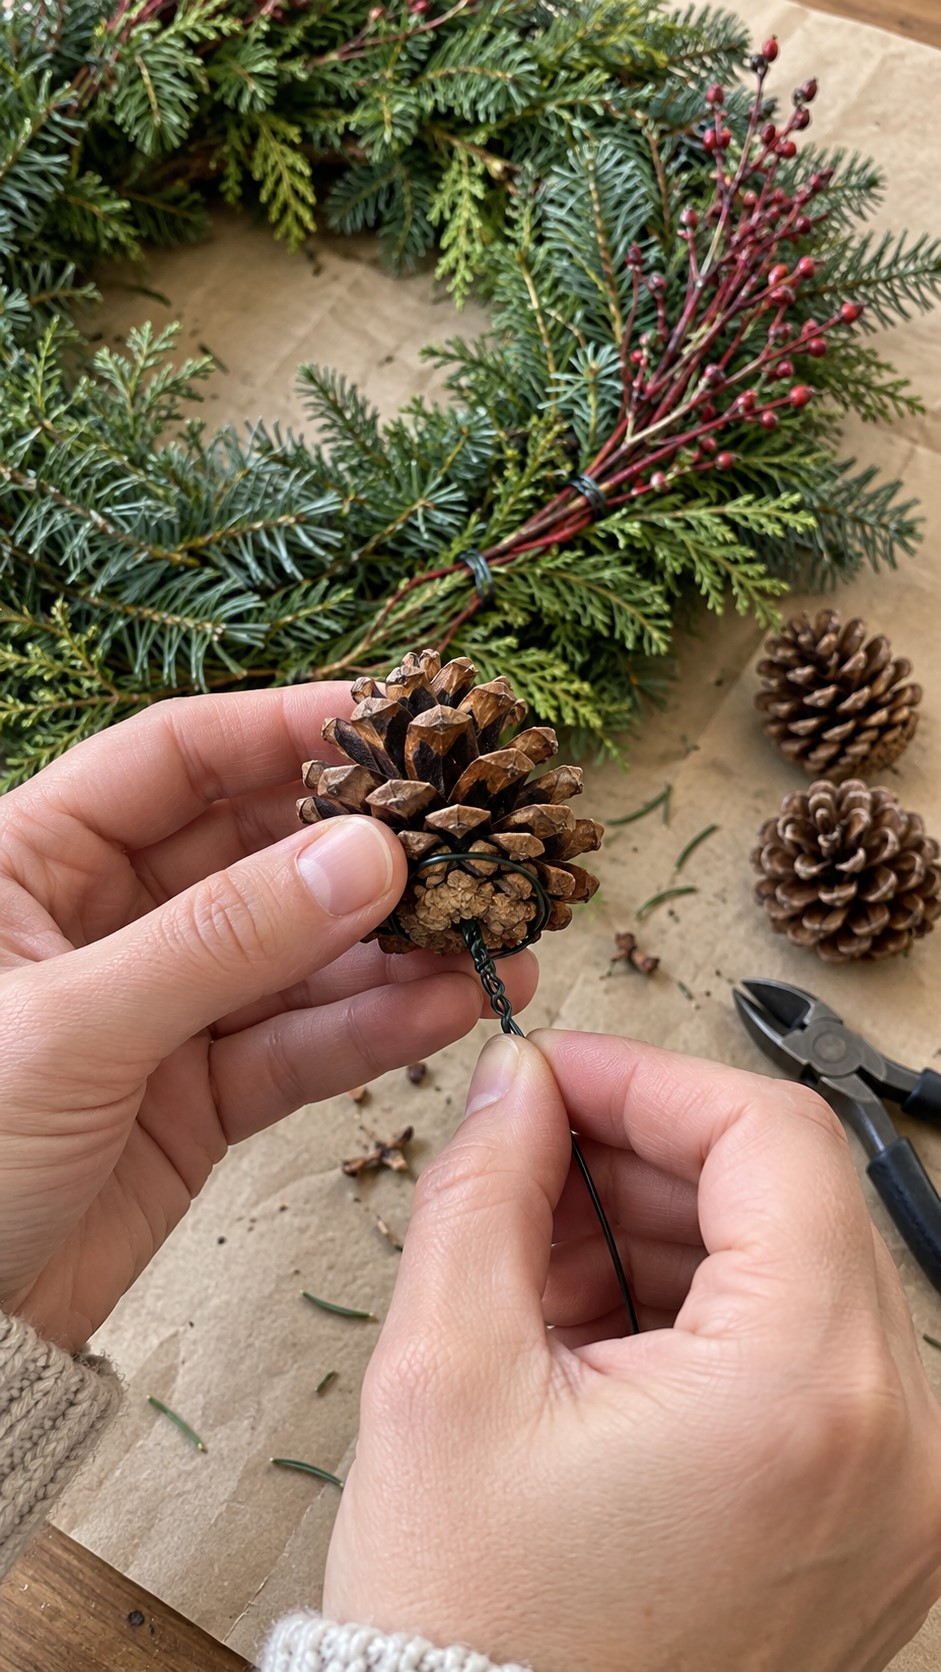
Fit the heavier decorations before the fragile flowers. To attach a pinecone, work a length of wire around its base beneath the scales, then twist the ends together. Pass them through the greenery and secure them to the frame. Place a few cones close together where you want the main cluster, rather than spacing every piece at equal intervals. For the twigs, fasten each small spray at two points along its lower stems. This helps stop it swinging when the door moves. Angle the colored tips beyond the foliage and trim any sharp ends pointing towards visitors.
Add Dried Hydrangeas Without Crushing the Flowers
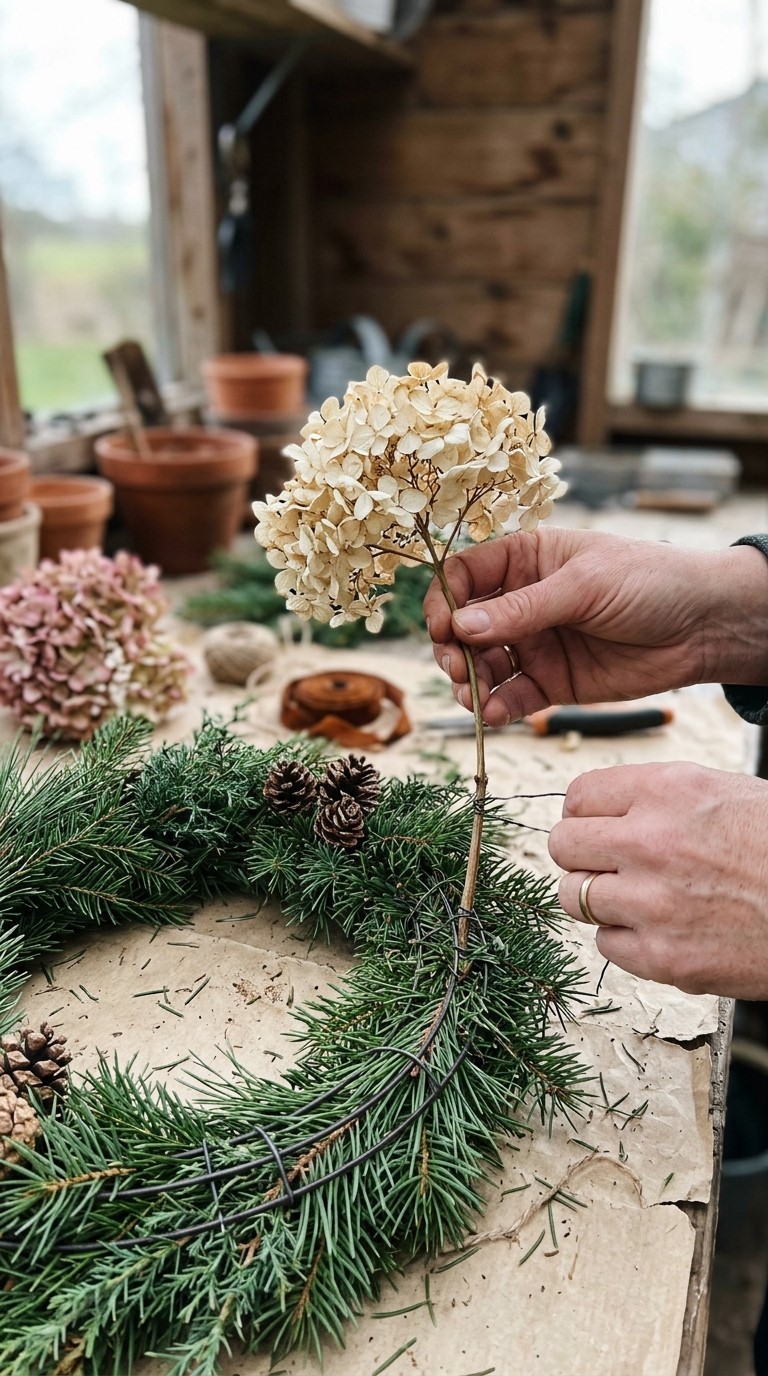
Rest the flowerheads on the wreath to test their positions. One generous cluster low on the left gives you a clear place to start, while smaller heads can sit farther around the ring. Handle each bloom by its stem. Tie the stem to the frame beneath the surrounding greenery, keeping wire away from the fragile flowerhead. Support it with your free hand while tightening the fastening so it doesn’t twist or catch against a pinecone.
If a stem is too short to reach the frame, place it alongside a small, sturdy twig and bind the two together. Leave enough twig below the flower to make the attachment. Test that it holds before adding it to the wreath. Then stand back again. A small piece of greenery can hide an exposed fastening, and a loose flower cluster may look better with space around it. Stop before every inch has something competing for attention.
Finish Your Thanksgiving Wreath with Copper or Rust Ribbon
Copper ribbon catches the light against dark foliage, while rust-colored cotton or linen gives a softer finish. Try the bow beside your main flower cluster before tying it in place. If the blooms already fill that space, use long ribbon tails lower down instead. Attach the ribbon separately so you can remove it later. Fold wire ends towards the frame, tighten anything that shifts and lift the finished wreath by its hanging loop. Open and close the door to check that the twigs and tails stay clear of the handle.
Four DIY Thanksgiving Wreath Ideas for Your Front Door
A Full Evergreen Wreath with Copper Ribbon

For a full, rounded wreath, let mixed greenery occupy most of the ring. Place small pinecone groups between a few cream hydrangea heads, with short red twigs appearing around the outside edge. A copper bow below the center opening gives the eye somewhere to settle. This design works well against a pale door where the green outline remains clear. Keep the flowerheads tucked close to the base so they don’t project too far forwards. If you have only two good hydrangea heads, place them together near the bow and let the foliage fill the remaining space.
A Dried Hydrangea Wreath with Rust-Colored Tails

Give your dried flowers more room in this version. Arrange the heads close together across the front of a thinner evergreen base, mixing their faded colors as you go. You’ll need more blooms than the starting selection if you want flowers around the entire circle. Tuck small pinecones between them and let a few yellow twigs rise above the upper edge. Narrow rust-colored tails can hang from the lower side without hiding the flowers. Place this dried hydrangea wreath under a covered entrance where rain won’t batter the heads. Its soft colors look lovely against charcoal or deep blue paint.
A Twig Wreath with a Crescent of Garden Cuttings
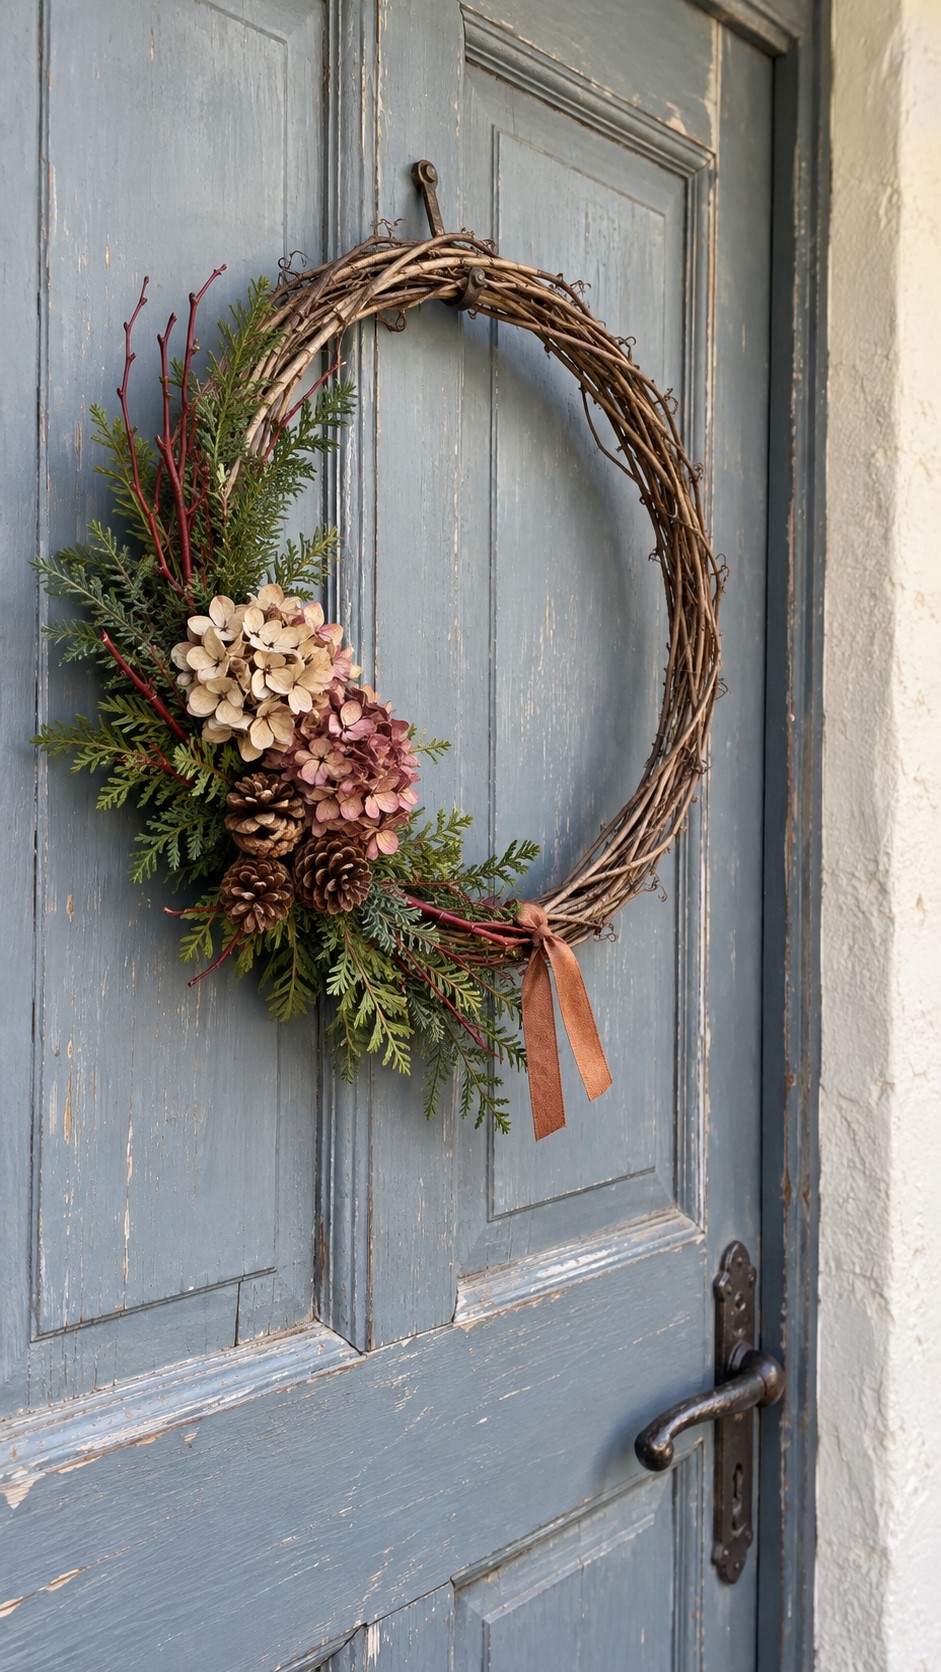
A grapevine ring is useful when the garden offers only a little material. Cover its lower-left curve with evergreen sprigs, then add hydrangeas and a small pinecone group at the fullest point. Let colored twigs follow the curve, leaving the upper part of the ring exposed. As you approach each end of the decorated section, use smaller sprigs so it tapers. Hide the last fastening under a flowerhead or a short piece of foliage. Try a narrow copper ribbon tied at the lower edge. The exposed ring gives this twig wreath enough shape without needing a large bow.
A Pinecone Wreath with Red Twigs and a Small Rust Bow
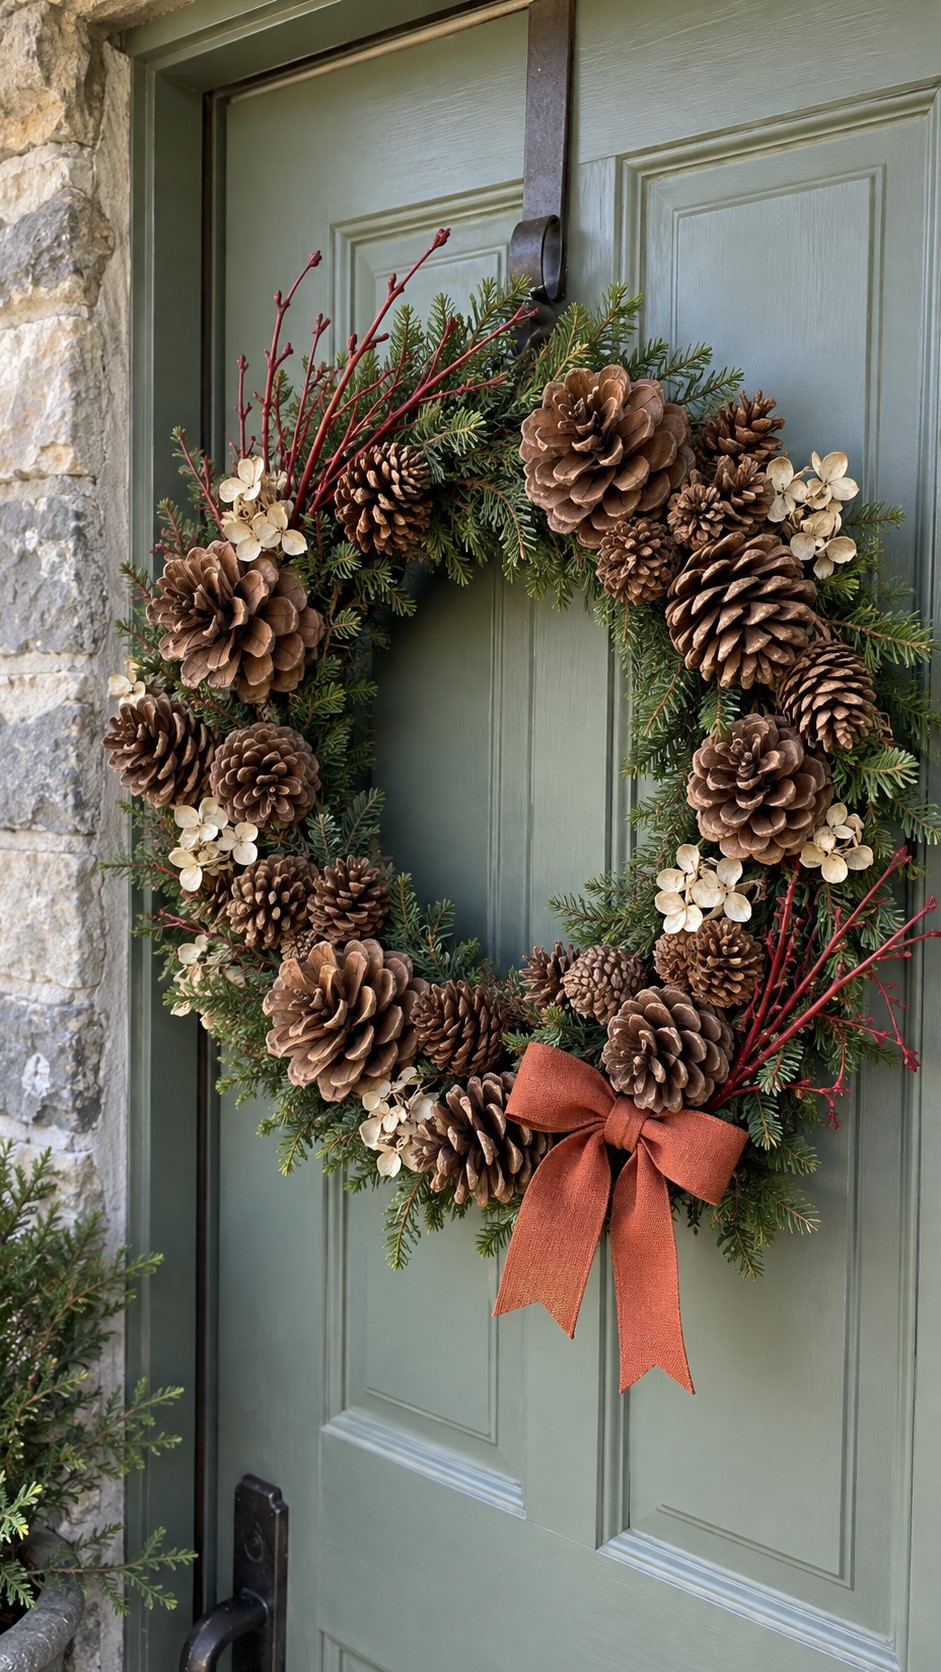
Make the cones the main feature by placing them in generous groups over a thin covering of greenery. This version needs more than the six cones suggested for the mixed wreath, so lay them around the frame before fastening any. Put the larger ones close to the base and fill awkward spaces with smaller cones. Add little pieces of hydrangea and short red twig sprays, then finish with a small rust bow. Keep its loops away from the cone clusters. The extra cones add weight, so check that the frame, hanging loop and door hook can support the finished wreath.
Care for a Wreath Made with Fresh Greenery and Dried Flowers
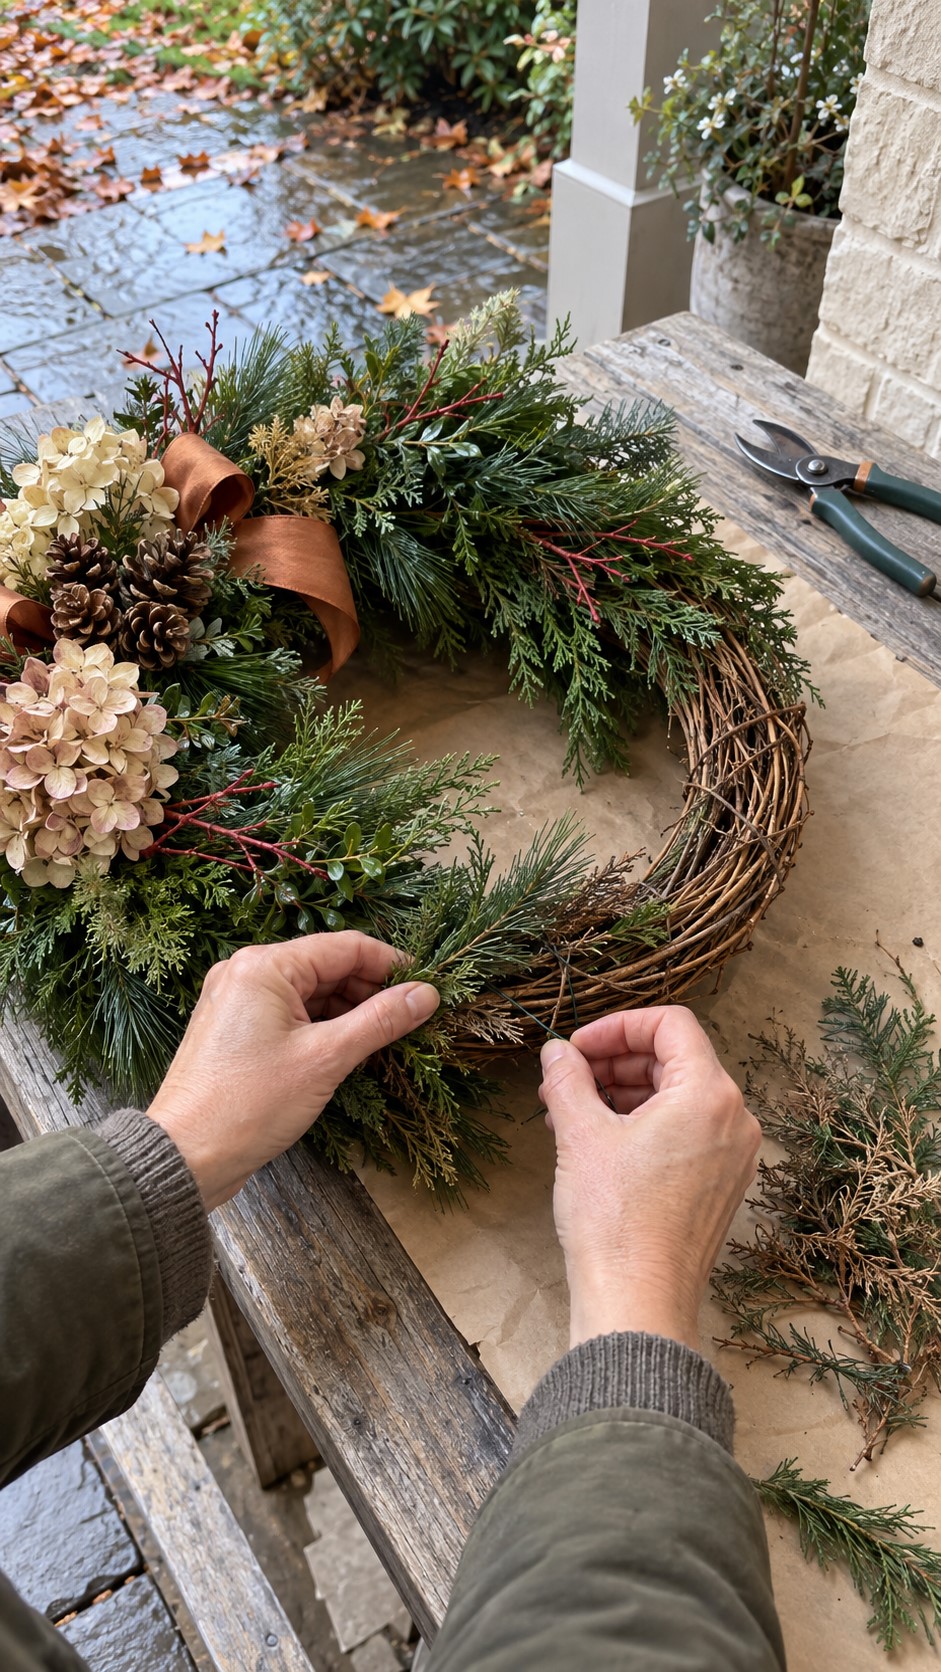
Fresh greenery dries faster in warm surroundings, so choose a cool position away from heating vents and strong sun. University of Minnesota Extension recommends cooler locations for cut pine and cedar used indoors.3 For this mixed wreath, a covered porch is a sensible choice: it offers outdoor coolness while sheltering the dried hydrangeas and ribbon. Check where wind-driven rain reaches before choosing the hook. A doorway can look sheltered from inside the house and still receive a soaking during a storm.
Care for the fresh and dried parts separately. Avoid soaking or misting the completed wreath, which would wet the flowerheads and ribbon too. If an evergreen bundle becomes brittle, add a fresh bundle with its own wire fastening, then remove the old stems without cutting the continuous wire holding the base together. Use the same approach for a damaged flowerhead. Small repairs are easier when you check the wreath as you pass the door, rather than waiting until several decorations have slipped.
Look for shedding needles, loose attachments and cones that have begun to sag. Lift the wreath off its hook for adjustments so you can reach the back without scraping the door. Keep dried plant material away from candles and other flames. There’s no fixed lifespan that suits every garden or climate, so use its condition as your guide. If you’re decorating for a Thanksgiving gathering, collect dry materials ahead and leave the fresh greenery and final assembly until nearer the day.
Give Your Thanksgiving Wreath Frame Another Season
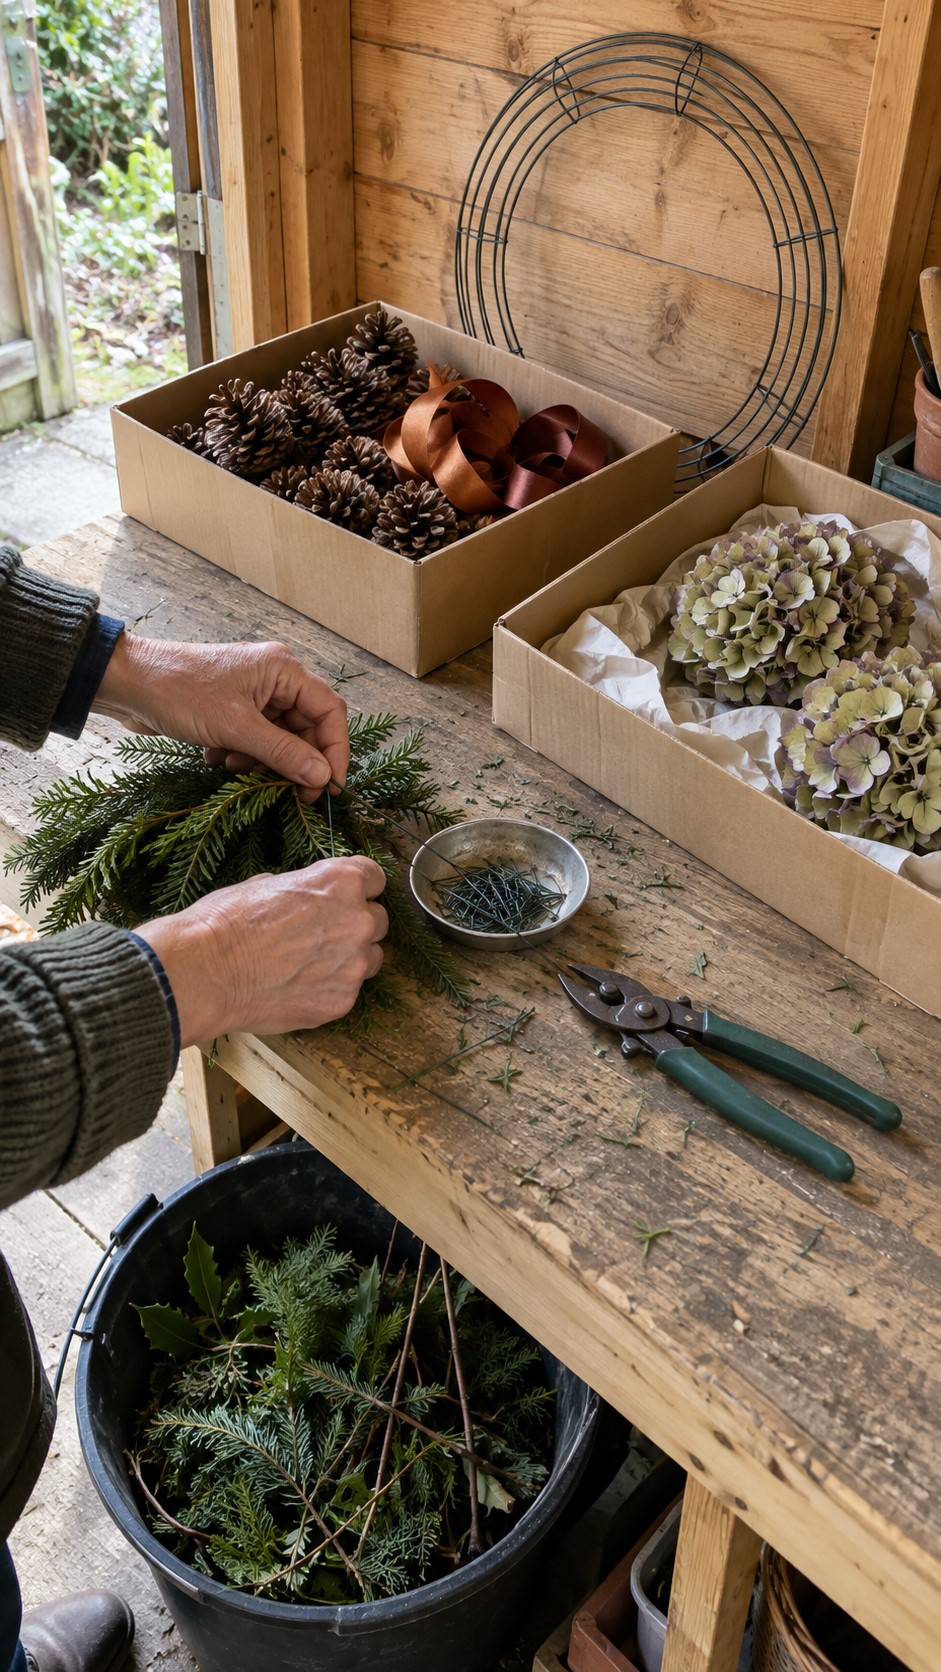
When the wreath comes down, take off the ribbon and decorations before cutting away the binding wire. Remove every piece of wire before composting suitable, disease-free plant material. RHS Advice Save the dry frame and sound pinecones, with any unbroken flowerheads in a separate box where they won’t be crushed. Coil the clean ribbon ready for another year. Next autumn, begin with one familiar plant and see what else the garden offers alongside it. The frame can stay the same while the wreath reflects a different season outside your door.
Notes:
- https://extension.illinois.edu/blogs/flowers-fruits-and-frass/2020-12-04-harvesting-evergreens-holiday-decorations?utm_source=chatgpt.com
- https://www.rhs.org.uk/plants/hydrangea/pruning-guide?utm_source=chatgpt.com
- https://extension.umn.edu/about/our-stories/news/fresh-cut-greens-and-winter-decor?utm_source=chatgpt.com
