10 x 10 Farmers Market Booth Layout Ideas for Sellers Who Need Room to Work
A good 10 x 10 farmers market booth layout starts with the way your stall needs to work on market day. Before choosing tables, crates or display stands, look at what you sell, how much stock you bring, how often you need to restock and where customers are likely to pause. A vegetable-heavy stall needs different space from a flower booth, a jam table or a mixed homestead setup with produce, eggs, herbs and preserves.

The best layout gives every part of the stall a clear job. Shoppers need to see the main products from the aisle. Prices need to be easy to read. Checkout needs enough room for bags, payment tools and a small line. You need a working corner for extra stock, water, clips, tape and anything else that saves the morning from turning messy. Once those decisions are made, the 10 x 10 space becomes much easier to plan.
Start With 10 x 10 Farmers Market Booth Layout Ideas That Match Your Market Day

A good 10 x 10 farmers market booth layout starts with a plain question: how do you actually sell? A flower grower with buckets of stems works in a different way from a vegetable seller with heavy crates. A homesteader selling eggs, jams, herbs and extra tomatoes needs little zones. Someone with only two crops and a cash box can get away with less furniture. Your booth should fit the work, not the other way around.
Before you load the car, walk through the morning in your head. Where will you stand? Where will shoppers stop first? Where do bags, change, paper sleeves, rubber bands and extra signs go? If you sell alone, your layout needs to protect your time as much as your produce. You should be able to answer a question, refill a basket and take payment without turning your back on half the booth.
Plan a 10×10 Farmers Market Booth Setup Around Your Products
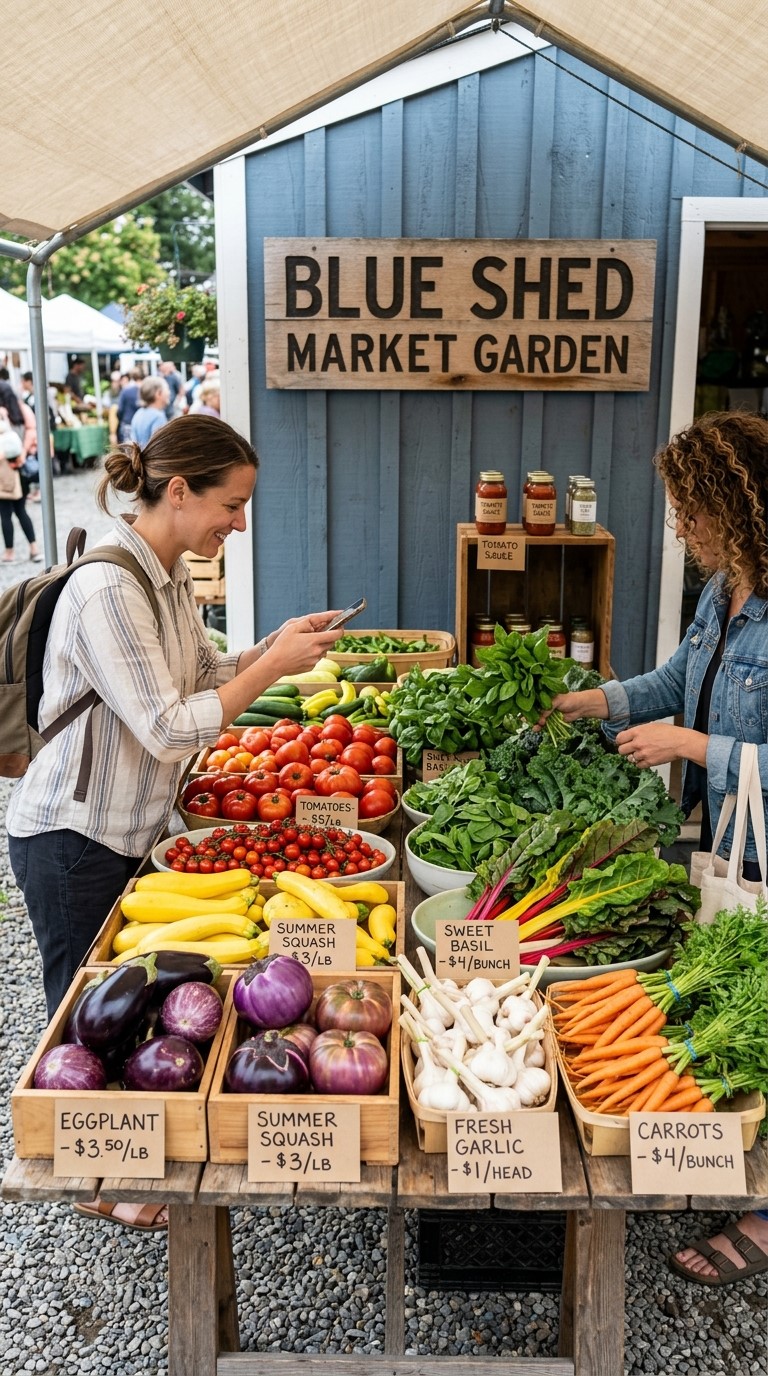
Fresh produce has a way of making a table look full and messy at the same time. Tomatoes tumble. Herbs wilt. Squash takes up more space than you expect, especially once shoppers start picking through it. A 10×10 farmers market booth setup for vegetables needs strong surfaces, clear labels and a little breathing room between groups.
Think in zones. Heavy items like potatoes, onions, melons and winter squash can sit lower in crates. Smaller produce, such as garlic, cherry tomatoes, peppers and beans, usually looks better in shallow baskets. Greens need shade and quick access for misting or restocking. Jars, eggs and flowers deserve their own steady spots, away from elbows and swinging tote bags.
Sketch a Vendor Booth Layout Before You Pack the Car
A quick sketch can save you from hauling the wrong table at sunrise. Draw a square and mark the canopy legs, tables, crates, cooler, checkout area and seller space. It doesn’t have to be neat. It has to tell you what will fit, where people will walk and which pieces will cause trouble.
The danger in a 10 x 10 space is bringing “just one more” display piece. One extra rack can make the whole booth feel pinched. A sketch shows you where the crowding starts. Leave room for your own feet, for shoppers carrying bags and for the person who wants to pause without blocking everyone else. Markets punish cramped layouts fast.
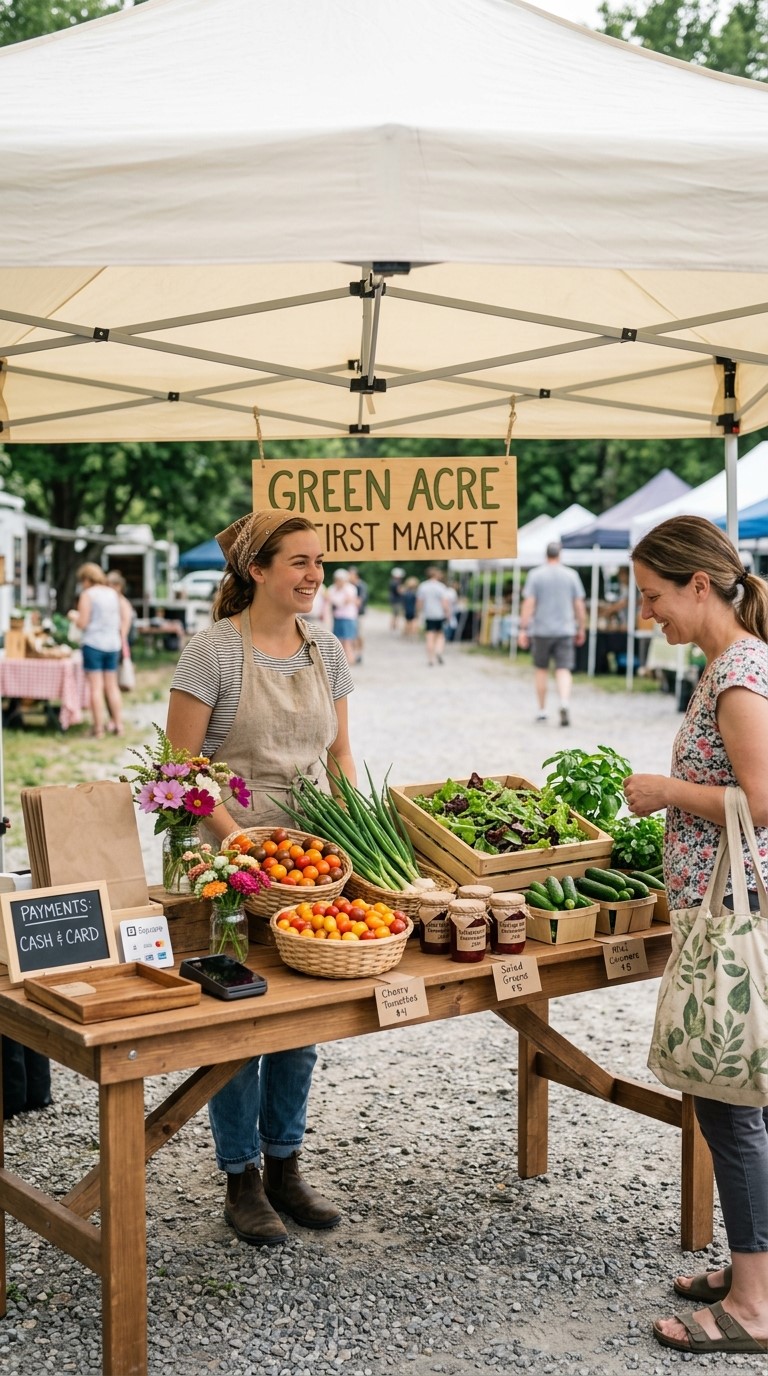
Use a Front-Facing Farmers Market Booth Layout for Quick Browsing

A front-facing farmers market booth layout is the simplest setup: one or two tables across the front, with the seller standing behind them. It works well for growers with a tight product range, steady prices and shoppers who want to make quick choices. It also suits busy markets where people move down the aisle in a line and don’t want to step inside every tent.
The risk is flatness. A long table can turn into a row of similar baskets, especially when the first rush of shoppers has passed. Add height at the back with sturdy crates or risers, then keep the front edge open enough for shoppers to reach. The table should say, “come look,” not “please solve this produce puzzle before coffee.”
Build a Farmers Market Table Layout With Clear Groups
A farmers market table layout works best when shoppers can read it in seconds. Put tomatoes with tomatoes, herbs with herbs and greens with greens. If you mix everything for a “farm abundance” look, it can photograph well, but it often slows people down. Shoppers shouldn’t have to ask where the basil is while standing in front of the basil.
Use small signs that name the item and the price in plain language. If you sell by bunch, say so. If you sell by pound, make the scale easy to see. Confusion costs sales because some shoppers won’t ask. They’ll smile, touch a pepper, wander away and buy from the stall with clearer signs.
Keep the Farmers Market Booth Display Open at Checkout
The checkout spot needs more space than you think. A card reader, cash box, paper bags, scale and receipt book can swallow one end of a table. Then a shopper arrives with a tote, another person reaches for cucumbers and suddenly the best part of your display becomes a traffic jam.
Put checkout at one end, not in the center. That gives browsing shoppers room to keep looking while someone pays. If you use a front-facing layout, the checkout end should be obvious but not loud. A small “Pay Here” sign, a neat stack of bags and a clear space for produce can make the whole booth feel calmer.
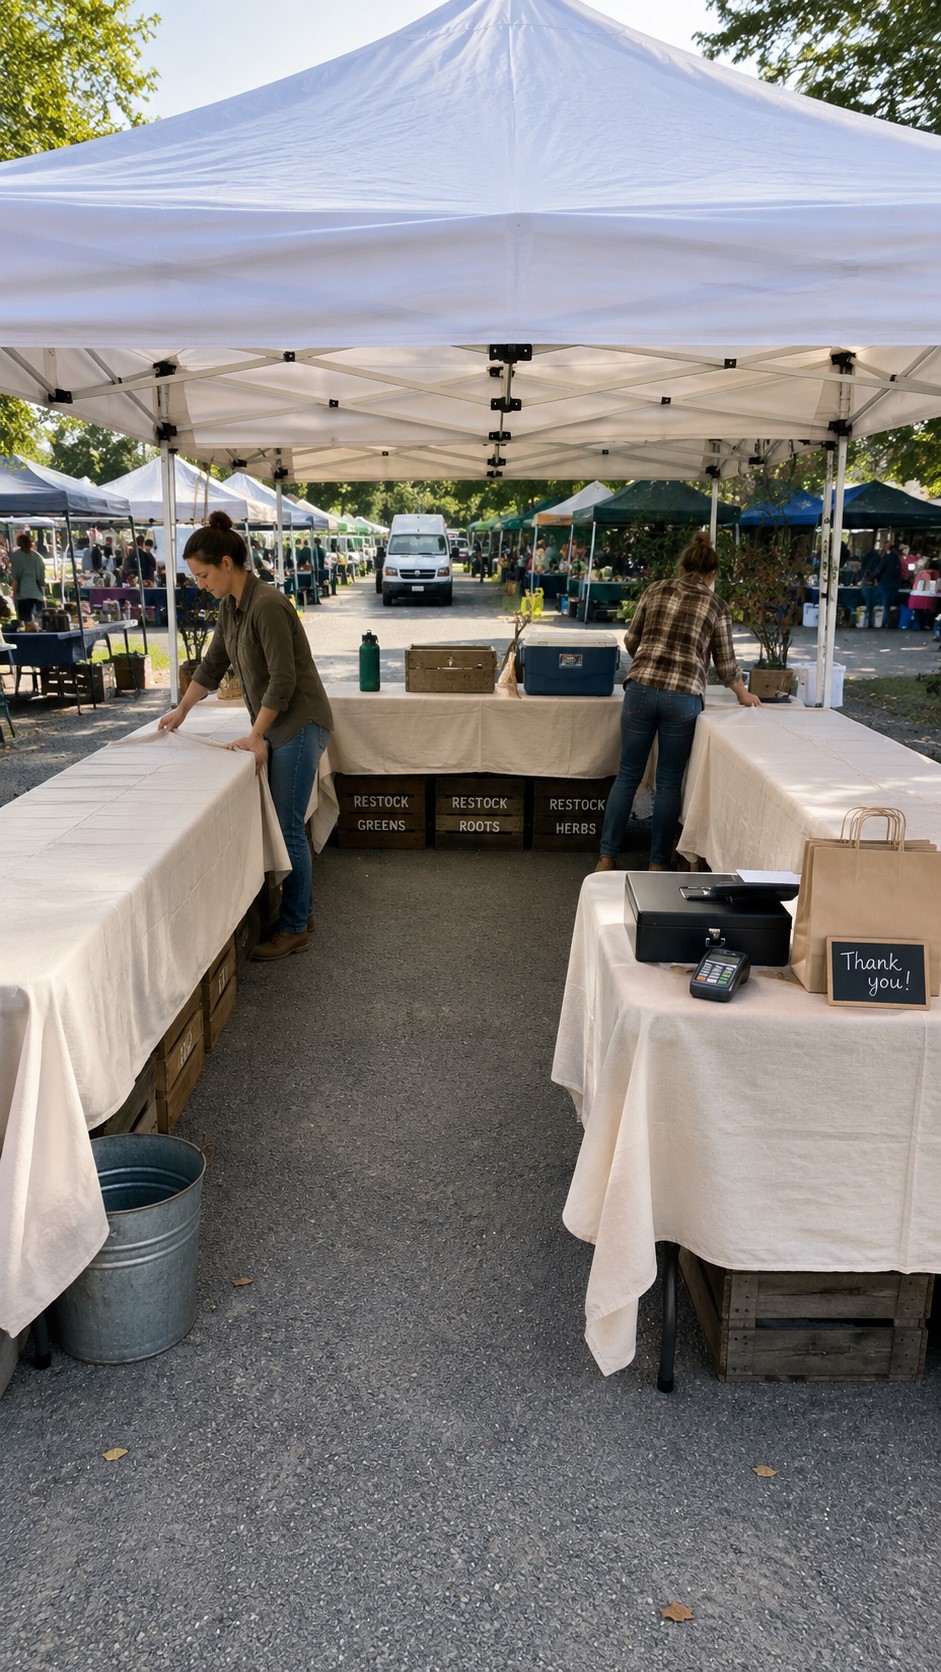
Try an L-Shaped 10×10 Vendor Booth Layout for One-Person Selling
An L-shaped 10×10 vendor booth layout is a favorite for good reason. It gives you a main selling table along the front and a second surface down one side. The open space behind the L becomes your work area, storage corner and breathing room. For one-person sellers, that matters on a hot day when every small movement starts to count.
The front table can hold the produce that gets people to stop: tomatoes, greens, cucumbers, peppers or flowers. The side table can hold jars, herbs, eggs, recipe cards or checkout. Because the shape naturally leads shoppers from the front toward the side, it can make paying feel more natural than standing in a clump at the middle of the booth.
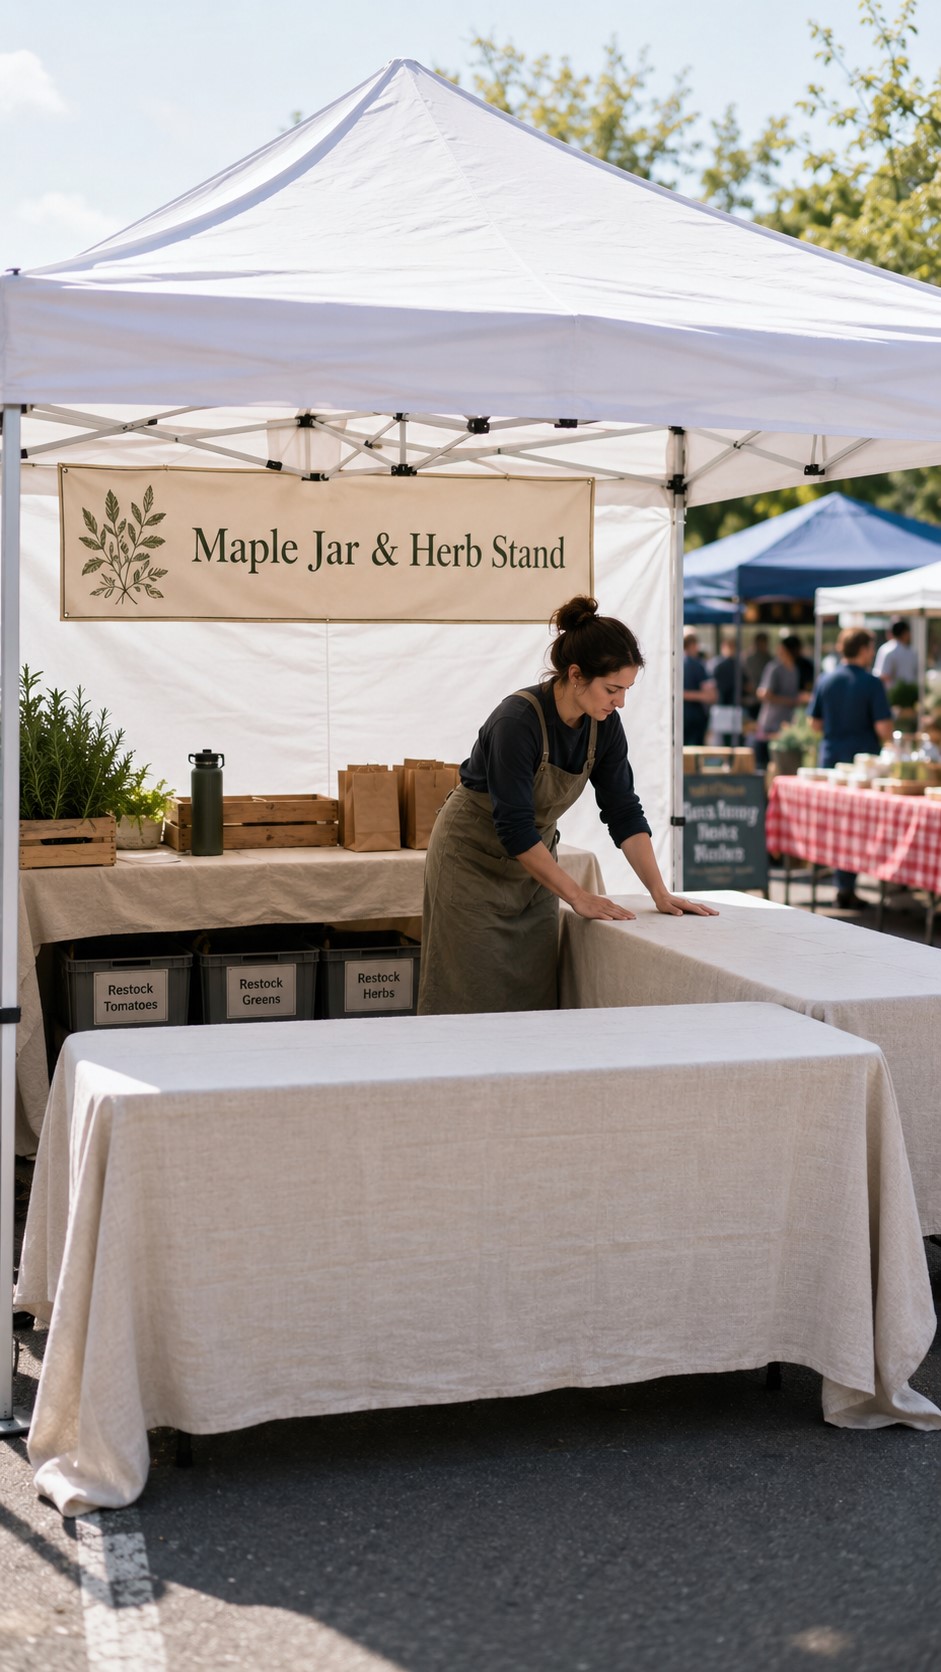
Set the 10×10 Market Booth Layout With a Seller Corner
A 10×10 market booth layout needs one private-feeling corner, even if it’s only three feet wide. This is where you keep the restock crates, cooler, spare bags, water bottle, clips, tape and jacket you won’t need after 8 a.m. It should be hidden enough to keep the booth tidy but close enough that you can grab things without leaving customers waiting.
In an L-shape, tuck this corner at the back of the side table. Use covered bins or crates under the table if you can. A tablecloth that reaches near the ground hides a lot of market reality. Nobody needs to see the backup zucchini, half-empty snack wrapper and emergency roll of paper towels.
Place the 10×10 Vendor Booth Layout Checkout Near the Exit
Checkout should sit where shoppers are already headed. In an L-shaped 10×10 vendor booth layout, that usually means the outer end of the side table or the front corner nearest the aisle. If shoppers have to move deep into the booth to pay, they can block the people still browsing.
A good checkout area has a flat spot for produce, a bagging zone and your payment tools within reach. Keep it boring. Boring is excellent here. The prettiest carrots can be on the main table. The checkout should be clean, fast and hard to misunderstand. A small sign and one clear payment surface will do more than a crowded little cashier station.
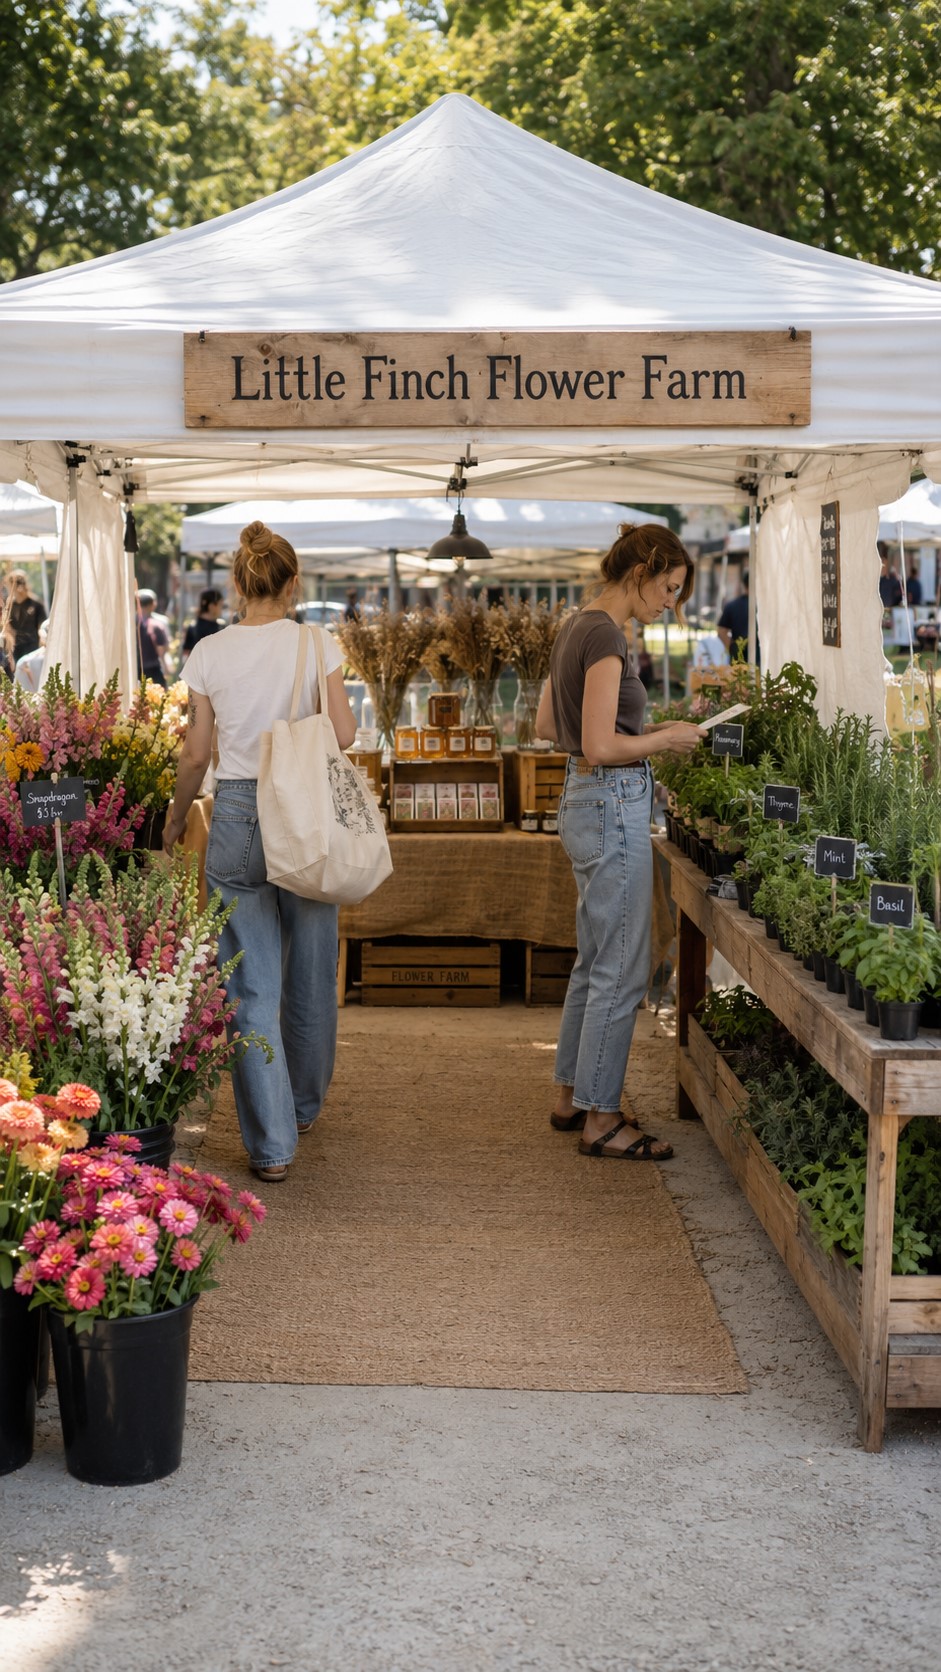
Shape a U-Style Farmers Market Booth Layout
A U-style farmers market booth layout can be lovely when you bring more than one category of goods. It gives shoppers three sides to browse and lets you build a small market room under the canopy. This can work for a homestead booth with vegetables, flowers, preserves, eggs, herbs and baked goods.
But a U-shape needs discipline. If the entrance is too narrow, people hesitate. If the tables sit too close together, two shoppers can make the whole booth feel stuck. The opening should be wide, and the center should stay open. The goal is not to fill every inch. The goal is to give people enough to see without making them feel penned in.
Guide Farmers Market Customer Flow Through the U Shape
With a U-shaped booth, product placement has to do some quiet work. Put colorful, easy-grab items near the front: tomatoes, flowers, herbs or berries. Place slower browsing items along the sides, such as preserves, recipe cards, garlic braids or mixed vegetable baskets. Put checkout near the exit so shoppers can finish without turning around.
Watch how people move during your first hour. If everyone enters and freezes, the display is probably too dense at the front. If shoppers miss the side table, you may need a sign or stronger product grouping. Markets give blunt feedback. You just have to notice it before the next Saturday.
Use Market Display Stands Along the Booth Edges
Market display stands can help a U-shaped booth feel full without eating up the middle. Place risers, crates, small shelves or flower buckets along the edges, where they add height and structure. Keep anything tall from blocking your view across the booth. You need to see shoppers, answer questions and spot when a basket needs restocking.
Avoid tall displays in the center. They may look good during setup, but they turn awkward when people step inside with bags or strollers. The center of the U is not display space. It’s people space. That little bit of restraint often makes the booth feel more generous.
Plan a Farmers Market Tent Layout for Shade, Wind and Heat

A farmers market tent layout has to handle the weather because the weather will not care how pretty your table looks. Morning shade can turn into direct sun by midmarket. A breezy aisle can flip price cards into the onions. Rain can blow sideways under the canopy, especially when you least want it to.
Start with the sun. Put delicate greens, herbs, eggs, flowers and baked goods in the coolest part of the booth. Use the back or side shade for items that suffer fast. Hardier crops like potatoes, squash and onions can handle more exposure. If your checkout spot sits in full sun, you’ll feel it by 10 a.m., and so will your customers.
Secure the Farmers Market Canopy Setup Without Blocking Paths
A farmers market canopy setup needs proper weights on every leg. That part is nonnegotiable. Still, those weights shouldn’t become ankle traps. Keep them tight to the legs where possible, and avoid cords or straps that cross the customer path. A booth can be safe and still look clean.
If you use sandbags, buckets or metal weights, work them into the layout. Put crates, flower buckets or table ends near them so shoppers naturally walk around them. Nobody should have to step over a rope to buy lettuce. Good safety looks uneventful, which is exactly what you want at a market.
Add Booth Storage Ideas That Stay Out of Sight
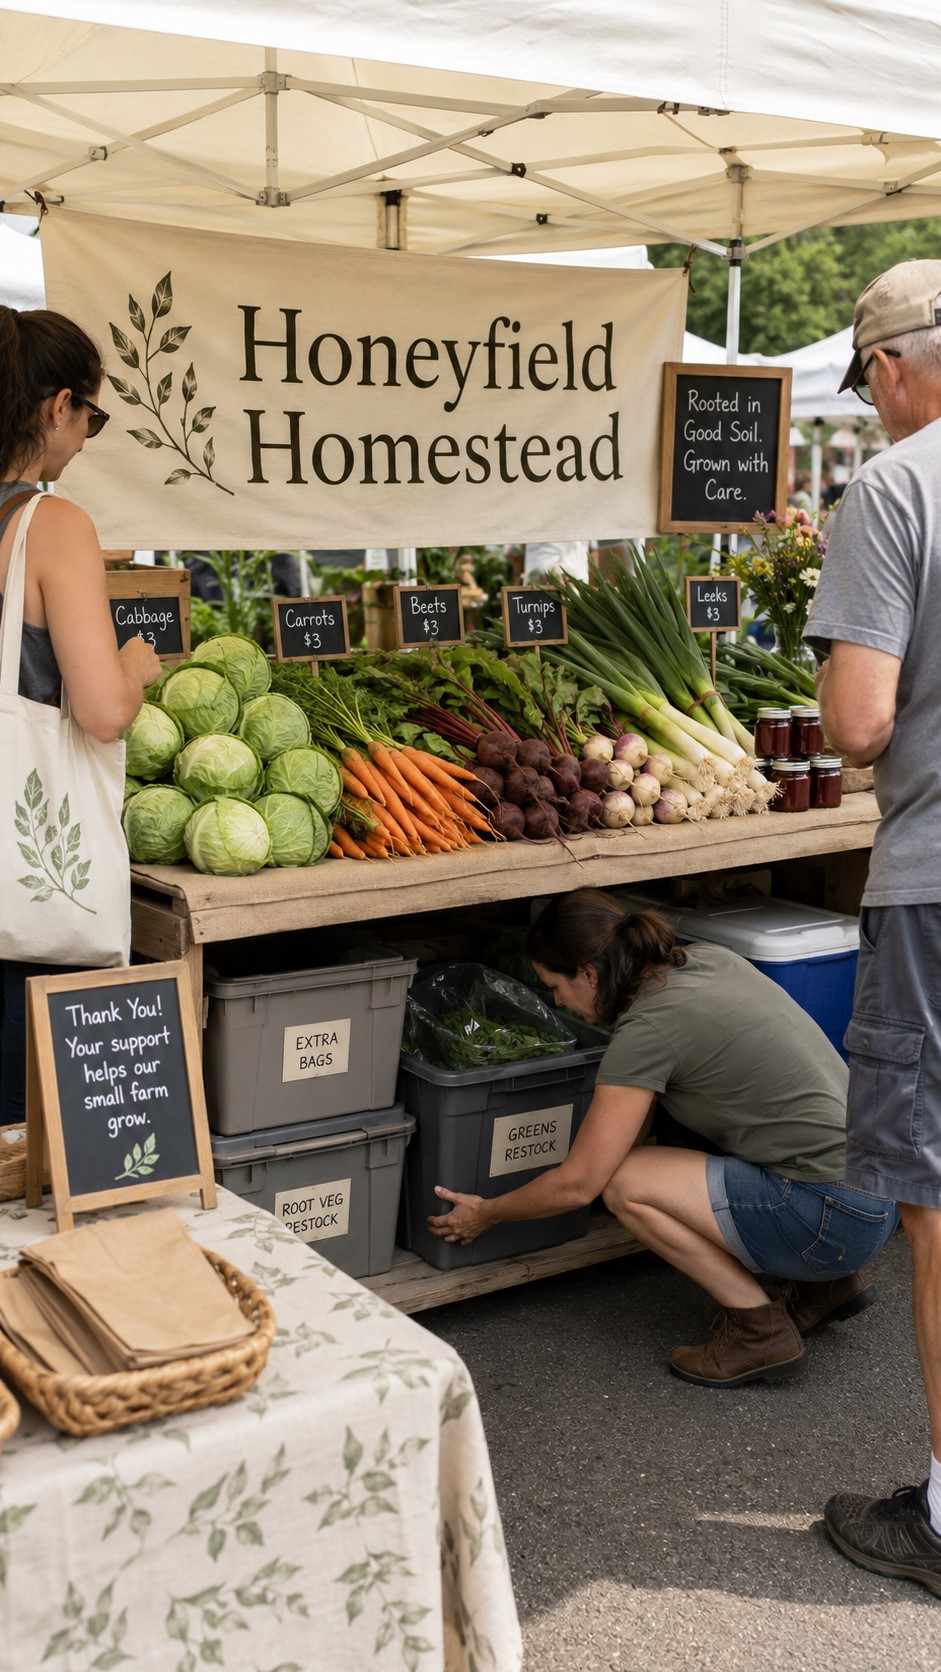
Booth storage ideas are where many new sellers underplan. The first table looks beautiful, then the extra crates end up scattered behind the seller’s feet. After one busy hour, the booth looks less like a farm stand and more like the back of a shed.
Use covered bins, low crates under tables and a back-corner cooler system. Label restock boxes before leaving home, especially if you bring similar-looking greens or mixed herbs. The faster you can refill, the fresher the display looks. And if the booth looks cared for, shoppers tend to trust the produce more.
Arrange a Farmers Market Table Layout for Produce, Flowers and Jars
A farmers market table layout should help different products keep their own character. Vegetables need abundance. Flowers need height. Jars need order. Eggs need protection. Herbs need freshness and a little romance, though not so much that shoppers can’t find the parsley.
Give each category a job. Flowers can pull people in from the aisle. Tomatoes can hold the center because they’re bright and familiar. Greens can sit in shade, perhaps in lined crates. Jars can stand in neat rows with one sample jar or flavor sign. This kind of grouping keeps the booth from looking like everything landed there in a hurry.
Use Vegetable Display Ideas With Baskets and Crates
Vegetable display ideas don’t need fancy props. Wooden crates, shallow baskets and clean signs can do most of the work. Heavy produce belongs in strong containers. Small produce needs baskets that stop it from spreading across the table. A half-full giant basket looks sad, but a smaller full basket looks generous.
Tilt crates slightly when the produce can handle it. The angle helps shoppers see what’s inside without digging. For delicate items, keep things flatter and gentler. Beans, tomatoes and leafy greens bruise or wilt when they’re treated like decor. The best display still respects the food.
Give the Farmers Market Produce Display Color and Order
A farmers market produce display can use color without becoming fussy. Put red tomatoes near green basil. Place yellow squash beside darker zucchini. Let purple eggplant sit where the light catches it. These simple pairings help the table read from across the aisle.
Order matters, too. Don’t hide small premium items behind bulk crops. Garlic, herbs, microgreens, small flowers and specialty peppers can get lost if they’re tucked behind a wall of squash. Raise them slightly or give them a clear front corner. If people don’t see them, they don’t buy them. Painful, but true.
Small Farmers Market Booth Layout
A small farmers market booth layout is useful for backyard growers, first-time vendors or anyone testing a new market. You may not have a truck full of produce yet. That’s fine. A smaller harvest can still look polished if you choose the right table size, containers and spacing.
The trick is not to spread a modest harvest across too much surface. A single table with tight groupings often looks better than two tables with lonely baskets. Use smaller containers, stack a few crates and add signs with care instructions or recipe ideas. A booth can feel full of thought without being packed full of product.
Use a One Table Booth Setup for Early Market Days
A one table booth setup can be a gift when you’re starting out. You have fewer surfaces to dress, fewer places for things to go wrong and less packing at the end of the day. One six-foot table under a 10 x 10 canopy can hold more than people expect if you group products well.
Put the strongest items in the center and the easiest add-ons near checkout. Herbs, small jars, recipe cards and flower bundles can lift the table without needing much room. Keep backup stock under the table in labeled crates. Refill in small amounts, so the display stays fresh rather than crowded.
Make a Compact Market Booth Easy to Shop
A compact market booth should be almost impossible to misunderstand. Clear sign. Clear prices. Clear checkout. If a shopper has to ask three basic questions before buying, the layout is working against you. This is especially true in a busy aisle, where people decide fast.
Use fewer signs, but make them readable. Put bags where shoppers can see them, but not where they take over the table. If you sell by weight, make the scale part of the checkout zone. A simple booth can feel confident. It says you know what you brought and you’re ready to sell it.
Check Your 10×10 Farmers Market Booth Setup Before Market Morning
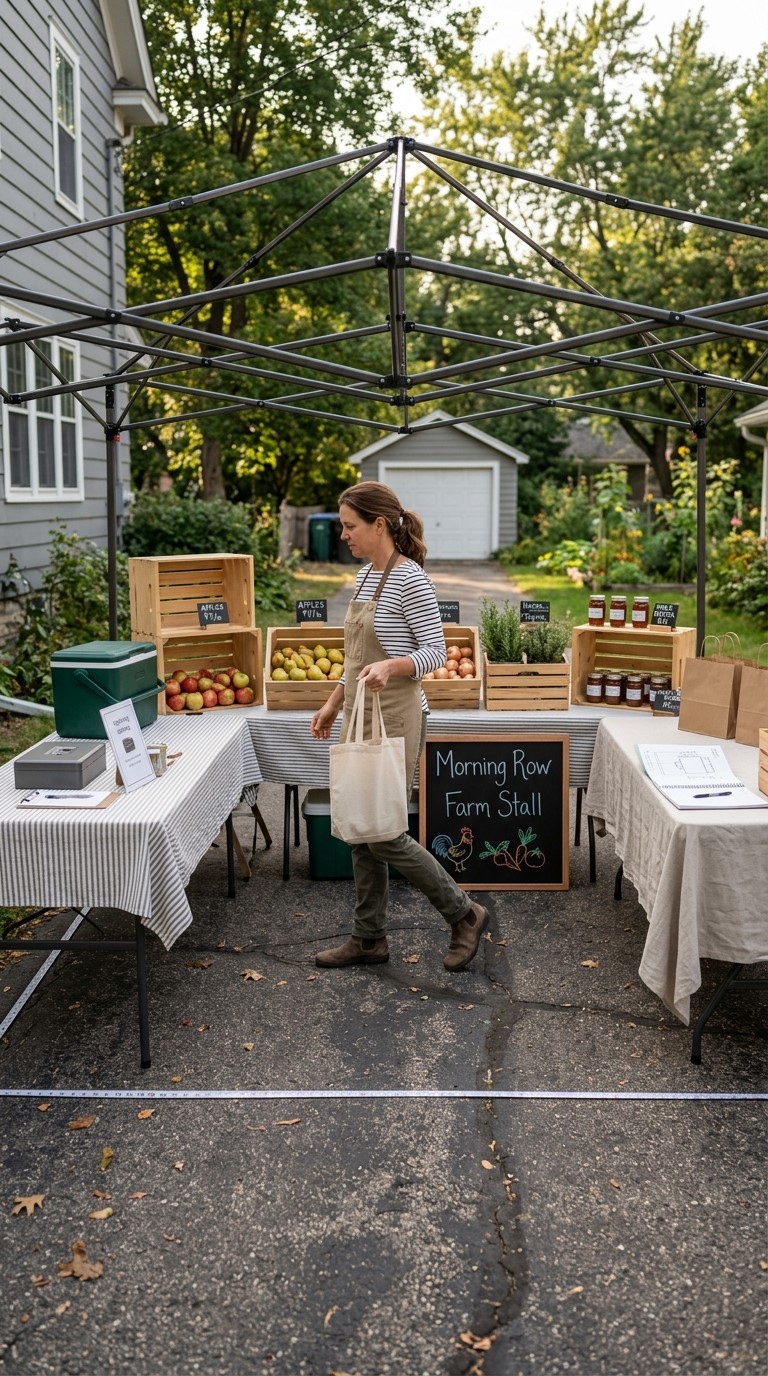
The best time to fix a 10×10 farmers market booth setup is not while the market manager is waving you into your space. Test it at home once, even if you feel ridiculous standing in the driveway with empty crates. Mark the canopy footprint, set the tables where you think they belong and walk through the motions.
Pretend to sell. Pick up a bag. Reach for the card reader. Restock tomatoes. Move around another person. If the setup annoys you at home, it will be worse at the market. Change it before the car is packed. This small rehearsal can spare you a lot of muttering before sunrise.
Pack a Farmers Market Vendor Checklist Around the Layout
A farmers market vendor checklist should follow the layout, not sit in a random notebook. If checkout is on the right, pack the checkout bin with everything that belongs there: card reader, cash box, bags, scale, pens, tape and price tags. If flowers sit at the left front, pack sleeves, rubber bands and water tools near the flower buckets.
Think in booth zones as you load. Display items together. Checkout items together. Restock items together. This makes setup faster, and it also helps when you’re tired after the market. A good packing system is not glamorous. It’s the reason you can find the clips when the wind starts acting up.
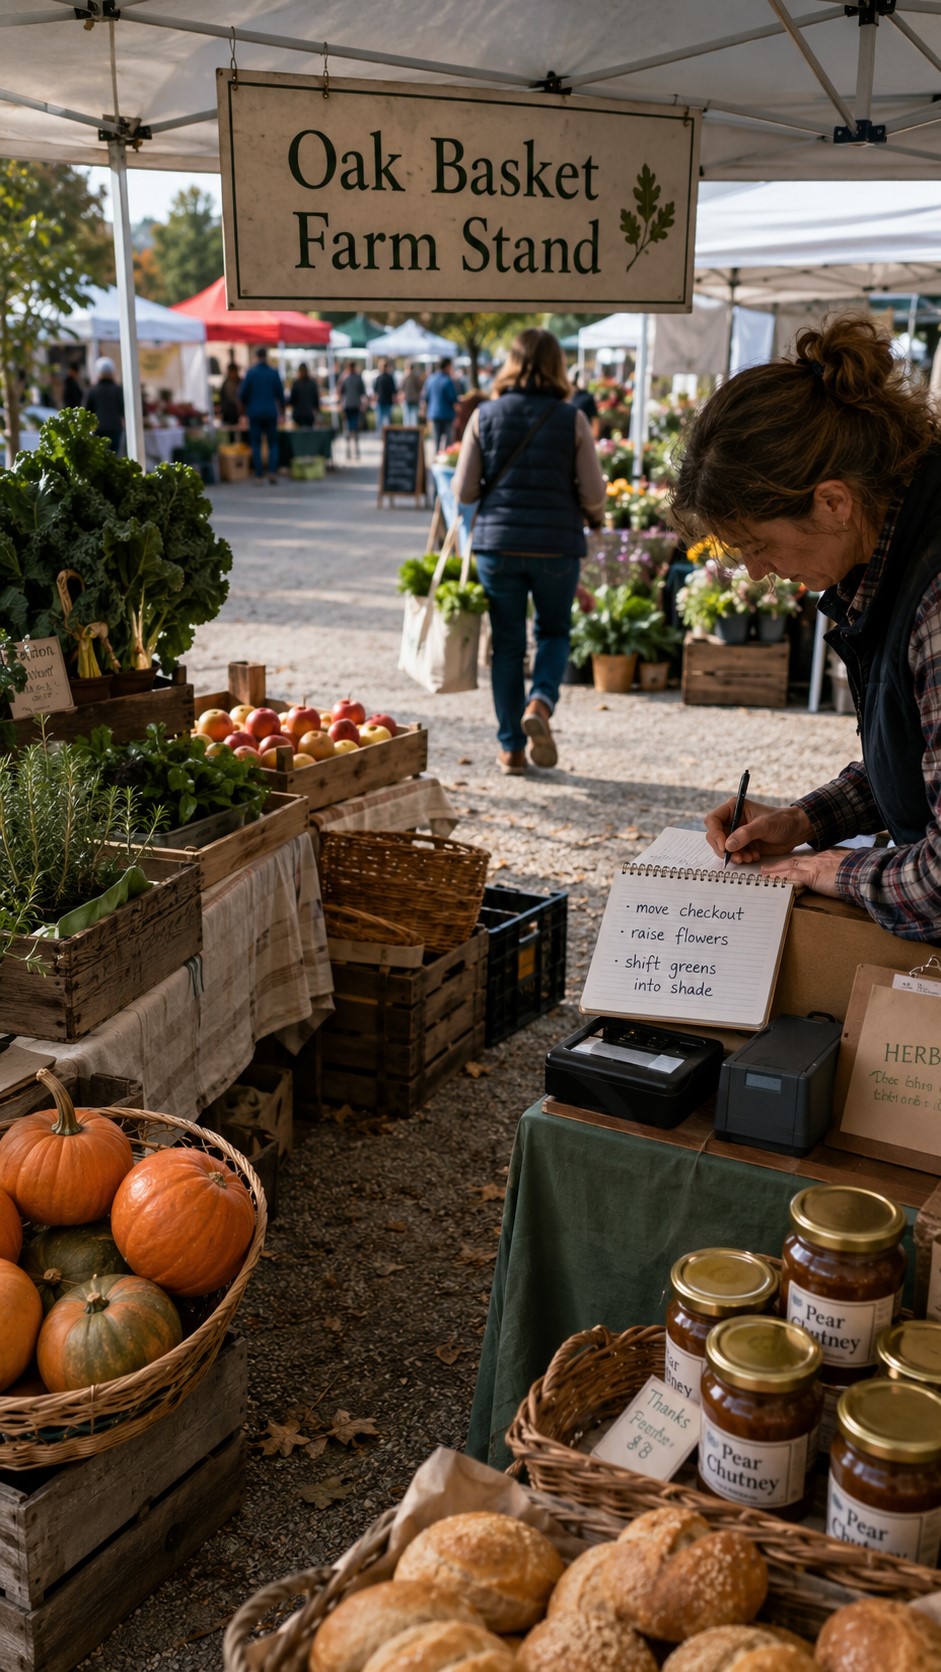
Adjust Your Farmers Market Booth Organization After Each Saturday
Farmers market booth organization gets better when you pay attention to what bothered you. Maybe the checkout line blocked the cucumbers. Maybe everyone missed the herb bundles. Maybe the sun hit the lettuce too early. Write those things down before you forget them.
Small changes can do a lot. Move checkout six inches. Turn a crate. Raise the flowers. Shift greens to the shade. Retire the extra rack that always feels in the way. A booth doesn’t have to be perfect to sell well. It has to be useful, readable and kind to the person working inside it.
The Booth You’ll Be Glad to Set Up Again
A 10 x 10 farmers market booth layout has done its job when the morning feels less frantic. Customers can see what you brought. Prices make sense. The checkout has room to breathe. You can refill a basket without knocking over the basil, and the extra bags are exactly where your hand expects them to be.
That kind of booth may not look dramatic on paper, but it changes the day. It lets the produce do the talking and gives the seller a little dignity at 7 a.m., which is no small thing. Start with one layout, take notes after the market and keep adjusting until the space feels like it belongs to the way you sell.