Farmers Market Booth Setup Ideas for Sellers Who Want Shoppers to Stop
The canopy leg jams halfway open, one tablecloth is still folded in the car and the first shopper is already drifting down the aisle with coffee in hand. This is the moment a farmers market booth setup starts doing its real work. Before you say hello, your table is already telling people if you’re ready, organized and worth stopping for.
A good booth doesn’t need to look like a shop window in a catalog. It needs to feel fresh, calm and easy to buy from. The shopper should know what you sell, what it costs and where to pay without squinting at a curled-up note taped to a crate. That sounds basic, but basic is where many market mornings go wrong.
Farmers Market Booth Setup Starts Before the First Shopper Arrives
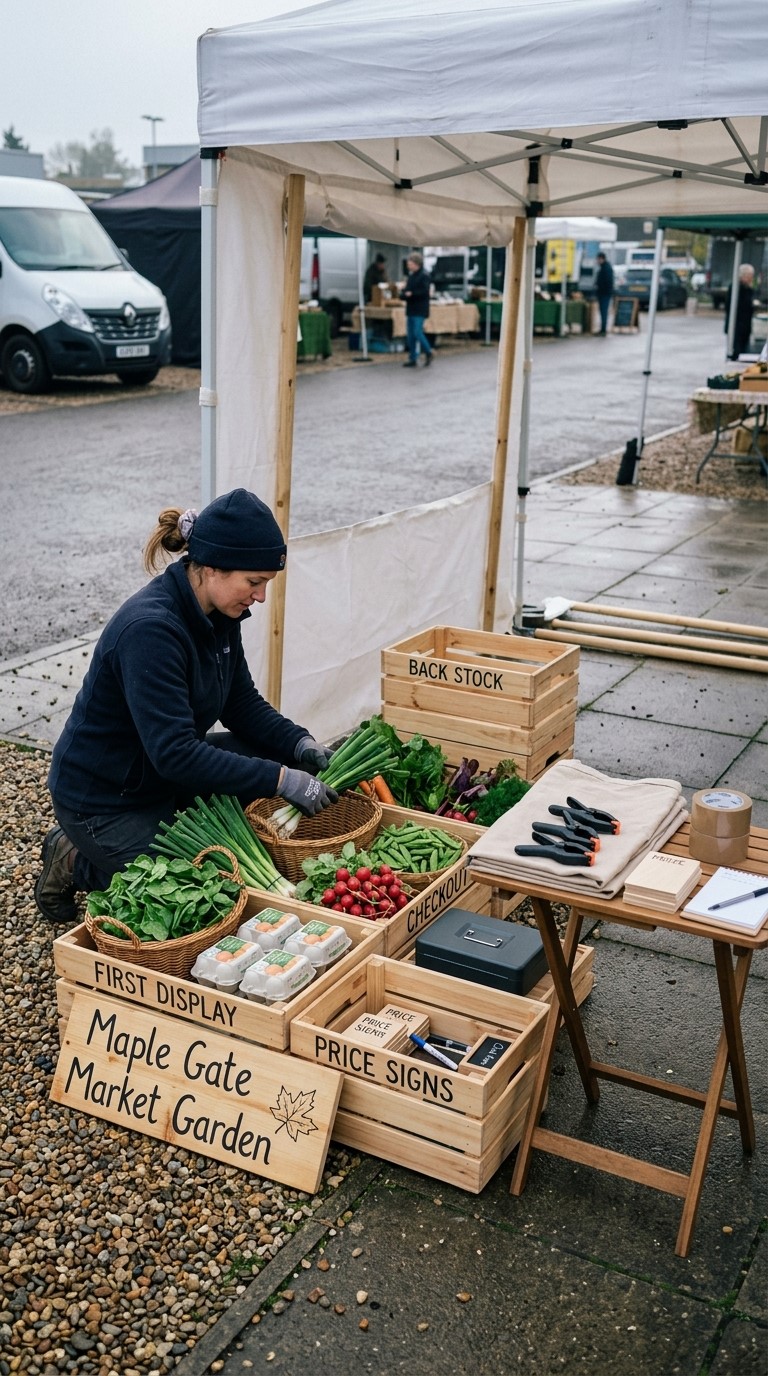
The best farmers market booth setup starts in the driveway, not under the canopy. Pack with the finished table in mind. Put first-display crates on top, tuck checkout supplies into one box and group signs where you can grab them fast. If everything arrives mixed together, you’ll spend the first twenty minutes digging for tape while your lettuce wilts and your confidence slips.
A Farmers Market Vendor Setup Should Answer Three Questions
A strong farmers market vendor setup answers three things before anyone speaks: what’s for sale, what it costs and where shoppers should pay. If people can’t work that out while walking past, many will keep moving. A busy market gives people easier choices, so confusion loses them fast. Use one main sign, clear price cards and a checkout spot that looks like checkout.
A Farmers Market Booth Layout Needs Space for Quiet Browsers
A farmers market booth layout should make room for the quiet shopper. Plenty of buyers want to look first and talk later. If the table blocks every approach or the seller stands right in front of the tomatoes, browsing starts to feel like asking permission. Leave a clean front edge, stand slightly to the side when you can and give people room to step in, look and step back out.
Choose the Farmers Market Booth Layout Your Stall Can Handle
The right farmers market booth layout depends on the size of your stall, the amount you bring and how many hands you have. A first-time vegetable seller with one table needs a different setup than a flower grower with buckets, wrapped bouquets and a helper. Start with the easiest layout you can run without panic, because workable beats fussy on a market morning.
A Front Farmers Market Table Setup Keeps First Markets Simple
A front farmers market table setup is the plain workhorse: one table across the front, produce facing the aisle and the seller behind it. It’s easy to understand and easy to manage. You can greet people, bag purchases and see the whole display without turning your back on the cash box. Use the back of the table for taller crates or signs, then keep the front low so shoppers can see everything.
An L-Shaped Farmers Market Booth Layout Gives Checkout a Home
An L-shaped farmers market booth layout gives you a main selling table and a side checkout. This helps when shoppers want to handle produce before paying. They can browse across the front, then move to the side with their basket while the next person steps in. The short side of the L is a good spot for paper bags, a card reader, cash box, phone charger and small extras.
A U-Shaped Farmers Market Setup Works Best With Room
A U-shaped farmers market setup can work well for deeper stalls, but only if customers can enter and turn around with comfort. The shape is useful for flowers, larger produce runs, plant starts or a booth that sells several categories. The risk is crowding. If two people inside the U block the entrance, everyone else waits or walks away. Leave a generous opening and keep checkout near the exit.
Build a Farmers Market Booth Display Shoppers Can Read From the Aisle
A farmers market booth display is read from several feet away, often while someone is carrying coffee, a tote bag and maybe a child who has decided the ground is lava. Your job is to make the table easy to scan. Color, height and spacing do more work than tiny labels or cute props, especially when shoppers are deciding in a few seconds.
Add Height to Your Farmers Market Booth Display With Crates
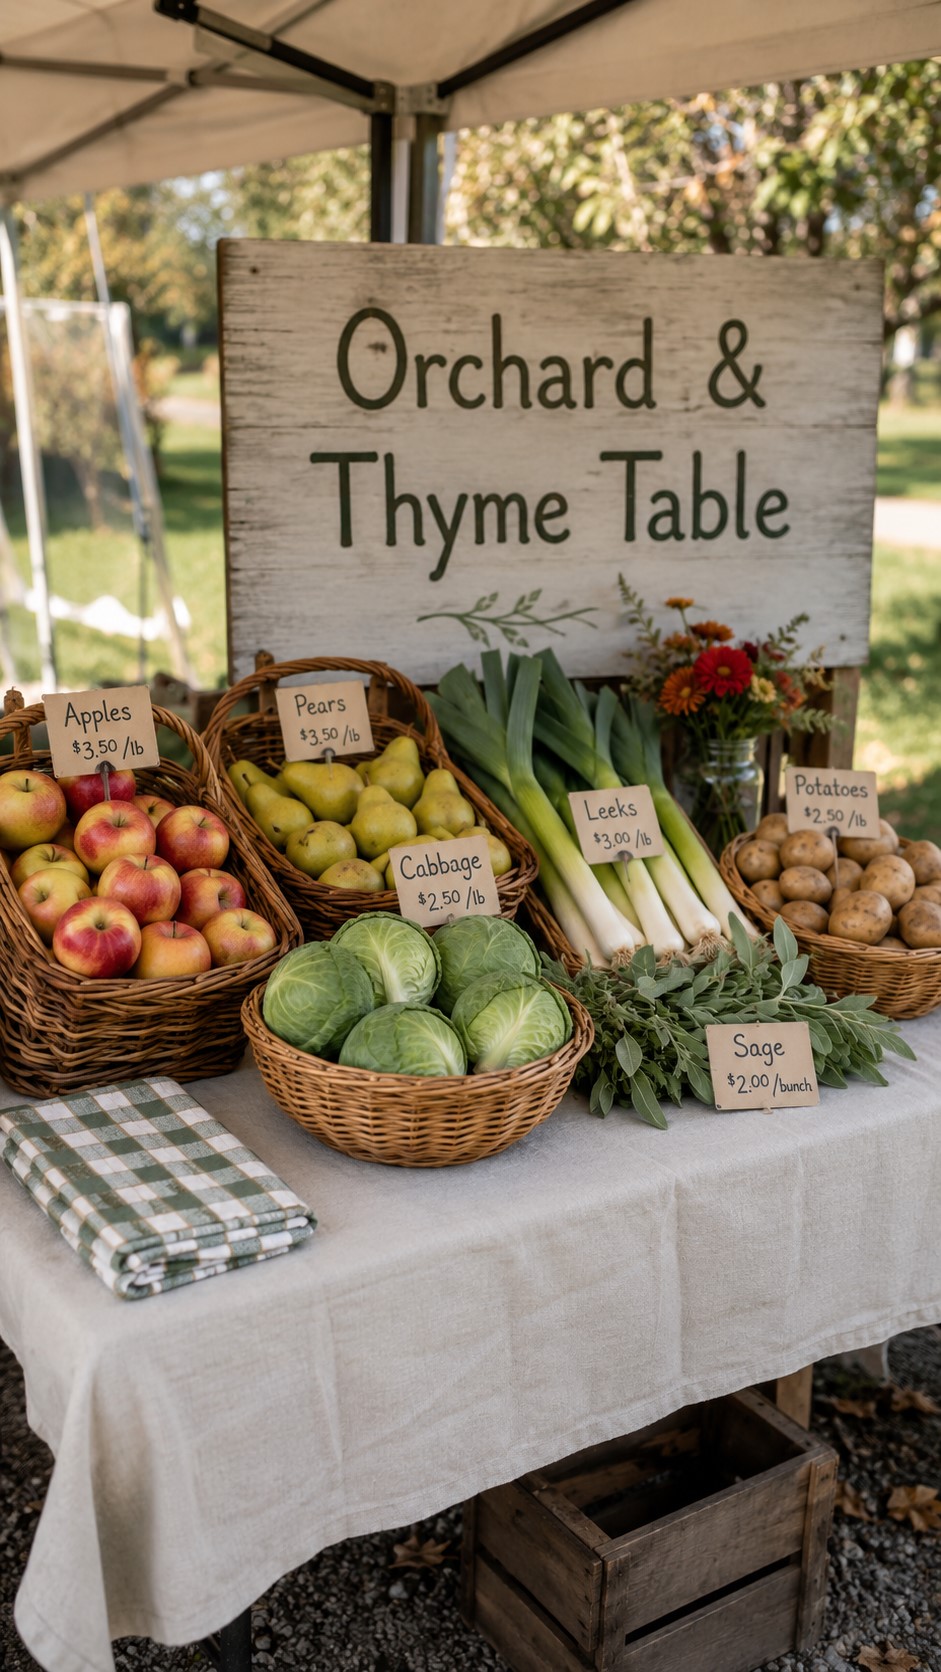
Height gives a farmers market booth display shape. Wooden crates, sturdy risers, shallow shelves or flipped baskets can lift herbs, flowers, jam jars and signs toward eye level. Keep heavy items low for safety. Use height at the back and sides, then let the front stay open for easy picking. This makes the table feel full without blocking the produce, and it helps your booth stand out in a row of flat tables.
Group Your Farmers Market Table Display by Color and Crop
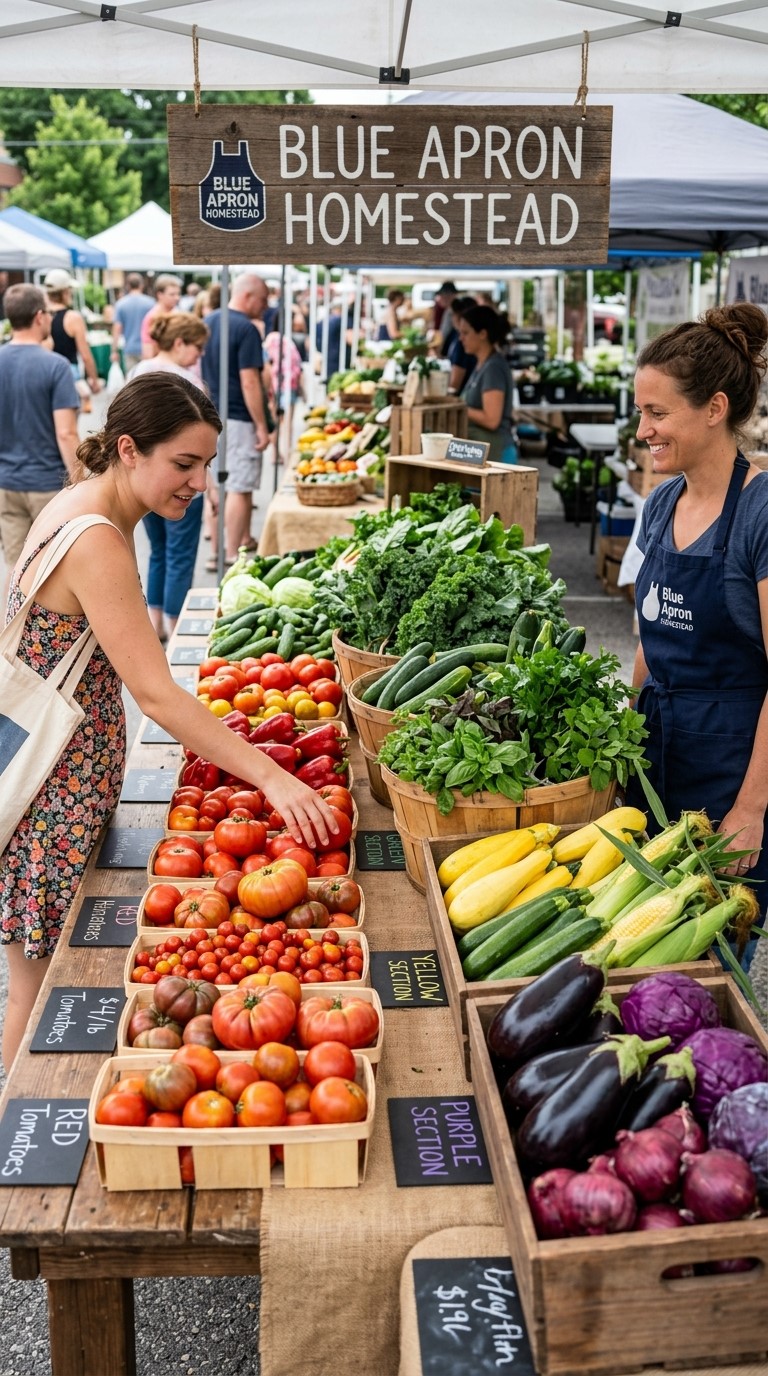
A farmers market table display looks stronger when crops are grouped. Put tomatoes with tomatoes, cucumbers with cucumbers and greens with greens. If you scatter everything across the table, shoppers have to search, and the display can start to look messy even when the produce is beautiful. Use baskets that fit the amount you have. A full small basket looks better than a wide crate with six lonely peppers rolling around.
Make Your Farmers Market Table Setup Feel Fresh and Full
A farmers market table setup has to balance abundance with order. Too sparse and people worry the best items are gone. Too crowded and they can’t see what’s available. Bring extra clothespins, small baskets and folded tea towels so you can adjust as the morning changes. Early on, larger crates may look right. Later, after the rush, tighter containers can make the table feel fresh again.
Put Seasonal Produce First in Your Farmers Market Table Setup
The strongest farmers market table setup starts with the crop that feels most alive that week. In July, that might be tomatoes, basil and cucumbers. In fall, it might be squash, apples, garlic or bunches of kale. Put the seasonal star where shoppers can’t miss it. If you have a small amount of a prized crop, place it in a shallow bowl or basket with a clear price sign.
Add Jars and Extras to Your Farmers Market Booth Display in One Zone
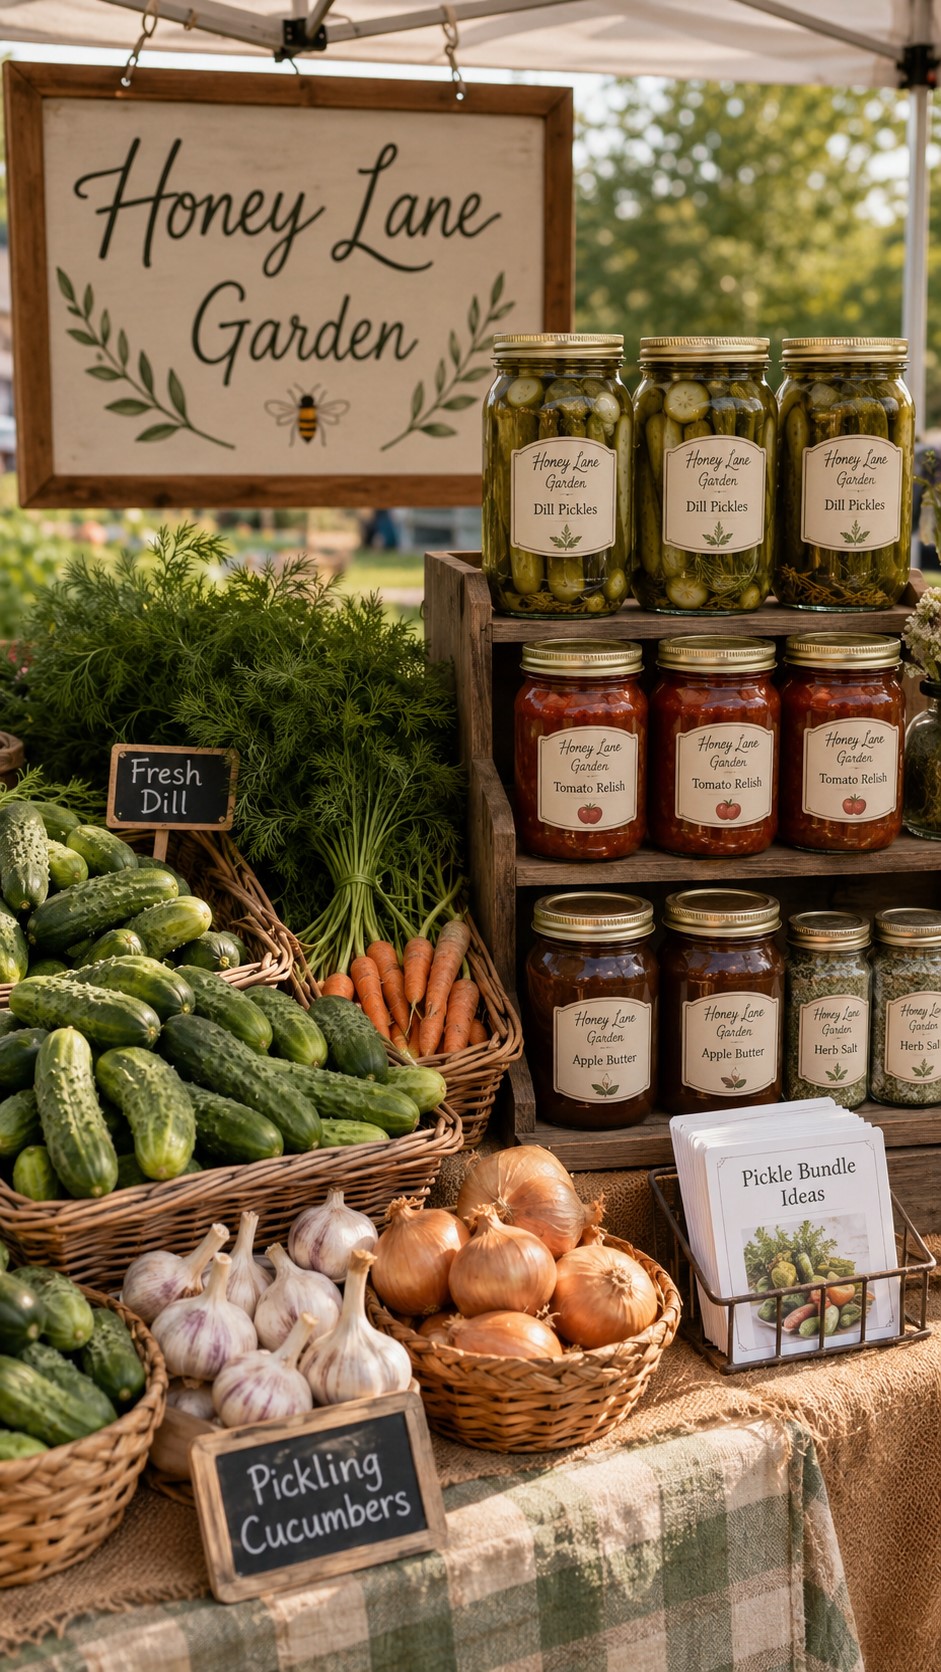
Preserves, pickles, herb salts, baked goods and flower bunches can add charm to a farmers market booth display, but they need their own zone. If jam jars are scattered between lettuce heads and loose onions, the table starts to lose its shape. Place related items near each other. A shopper who came for cucumbers may add dill, garlic and a jar of pickles if the connection is easy to see.
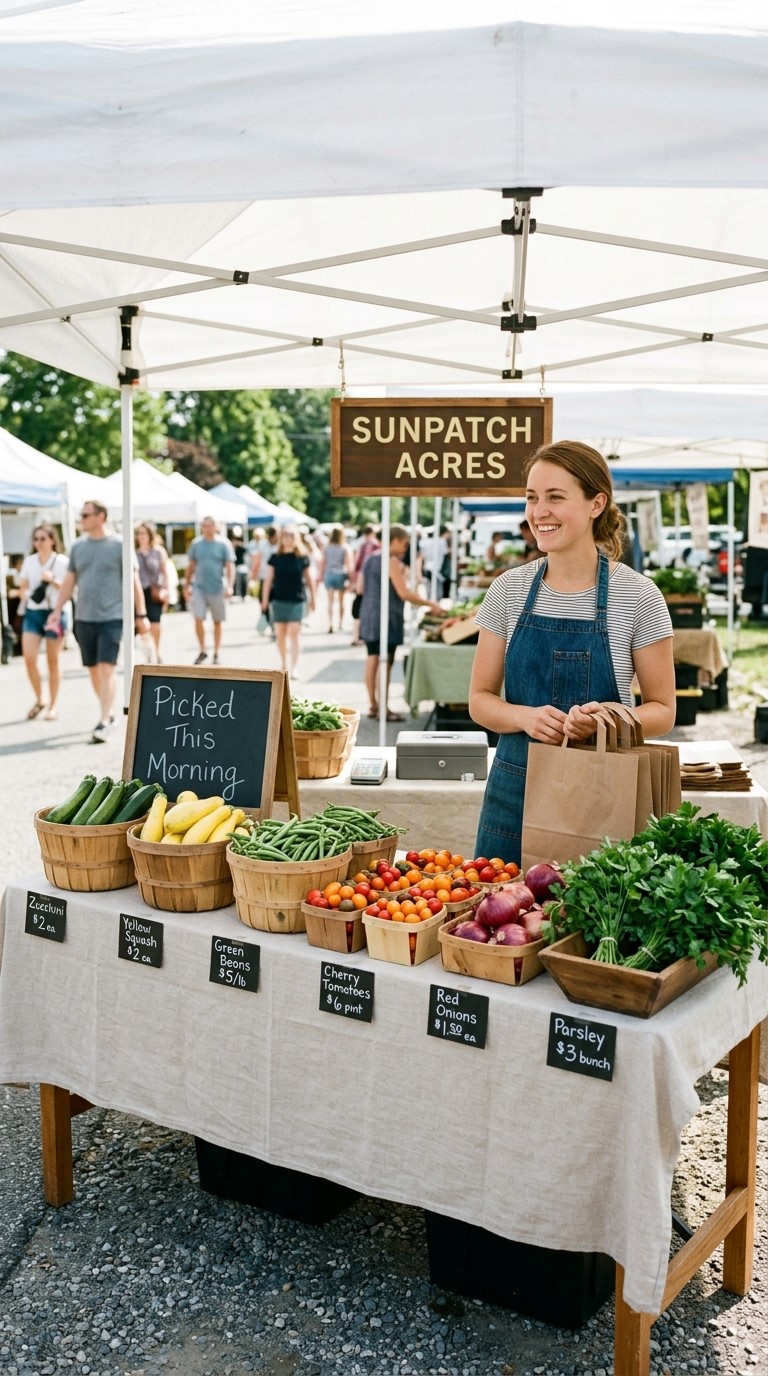
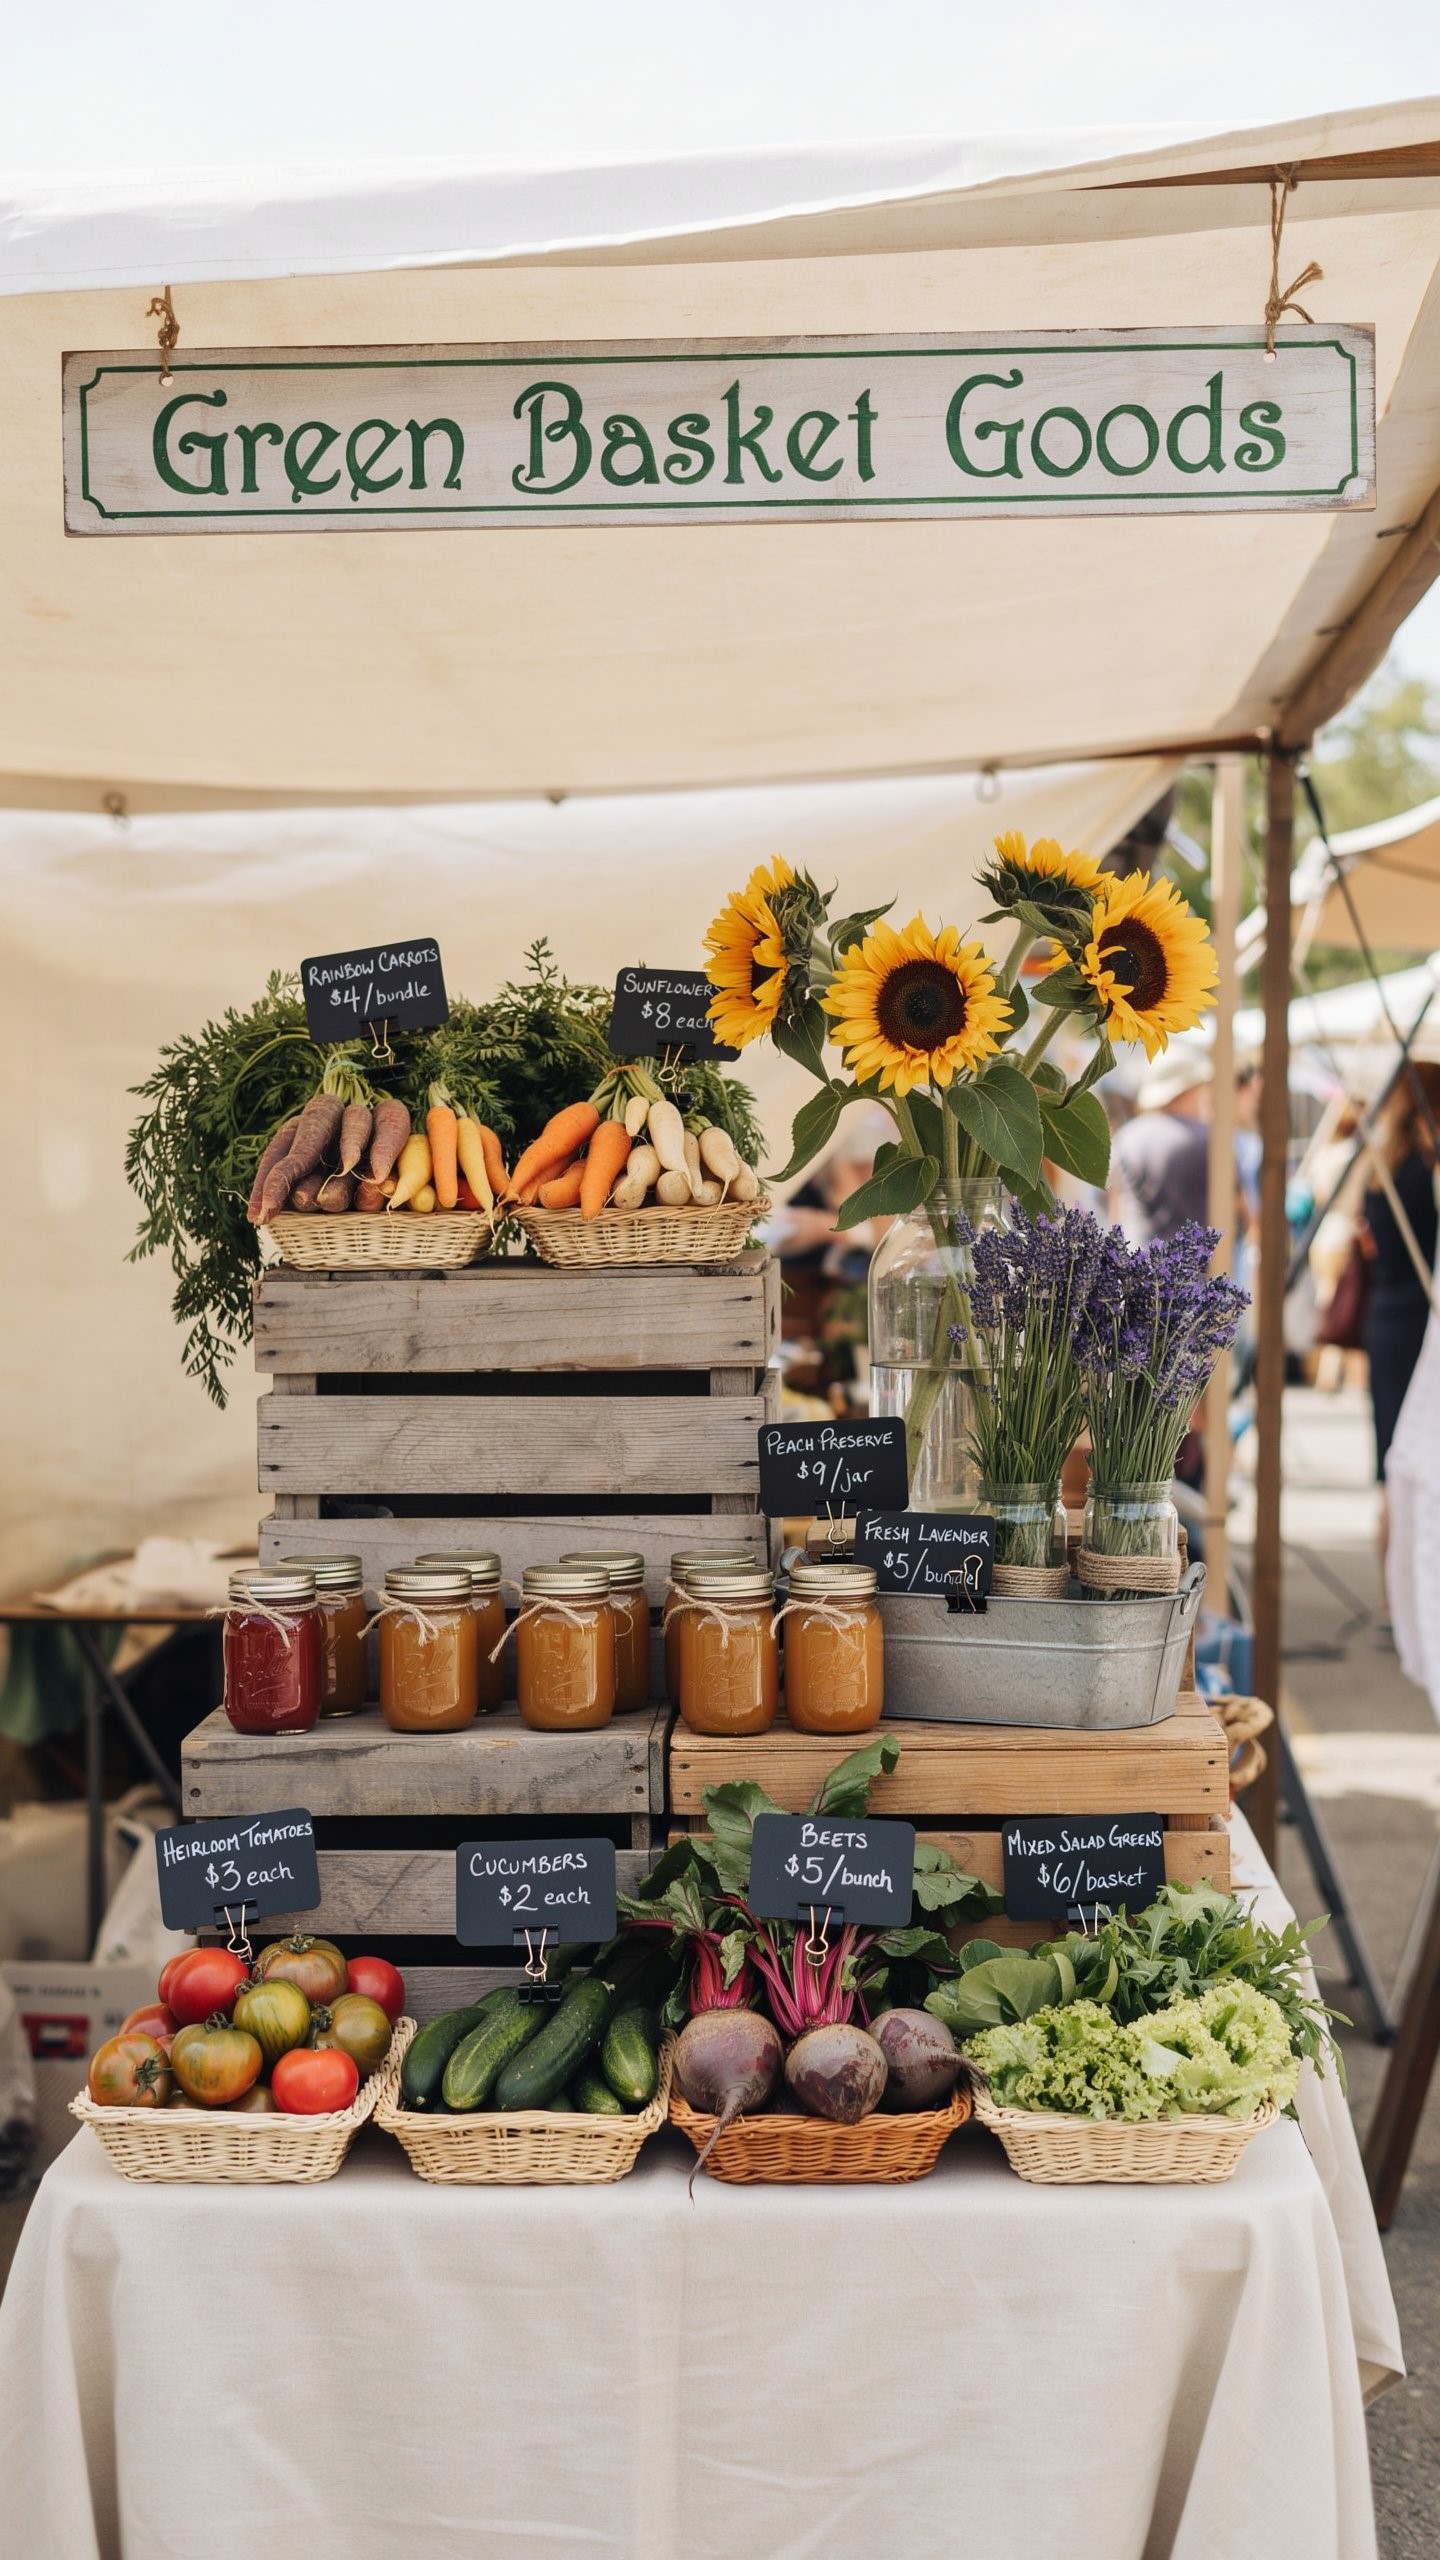
Use Basket Labels in Your Farmers Market Stand Setup
A farmers market stand setup becomes easier to shop when labels do more than name the crop. “Cherry tomatoes, $4 pint” is useful. “Best for salsa” or “picked this morning” can be even better. Short notes help people decide without turning every purchase into a conversation. Keep the writing large enough to read from a standing position and use the same style of cards across the booth.
Give Your Farmers Market Stand Setup Character Without Clutter
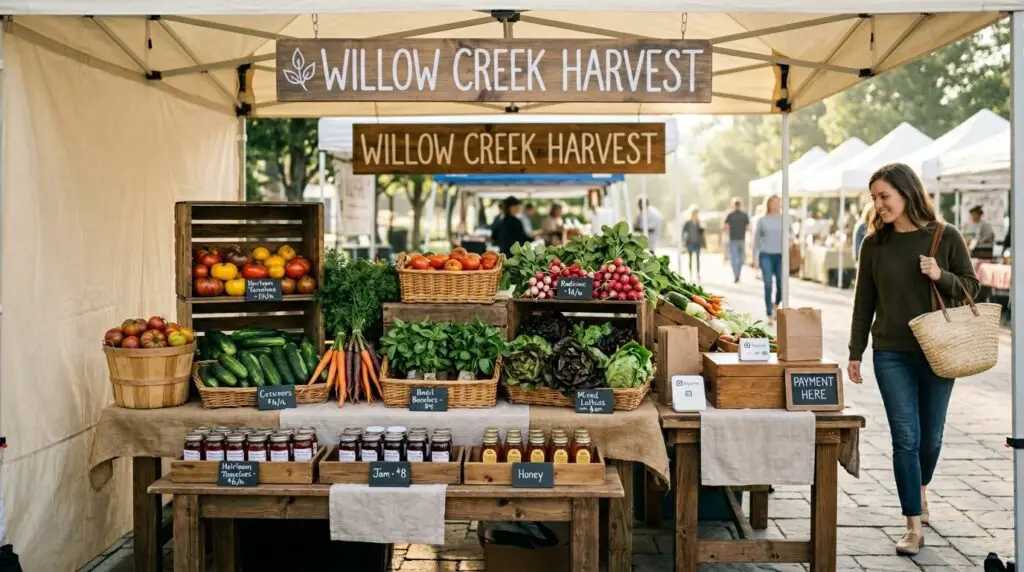
A farmers market stand setup should feel like it belongs to someone. A booth name, clean baskets, a few flowers in jars and neat handwritten cards can make a seller memorable. You don’t need a table so decorated that shoppers have to hunt for the carrots. Character works best when it supports the food, not when it steals space from it.
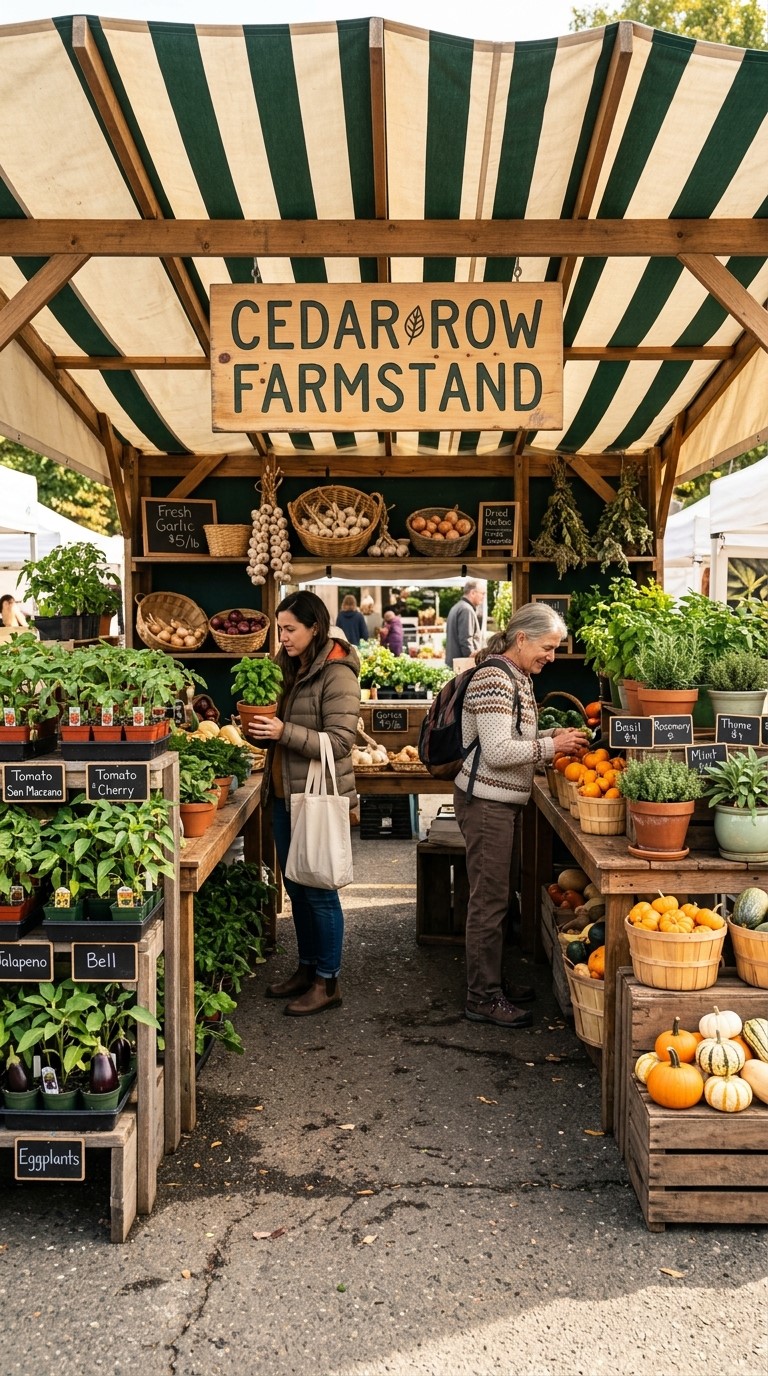
Pick One Name Sign for Your Farmers Market Stand Setup
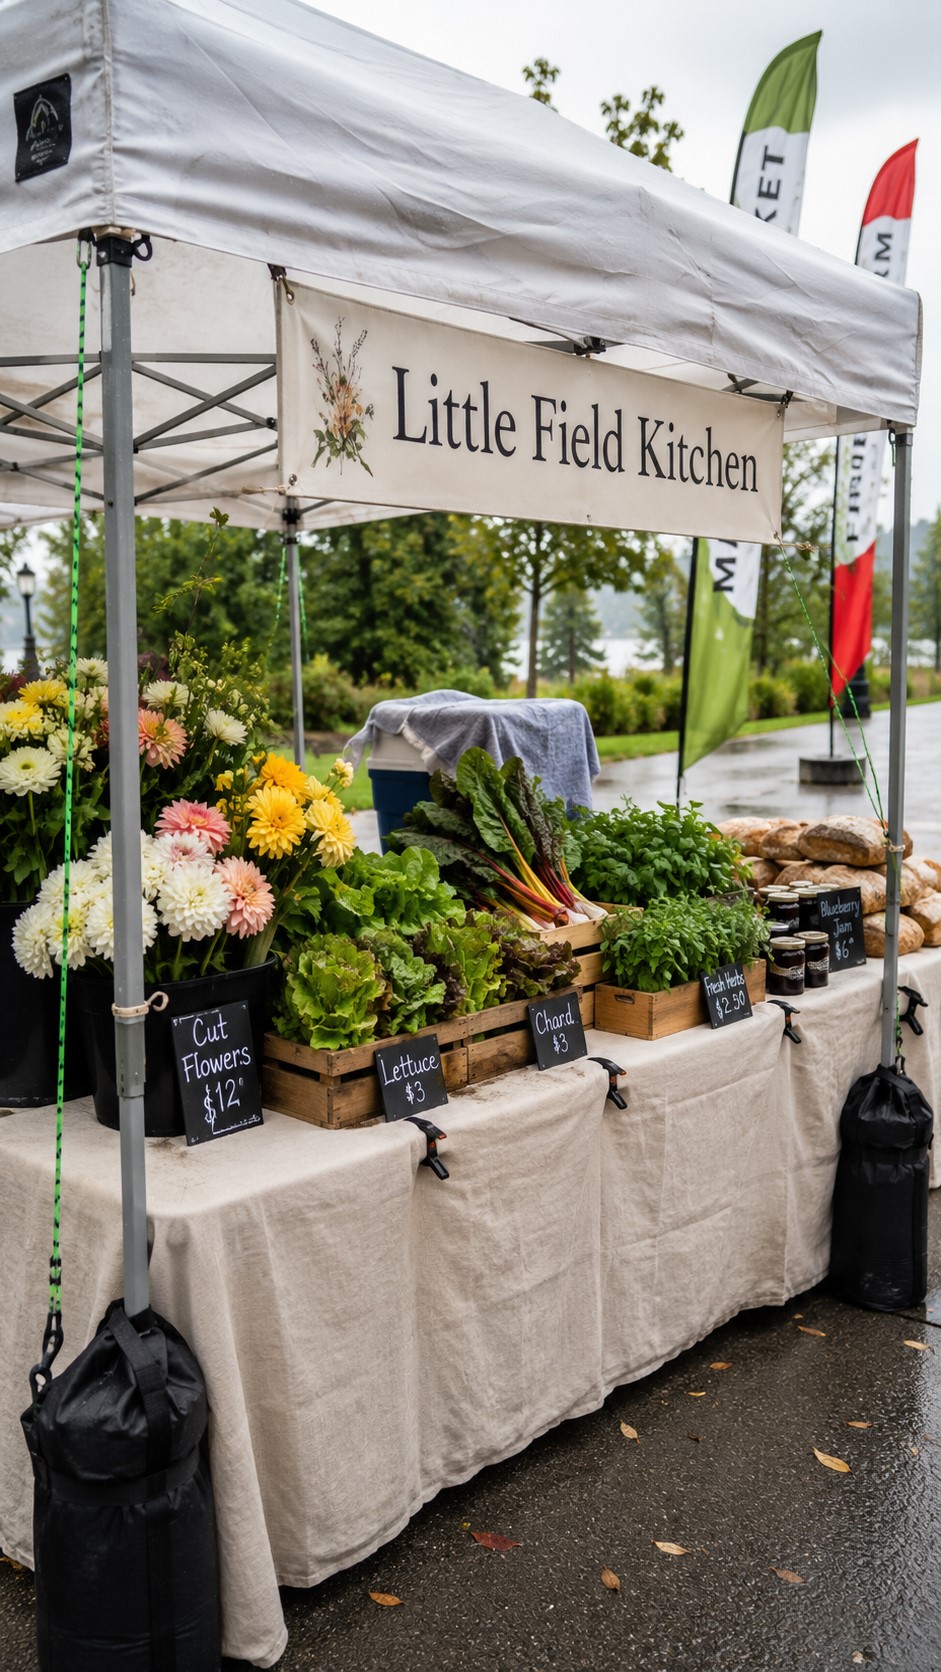
A name gives a farmers market stand setup a little staying power. “Oak Lane Garden,” “Little Gate Produce” or “Hilltop Homestead” is easier to remember than “the table with the beans.” Your sign doesn’t have to be expensive. A painted board, printed banner or neat chalkboard can work. Place it high enough to be seen over the table, especially when people are walking past in a crowd.
Let Farmers Market Booth Ideas Fit What You Grow
The best farmers market booth ideas fit the goods. A tomato-heavy booth can lean into strong color, big baskets and sauce recipe cards. A herb booth may need smaller containers, bunch tags and a display that invites smelling. A flower booth needs water, shade and enough room for stems to stand tall. Copying another seller can go wrong because their harvest is not yours.
Run Checkout Through a Farmers Market Vendor Setup That Makes Sense
The checkout area is where a farmers market vendor setup often gets messy. People arrive with full hands, ask about payment, need a bag and stand in the same spot where the next shopper wants to reach the basil. Choose one side of the booth for checkout and keep it consistent. Put bags, the card reader, cash box, calculator, pen and notebook in that zone.
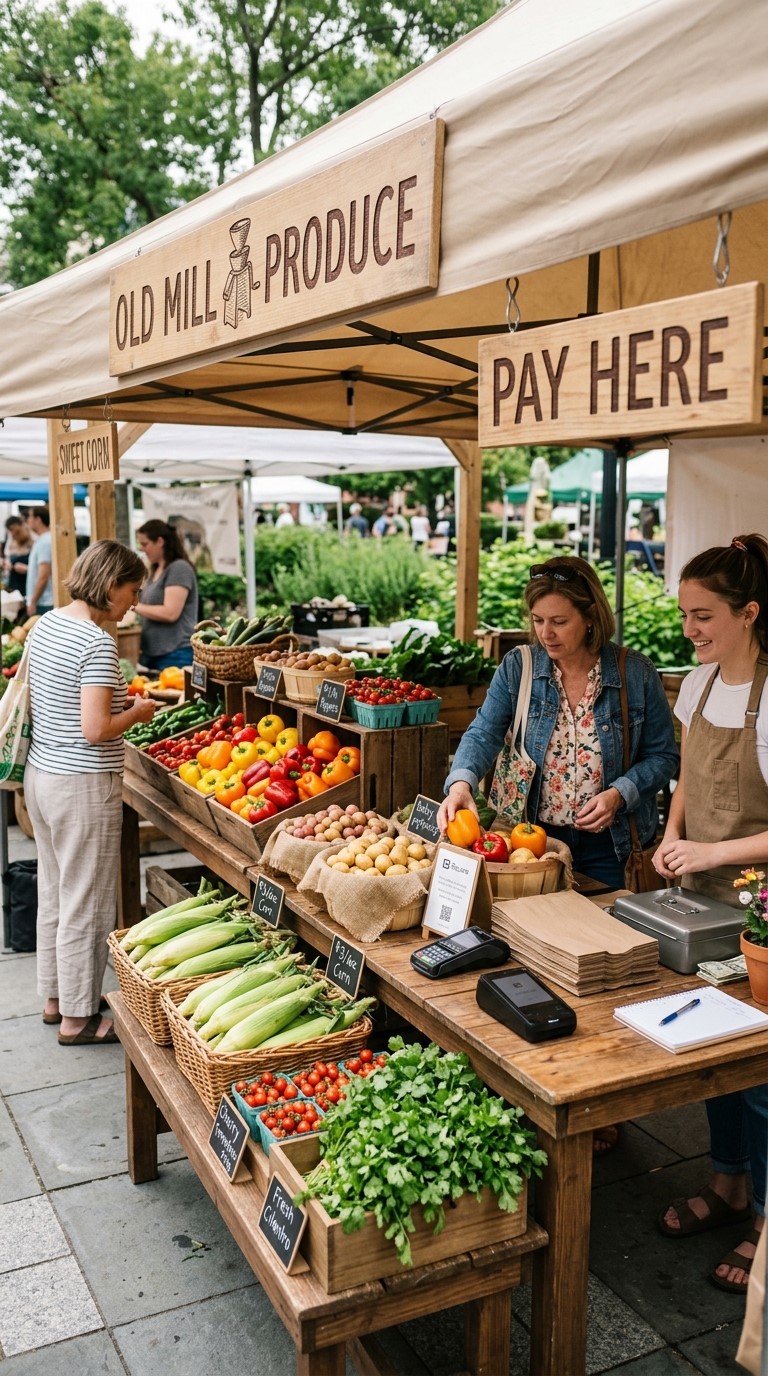
Create a Payment Corner in Your Farmers Market Vendor Setup
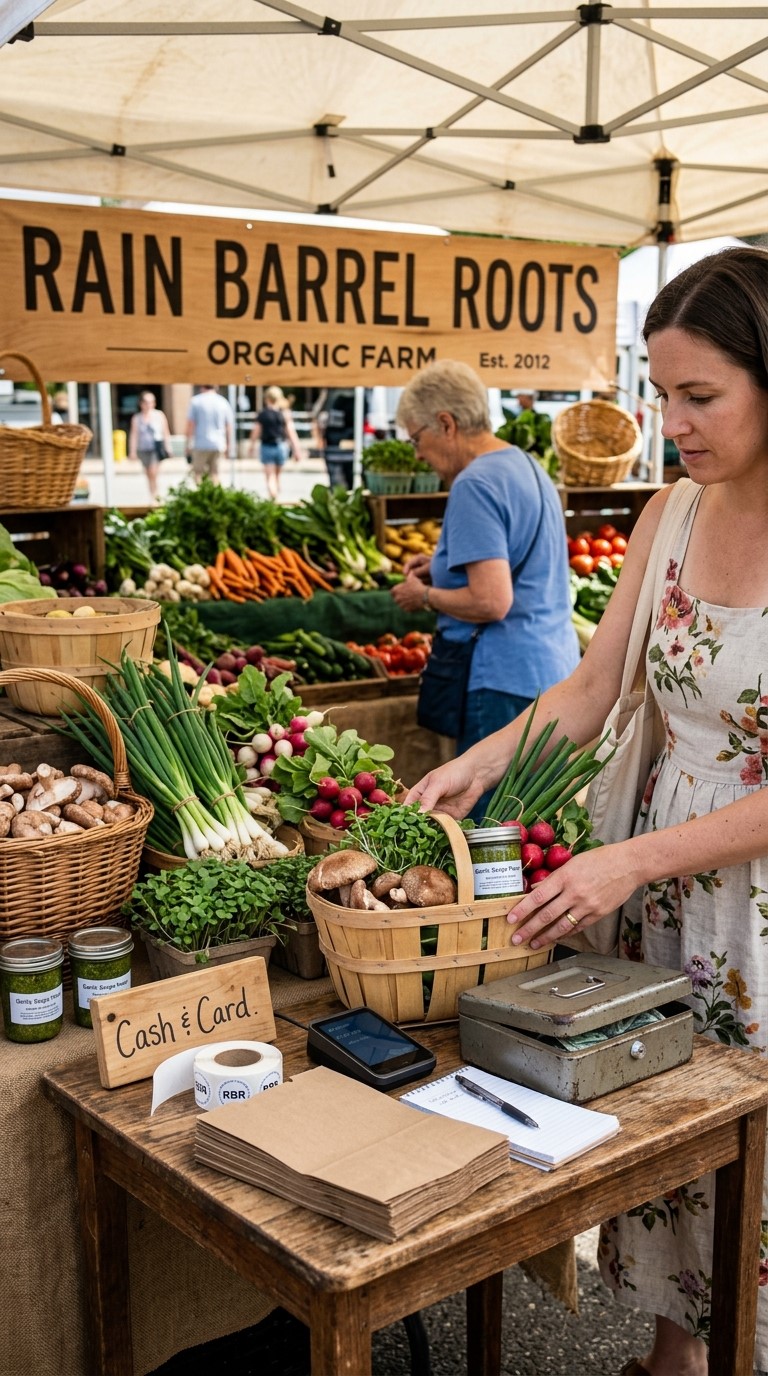
A payment corner gives your farmers market vendor setup a clear ending point. Shoppers can browse, choose and then move toward the side to pay. That keeps the front of the table open and gives you a place to pack purchases without blocking the display. A small sign helps: “Pay Here” or “Cash and Card.” Don’t make people guess, because guessing slows down the sale.
Use Farmers Market Setup Ideas for Quick Restocking
Good farmers market setup ideas include the space shoppers don’t see. Keep back stock in labeled crates behind the table or tucked under a cloth. Place delicate greens in a cooler, extra jars in a box and empty baskets in one stack. Restocking should take seconds. If you have to open six bins to find more cucumbers, shoppers end up watching you wrestle with your own booth.
Prepare Your Farmers Market Booth Setup for Weather and Long Mornings
A farmers market booth setup has to handle real weather. Wind grabs tablecloths, sun cooks greens and rain turns cardboard price signs into sad little flags. The prettiest booth in the row won’t help if the canopy lifts or your flowers droop before the lunch crowd arrives. Pack for the boring problems: weights, clamps, bungee cords, towels, coolers, waterproof bins and extra signs.
Anchor Your Farmers Market Booth Setup Before Anything Looks Pretty
Anchor your farmers market booth setup first. Weights go on the canopy before the tablecloths come out. Clips go on cloths before the first gust. Crates should sit flat, and raised displays should be steady enough for a shopper to bump the table without disaster. Wind is one of the fastest ways to make a booth feel chaotic, so secure the bones of the stall before adding the nice touches.
Protect Greens and Flowers in Your Farmers Market Table Setup
Greens, herbs and flowers need special care in a farmers market table setup. Keep them shaded, misted when needed and out of hot wind. Use buckets for cut flowers, coolers for delicate greens and damp towels for backup produce waiting behind the table. A smaller fresh display that gets refilled often can look better than a huge pile fading in the sun.
Small Farmers Market Booth Ideas for a Smaller Harvest
Small farmers market booth ideas matter because many home growers don’t arrive with truckloads of produce. Some mornings you have three crates of cucumbers, a basket of herbs and enough tomatoes to make you proud but not enough to cover two tables. Use smaller baskets, repeated containers and a tight layout. A small booth can feel cared for, even when the garden had a quieter week.
Repeat Containers in Small Farmers Market Booth Ideas
Repeated containers make small farmers market booth ideas look cleaner. Matching baskets, similar crates or a set of enamel trays can turn a modest harvest into a neat display. Random containers can work at home, but at the market they often make the table feel patched together. If you only have a little of each crop, group items by use: salsa ingredients, pickling cucumbers with dill or herbs beside recipe cards.
Add Recipe Cards to Your Farmers Market Stand Setup
Recipe cards can help a farmers market stand setup sell slower crops. A shopper may ignore a strange squash until a simple soup idea makes it feel less risky. Herbs, greens, eggplant, okra and extra zucchini all benefit from a little cooking nudge. Keep cards short. A few ingredients and a serving idea are enough, especially when someone is holding a tote bag and trying to decide on dinner.
A Farmers Market Booth Setup Worth Returning To
A farmers market booth setup doesn’t have to be fancy to work. It needs to be steady, readable and kind to the person shopping it. When the path is clear, the prices are visible, the checkout makes sense and the produce looks cared for, people are more willing to stop.
The real test comes after the first rush, when the table has gaps and the seller has been standing for hours. A good setup can be adjusted without drama. Baskets can shrink, signs can move and checkout can stay clean. Market selling is part garden planning, part home styling and part old-fashioned people sense. Set the booth up well, and the morning feels less like a scramble and more like a table worth returning to.