
How to Build Your Own Polytunnel in Your Garden for All Types of Weather
A polytunnel is only as dependable as the ground holding it down. The sheet of clear plastic gets all the attention, especially when it is new and shining in the sun, but the quiet work below it decides whether the structure lasts. A poorly anchored frame can creep sideways after heavy rain. Loose plastic drums in the wind. A door built slightly out of square soon begins scraping the path like an old garden gate.
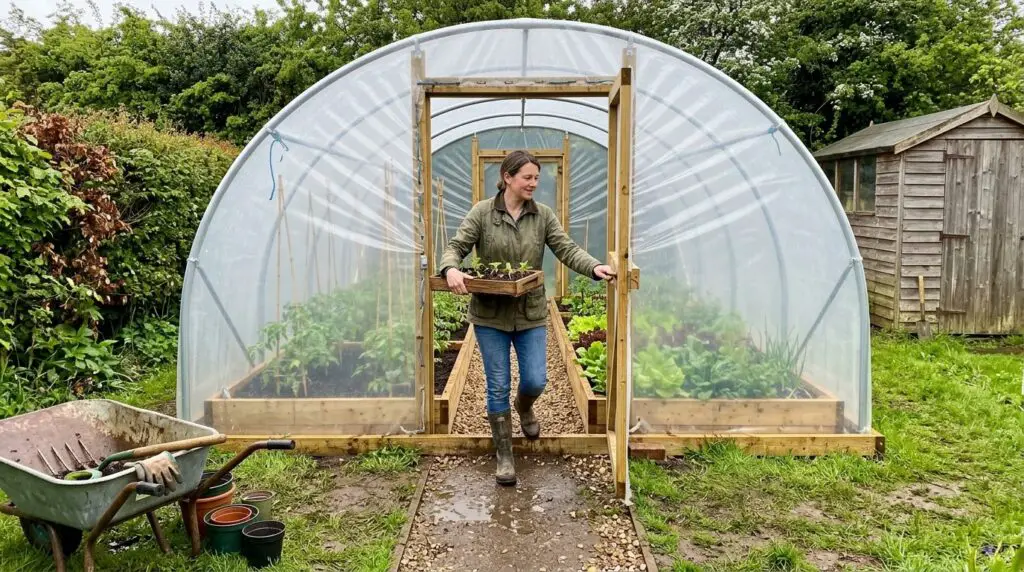
Building your own polytunnel gives you control over the size, materials and interior layout. It also leaves nowhere for lazy measurements to hide. The sensible approach begins with the site and works upward: drainage first, then anchors, hoops, bracing and the cover. Beds and paths belong in the plan before construction starts, because a tunnel that is awkward to work in will annoy you for years. Done well, it becomes a warm, useful part of the garden rather than a nervous plastic sail.
Download FREE DIY Polytunnel Plans
The free 16-page plan booklet includes dimensioned diagrams, materials and cut lists, eight construction stages, anchoring guidance, cover fitting, ventilation, maintenance and inspection checklists.
Before You Build a Polytunnel, Plan for Wind, Water and Work
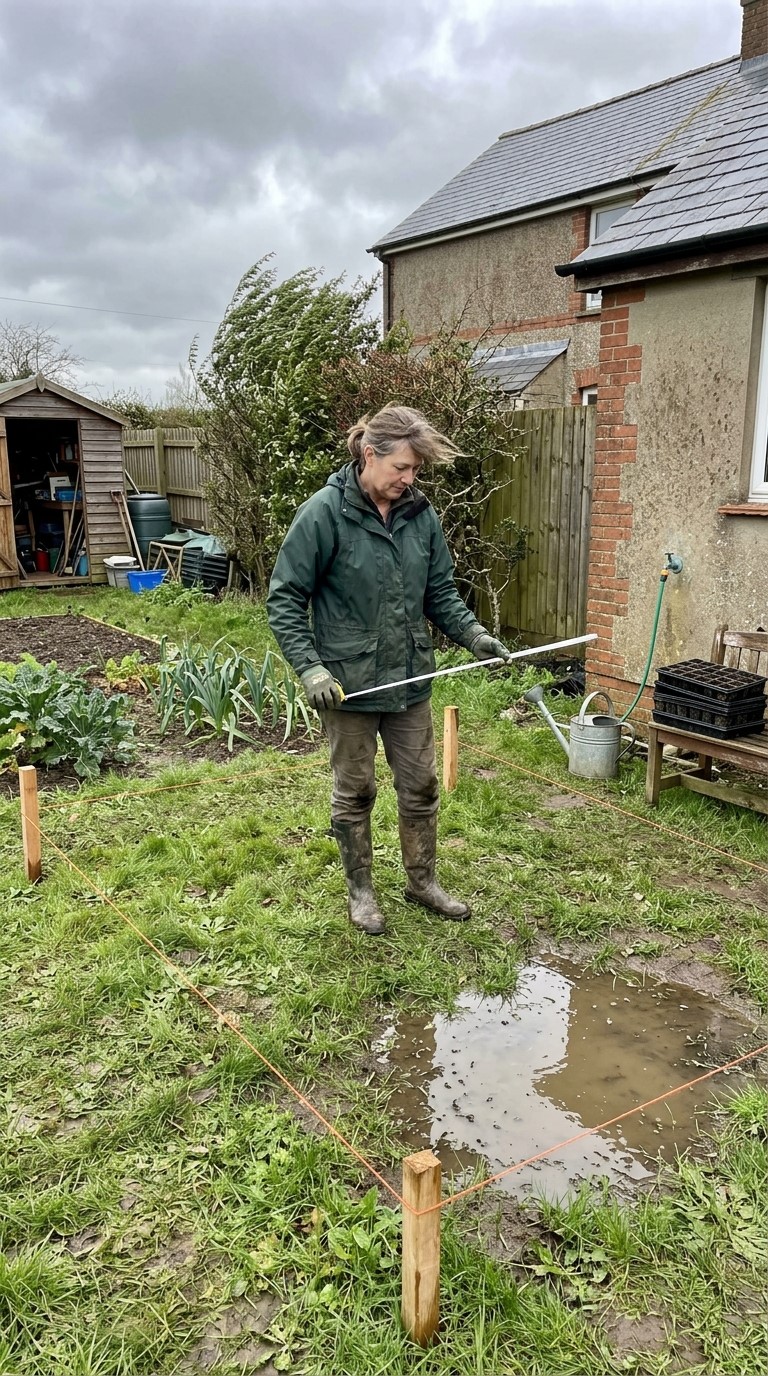
Stand in the proposed spot on a wet or windy day, not only during a pleasant afternoon. Watch where water sits and which way the shrubs bend. Check the route from the house, shed or water supply. You will use that route while carrying trays, compost and armfuls of tomato plants. A few extra steps seem harmless on paper. By August, with a watering can cutting into your fingers, they feel less charming.
Choose the Best Position for a Home Garden Greenhouse
Choose open light, firm soil and reasonable shelter from the strongest wind. Avoid the bottom of a slope where rainwater collects, since wet ground weakens anchors and makes the interior miserable underfoot. A hedge can soften gusts, but a close hedge also casts shade and sends roots into the beds. Leave working room around the outer cover for cleaning, repairs and vegetation control. Before digging, check for buried services, drains and any local restrictions that apply to garden structures.
Use Polytunnel Dimensions to Protect Paths, Beds and Doors
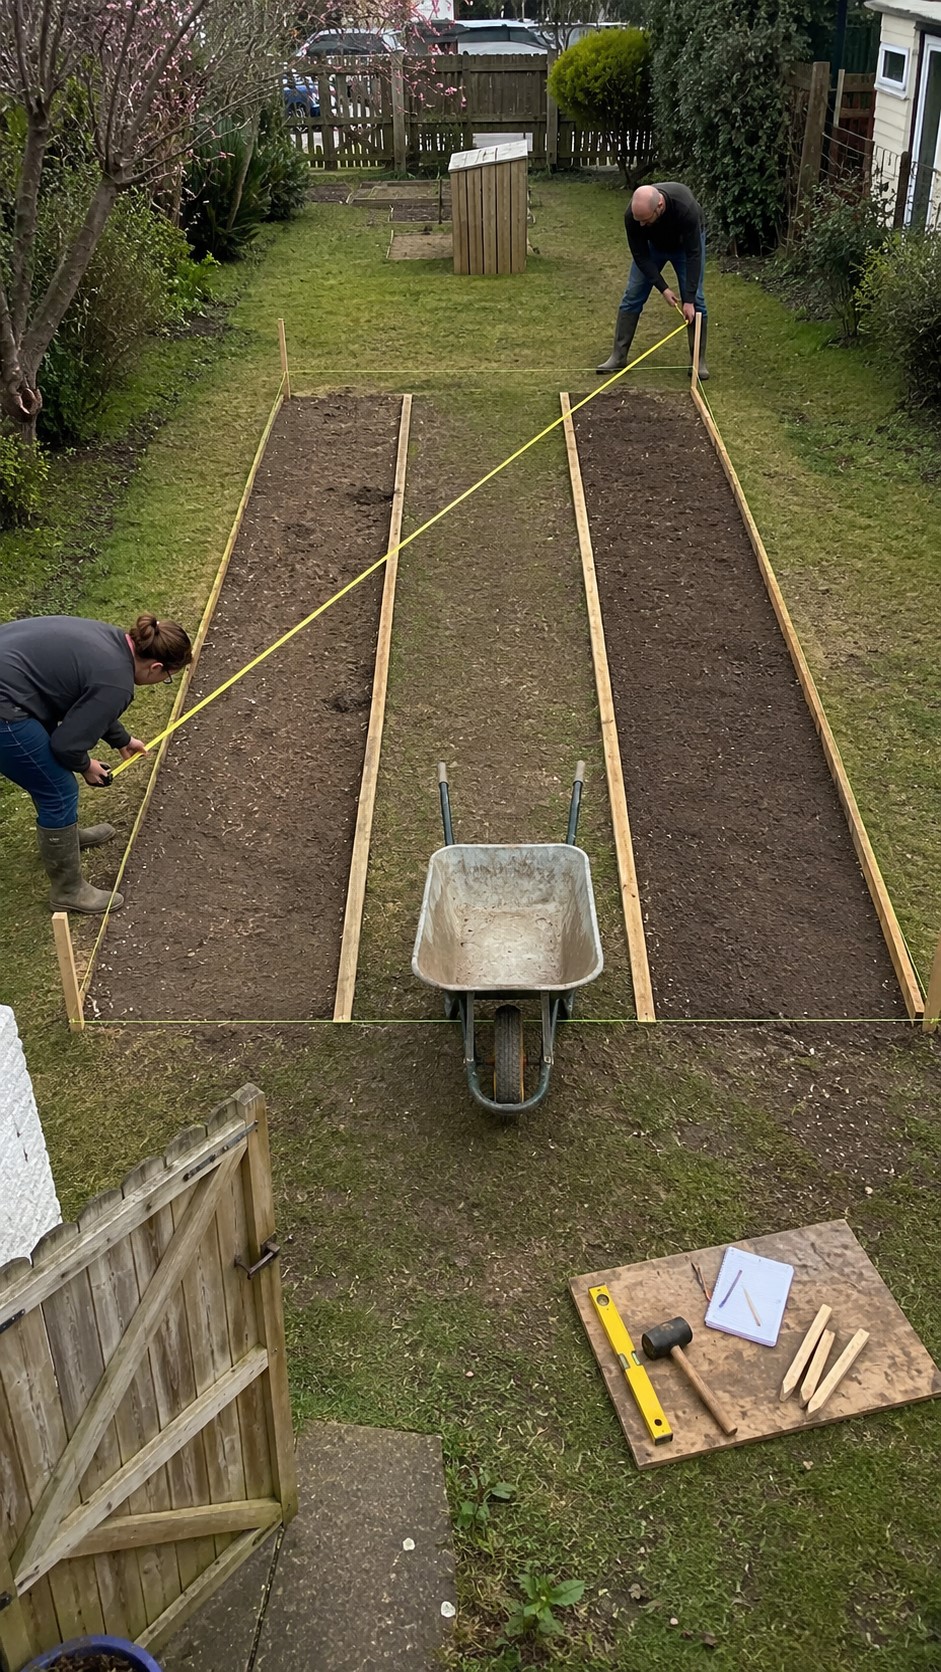
Mark the full footprint with string, then mark the beds and path inside it. This simple rehearsal catches bad ideas early. A narrow central path may look efficient until you try turning with a seed tray. Deep side beds waste space when you cannot reach their back edges. Allow enough height beside the hoops for the crops you want to grow, and make the doorway wide enough for a wheelbarrow. Open the imaginary door too. Fences, raised beds and water barrels have a habit of occupying its swing.
Good Polytunnel Plans Start at Ground Level
Use stakes and string to set out a clean rectangle. Measure both diagonals as well as the four sides. When the diagonals match, the corners are square. This is fussy work, and it can feel slow when a stack of hoops is waiting on the lawn. Do it anyway. A small error at the base travels upward through the frame and reappears as a crooked ridge, twisted door opening or cover that refuses to sit evenly.
Prepare the Ground for a Polytunnel Before Measuring the Frame
Remove turf, thick roots, stones and anything sharp enough to damage the cover later. Level the lines where the frame and doors will sit, but preserve a slight fall that carries water away from the structure. If the garden is boggy, deal with drainage before building. University of Minnesota Extension suggests placing high tunnels slightly above the surrounding ground where standing water is a risk. That small rise also keeps paths usable after rain. Save good topsoil nearby if you plan to return it to the beds.
Set Polytunnel Ground Anchors for the Weather You Actually Get
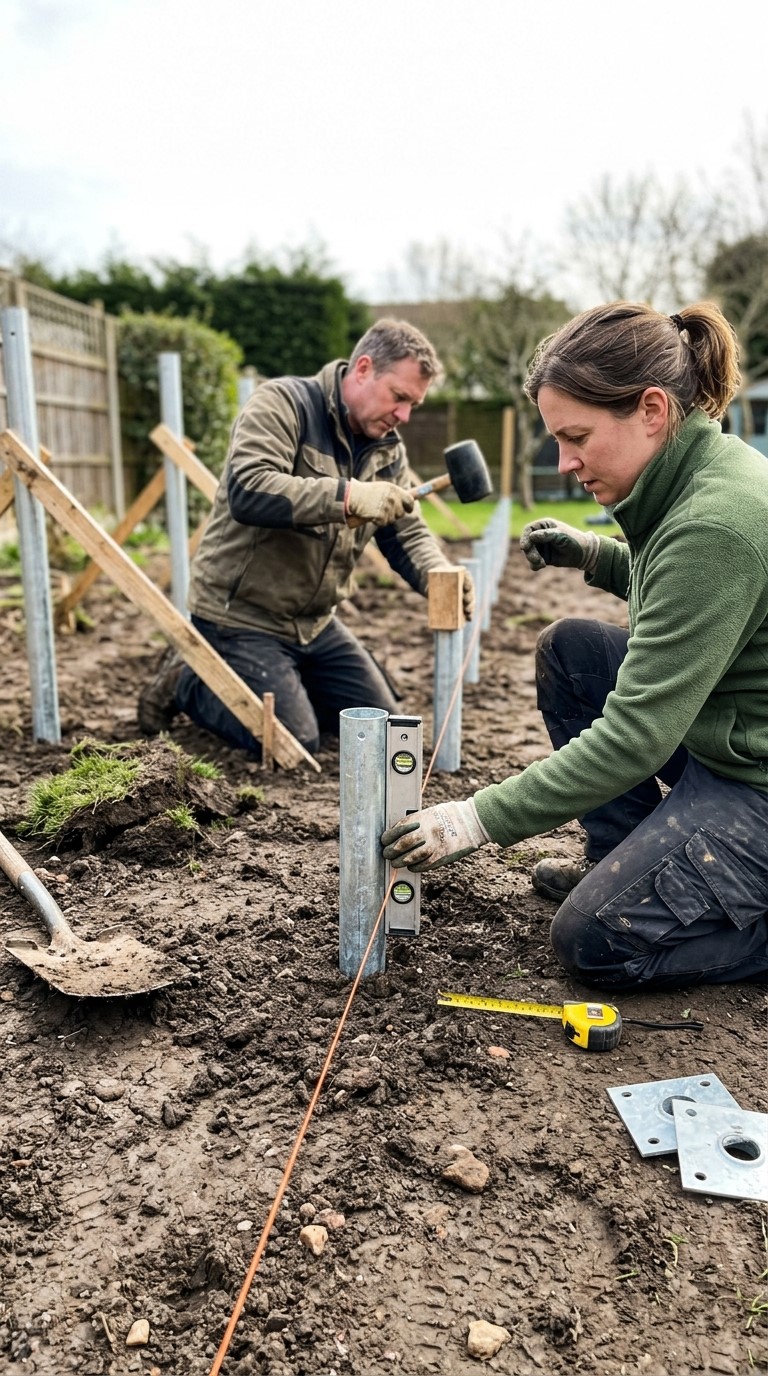
Choose anchors for the soil and exposure, rather than for the easiest afternoon of digging. Driven ground tubes can work well in firm ground. Loose soil or an exposed plot may call for anchor plates, screw anchors or concrete. Set every fixing at the correct spacing and height, then pull on it. If it shifts under your hand, a winter gust will be far less polite.
Choose Polytunnel Building Materials With Repairs in Mind
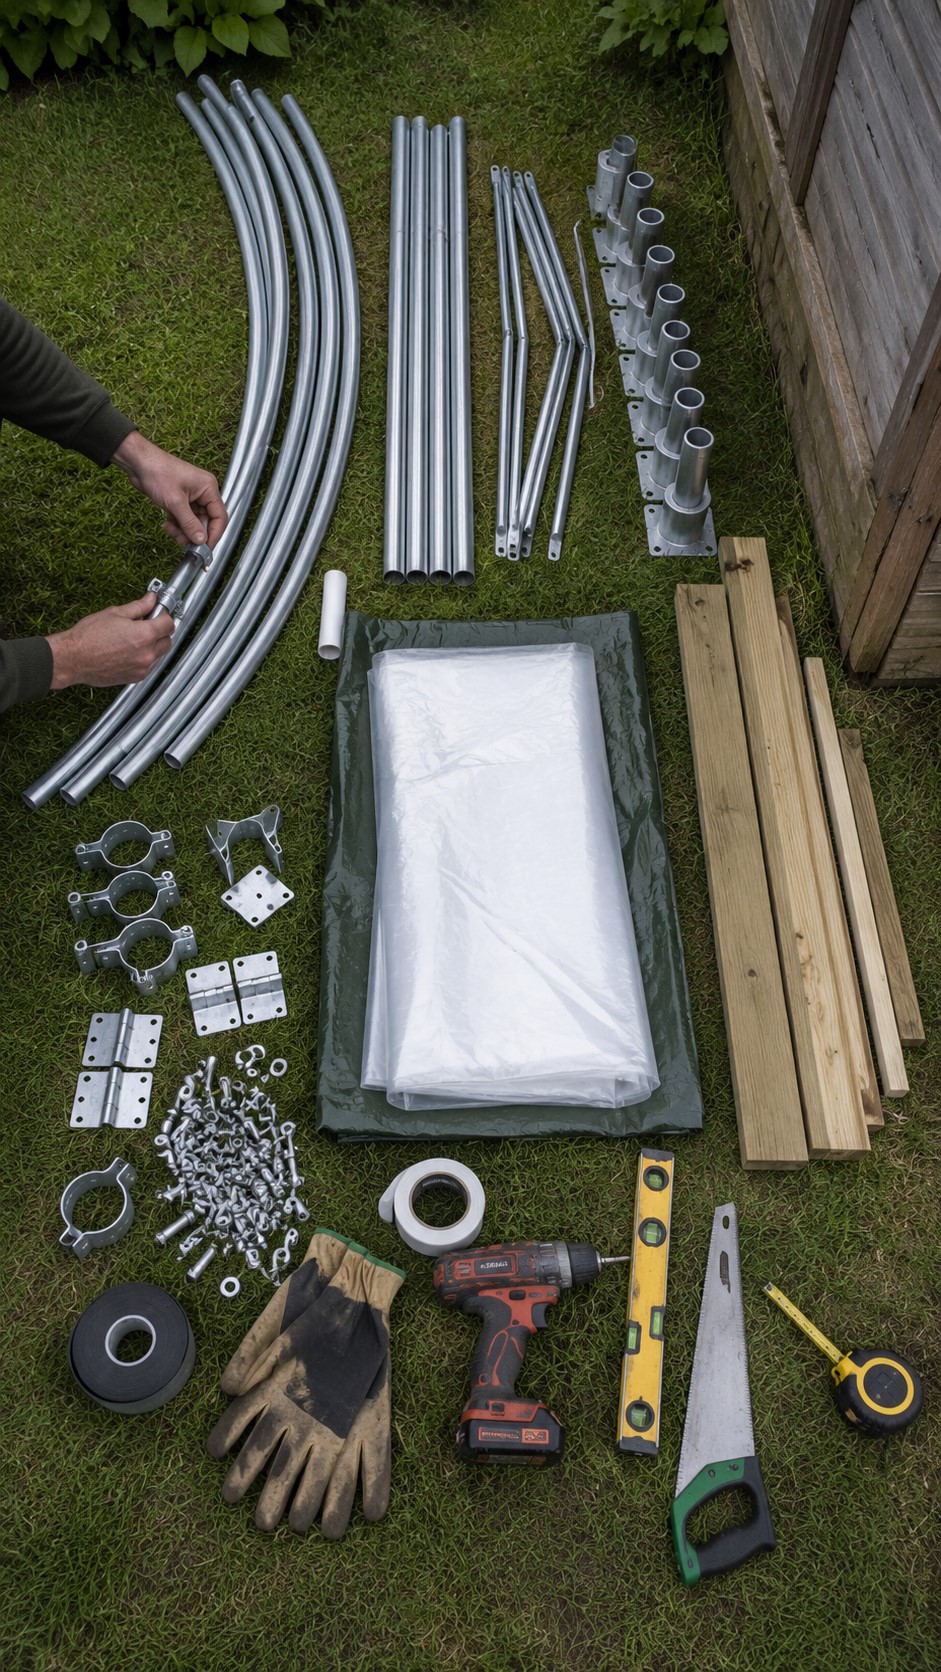
A basic materials list includes hoops, ground tubes, a ridge pole, diagonal braces, timber for the ends and suitable fixings. Add UV-stabilised horticultural polythene, cover battens or rails, repair tape, hinges and a latch. Anti-hotspot tape protects the sheet where it rests on metal hoops. Buy extra timber for test cuts and last-minute blocking. Ordinary builders’ plastic may look cheaper, but it was not made to spend years under sunlight and repeated wind movement.
Compare a PVC Pipe Greenhouse Frame With Metal Hoops
PVC pipe is light, easy to cut and tempting for a small homemade polytunnel. It suits low tunnels and modest, sheltered structures where replacement would not be a disaster. A full-height walk-in tunnel asks more from its frame. Galvanised metal hoops resist flexing and provide a firmer base for ridge poles, braces and crop bars. If you use PVC, follow a proven plan, space the hoops closely enough and add proper longitudinal bracing. Cheap pipe plus a large cover can become an expensive kite.
A Timber Polytunnel Base Gives Door Frames a Square Start
Treated timber gives the base rails and end frames a solid fixing surface. Keep it out of standing water and seal cut ends with a suitable preservative. Build each door frame on level ground if you can, then raise and brace it in position. Check the posts with a spirit level and compare both diagonals across the opening. Cover sharp corners and proud screw heads before the polythene goes near them. Plastic remembers every rough edge, usually on the windiest night of the year.
How to Build a Polytunnel Frame Without Wrestling Every Hoop
Lay out the labelled parts beside the footprint and read the complete plan before assembly. Some frames depend on a precise order of clamps, rails and braces. Skipping ahead can trap a fitting behind a fixed section. Get another person to help with long hoops and ridge poles. One person can hold the arch steady while the other checks its position. The work becomes calmer, and fewer metal tubes end up rolling into the flower border.
Install Polytunnel Ground Tubes in a Straight, Level Run
Mark each ground-tube position from one fixed corner, following the spacing in your plan. Protect the tube with a driving cap or timber block as you knock it into the soil. Stop often to check it remains plumb. Opposing tubes must line up, since each pair receives one hoop. Run a string along their tops to compare height. Correct a high or leaning tube now. Once several arches are connected, the frame becomes much less willing to accommodate your arithmetic.
Join the Polytunnel Hoops With a Ridge Pole and Bracing
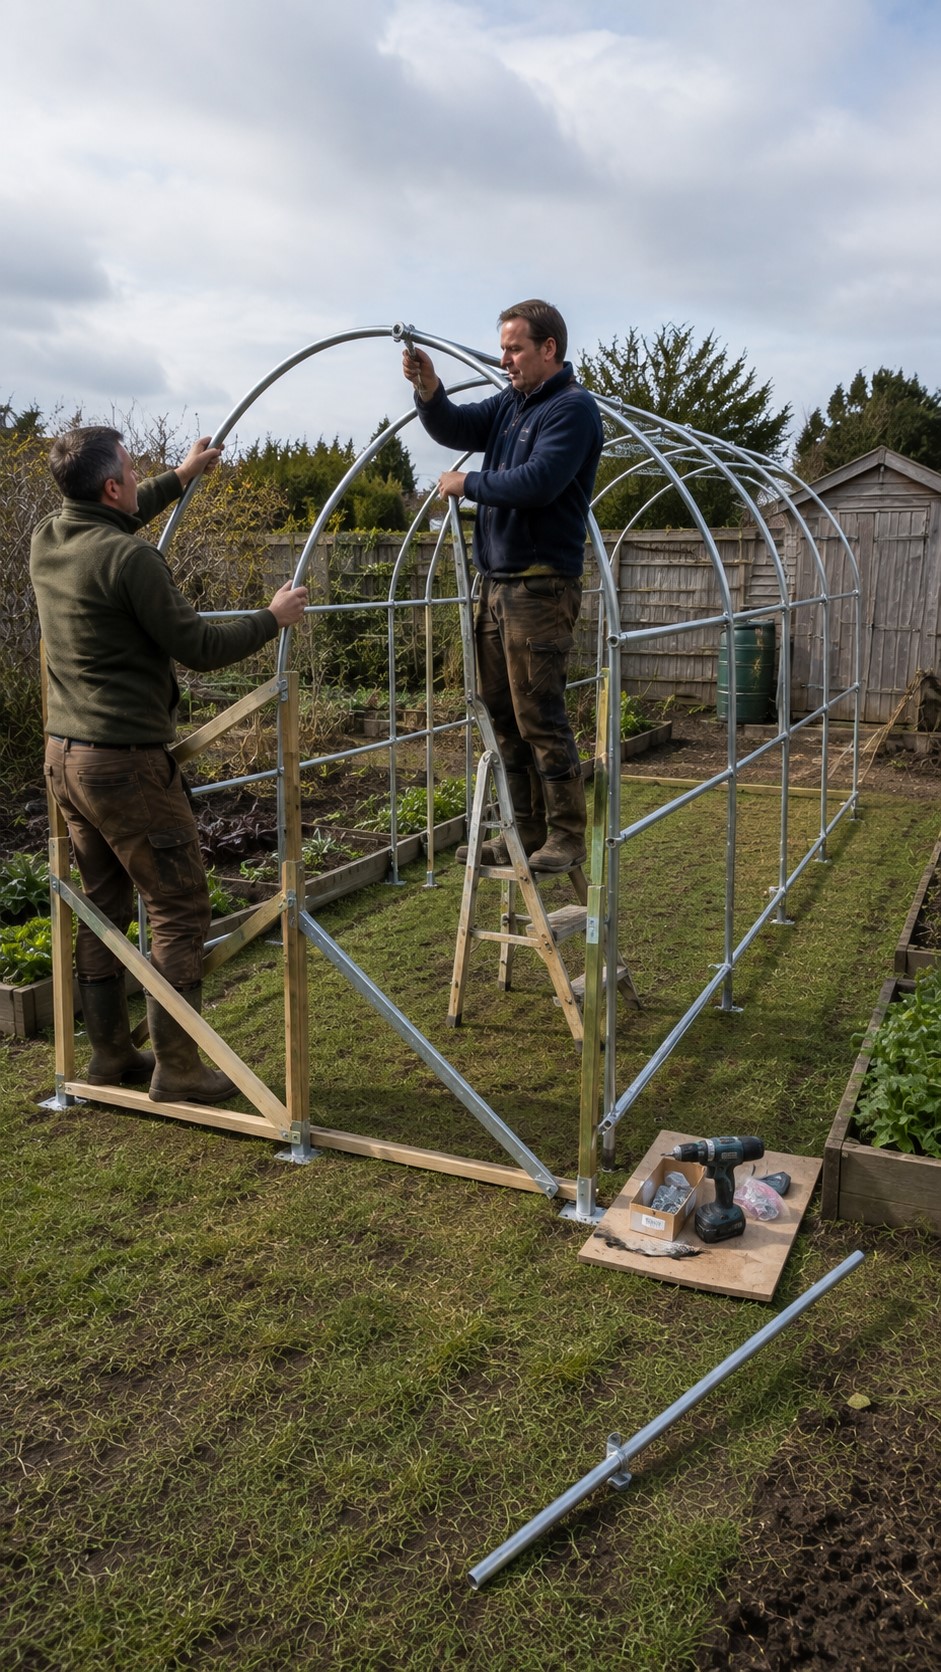
Insert or assemble the first hoop, brace it and move along the row. Keep every arch upright rather than trusting your eye from close range. The ridge pole joins the hoops at their highest point and stops them behaving like separate ribs. Side rails or crop bars add stiffness where the plan includes them. Fit diagonal braces at the end bays, where doors and wind pressure place extra strain on the structure. Tighten clamps firmly, but follow the fixing maker’s guidance and avoid crushing thin tube.
Build the Polytunnel Door Frame Before the Opening Wanders
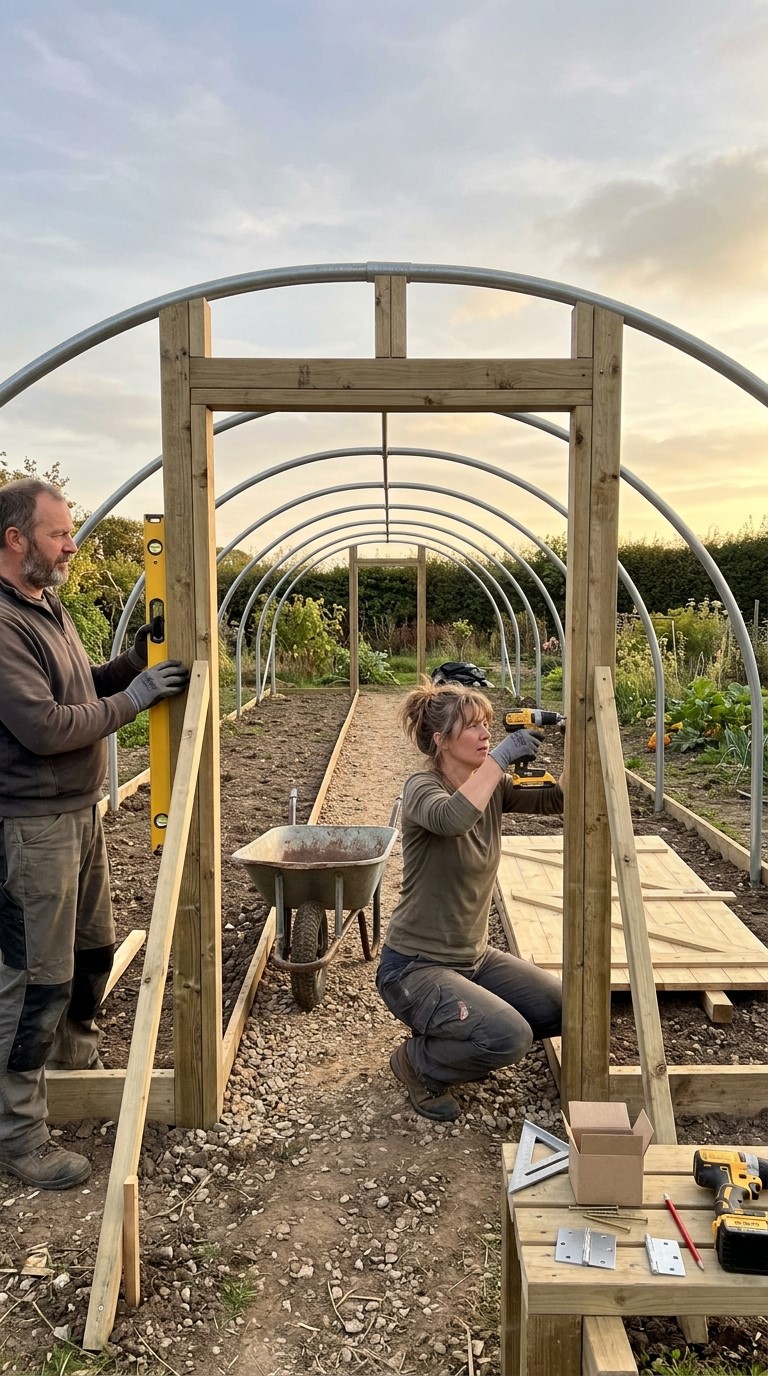
Fit the end frames while the bare hoops remain easy to measure. Centre each opening under the ridge and brace the uprights before hanging a door. A generous doorway is rarely regretted. It should admit a wheelbarrow, wide trays and bulky compost bags without a sideways shuffle. If the design has a door at each end, line them up with the central path. That straight route helps airflow and makes moving soil or harvested crops much easier.
Fit a Polytunnel Cover When the Air Is Still
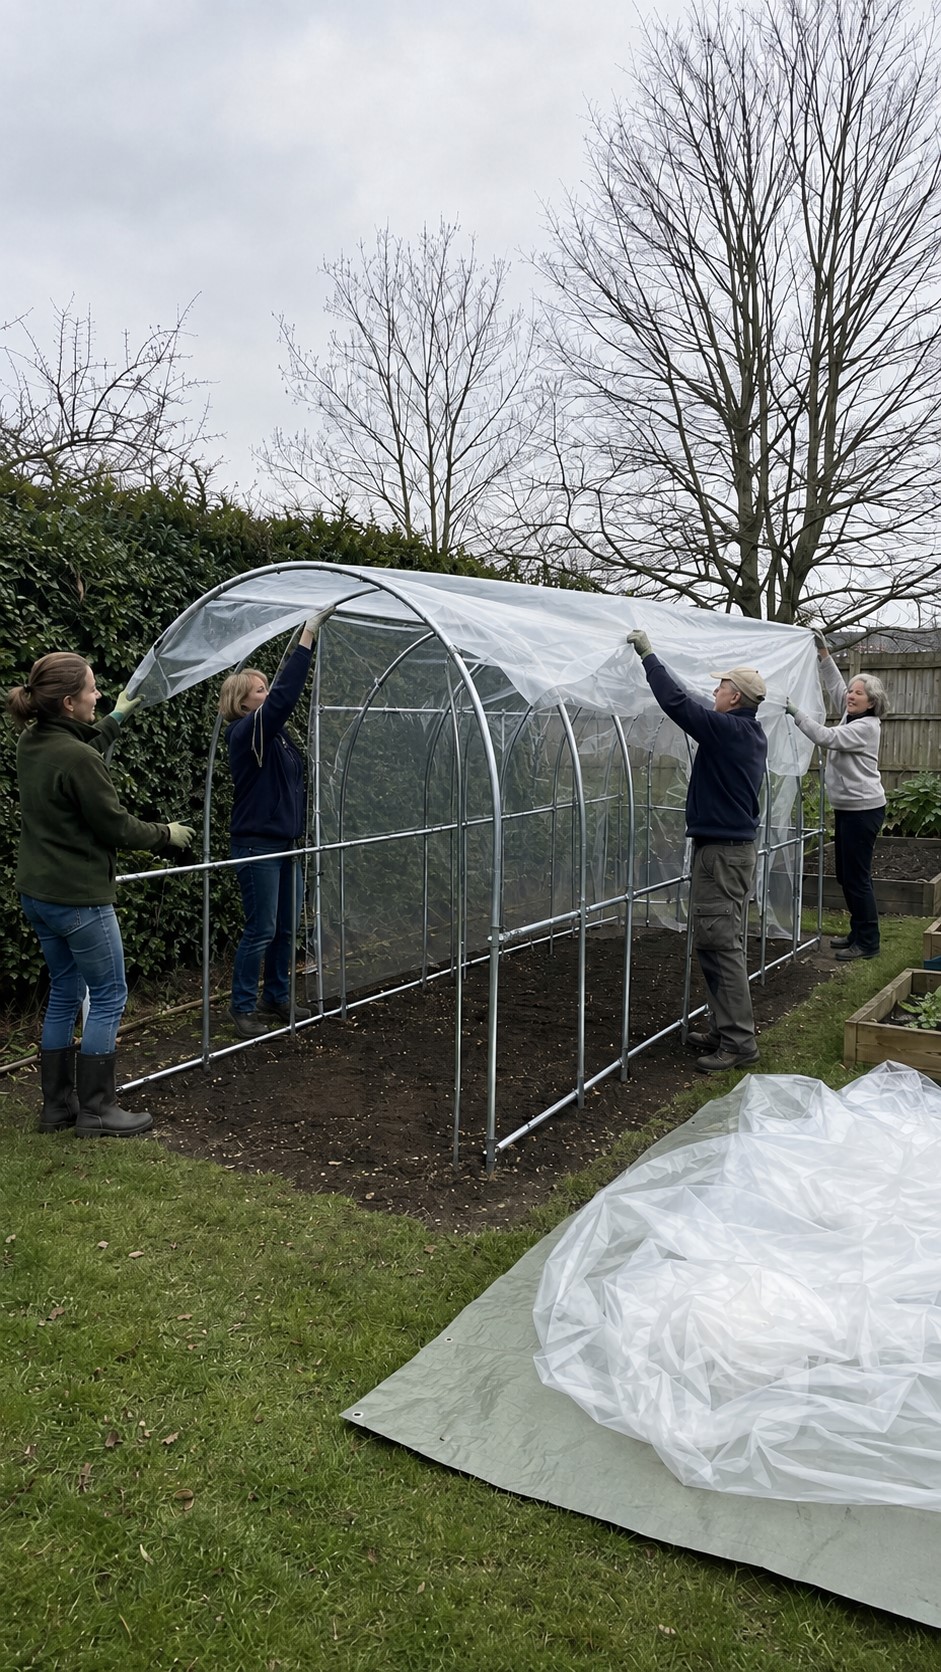
Wait for a calm, mild day and gather several helpers. Clear wire offcuts, tools and sharp stones from the area, then unroll the cover on clean ground. Check which side should face outward if the material has a specified face. Carry the sheet over the frame instead of dragging it. Leave a similar amount of spare material at both ends. Wind turns a broad sheet of polythene into something with opinions, arms and a strong desire to visit next door.
Use Even Pressure When Tensioning the Polytunnel Cover
Find the centre of the sheet and match it to the centre of the frame. Secure the middle sections first, then work toward the ends in small stages. Pull evenly across the width as well as along the length. The finished cover should be taut enough to resist flapping, without being stretched so hard that fittings create stress points. Warm polythene is easier to tension than cold, stiff material. Follow the cover supplier’s method, since different rail and batten systems grip the sheet in different ways.
Choose Base Rails or Trenching for Polytunnel Plastic
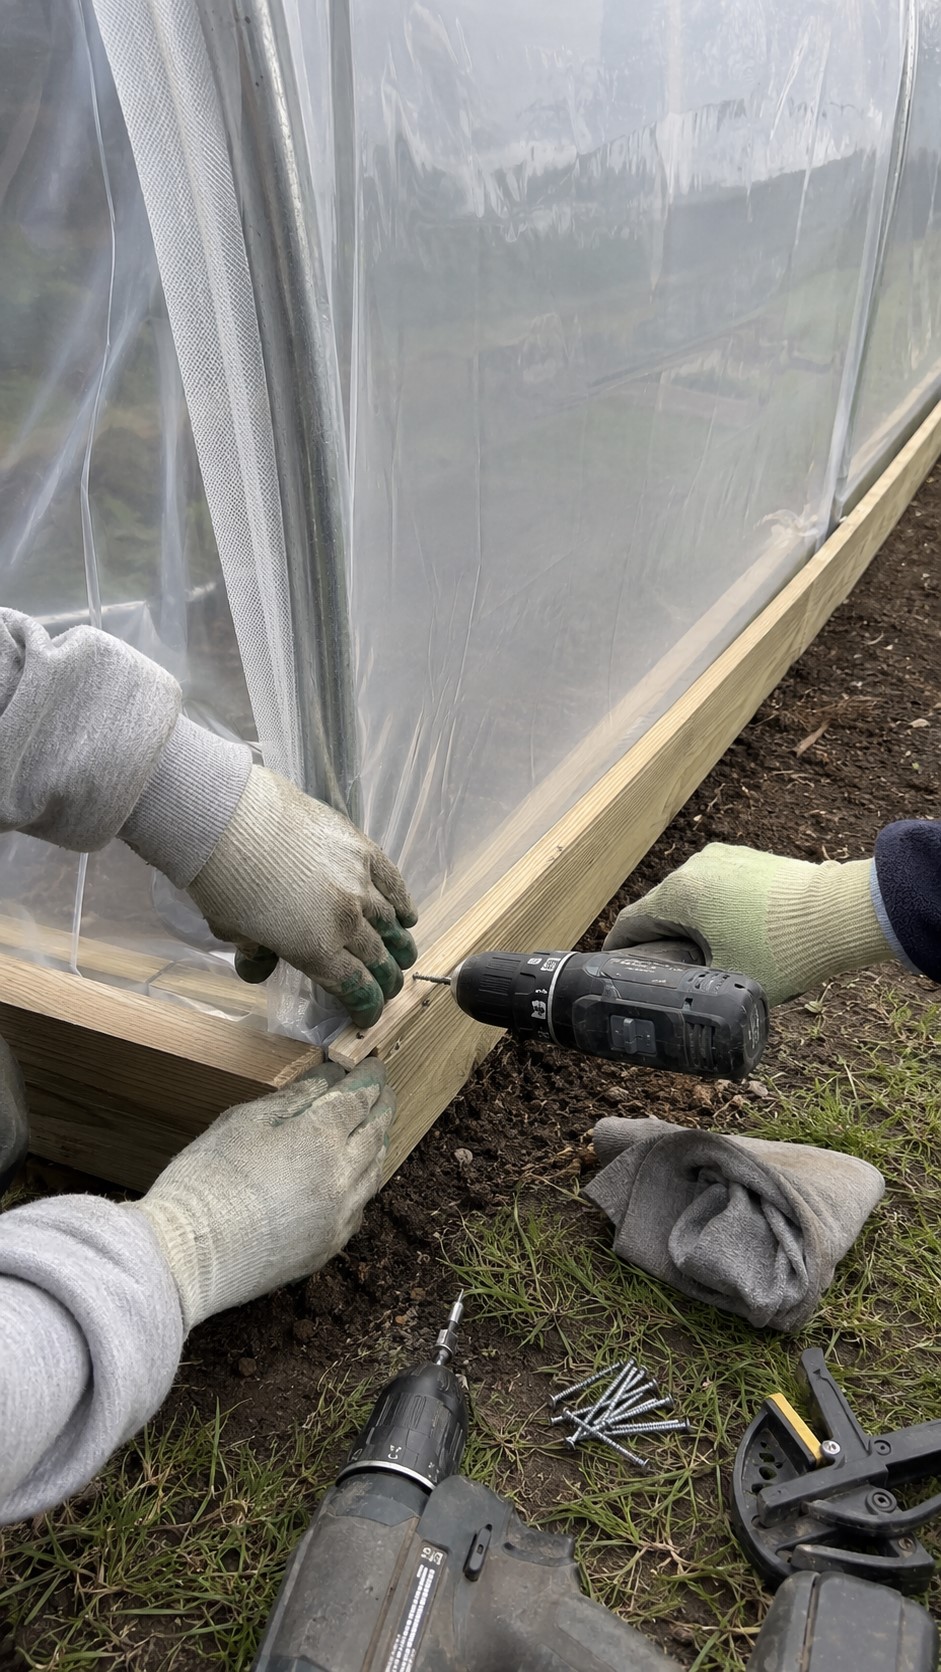
A timber or aluminium base rail keeps the cover edge accessible and makes future replacement less disruptive. Some rail systems gain tension by fixing the sheet with the rail raised, then lowering it into place. Trenching uses a narrow trench around the sides, with the cover edge buried and the soil returned firmly. It gives strong ground-level restraint, though replacing the sheet means digging it out again.
Finish Polytunnel Construction With Doors, Edges and Ventilation
Secure the end folds before trimming any excess. Neat folds reduce bulky pressure points beside the doors, but neatness should never come at the cost of a loose cover. Add anti-hotspot tape anywhere the sheet may rub against metal and patch accidental nicks at once. Fit the doors, check their swing and fasten a latch that cannot shake open. A lower kickboard helps protect the doorway plastic from boots, tools and muddy wheelbarrow tyres.
Polytunnel Doors Need Room for Barrows and Seed Trays
Hang each door with a small, even gap around the frame. Timber moves with changes in moisture, so a door fitted too tightly on a dry day may bind after rain. Open it fully and test the route with the widest item you expect to carry. Fit handles on both sides. A simple hold-open hook is useful during watering and harvest, when a door that keeps drifting shut becomes surprisingly irritating. If rabbits are a problem, close the gap below the door without creating a trip hazard.
Use Polytunnel Ventilation to Control Heat and Condensation
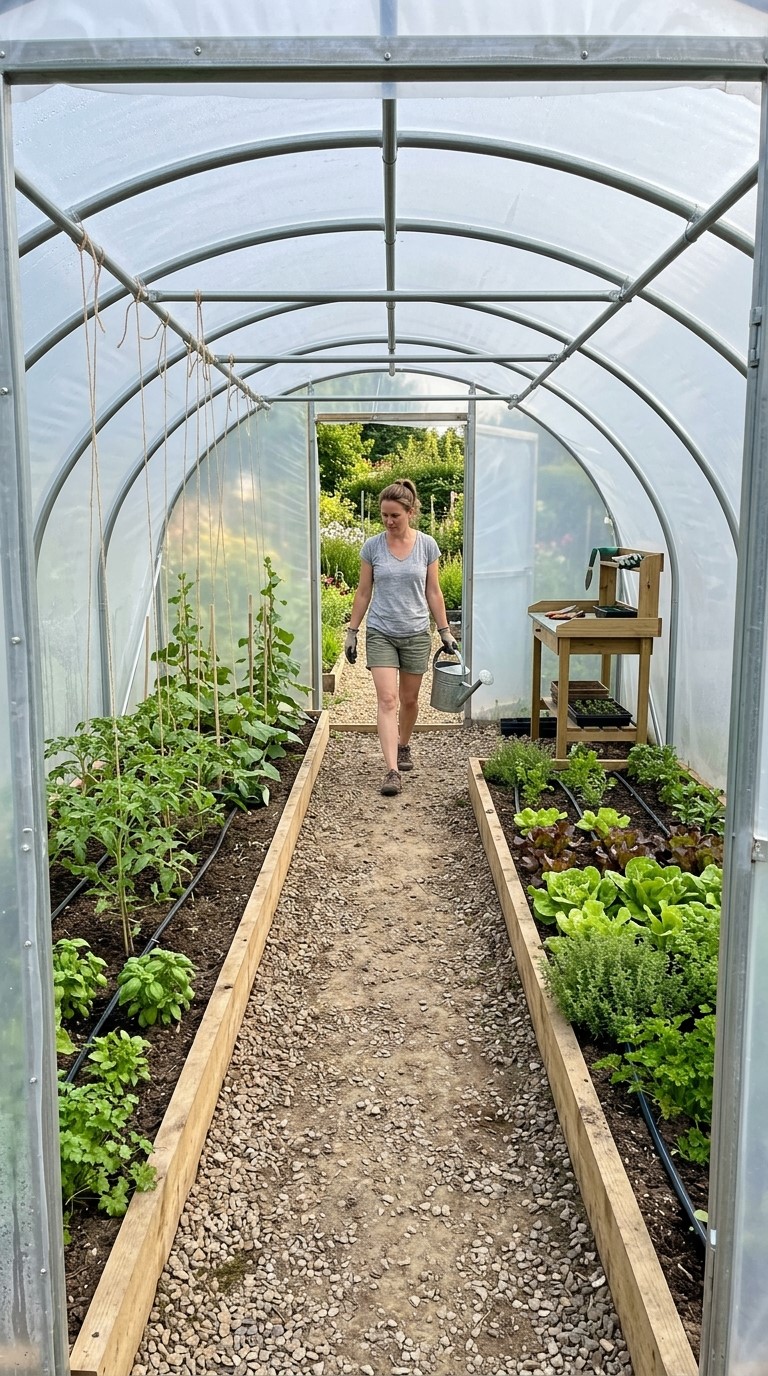
Clear plastic traps heat quickly. You should be aware that polytunnels and plastic greenhouses can overheat, so generous ventilation belongs in the build process rather than on a wish list for later. Doors at both ends give useful through-flow. Larger tunnels may need screened end vents or roll-up sides. Warm, damp air also encourages disease, and so you should maintain high-tunnel ventilation to limit excessive humidity. Keep tall shelving away from the main air path.
Turn a DIY Polytunnel Into a Garden You Can Work In
The bare interior looks huge until beds, paths and plants arrive. Mark everything again before filling a single raised bed. Walk the main route with a watering can and turn at the far end. Reach across each proposed bed. Leave a small gap between working areas and the cover, since spades, canes and timber corners cause punctures. A polytunnel earns its keep through ordinary Tuesday jobs, not through the flattering wide-angle photograph taken on completion day.
Polytunnel Layout Ideas Begin With One Clear Central Path
A straight central path works for most small walk-in tunnels. Make it wide enough for comfortable carrying and use a surface that stays firm when wet. Gravel drains well, wood chips feel softer underfoot and paving is easy to sweep. Each has drawbacks, so choose for your soil and habits. Keep beds within easy reach from the path. Where the curved sides reduce headroom, grow shorter crops or place low storage rather than forcing tall tomatoes against the plastic.
Add Polytunnel Raised Beds, Irrigation and Storage in Stages
In-ground beds cost little and preserve headroom. Raised beds warm quickly, define the paths and can be filled with chosen soil, but deep timber sides take up valuable width. Settle the layout before installing irrigation. Drip lines place water near the roots and keep paths drier than overhead watering. Use crop bars or separate supports for tomatoes and cucumbers. Never hang heavy shelves or baskets from a light frame unless the design was built to carry them.
Test the Homemade Polytunnel Before Bad Weather Does
Walk around the finished structure and push against several hoops. The frame should feel connected rather than loose at each joint. Tighten clamps, inspect braces and pull on the ground anchors. Check every place where plastic touches metal or timber. Open both doors, close them and test the latches. This inspection feels slightly ridiculous in good weather, which is exactly why it gets skipped. Do it before the forecast fills with little wind symbols.
Stop a Polytunnel Blowing Away With a Hands-On Frame Check
Look closely at the end bays, door frames and cover edges. These areas receive repeated movement and deserve more attention than the quiet middle hoops. Firm loose soil around anchors and replace any fixing that turns without tightening. Cut back branches that could strike the cover. After the first strong wind, inspect the frame again. Fresh construction settles, clamps can move and a small loose section often announces itself with a maddening flap long before sunrise.
Check the Polytunnel Cover Installation After Its First Warm Day
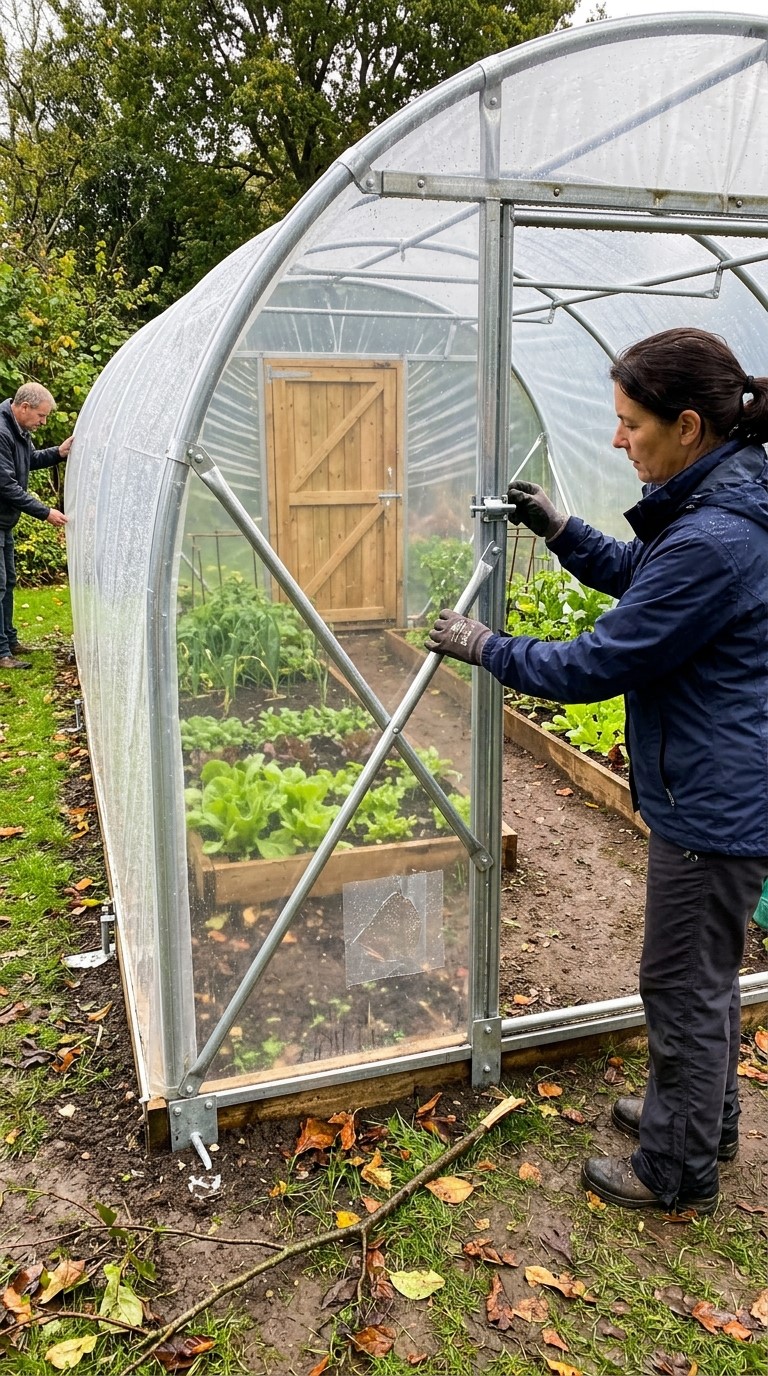
Polythene becomes more pliable as it warms, so inspect the cover after a sunny spell. Follow your chosen fixing system if a small tension adjustment is needed. Search for rubbing near clamps, door corners and ridge connections. Patch pinholes with the correct repair tape while the surface is clean and dry. Keep spare tape, fixings and a short piece of batten in the shed. Tiny repairs take minutes. Ignored ones have a talent for becoming weekend projects.
A DIY Polytunnel Should Become Part of the Garden
The first cold morning inside a finished polytunnel feels quietly satisfying. The door opens squarely, the cover stays still and the soil is ready while rain taps above your head. Homemade construction may leave a few visible wrinkles or mismatched screw heads. Plants will not care. They respond to shelter, light, water and fresh air. Build the base well, give the cover fair treatment and keep checking the structure as the seasons change. In return, your polytunnel will give you earlier sowings, later harvests and a dry place to keep gardening when the outdoor beds have turned to soup.
